Uberoo Posted April 25, 2013 Share Posted April 25, 2013 (edited) So I heard a rumor that the strut inserts for a late VW super beetle(74-80) could be used to improve the travel of the front EA suspension.I am dealing with EA82 front suspension,but I'd imagine the same technique could be used with EA81 suspension.My front struts were blown so I thought I would give it a try. Here is a side by side comparison of the struts as I got them. A FWD EA82 strut is on the left and the VW strut insert is on the right. I originally thought that I would remove the "strut" from the subaru strut assembly and insert the VW strut insert and Bob's your uncle.So I cut open the EA82 strut and found this. Much to my dismay I found that the VW strut insert was about 2 mm too large to fit into the Subaru strut housing.NOTE: after this point I don't have pics detailing every step of the way,so just bear with me.Once I get time to make the other side I will post up some pics detailing every step of the way. Anyway I cut off the strut mount and spring perch from the ea82 strut body.The VW strut insert is alittle bigger than 1.5" while the OD of the subaru strut is about 1.75.So I got some 1.75" exhaust tubing and cut it along the seam weld to make a sleeve to mount the perch and mount to. Then I drilled a 1/8" hole near the top of the VW strut insert to relieve the pressure from welding.The VW strut insert is made out of some thin metal, so extreme care will need to be taken when welding the sleeve to the strut insert.The best I could do was just a series of spot welds.This is the is the make or break it part of the whole operation.If you burn through and deform the wall of the strut-its ruined,If you burn/melt the seals its also ruined,If your welds don't seal you guessed it ruined.It is also worth noting that you want the valve of the strut to be as far away from where your welding.The valve is at the bottom of the strut rod.Luckily for me when the smoke cleared my welds were air tight, and I didn't destroy the seals. As for that 1/8" hole it is an excellent place to put a schrader valve to refill the strut.I wasn't able to get a spec for the amount of oil to use but the strut is to filled with 30 PSI of nitrogen. Here is the finished product.I added 10 oz of 15W motorcycle fork oil and 30 psi of nitrogen and its very firm. Once again I apologize for the lack of intermediate steps,give me a day or so and I will have those for you.These struts have 7.8" of travel compared to FWD EA82 struts that have 6.125",4wd EA82 strut are about 5.75" just for reference. This works because even in stock form the struts have the nitrogen in solution with the oil.If this was a high end strut that the nitrogen is separate from the oil it wouldn't work. Edited April 25, 2013 by Uberoo Quote Link to comment Share on other sites More sharing options...
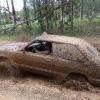
Uberoo Posted April 27, 2013 Author Share Posted April 27, 2013 (edited) So I put the one completed strut in an tested it.Keep in mind the driver side is on a jackstand right now so its not a totally accurate test.I put a floor jack under the passenger side front and I am reasonably pleased with the initial results.I have the bump stop that was on the factory strut on there and its a tight fit so it doesn't move unless the suspension itself pushes on it.Anyway it looks like 3" of up travel and 4" of down travel from static.I would be able to get the full 8" of travel if I had softer springs.The factory springs are just a little too stiff and wont quite compress enough to get that extra inch to get full travel. oh well. here is a gratuitous poser shot measurement: keen observers may notice that i need a new paint job.Any ideas? Edited April 27, 2013 by Uberoo Quote Link to comment Share on other sites More sharing options...
Gloyale Posted April 28, 2013 Share Posted April 28, 2013 Measurement to the ground doesn't really show much. You should measure compressed vs. extended lengths while you have it flexed out. That's the real # that matters. Quote Link to comment Share on other sites More sharing options...
Uberoo Posted April 28, 2013 Author Share Posted April 28, 2013 (edited) I'll remember that when I take another pic of it flexed out with the other strut in.Speaking of the other strut I worked on it a little bit yesterday so I have some pics to put up of the whole process. old strut,new strut, and sleeve next sand off all the paint on the VW dub strut insert To make the "sleeve" fit over the strut insert it needs to be cut down the middle,cut the weld seem if possible.I used a 4 1/2" angle grinder with a cut off wheel. Next go drill a 1/8" hole into the VW strut insert to relieve the pressure that would be created from welding.I put my hole 8" from the bottom because thats where the hole ended up being on my first strut.If you keep the hole on top only the 30 PSI of nitrogen will escape.Then you can turn the insert so the hole is on the bottom you can force all the oil into a bucket for later use.Moving the strut through its travel will remove most of the oil from the strut.If you aim is correct most of the oil will go into the bucket... Then slide the sleeve over the strut so you can drill a large hole around the 1/8" hole in the strut insert in the sleeve.Mark where the hole needs to be and remove the sleeve then drill the hole.I used a 9/16" drill bit. next go weld the sleeve onto the strut insert when you have it where you want it.Take your time and go slow when your welding it.I more or less used a TON of spot welds to keep the heat down.Keep the valve at the end of the rod as far away from where you are welding.Also keep the heat down and let everything cool as needed.Air cooling only.You do not want to warp or deform the strut body in any way because it will be ruined. Thats what I have so far. Edited April 28, 2013 by Uberoo Quote Link to comment Share on other sites More sharing options...
Uberoo Posted April 28, 2013 Author Share Posted April 28, 2013 Got the strut more or less finished today.First order is to grind all of your welds on the soon to be strut down smooth.Down at the bottom especially because thats where the strut goes into the hub/spindle.That and it makes it easier to place the mount and spring perch.While your at it grind the welds on the subaru strut that hold the mount and spring perch,and if you want to the little bracket that holds the brake lines.When your done a few smacks with a hammer should free them. clean them up and get them ready for welding then measure where to put them.In my case from the bottom of the mount to the seam weld at the bottom of the strut was 2 1/16".From the top surface of the mount the spring perch is 7" to one of the flat dimples on the spring perch.In my case I welded that at 8" to counter act all of the extra weight I have in the front.It is worth noting that I put the hole drilled in the strut facing towards the engine.The bolt hole of the strut mount goes 90* from there,and the spring perch is mounted 90* from that.Which direction depends on what side strut your working on.This is a driver side so I went CCW from the hole in the strut. measure and weld where the mount goes then measure and weld the spring perch on the next item is to weld/solder/braze a schrader valve on over the hole in the strut so you can fill the strut back with oil and nitrogen. If you managed to save all of the oil that came out of the strut pour it into the hole and put 30 PSI of nitrogen in and your done.If you lost some oil then put 10 OZ of motorcycle fork oil/strut oil and fill it nitrogen. assuming your welds don't leak and you didn't warp the strut body the strut will be ready to install just like any other strut.Have fun installing the strut because its a bear because the strut is so long.Installation will max out the travel of the radius rod/control arm...You will need alot of lift to use most of the travel or lots of fender cutting.I used stock springs The idea for the VW struts came from monstaru,although my result is not his idea. I take no responsibility for any of you guys doing this,yada,yada,yada this is just how I got longer travel in the front you all are free to go another way.. Quote Link to comment Share on other sites More sharing options...
monstaru Posted April 29, 2013 Share Posted April 29, 2013 DUMBEST rump roast spoob EVER.DON'T WELD TO STRUT BODIES AND EXPECT THEM TO WORK AS THEY WERE MEANT TOO. Quote Link to comment Share on other sites More sharing options...
Uberoo Posted April 29, 2013 Author Share Posted April 29, 2013 monstaru can we just agree to disagree?If they work great if not it was only a $70 experiment.There is enough steel on them that they aren't gonna collapse or fold over while going down the road.So if they don't work then I am just out the money.There is no need for name calling. Quote Link to comment Share on other sites More sharing options...
monstaru Posted May 1, 2013 Share Posted May 1, 2013 umm, NO.You are trying to post this as Tech.And It is defenitely not. Quote Link to comment Share on other sites More sharing options...
86BRATMAN Posted May 1, 2013 Share Posted May 1, 2013 I'm no fabricator, but it seems to me to be safer and more effectice to build a complete body for the strut cartrige to slide down into, and weld your bottom and spring perch onto. Maybe with a threaded end sort of like the older toyota cars like my mk2 supra has on top to change out cartriges. That way its easily replaced and not comprimised in the build process. Quote Link to comment Share on other sites More sharing options...
ezapar Posted May 1, 2013 Share Posted May 1, 2013 But but but. . . Doesn't more travel just grenade your axles easier? I mean. . . And uh. . . Doesn't heating up gas cartridges pretty much kill them? You know, rubber seals and stuff. 1 Quote Link to comment Share on other sites More sharing options...
ShawnW Posted May 1, 2013 Share Posted May 1, 2013 monstaru can we just agree to disagree?If they work great if not it was only a $70 experiment.There is enough steel on them that they aren't gonna collapse or fold over while going down the road.So if they don't work then I am just out the money.There is no need for name calling. I think everybody on the board and the road has a right to know what you have done here. I don't think its safe either and there are a lot of guys saying that. We do share roadways with you. Nobody is telling you not to experiment, but that there are limits to a home tool set and engineering. Contacting a strut manufacturer to get something made to your liking might work or buying some coil over type units that have adjustable perches. Quote Link to comment Share on other sites More sharing options...
torxxx Posted May 2, 2013 Share Posted May 2, 2013 gotta realize, he basically did what others have already done on the board as far as welding on struts. I can think of a few rigs that have been on there that have welded struts. They may not have been designed the same way these were, but they were welded on none the less. The same exact "safety" thing and being on the road could be said about lifting these cars. Theoretically creating a part (even it being a strut spacer) creates more wear on the factory body, which could be considered just as dangerous. I know if I snap one of my drop down brackets on the rear of my front control arms, I'm going off into the ditch, possibly rolling my car, catching on fire and the story continues from there.... Or some of the "homemade" lift kits that guys have done, everything has its failure point somewhere, either it be a welded strut, or a SVX control arm welded onto the end of a EJ control arm. I'm not calling anyone out, or saying their work is crap or anything so dont read this the wrong way. I enjoy the hell out of a lot of these builds I've come across on the forums and I hope to continue seeing people pushing the limits of what a "grocery getter" or a "menopause mobile" can do. 1 Quote Link to comment Share on other sites More sharing options...
Uberoo Posted May 2, 2013 Author Share Posted May 2, 2013 Here is some compression and extension shots.sadly I am only getting about 5" of travel because the springs are a little too stiff.Anyone know where I can find some slightly softer springs? extension compressed. I have room to go for more compression but the factory subaru springs are too stiff. Quote Link to comment Share on other sites More sharing options...
Uberoo Posted May 2, 2013 Author Share Posted May 2, 2013 (edited) ok so ford tempo springs are 130-140 in-lbs depending on how much you cut them stock subaru is 120-125 according to moog's spring listing the springs for a 80's chevy nova/toyota coralla are 113 in-lbs tempo springs raise my car up 1".I wonder if nova springs would be soft enough to compress an extra 2.5" to at least compress down to where the car is sitting on the spring compression bump stop at full compression? Edited May 2, 2013 by Uberoo Quote Link to comment Share on other sites More sharing options...
monstaru Posted May 2, 2013 Share Posted May 2, 2013 I think everybody on the board and the road has a right to know what you have done here. I don't think its safe either and there are a lot of guys saying that. We do share roadways with you. Nobody is telling you not to experiment, but that there are limits to a home tool set and engineering. Contacting a strut manufacturer to get something made to your liking might work or buying some coil over type units that have adjustable perches. DING DING DING DING!!!!!!!!! Quote Link to comment Share on other sites More sharing options...
torxxx Posted May 2, 2013 Share Posted May 2, 2013 so what you are saying Monstaru is dish out a bunch of money to get custom coilovers built for a 500 dollar car? Logic isnt there mate. Which is why everyone's started modifying these cars at home in their garage. Everyone started somewhere, I'm sure you've had a rig with a rigged or sketchy part on it? How can it not be safe? The dangerous part is already done. There's no ill effect to a blown strut other than bad handling. Yall are making it sound like the car is going to randomly explode going down the road because he welded a strut.... Read the title above your avatar... "Bought And Built?" Kinda misleading. He bought a part, and built it to work for his car Quote Link to comment Share on other sites More sharing options...
Uberoo Posted May 2, 2013 Author Share Posted May 2, 2013 When you look at EVERYTHING we do to make our subarus go better offroad is SKETCHY to the rest of the offroading world.Suspension lift made from blocks of steel that space the suspension down from the body/frame-sketchy,drilling a couple extra holes in rims-super sketchy.Even welding the rear diff is looked down as sketchy. As far as the struts go torxxx is right the only thing I have to worry about with the struts is them being blown from welding.When I welded them I drained the oil to prevent the oil from heating all the seals and valves,I did my welding as far away from the all the seals and valves as possible. I allowed everything to cool before welding another section.Every single welding related step that the pictures show was spaced apart by an hour's worth of cooling time. Me,my car,and my welded on struts will be at the summer run at evan's creek if you want to check it out.For those that wont be there I will make an update post after I haven't died. 3 Quote Link to comment Share on other sites More sharing options...
monstaru Posted May 2, 2013 Share Posted May 2, 2013 so what you are saying Monstaru is dish out a bunch of money to get custom coilovers built for a 500 dollar car? Logic isnt there mate. Which is why everyone's started modifying these cars at home in their garage. Everyone started somewhere, I'm sure you've had a rig with a rigged or sketchy part on it? How can it not be safe? The dangerous part is already done. There's no ill effect to a blown strut other than bad handling. Yall are making it sound like the car is going to randomly explode going down the road because he welded a strut.... Read the title above your avatar... "Bought And Built?" Kinda misleading. He bought a part, and built it to work for his car Not atll am I saying to go buy coilovers. You are correct about the handling. I simply say SLEEVE the original insert with a BODY of a strut.The way it SHOuLD be done. The actual act of cutting into/burning the oil in the strut is the issue for me really. I just don't want some kid getting this idea and burning his codswalloping face off when he reads this as "tech". And as far as sketchy goes, I have reednecked the hell out of some spoob .On Subaru's even. AND put others in danger.BUT have learned the error of my ways. I HAVE WELDED TO STRUT BODIES AND DONE IT SUCCESSFULLY. BUTTTTTT.I also did it with very little heat intrusion.With short circuit welding, on the second layer of the housing off a lip sticking out from the body of the strut. The welding he describes above my post is ridiculous.The seals inside are most likely rubber and viton, or a like derivative.The heat from the strut tube itself is what destroys those seals.Not the heat from the oil.The oil simply degrades itself, it does not melt the seals. This is simply not the proper way of doing it. AT ALL.Dangerous for you to do, for me to do, and for anyone standing around. Not to mention ridiculously stupid to get 1" of travel. Look, I know I am an antagonist.I like it that way.BUT, I don't want tech that is not tech ruining someones life because of some dumbass that is just convinced that he can engineer a strut because he THINKS he understands it. That is all.... Quote Link to comment Share on other sites More sharing options...
Uberoo Posted May 3, 2013 Author Share Posted May 3, 2013 Ok monstaru rather than name calling how would you do it?Everyone is talking about welding some sleeve for the strut to go into and other stuff like that but there just wasnt room.. the OD of the subaru strut is 1.75" the OD of the VW strut is 1.67" a .08" difference.The ONLY way you could make a sleeve for the strut and have it still fit in the hub would be with 20 gauge 1.75" tube/pipe even then the weld seam would be a problem.Go to a steel shop and find some 20 gauge 1.75" round tube.Maybe you get lucky and find some,no one around here had even seen tube that thin so I used 16 gauge steel.I had to cut along the weld seam and hammer it on,even that was so thick that I had to pry apart the hub and use alot of force just to get the strut tube into the subaru suspension. Yes it is ALOT of work for the amount of travel I gained,but now that the strut is in there I just have to find some softer springs to get more travel. So with that being said please monstaru tell us ALL how you would have done it differently.How would you make it work with the subaru suspension? Quote Link to comment Share on other sites More sharing options...
monstaru Posted May 4, 2013 Share Posted May 4, 2013 (edited) I personally got a few sets of VW struts(complete). Welded the bottom mount from an ea81 strut on the bottom of it, and then used the VW spring with a coilover spring inside of the VW spring for secondary absorption. These came out to be built for an 8" lift. Utilizing the VW strut body has its limits too. BUT the positive is that it already has the threaded cap up top to retain the insert. That piece could even be cut and pasted though. Currently Subruise has them up here in Parkland. I should be getting them back pretty soon. If I would do it over again, I would actually measure the OD of the strut housing and buy the appropriate size tubing for it to fit in..... you know because they happen to sell a million different ID sizes. Then make a threaded cap(pipe threader ,some plate, and a drill), and make my own bottom mount(lathe body tubing to fit)........really, really simple. Your never said anything about ID. Go bigger. Cut down for mount..1.67" will fit in 2" .120 wall DOM. You know, tubing. Not fence post, or pipe. There is a difference in nominal size and how they are measured. I HAVE built these. Only I built them to utilize them instead of a lift block, not necessarily travel .As there is little gain.EA81 axles could not take the extra anyway Just Sayin. Pretty sure when whoever built them the first time (which I modeled mine after) was a mix of the above two descriptions. In conjunction there are two different lengths of VW inserts. So a couple of different options are available. anyways. If I get pics of those struts I will post them. Edited May 4, 2013 by monstaru Quote Link to comment Share on other sites More sharing options...
Uberoo Posted May 4, 2013 Author Share Posted May 4, 2013 The only problem with that is 2" .120 wall will not fit in the hub/spindle.As far as the travel goes I will see how long the EA82 axles hold up. Quote Link to comment Share on other sites More sharing options...
monstaru Posted May 5, 2013 Share Posted May 5, 2013 The only problem with that is 2" .120 wall will not fit in the hub/spindle.As far as the travel goes I will see how long the EA82 axles hold up. So sleeve a piece of smaller tubing inside for a skosch , rosette weld it, and then lathe it down. Quote Link to comment Share on other sites More sharing options...
Scott in Bellingham Posted May 5, 2013 Share Posted May 5, 2013 When you look at EVERYTHING we do to make our subarus go better offroad is SKETCHY to the rest of the offroading world.Suspension lift made from blocks of steel that space the suspension down from the body/frame-sketchy,drilling a couple extra holes in rims-super sketchy.Even welding the rear diff is looked down as sketchy its not only Subarus, you will find many a questionable builds on all types of vehicles, ever heard of a "Suicide frontend" on a hotrod? well theres a reason they call it that, people have been modifiying cars for there own purpose even before the first Model T Ford came off the line, how bout the Ford Pinto? they knew from there own tests that it may catch on fire and kill the occupants if rearended just right but out of greed they looked the other way knowing they were going to make a bundle o money and just pay out a few lawsuits, myself I enjoy seeing others creativity and myself enjoy making things and trying them out to see how they work, beleive me Ive made some junk along the way , If I never made a few mistakes I never would of learned on my own whats good and works well and what just wont cut it, the strut thing is the right Idea just needs some refining, maybe if we work together we united can come up with a great safe solution 2 Quote Link to comment Share on other sites More sharing options...
monstaru Posted May 6, 2013 Share Posted May 6, 2013 No reASON TO LOOK FARTHER.Just do whats been done.This is not new territory. You just need existing VeeWee strut housings.and some Ea81 struts. Tada. Quote Link to comment Share on other sites More sharing options...

Recommended Posts
Join the conversation
You can post now and register later. If you have an account, sign in now to post with your account.