ivantruckman Posted February 23, 2008 Share Posted February 23, 2008 i wanted to do my own lift kit, im a stubborn cuss.. i found out why others get the money they are asking. these kits like scotts are actually very reasonably priced when you consider the time involved in fabracating, but i have to prove that i can do it, but im considering buying the next one. day one http://s247.photobucket.com/albums/gg137/ivantruckman/?action=view¤t=strutower.jpg http://s247.photobucket.com/albums/gg137/ivantruckman/?action=view¤t=6inchblocks.jpg http://s247.photobucket.com/albums/gg137/ivantruckman/?action=view¤t=liftkit1.jpg Quote Link to comment Share on other sites More sharing options...
Phizinza Posted February 24, 2008 Share Posted February 24, 2008 It always feels good doing it yourself. Theres lifts on the markets for the people who just want one. But for the other few at least we can do it ourselves. You going to reinforce those 2x3x2" pieces? Don't want them just folding over. Quote Link to comment Share on other sites More sharing options...
Reveeen Posted February 24, 2008 Share Posted February 24, 2008 When I did mine, I looked at the 2X2X6 blocks, and they looked kinda flimsy to me, especially if you are going to connect them, so I plated one of the open sides, now I know they won't do anything weird. I didn't mind building it and would do it again. Of course it helps when a neighbor drops by and asks: "where did you buy that lift kit, I didn't know you could buy one for those cars?" Quote Link to comment Share on other sites More sharing options...
Scott in Bellingham Posted February 24, 2008 Share Posted February 24, 2008 Ivan, cant wait to see the finished car, what size diameter and thickness round tubig or pipe did you use on the towers?? Quote Link to comment Share on other sites More sharing options...
ivantruckman Posted February 25, 2008 Author Share Posted February 25, 2008 hey scott ..the pipes are 4 1/4 od .125 wall i cut the flanges with a plasma cutter, i cut out a template out of wood , and use a drag sheild. still a lot of work to do. and steel prices have gone up big time, i used drop peices at the local steel shop, but i still have about 100 bucks in small peices of steel.. http://s247.photobucket.com/albums/gg137/ivantruckman/?action=view¤t=blockinstall.jpg Quote Link to comment Share on other sites More sharing options...
Urabus-84HBDR Posted March 12, 2008 Share Posted March 12, 2008 one question for all who have made their own lift kit... why extend the struts up? where they sit stock is likely the best place for them, your not going to be rubbing your tires on the spring...? no angles, just add the extension to the bottom.. maybe im wrong here but sometimes simple is better. hey scott ..the pipes are 4 1/4 od .125 wall i cut the flanges with a plasma cutter, i cut out a template out of wood , and use a drag sheild. still a lot of work to do. and steel prices have gone up big time, i used drop peices at the local steel shop, but i still have about 100 bucks in small peices of steel.. Quote Link to comment Share on other sites More sharing options...
bigo1966 Posted March 12, 2008 Share Posted March 12, 2008 How would you extend the bottom, ive thought about that too. Quote Link to comment Share on other sites More sharing options...
Reveeen Posted March 12, 2008 Share Posted March 12, 2008 just add the extension to the bottom This is what I did. I took a new strut, cleaned off the brackets, cut an old strut bottom (with brackets) 7" in length, measured the length, looked high, and low, for a piece of tubing to sleeve the assembly in a shrink fit situation (freeze strut, and bottom piece, heat tubing) quickly assemble, weld tubing to spring mount on the top, and the bottom piece. End result: bad camber Remove lower control arms, and lengthen by an inch, plating the bottom for extra strength, slot upper strut mount holes, and now the camber is under control AND fully adjustable. Looking back at it I should have just made the offset top mounts, but I know that my stresses created by driving is in line with what it was originally, and not offset. Quote Link to comment Share on other sites More sharing options...
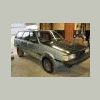
ivantruckman Posted April 16, 2008 Author Share Posted April 16, 2008 updated pics http://s247.photobucket.com/albums/gg137/ivantruckman/?action=view¤t=2subies.jpg http://s247.photobucket.com/albums/gg137/ivantruckman/?action=view¤t=front.jpg how do you get these stupid pics to show up instead of posting a a link arrggggg Quote Link to comment Share on other sites More sharing options...
smithe Posted April 17, 2008 Share Posted April 17, 2008 updated pics http://s247.photobucket.com/albums/gg137/ivantruckman/?action=view¤t=2subies.jpg http://s247.photobucket.com/albums/gg137/ivantruckman/?action=view¤t=front.jpg how do you get these stupid pics to show up instead of posting a a link arrggggg There is a little icon for inserting a picture, it looks like a little mountain and sun or some such. Quote Link to comment Share on other sites More sharing options...
smithe Posted April 17, 2008 Share Posted April 17, 2008 updated pics http://s247.photobucket.com/albums/gg137/ivantruckman/?action=view¤t=2subies.jpg http://s247.photobucket.com/albums/gg137/ivantruckman/?action=view¤t=front.jpg how do you get these stupid pics to show up instead of posting a a link arrggggg There is a little icon for inserting a picture. You need to use the "direct link" one, not the "email IM" one that you used. Quote Link to comment Share on other sites More sharing options...
Adam N.D.J. Posted April 26, 2008 Share Posted April 26, 2008 Kewl work. There definatly is a sense of pride when you do something like this yourself. Keep up the work. As for the strut extension, a lower extension is the way to go. I started with an upper, but the tires would rub all the time. I've been running my 7" lowers for about 4 years now, holding up strong. They are made from 1/4" wall that I pressed onto the strut. I did have a little trouble with the knuckle falling off the strut at full extension, so I added the tab. (if I had knuckles in better condition, it wouldn't have been a prob, but mine are pretty abused.) Quote Link to comment Share on other sites More sharing options...
Gloyale Posted April 28, 2008 Share Posted April 28, 2008 Kewl work. There definatly is a sense of pride when you do something like this yourself. Keep up the work. As for the strut extension, a lower extension is the way to go. I started with an upper, but the tires would rub all the time. I've been running my 7" lowers for about 4 years now, holding up strong. They are made from 1/4" wall that I pressed onto the strut. I did have a little trouble with the knuckle falling off the strut at full extension, so I added the tab. (if I had knuckles in better condition, it wouldn't have been a prob, but mine are pretty abused.) Only problem with the strut bottom extension is the camber. If you just effectively lengthen the shock, you are pushing the top of the knuckle outward. end up like this \-/ With strut tops, you can make them with an angle to compensate, and actually improve over stock camber. Quote Link to comment Share on other sites More sharing options...

Recommended Posts
Join the conversation
You can post now and register later. If you have an account, sign in now to post with your account.