Leaderboard


Popular Content
Showing content with the highest reputation on 04/15/19 in all areas
-
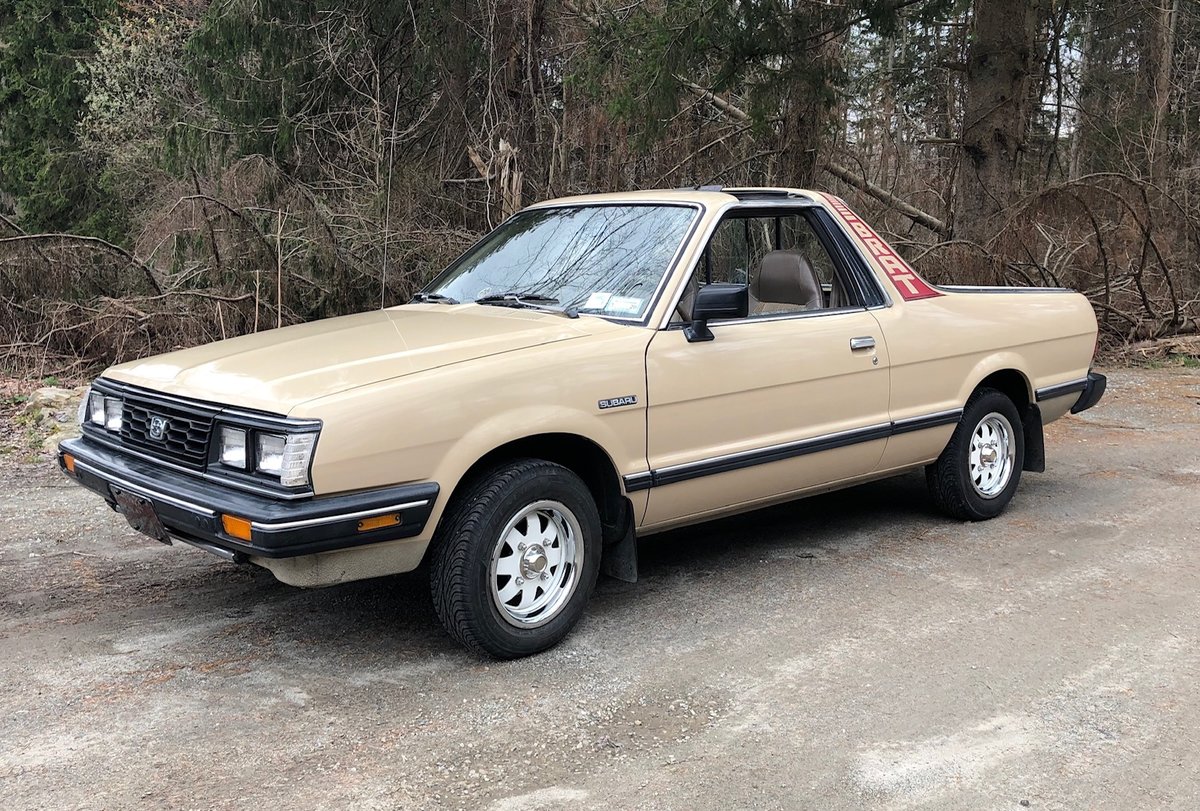
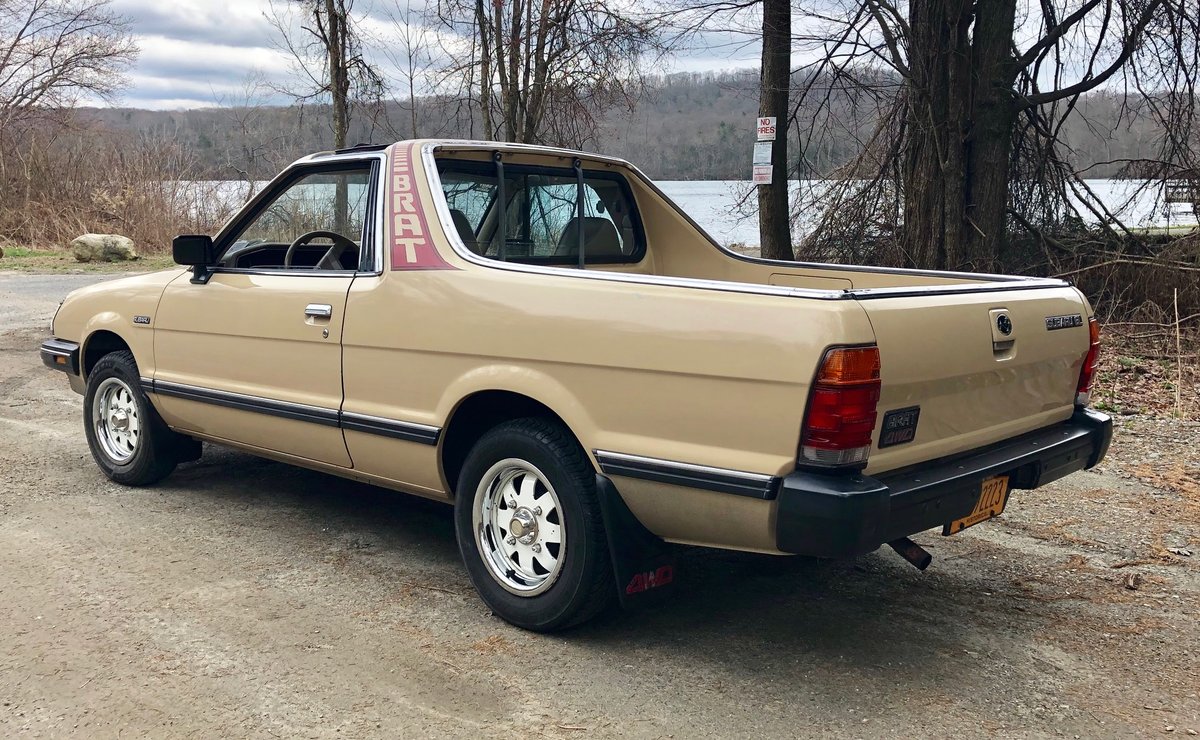
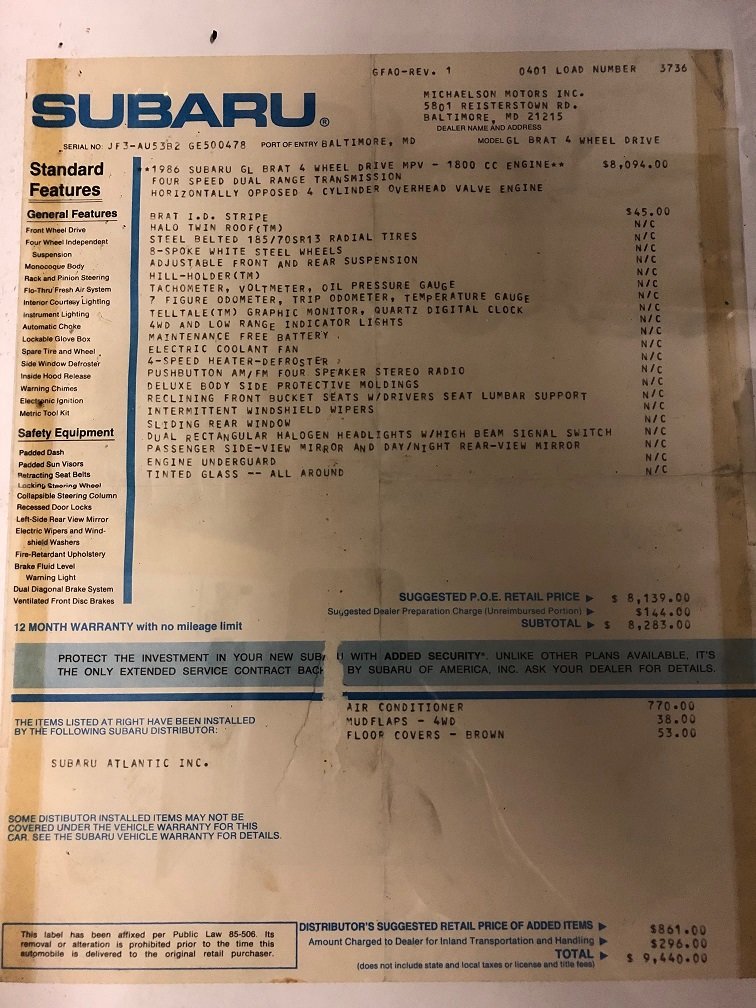
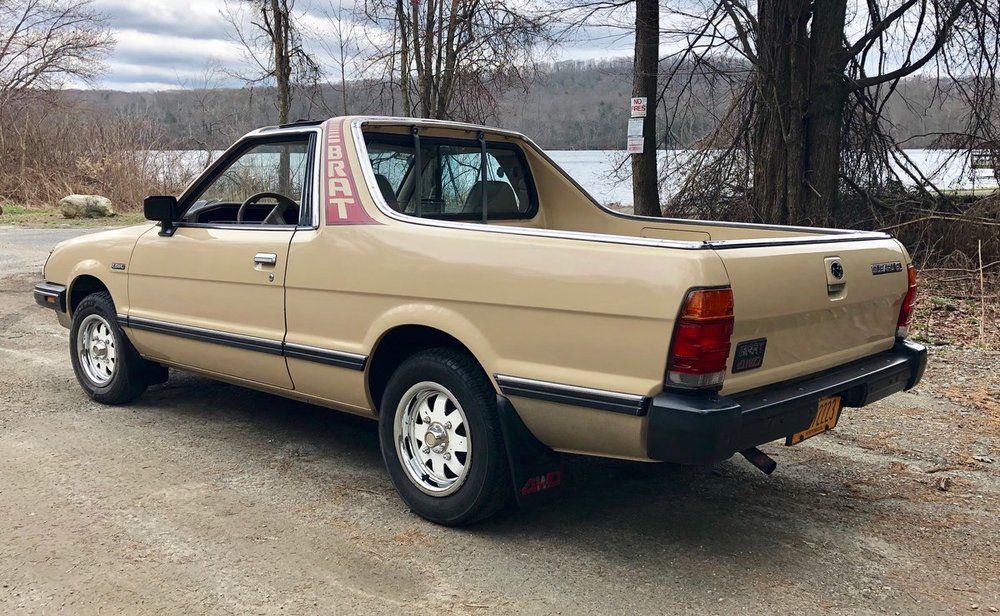
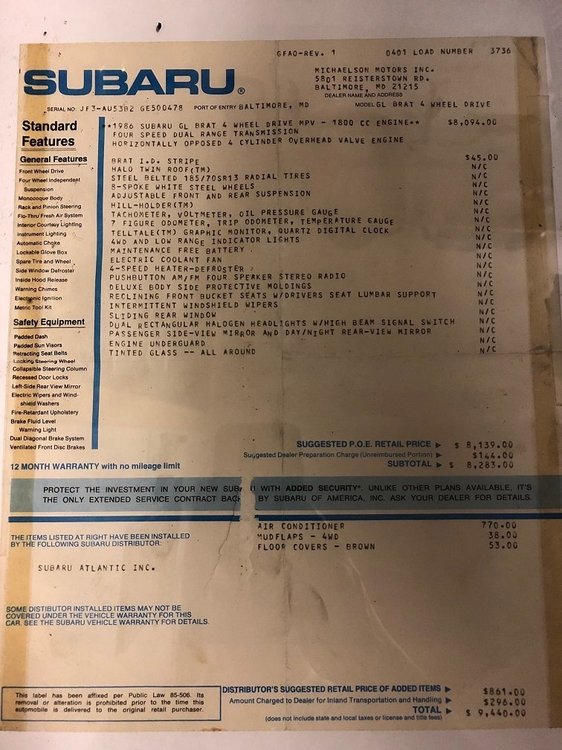
Hey guys, Joined about a month ago after having bought an EA81 hatch. Because of my rekindled love of old Subaru's I joined some facebook groups and happened to find this 86 Brat for sale. I've basically wanted to own a Brat forever, so I couldnt resist. So far I have resealed the oil pump and installed a new front crank seal, fixed the fan blower motor, installed a new dist cap and rotor, and put the original wheels back on with new trim rings. Planning to do the oil pan and valve cover gaskets maybe this weekend. I'd like to add jump seats at some point but otherwise Ill keep it stock. I have the original window sticker which is pretty cool. It has no rot and almost no rust, which is amazing since its always been in VA and PA. Interior is original and in excellent shape. Paint is original too. Only has 80k on the odo and runs great. Gets alot of attention and someone already offered to buy it, but Im keeping it.

 3 points
 -
A recurring problem on my 99 Outback has been the cowl buckling/tearing/cracking. I have posted a few pictures in the past of some welding I've done when the windshield has been replaced (lost count how many times now). Symptoms of this include the wiper arms rubbing on the windshield and the windshield cracking from the bottom corners up. At least partially caused by hard nose first landings off jumps. This car doesn't have a great approach angle. Also had the fronts a little too soft on the Arkansas trip so it was bottoming out too easily. Changed the shock valving, hopefully it will jump more level now too. This portion of the body completely separated from the door hinge area at the end of the last Vegas to Reno and we straightened it back out and welded it then (1.5 years ago?). It has started to crack and buckle again. The other side didn't look quite this bad but there are various small cracks all around both front strut towers. First step I tried was pulling the strut mounts back down. Despite shortening up both ends of the come a long I still eventually ran out of travel but had a good load on it. A lot of the displacement was crushing that front part of the floor the tube is pulling up against but I reduced the distance from that tube to the strut tower by about 1.5". I was also hoping this will give me a little more lift and tire clearance. Also kept having problems with the come a long. My good one is in another state. This one just has some stamped pieces tabbed together so I welded those and it started working better. With the spring and bump stop off the strut this is as high as the tire goes. Not a very good perspective but have a little clearance all the way around. Wanted to reinforce the front end without reducing this clearance. Cut out big slots above the wheel wells on both sides for tubing. Also drilled big holes with a step drill into the strut tower. After cutting into that, found more sheet metal buckled, cracked, and torn. Welded some of it before installing tubing. These are most of the pieces we cut to add to the body. This is how it looked fully welded, the top tube is a piece of 2" x 4" that goes all the way in to the strut tower. Fortunately the door frame seems fairly strong. The only wiring inside where I'm welding is for the door so I pulled that out while welding and wrapped a wet rag around it. Also sprayed some water in that part of the body. I really hope this doesn't just start ripping the door frame apart. Added the clean piece of sheet metal to the bottom of the strut mount and a gusset on either side to brace it. The big holes drilled in the strut tower allowed me to plug weld that to the 2"x4" tube. Some of these welds were nearly impossible to see with the welding helmet on. It's rough but hopefully strong enough. This is how the other side turned out. This is how it looks painted, not that anyone will ever see it, but hopefully delays the rusting process long enough we can finish the Vegas to Reno some year. Fenders fit over that tubing with a little room to spare. Car is mostly back together, will hopefully drive it this week. Once we get a little dry weather I'll test out the new shock tuning.1 point
-
THIS!!! I've been ignoring the non-op wipers on my RX-RA for the last two years. No blown fuses, damaged wiring or broken components. Turns out that adding that new ground wire from the wiper motor body to the vehicle's chassis fixed the wipers. Who would have guessed...1 point
-
I love the old style. Just compress the plunger slowly and pin it. Once you are happy with the timing, Slide it inboard, torque the bolts and pull the pin!1 point
-
My first Subaru was actually 3 of the exact same car, that i got as a package deal, which were green 5 speed Legacy L wagons. The guy i got them from bought them for who knows what reason, and didnt do anything with them, then sold them because his wife got sick of all the "project" cars he had that code was always nailing him for. I still have one of those cars, with 357,000 miles on it, and only now is it getting ready to need another clutch, which will only be the second one i have put in it, if i actually do it, since the body is showing its age badly now (i live in the rust belt unfortunately). Granted i haven't been driving it near as much the last 4 years, since i picked up a 2004 Impreza Outback Sport, and have a 2001 Jeep Grand Cherokee, but, i do put at least 2,000 miles on it a year, just for the hell of it (the stereo is still louder than the exhaust, even after the front flange rotted, so i just blast it and drive). I have way more problems with exhaust than i do clutch or even brakes on any of my cars. One of the other cars i bought, i sold to a kid that, even after teaching him how to drive it, went through 3 clutches in 7 years, and, the jeep he has now (2006 Compass) needs a transmission because he wont learn to drive it properly, and blew the trans "power shifting". The third one, we turned into an autocross/rallye car, that my wife wrecked the first season she ran it. Not her fault though, some guy "nudged" her into a tree hard, so, i kept all the useable parts out of it for spares, and, never used them, so i sold them just to get them out of my way.1 point
-
Hello Steptoe Under my outer air vent (grilled section) is were the one factory speaker of my car lives. And on the shifter boot that is how i bought the car. Car came 99% with original parts. I even have the original manuals and glove box key!1 point
-
could not agree more. My 1st Subaru - an 89 GL wagon, 5 spd - needed a clutch when I bought it (super cheaply). Clutch got replaced along with new brakes and a few other items, and i drove the snot out of that car for over 8 years on the same clutch with no issue at all, then gave the car to my daughter, who also had no problems with it. Replaced the brakes once during those 8+ years. Timing belts were done a couple of times. Now, wheel bearings - that was a whole different issue, LOL - those got replaced a few times. i put that off to cheap bearings - live and learn. the point being, the car was 11yrs old when I got it, with approx 150k on the clock... it was nearing 300k when it was permanently retired in 2012 due to structural rust and to my knowledge, had 2 clutches in its entire 23 yr life. Learn how to properly drive one and they will last a long time.1 point
-
This is why I ONLY will install Misuboshi timing belts and Koyo/NTN rollers. Just like OE Glad you figured it out. You got SUPER lucky. 19 time out of 20 that would be a valve bender.1 point
-
Well guys, I pulled the timing cover and the belt was not broken. I then went ahead and pulled the entire cover off and found that the belt was still jlin one piece, however the teeth on the belt had stripped away at the crank pully. Thankfully, the engine stopped with the valves closed. I replaced the timing belt and the idlers and the car is up and running again. I swear I replaced the components when I replaced the motor two years ago. That is what I get for using a kit off of ebay. Name brand for me from now on. Thanks for everybody's help.1 point
-
All the old engines already came with 10's. It wasn't till about 2000 that Subaru started experimenting with small pumps. GD1 point
-
If the valves happen to be closed and none are bent then it will show compression. It's easy to pull the covers and check. Probably a broken belt. GD1 point
-
Whew - that was a blowout rant. I'm not the slightest bit interested in getting into a knock-down-drag-out on the (WAY OT) subjects of peak oil, the growing environmental depredations associated with its extraction, and global warming here, but they're all real. And they're the pressures that are going to cause the effective extinction of the ICE - probably in my lifetime, but most certainly in that of my kids. Are electrics perfect? Far from it - in fact, around here, at present, they're the worst example of "long tailpipe" pollution, as most of Alberta's electricity still comes from coal (yes, all of those plants are being forced by legislation to convert to natural gas by 2030, but that's a marginal improvement, not a quantum one). So while Teslas are cool, they aren't as meritorious as owners here would have you believe. They may tell you that they pay a premium for solar- or wind-generated power, but that's accounting flummery. Hydrocarbon fuels remain the gold standard in terms of energy density, but there isn't a car company or related industry that doesn't see the writing on the wall, and the investment and effort in improving battery chemistry (and every other aspect of the electric drivetrain) is massive, and will continue to improve to the points at which it's competitive with, then superior to, burning fossil fuels. And that's the viewpoint from the very practical engineering perspective, not the starry-eyed environmentalist one. That doesn't mean we don't have a lot to atone for. The energy of slaves (as fossil fuels haven been described - PM me for references) has resulted in our building an unsustainable society in many respects. Departing it may force us to make very difficult and unpleasant compromises, but compromises that will in the long run rationalize and improve our society.1 point
-
It's been a few years, but I did that swap on my '83 wagon. Just make sure you match the driveline types. What I mean is if your '84 is 4WD, the donor EA82 car has to also be 4WD. Rotors, calipers, backing plates are all that was needed. Once installed, you may have to CAREFULLY modify the brake lines leading to your new calipers, otherwise they will snag or rub (can't remember). There is a good step by step guide: Scroll way down to "The ultimate Subaru Repair Manual" section from the home page. A little more to "Transmission, Axle and Brakes". Click on that. On page 2, down to "Rear Disc Conversion on EA81 & EA82's". Click. There ya go. :-)1 point
-
***edit on Nov 4 2014*** Apologies for the missing images. Im almost certain I have these images somewhere and will make an effort to retrieve them and re-post them with this guide. -TSJ Installing Rear Disk Brakes All Non-Turbo Subaru's come equiped with rear drum brakes... while all Turbo EA82 Subaru's come with rear disk brakes. Wouldn't it be nice to swap those ancient drum brakes with some nifty rear disk's?? Well, you can Even your EA81 Subaru can use the rear disk brakes off of any EA82T Subaru. I recently did the conversion, and here's how its done. First off, lets tell you where to find rear disk brakes. Pretty much any turbo Subaru built after 1985 will have rear disk brakes. You can use these rear disk brakes on any EA81 and EA82 Subaru. If your Subaru is 4WD, you will need the rear disk brakes off of another Turbo 4WD Subaru. If your Subaru is 2WD, you will have to find rear disks off of a 2WD Turbo Subaru. I found my rear disks in a junk yard on a 1986 Subaru XT Turbo Coupe. Any Subaru RX, XT Turbo, GL-10 Turbo (both wagon and sedan) will have rear disk brakes. Next, lets go through the tools you'll need to remove and install your rear disks. 1) 14mm socket 2) 14mm wrench 3) 36mm socket 4) Socket Wrench 5) Hammer 6) 10mm wrench 7) Plyers (needlenose prefferably) 8) Flat Head Screwdriver. 9) Breaker Bar (long piece of pipe for more leverage) 10) Jack & 1 Jack Stand The parts you need from the donor car are the Disk Rotor, Disk Caliper with the flexable break line attatched and the backing plate that the caliper mounts to. <-- Parts Let's Get Started! First, if the car is on the ground, use the screwdriver and your pliers to straighten out the cotter pin. Then remove the cotter pin from the spindle. *tip* I use my pliers, and grab the rear of the cotter pin, right between the loop. Then I take my hammer and gently tap the pliers and the cotter pin should tap right out. After you have the cotter pin out, use your 36mm socket with the breaker bar and break the nut loose on the spindle. Do not remove the nut just yet. Then go ahead and break your lug nuts loose. Use your jack to raise the car and support it with your jack stand. NEVER work on a car that is supported by just your jack (or cinder blocks, 2x4's or wooden planks!). Always use a jackstand! After you raise your car, go ahead and remove the tire and then remove the 36mm nut. Make sure you keep the nut, washer and cone-washer as well. Sometimes the cone washer wont want to come loose, use your hammer and gently tap the spindle and the sides of the rotor until the cone-washer pops out of place. Now you should be able to remove the drum and expose the mounting bolts. Remove the 3 bolts on the inside of the drum, holding the drum to the trailing arm. You will need to use a 10mm wrench to loosen the metal brake line. Take care not to strip the 10mm nut on the line, or break the line itself, you will be re-using it. Clean as much of the brake dust off of the hub assembly. Remove the drums from trailing arm by rotating it and tapping the backside with a hammer or mallet. Once its removed it should look like this. Once you have everything cleaned up, you should be ready to install your disk's. All the hardware is the same, bolt the backing plate onto the hub. Once that is done, you will need to install the rotor. You must do this before you install your caliper. Its not neccessary to torque the castle nut just yet, just fit the rotor in place. After the rotor is on, you can install the caliper. Bolt the caliper bracket into place, and slide the caliper into its bracket. After youve installed the brake pads tighten the caliper and everything and attatch your metal brake line to the rubber line leading from the caliper. You might need to bend the metal line out of the way. Make sure its safe from being pinched or crushed. Repeat the process for the other side.When you install your rotor, make sure to use the cone washer, then the flat washer, and torque your 36mm nut to 145lbs. Install the cotter pin, i find nails work just as well You may want to bleed your brakes afterward, then take the car out for a brief test drive. Good Luck & Have Fun, -Brian1 point
-
I cleaned up my battery terminals today. Removed all the grounds and took my dremel and a wire-wheel to every contact. I also re-grounded my windshield wiper motor, and now the wipers work 4x better and my intermittent works again -Brian1 point