

DaveT
-
Posts
5087 -
Joined
-
Last visited
-
Days Won
86
Content Type
Profiles
Forums
Gallery
Store
Posts posted by DaveT
-
-
Here is my collection of CTS info -
-
 1
1
-
-
Check the CTS and wiring for it. Its the 2 wire sensor on the lower thermostat housing.
-
Which automatic? A 3AT should be manageable. Im not familiar with the gl10 other than they usually have a turbo.
-
That one goes to the fuel tank. The whole reason that system is there is to collect the fuel vapors, and let them get burned in the engine.
-
Maybe struts for a Nissan Rogue? I haven't tried this - but I came across this video - at 10:30 you can see the struct clamps into the knuckle similar to the Subaru ones. I don't have any to measure. I figure the top end is easier to mod or swap.
-
On my non turbo EA82s, for purge solenoids, and the egr solenoid, I use Toyota solenoids. Almost every Subaru solenoid I have ever had has died. I am still using the same Toyota ones I got at a scrap yard in 1989. I've had about 7 of these cars over the time from 1988 til present. I don't know what model the solenoids were removed from, but it was a similar age as the car, so late 80s. They are not unique, so it doesn't matter. 3 ports, just have to test.which are equivalent function, replace the connector with the one off the dead subaru solenoid.
-
I know the factory service manuals have full wiring diagrams, pinouts, etc.
-
Active codes are displayed with no connectors. Read memory stored codes uses one set, clear memory uses another. Along with some other steps. With my EA82SPFI engines, I never needed to do either, since 1988.
-
 1
1
-
-
Note that the ecu code 35 is only an indication that the solenoid coil is open or maybe shorted. (I have only seen them fail open) The ECU is not very smart on this era engines, if you connect a resistor in its place, it will think it is fine.
-
Correct, long blink is 10s short blinks are 1s. I don't remember what 12 is , don't have the manual here. There might be a list one the forum, or someone will have a thread on that code.
-
Read the code by counting the blinks on the red led visible in a hole on the ecu. If something is triggering a code, it will just come back. If nothing is triggering a code, the cel should go off on its own.
-
1
-
-
Im not sure about the swap on this engine. For the EA82, the single belt pulley you take off the oem alternator. You have to shorten the spacer. There is a detailed write up on this forum.
-
The CTS [coolant temperature sensor] is a thermally sensitive resistor. It has 2 wires, and is located on the lower part of the thermostat housing. I have posted a thread with various readings of Ohms vs temp vs Volts on this forum.
-
2
-
-
check the engine ground wires and contact surfaces.
-
crank angle sensor is in the distributor... But you are getting spark if it runs for a burst when you dump fuel down the throat.
If the injector sprays when powered by 12V directly, the wiring or the ECU output that drives it are suspect. It is not unusual to get extraneous codes when something major is wrong.
-
No hammering on aluminum cast parts. Oil pump, distributor, big no, or expect it to break.
#1 thing I have found to help disassemble these engines without breaking bolts, etc. - Heat the entire thing to 160-190 degrees F. Easiest to do if it is still running, but a space heater and a heat gun will do it also. About 2KW of heaters did it for me.
#2 thing, Kano Aerokroil or similar penetrant.
#3 patience! Carefully turn bolts, etc. feeling if the bolt is turning, or twisting off. After years of experience, I can usually tell. Once a bolt starts to move, if it starts to get stiffer again, stop, turn the other way, then go back to loosening, until it sticks. Repeat many times.
-
2
-
-
The timing belt is an easy thing to check. My experience with several of these engines is that the timing belt makes it about 60k miles, then snaps. Not a big deal to fix, it does no damage to the internals. New belts and idlers, re set the marks, and go.
The sensor in the distributor could be bad. The igniter transistor could be bad. A wire between any of these could be bad. The easiest thing to check is the timing belt. Take the cap off, turn the crankshaft with a wrench. Does the rotor move?
-
2
-
1
-
-
Note it is also possible that the second nut, that holds the stud in when the ring terminal is removed is loose. If it is loose, the connection on the inside could also be causing heat and corrosion, so it should be checked also.
-
The condition of the nuts, stud and ring terminal on the alternator output looks like a very poor connection. Disconnect it, and clean all the rust and corrosion of the parts.
-
1
-
-
I had trouble with the gaskets between the head and exhaust Y pipe. I made my own. I used fiberglass body repair mesh. Use a new normal gasket as a template. Start with a piece of aluminum foil. Stack up 4 layers of the fibreglass, and work copper RTV or [higher temp] into each sheet, stacking them. You only need the RTV where the metal clamping areas are, not where the holes will be. Use a piece of .001" brass shim stock for the final layer. Put this assembly between 2 flat plates, and put something like 20-30 lbs on top of it. Let it set for several days. The RTV will cure very slowly. When it's cured, use an exacto knife and or gasket punches to cut them to shape. When installing them, aluminum goes to the head side. Use lock washer. Re check after a drive or 2, to make sure the nuts stay tight.
The combo of RTV and fibreglass will squish more than the typical hard gaskets, and seal up. The fibreglass won't burn away, and will protect the RTV from the exhaust gasses.
Note - I used the brass because I also made stainless exhaust pipes, and aluminum and stainless do not get along well in the environment involved. -
It would be less work and more reliable to do the EJ swap.
-
How many miles on the alternators? They typically wear out a brush right around 150k miles, causing low output. I've rebuilt several of the alternators since 1988, 150k is very repeatable. A couple of times the internal regulator or the rectifiers died.
-
1
-
-
parts car, NOS, junkyard, Someone on a forum that is selling off / moving onto other models. Many parts for these are NLA, so collecting spares is a must..
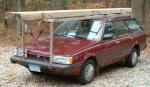
Oh - 1986 GL through 1993 Loyale wagons are mostly the same parts. There are also a few? years earlier, and 1994 - but my experience is with 86 - 93. -
It might work... be safest to disconnect the cables from the ECU, and the battery negative.
88 gl wagon spfi stalls after fully warmed up.
in Old Gen.: 80's GL/DL/XT/Loyales...
Posted
Its best to start a.new thread for your problem. Things that can cause bad running- first things to check, in no particular order -
Bad fuel, Bad coolant temp sensor. Low fuel pressure, blocked cat.