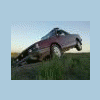
Very sorry, I had computer issues and lost everything. All I could find was an email with this information. I have the attached pictures I can send also if needed ( I need your email address).
I also made a few different versions of my kits. These instructions are for my very first type kit. Call it model #001 (I dont konw what type you have but rear strut assembly spacer will be different.)
I hope this helps
INSTRUCTIONS
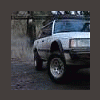
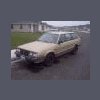
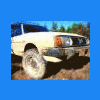
Ok so most of you are probably going to be installing this yourself ( or atleast I hope so). So im going to give you instructions for in your driveway on jack stands. Although the pictures that are included in your kit have pictures. There not in the act of installing, they are what a completed product looks like for reference.
Before you begin, lay out all your bolts with lockwashers and/or lock washers. Some are already equiped w/ a nut. These are differents then each other an need not try and mix up your nuts. Also go down to your local parts house and "rent" a spring compressor. They really only hold onto $20 as deposit untill you return the tool. That is if you dont own one. You can also get them really cheap from Sears.
-We will begin with the rear-
1. Jack up your car from the diff. Place jack stands under the body. Make sure your car is high enough off the ground for clearance once your XX amount higher.
2. Remove wheels.
3. Place spring compressor on either rear spring and compress it. Take enough slack off that when you remove the bottom bolt holding the strut assembly, it doesnt try to extend farther. You can also now put in your rear strut assembly spacer.
4. Place O.E.M. bolt from strut back in the same location. Fit strut in new home and place the 7/16x3in bolt, washers, lockwasher and nut in place of O.E.M. bolt, tighten.
5. Note the tab on rear strut spacer. Drill 1/4in hole threw the hole in tab and fit a 1/4in bolt, lockwasher and nut, tighten.
-see attached picture #1
6. Relieve spring compressor, move on to the other side and repeat steps 3-5
7. Place Jack under the differencial, jack it up just enough to hold it in place ( do not lift the car). Note the bar in the rear that holds the diff assembly up. Remove the 2 bolts on each side ( 4 total ) attaching it to the body.
8. Move up to the 4 bolts that hold up the diff. Remove the 4 nuts and the 1 bolt holding the diff hanger at the top. Lower the diff enough to get this diff hanger out.
9. Grind off the welds on diff hanger bracket to remove the 4 studs.
10. Move back to vehicle and push four 1/2x7/14in bolts and washers in the diff, from the bottom up. Place the spacers between diff hanger and diff. Fit with washer and lock nut. These are locking nuts. They wont back out. They are hard to turn but are the only thing that will not fail due to extensive heat. Hammer them as tight as you can.
11. Fit the top bolt that holds the diff hanger and move to the bolts you removed in step 7. Fit the 5 1/2x3in blocks and m10x4 1/4in bolts, washers, lock washer and nut. Tighten.
12. Move to other side and repeat.
13. Remove both bolts holding the carier bearing (center of driveline) Fit both 3in spacers, m10x4 1/4in bolts, washers, lock washers and nuts, Tighten.
-see attached picture #2 and #3
14. Put the wheels back on, lower car and move to the front. Note the height of the rear of your car!
-On to the front-
1. Jack up car and place jack stands under body. Do not block any engine or transmission braces. All the blocks are fitted first and tightened at the end.
2. Remove wheels
3. Remove steering knuckle, remove the upper stabalizer bar from the firewall( its the small round rod that has bushings on each end and goes from the engine to the firewall) Check clearances of any wiring and radiator hose. Note. I didnt have any issues, zero, didnt extend anything. BUT, I have an after market radiator, so my lower hose was already lower and I already had a different lower hose. Upper hose was extended w/ a temperature sensor addaptor (pretty much you cut your upper hose and put an aluminum piece in the middle that has a hole in it for a temp sensor).
4. Things that you should check the length of and probably extend.
A. Ground that goes from chassis to block, right by the battery
B. Ground that goes from chssis to block, right under the spare tire.
C. You may or may not have to "Bend" your shift lever rod for 4wd to clear your interior plastic due to its new positioning. You will know if you cant shift down far enough to get into 2wd. You can figure this out once the lift is complete.
D. Upper and lower rad hoses.
Other than that I didnt notice anything.
5. Place jack under engine crossmember but dont lift vehicle. Working one side at a time. Remove the two bolts holding the engine crossmember to frame. Remove the phillips screw holding the studs and bracket to the frame from the top. Grind off the welds holding the studs to bracket.
6. Move to the other side and loosen the eng crossmember bolts to the end of its threads. This will give you some working room. Moving back to the side you worked on in step 5, Lower the jack 3 inches. this will give you clearance for the lift block, If it doesnt you need to loosen your transmission crossmember bolts a bit. Install the 7x3in blocks and fit the m12x7 7/8 bolts in the bracket and drop back in the frame. Place a dab of locktite to the new bolts, fit the flange nut and "finger tight only"
-see attached picture #4 and #5
7. Move to the other side and repeat.
8. Remove exhaust hanger from useless crossmember, remove and discard.
8. Place jack under the transmission crossmember. Remove the 3 bolts on each side (6 total) holding the crossmember bracket to frame. Lower jack enough to fit the larger angled blocks the only way they fit (see attached picture #6 and #7). Fit the m12x5 1/4in bolts,washers and lockwashers in the ones with bushings. Fit the m12x4in bolts, washers and lock washers in the other two. Finger tight only
9. Place the smaller angled blocks between the lower rear two transmission crossmember to frame. Fit the last two m12x4in bolts, washers and lock washers and finger tigten.
-see attached picture #8 and #9
10. Starting from the front working back tighten all the bolts with a wratchet, not an impact gun. Take special care to have a few threads started before putting a wrench to it. These arent nuts you want to strip out.
11. Lower your driveshaft carrier bearing. Fit the round spacers and torque.
12. Fit steering knuckle and move on to the front spring spacers.
-Front spring spacers-
1. Start by removing both pins holding the D.O.J. to the output shafts. Remove both bolts that hold the control arms to the engine crossmember and front sway bar to control arm bolts while your under there.
2. Turn the wheel and pull clip holding the brakeline to strut. Take a cut-off wheel and cut the tab that the brakeline goes through. This way you can just bend the tab and slide out the brakeline and not have to re-bleed the brakes.
3. Remove the bolt holding the locking tab on the bottom of strut. Remove the main lower bolt holding the strut. Using a punch, tap down on the hub assembly. You may have to pry the control arm away from the crossmember, but by removing the d.o.j. pins alone gives you a few extra inches.
4.Once the bottom is out you can remove the 3 nuts holding the strut in at the top. With the strut out. fit the spacer at the top. Take three 1/4in bolts, lock washers and six nuts. Start at the top with the hardest to reach bolt first. Then the outer two. Re-assemble in reverse order
5. Repeat for other side.
You will probably need an alignment.
RE-TORQUE IN ONE WEEK!!!
Take pictures and send them to me.
Enjoy.
Thanks again
Jess


