DPDISXR4Ti
-
Posts
174 -
Joined
-
Last visited
DPDISXR4Ti's Achievements
USMB is life! (4/11)
11
Reputation
-
Thought I'd re-ping this thread. Anyone ever come up with a tent solution for the Brat? I'm assuming the one from Kodiak Canvas, even their shortest one, would be too big.
-
Dredging up this old thread as it was the first thing that came up when I search "Subaru Brat Tent". Alas, none of the pics are coming through nor any of the links pointing me to a relevant thread. Anyone have any pics of this thing? Anyone find a current truck bed tent that can be adapted to the Brat bed?
-
When replacing the plugs, wires, and coil pack on my friend's 2007 Forester, I noticed a fair amount of oil pooled in each of the 4 spark plug wells. Of course it all leaked into the chambers and subsequently smoked like an old diesel upon start-up, but that rapidly cleared up and all is well now. BUT, I'm wondering how soon I really need to get back in there and replace the gaskets. It's only leaking into the wells - no external leaks at all. Think I can let it slide for awhile? With 77K miles on the clock, I'd prefer to wait until it's time to replace the timing belt and tear into everything at once. Appreciate any input.
-
I'm sure many figured it had been abandoned, and rightfully so. It spent 20 months at the paint shop.
-
Nothing like bringing a thread back from the dead. Is this thing still alive and kicking? Oh yea, and if you're interested in bizarre projects... http://www.ultimatesubaru.org/forum/showthread.php?p=1156644#post1156644
-
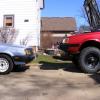
Finally got this thing home two days before snow starting falling...
-
Brat chrome bed trim alternatives
DPDISXR4Ti replied to DPDISXR4Ti's topic in Old Gen.: 80's GL/DL/XT/Loyales...
It's finally at the paint shop - you can see the latest pics here... http://forum.merkurclub.com/forum/viewtopic.php?f=37&t=2639&sid=2bb7ee459ee128284fbeedf53ce9b46b&start=600 -
Brat chrome bed trim alternatives
DPDISXR4Ti replied to DPDISXR4Ti's topic in Old Gen.: 80's GL/DL/XT/Loyales...
I recall having an off-line conversation with someone on this topic - probably "pksjeep" who posted above. I believe he used some 1" x 2" UHDPE and used a router to get a shape close to the stock trim. This was just for the straight pieces - the curved pieces were re-used after scuffing and painting satin black. I may be confusing some of the above with my plans. Emphasis on "plans" as I've yet to do this. -
Replacement gasket for Brat Camper Top
DPDISXR4Ti replied to DPDISXR4Ti's topic in Old Gen.: 80's GL/DL/XT/Loyales...
Thanks for the feedback. I'll have to look next time I'm at Carlisle as I seem to recall there are vendors that specialize in that sort of stuff. Anyone know what length I need? The car's in the body shop right now and it's about 120 degrees where the cap is in the attic over the garage! I'm thinking about 15 feet. -
Nearing the finish line to fresh paint... More pics here... http://forum.merkurclub.com/forum/viewtopic.php?f=37&t=2639&start=600
-
Now that I'm actually getting closer to having Project XRBrati painted and road-worthy, I'm thinking ahead to the occasional use of the camper top. The original gasket that goes around the perimeter is toast and I don't imagine it provided much paint protection even when new. I'm wondering if someone might have found an after-market gasket which provides a little more cushion and wider "footprint" to it. This is all the more important given the somewhat warped condition of my topper. I need to lessen the pressure points on the body and have something that will fill the gaps.
-
Brat Tailgate Latch Disassembly
DPDISXR4Ti replied to DPDISXR4Ti's topic in Old Gen.: 80's GL/DL/XT/Loyales...
I guess I'll provide my own answer in case anyone else ever wants to do this. Indeed the badge does come off - it's just held in place with double-sided foam tape, typical of many emblems. The little opening in the back helps to get things started with a small blade screwdriver. Getting the latch removed from the assembly is a little more involved, but not too bad. I took my 4" grinder to the smaller exposed head on each of the two pins. You need to get them fully flush, so it's all but impossible not to take off a little of the surrounding metal too. Even then, it takes some effort to push the pin out - need to make sure the casting is supporting or risk cracking it. The reassembled version will more readily come apart - looks like some 6mm Allen head bolts will do the job. -
Brat Tailgate Latch Disassembly
DPDISXR4Ti replied to DPDISXR4Ti's topic in Old Gen.: 80's GL/DL/XT/Loyales...
I can't be the first one to take one of these apart, can I? :-\