
sparklehorse
-
Posts
6 -
Joined
-
Last visited
sparklehorse's Achievements
Newbie (1/11)
0
Reputation
-
 Thanks for your reply. So the EJ253 was apparently the last of the four engines known to be prone to head gasket failure. Last week MrSubaru1387 posted a detailed video to his YouTube channel explaining the whole history. See below. For the 2011 Forester model year, Subaru finally switched to the MLS gaskets on the EJ253 which solved the problem. My 2010 Forester however still has the old, 'prone to failure' gaskets. The only thing as far as I can tell that sets the 2010 apart from it's earlier kin folk is that they had started adding conditioner to the coolant by then. How much that helps I don't know, but I know there are people with 2010's that have had the HG failure, but at double my mileage. Now all of this comes from the interwebs, so you can't know with 100% certainty what is true and what is not, but I've spent a lot of time researching this issue and that's the clearest picture I've been able to piece together. I'm all ears if you're privy to info I haven't seen and am more than willing to listen to what anyone has to say on this topic. Subaru doesn't say much so it's hard to get at actual facts. Like I said earlier, I had a 1999 whose gaskets failed at an early age, so call me paranoid but that's where I'm coming from. https://www.youtube.com/watch?v=-aq0hDvKJ5Q&t=870s Thanks for reading! .
 -
So I emailed the company that makes the Block Tester and here is what they have to say about this: >>Hi Gordon, lowering the coolant level in the radiator should not cause an air pocket to form in the cooling system. The only time air would be introduced is if the level is brought down so low, the water pump draws air and sends that into the engine. That said, I’d still recommend burping the system after bringing the coolant level back up to normal. It’s very easy to do, and will provide peace of mind that there isn’t an air pocket in the cooling system, which can lead to interrupted coolant flow and localized overheating. Usually, there’s a bleed screw that you open while the engine is idling, and you close it when only coolant and no air bubbles are coming out. Good luck, and I hope your Block Tester brings you good news! Regards, Tom<< I bolded the relevant text for emphasis. Interesting there is no mention of this in the instructions. Now I have to figure out where this bleed screw is (I'm not a mechanic). .
-
I bother because it’s an EJ253, the last of the problem engines, and the 2010 Forester still had the the problem gaskets. And I had a gasket fail on my last Forester, a 1999, at only about 70,000 miles. So call me paranoid, but I would not feel good about selling this car to a friend without being certain of its gasket health. He’s aware he will quite likely face this issue eventually, but hopes to get at least a few good years out of it before that happens. I hope he does.
-
Hello, I‘m getting ready to sell my 2010 Forester to a friend. It only has 65,000 miles on it, so a blown head gasket isn’t likely, but I told my friend I would use a Block Tester kit to confirm there‘s not currently an issue with the head gaskets. Trouble is, you have to remove quite a bit of coolant from the radiator neck to do this test. Instructions say to draw down the coolant with a turkey baster until the coolant level is 2 to 3 inches below the neck. This is to prevent actual coolant from being drawn into the testing fluid and contaminating it. I’ve never done this test before and I‘m worried about leaving the system with a big air bubble in it when I’m done. Is that a valid concern? Would I need to burp the cooling system after performing this test? Or is it fine to just replace the removed coolant by pouring fresh coolant into the radiator neck? The system currently has the blue Subaru Super Coolant in it, and I do have a gallon of fresh Super Blue on hand. Thanks so much for any and all help!! Gordon
-
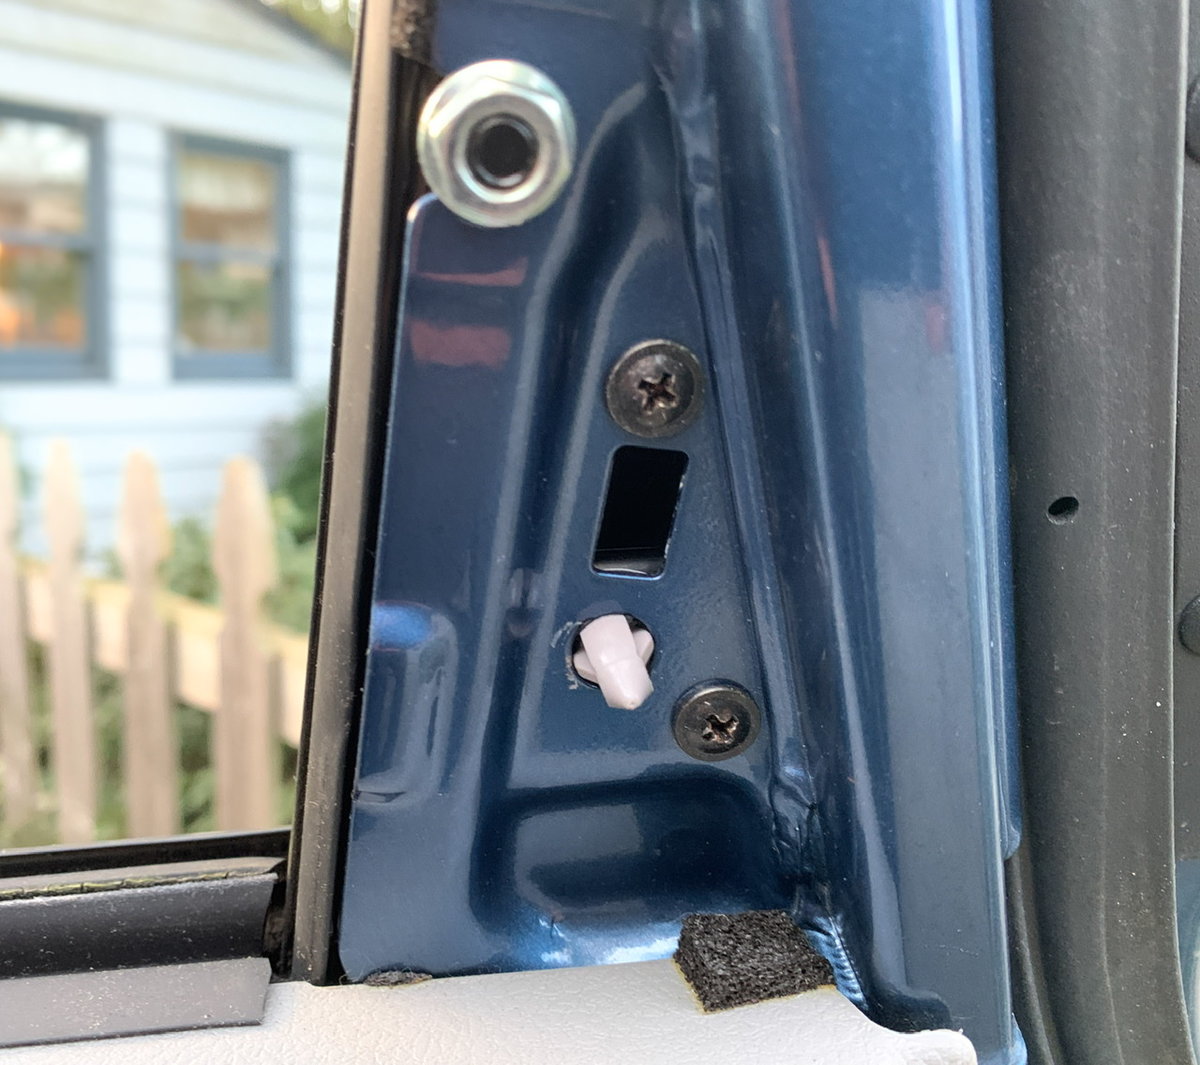
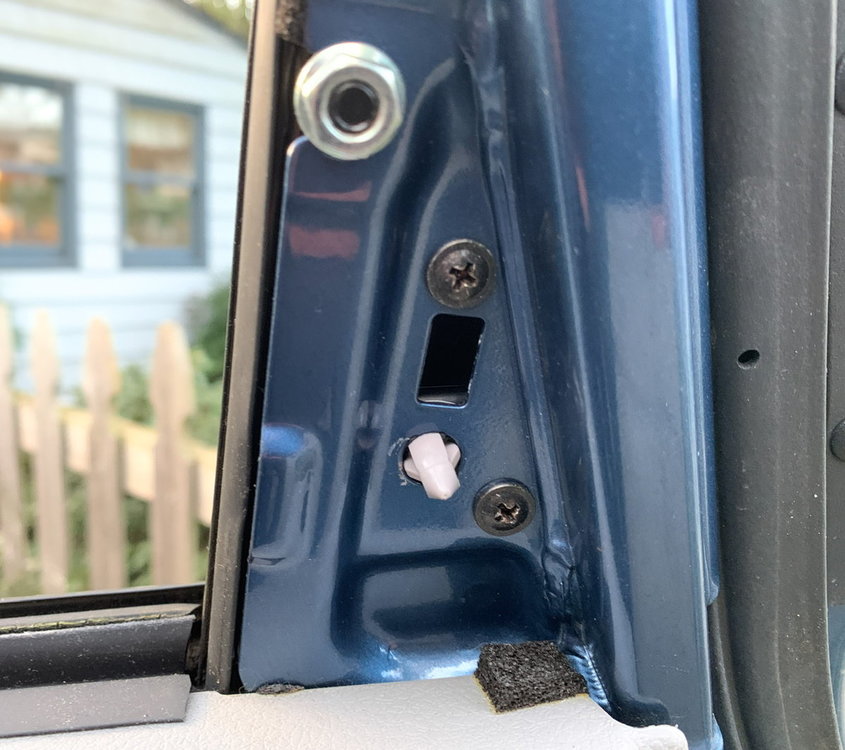
Ok, here’s an update for posterity. As brus brother surmised, you do in fact have to first remove the plastic cover on the inside of the door. That one pops off easily enough with a door panel removal tool, but you have to pry from the rearward side. Once that’s off you have access to two smallish Phillips head screws that hold the outside cover in place. These can be seen in somick’s photo (which was confusing to me when I first saw it, but makes sense now). Be sure to get the correct gusset cover, I don‘t think the left side gusset cover would fit the right side. Good luck!
-
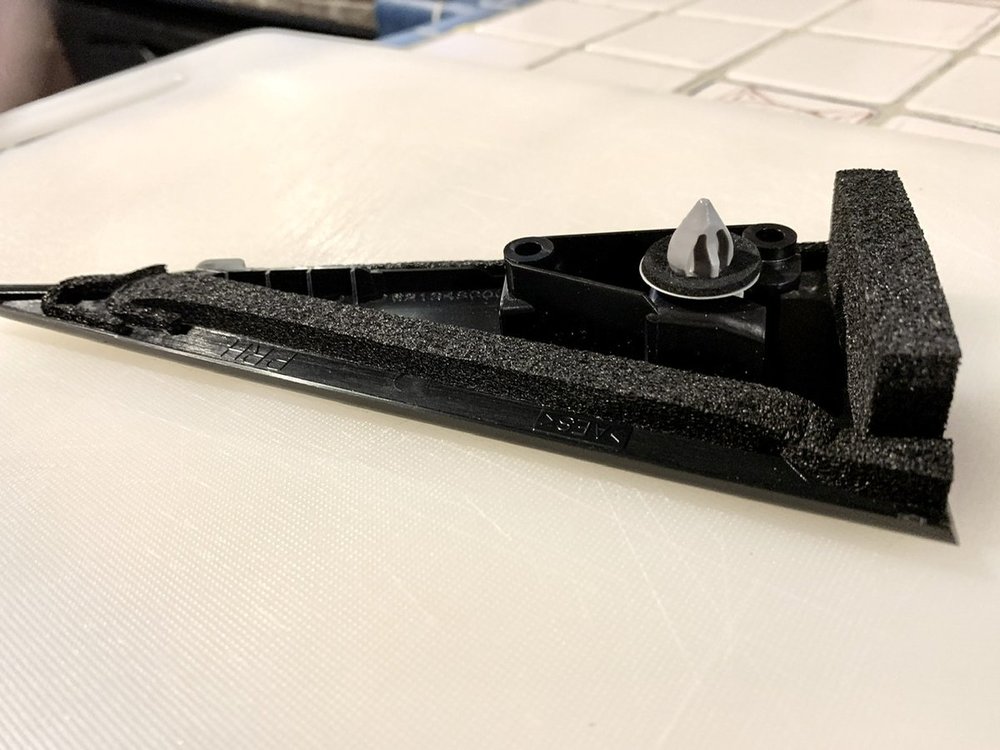
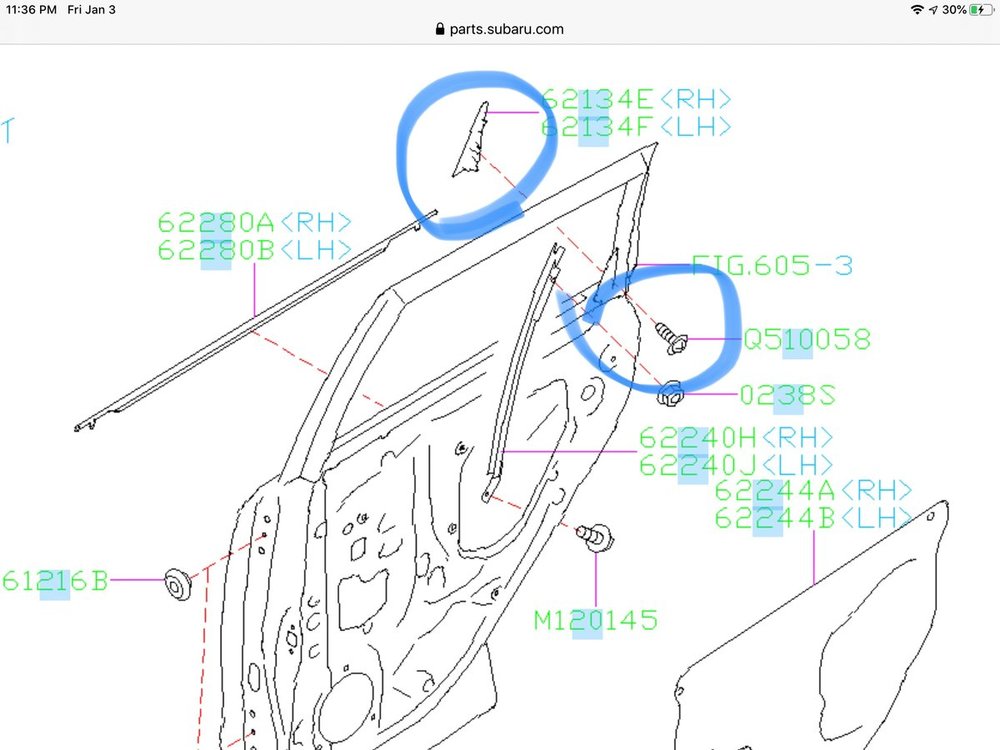
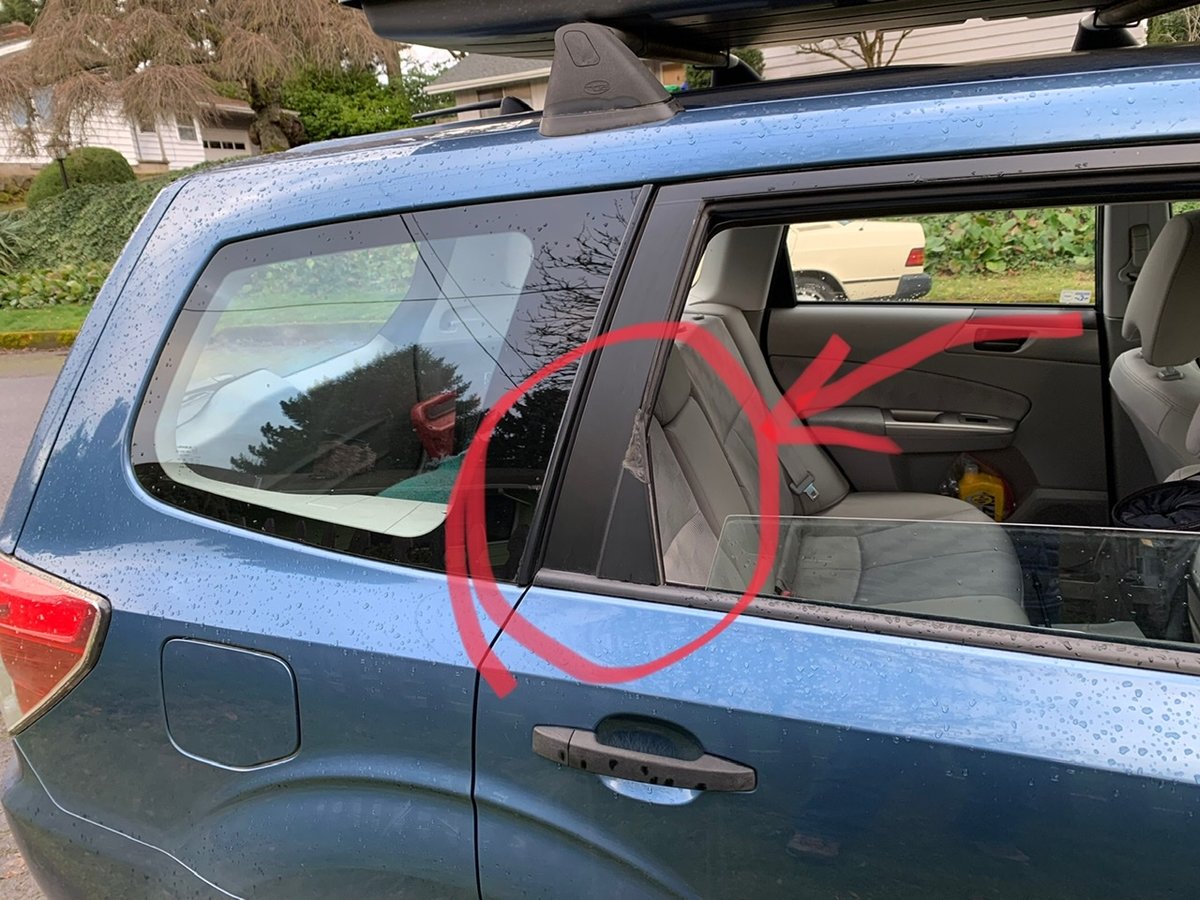
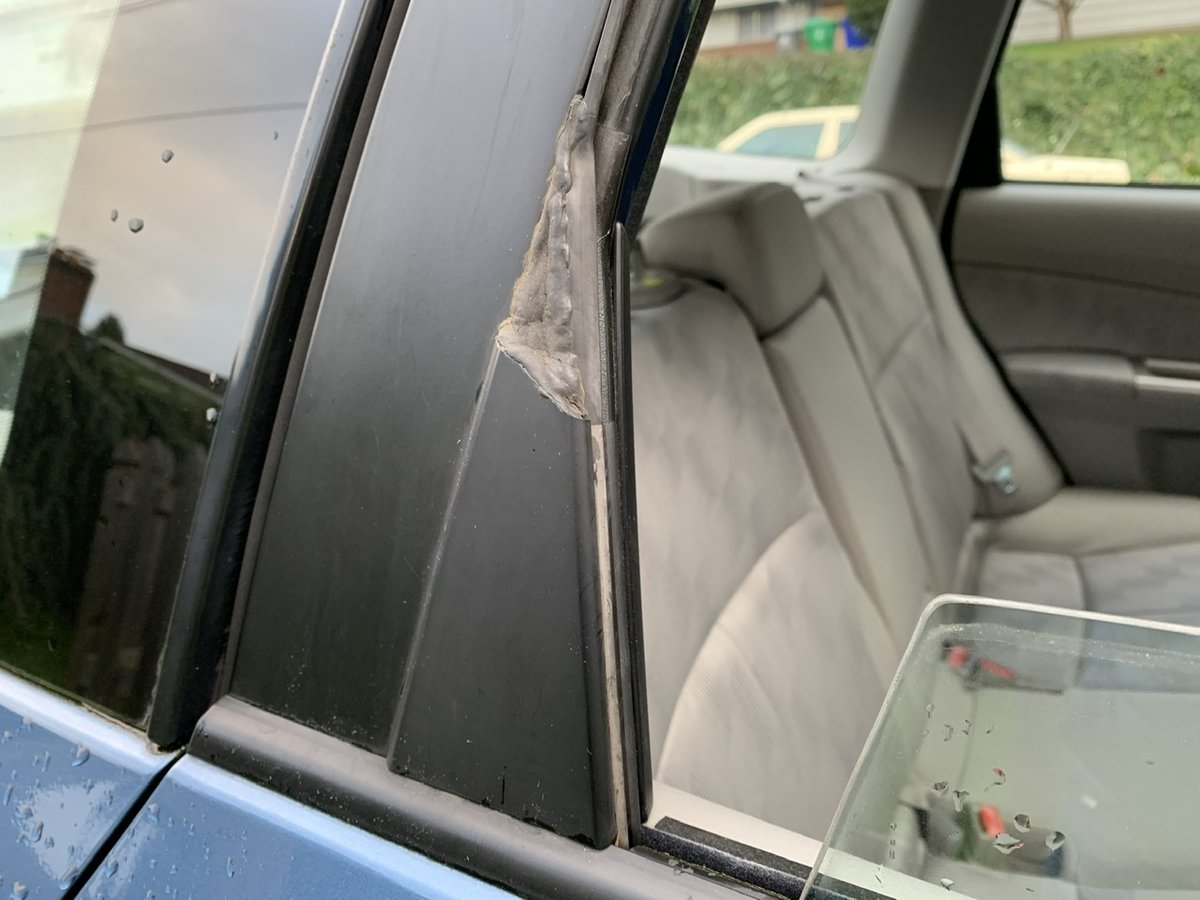
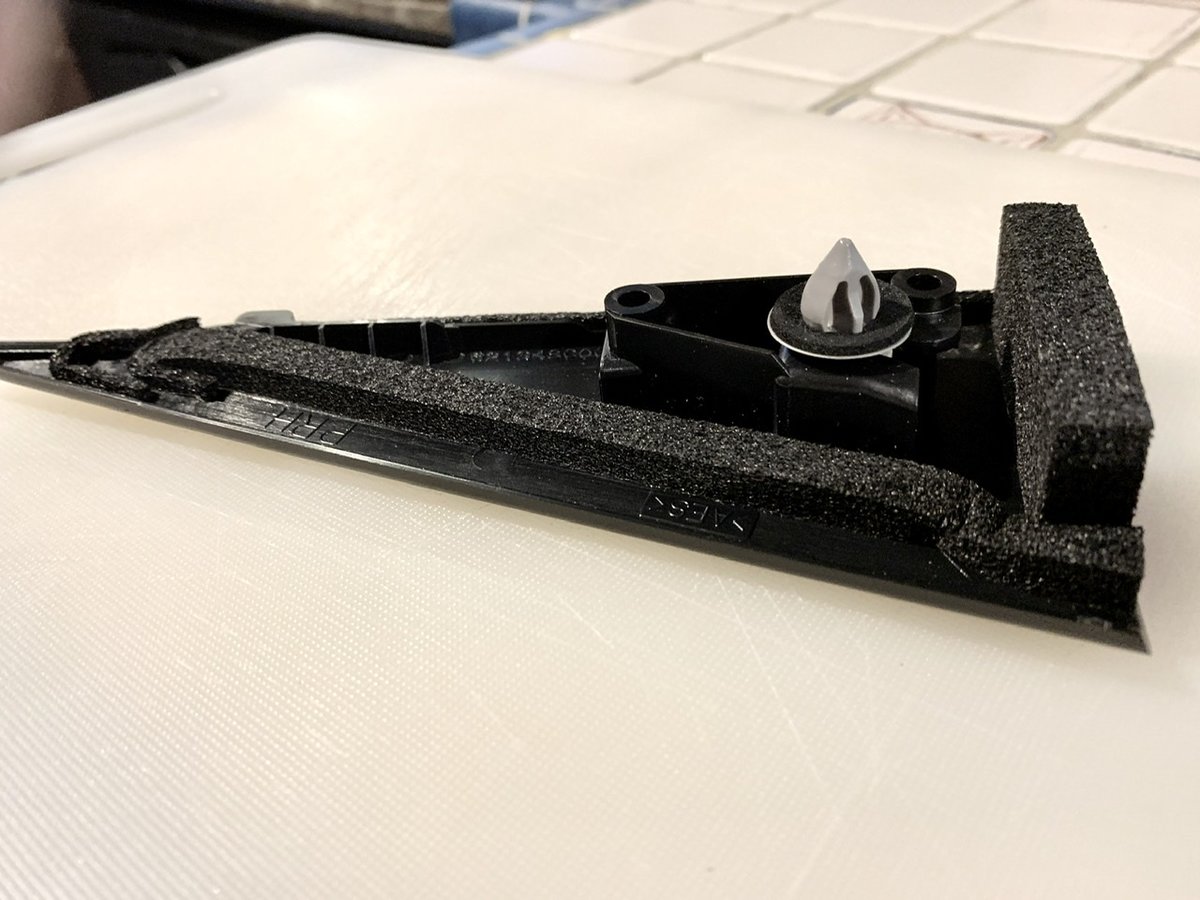
Hello! New member here. I have a 2010 2.5X with a broken rear door gusset. See photos. I’ve temporarily sealed the gap with some putty-like coax seal. I have a replacement part ready to install (see photo), but I don‘t know how to remove the broken gusset piece from the car. There’s many a YouTube video explaining the front door gussets, but nothing I can find regarding the rear doors. There’s a plastic clip in the new part. Is that the only thing holding it in place? Would a plastic door panel removal tool do the job? Is there any glue involved that would require heating with a hair dryer in order to soften it? I’ve seen schematics that appear to indicate a screw that I think would need to be accessed from the inside of the door, but I’m not totally sure on that. The schematic is confusing to me. See attached. Any help is much appreciated!!! Thanks very much. Gordon The new part, waiting to be installed...