Search the Community
Showing results for tags 'Ea81'.
-
 This may have been covered before and I just missed it, so if I did someone please just point me in the right direction... but I have been searching the forms for the past two hours and have come up with not a lot. So anyways, I was wondering what everyones favorite gear oils/lubes are for the EA81 4 speed trannys. So far it looks like Amsoil is a good choice from what I have read. I was hoping to be able to find something a little cheaper that I can get off the shelf that would work nearly as well. I know JesZek loves Motul 80W-90, but from what I have found online that stuff is insanely expensive for my thin wallet. Although Im sure it works like wonders. Has anyone tried Royal Purpel's 75W-90 synchromax? I know its just about as spendy as Amsoil, but I am curious if anyone has any experience with it so we can compare. Right now I am running the walmart supertech 75W-90 and i want to get something a little higher quality in there so I can make this little tranny last.. and shift easier in the winter months 5-speeders are more than welcome to give their experience as well! As so far it looks like they take the same oil/lube as the 4spds...
 -
Since completing new bearings and shafts on the front end I’ve got a squeak that seems to come from the front left. It is definitely rotational dependant and it comes/goes when there’s side load on the wheel. I initially thought it was the washer being fitted backwards. So I’ve rotated it and no change. I want this issue to be sorted! Any ideas or solutions welcome! Cheers Bennie
-
Here's the backstory: The carb I'm currently running on my EA81 in my Coupe I pulled off of an '81 brat in a junkyard along with the manifold. My unit says its a DCP 306-16/304, has manual choke and a vacuum secondary. The venturi sizes are 20/27. The only reference I can find to a carb like that is the Hitachi unit from Nissan A12 engines from the 70s. My setup has a small flat spot in the acceleration which has had me looking at how to remedy that. I am going to try raising the float level a smidge or maybe getting some slightly larger jets. I think this carb can run this engine properly it just needs tuned a bit more. It's pretty close as it is. The carb for the Nissan A14 engines is larger, I believe** its a 23/27, don't quote me on that. If I cannot get mine where I want it to be, I will get the A14 carb and see how it works. All the Nissan spec carbs have mechanical secondaries which is nice too, and manual chokes. The main point of this whole story is that I have found new A12 and A14 carbs (Hitachi design, just like the stock EA carbs) online for $40-$50. If these work satisfactorily this could be a cheap way to get a car running again and look stock, no worries of sloppy throttle shafts, and no expensive Weber swaps with stupid looking air filters. I will report back with more info and testing. Anyone tried this already?
-
 Hey Guys, I've been recommended to replace my ea81 distributor in my 1988 brumby to an electronic distributor (if I can find one) Symptoms: resistance while driving - jolting movement - intermittent miss. Has anybody else had this issue? Im looking for the exact part to replace but unsure where to find and what exactly to be looking for. can this play in the shaft cause the timing to be off? Thanks in advance. Drew
 -
 I was able to tap the axle spindle out of the bearing housing... that was pretty easy! ”How To Keep Your Subaru Alive” does not mention that as an option. A Youtube video shows tapping the housing back in to the spindle. Can I do this without harming the CV joint?
 -
 Hello USMB! Our beloved EA81 chassis is now well over 30-years-old and the parts supply is rapidly disappearing. Rubber parts, specifically, are mostly gone. In fact, RockAuto only lists the front windshield gasket and, as of this post, there is a single gasket left to order. My proposal is that we, as a community, band together like we did for the Gen-1 windshield gasket group buy, and have a run of parts made for the EA81 chassis. Right now, I'm thinking of four parts: BRAT/wagon/sedan/hatch front windshield gasket Wagon rear windshield gasket Coupe front/rear windshield gasket The first part is common across the listed body styles, so that makes perfect sense to me. I feel like the EA81 wagon is the most common body style still on the road, so it would make sense to target that application as well. I'm not an expert and have done exactly zero research on that, but it's my gut feeling. Finally the coupe has unique front and rear windshield gaskets, so it would need its own specific parts. Based on the previous group buy, I would estimate the cost per gasket to be between $50-80. These would be BRAND NEW rubber parts, not some 30-year-old NOS that has been sitting on a dusty shelf for the last three decades. So, who is interested? The minimum order will likely be around 50-units, so I'd hope we can get close to that number of members committed to buying. If you have any questions, comments or general input, please reply below and I will update this post with the usernames of interested parties.
- 63 replies
-
- 2
-

-
- Ea81
- windshield
- (and 8 more)
-
"I'm El_Freddo, and this is my Brumby Story:" Ok, time I "came clean" about the Redback Brumby. This is how I picked her up about two years ago. AFAIK I'm the third owner: The previous owner was a bit of a talker/player. I went out to check her out as a bit of a tease for me, it was local enough for the drive - I've always wanted a targa top since Sunnie the Brumby that we got for my mother inlaw. I would've loved a blue one but beggers can't be choosers. The owner said a fella was coming up from Melbourne that weekend so I bid him good luck, he was asking too much for my liking. 6 weeks later it was still there so I made an offer - he still played a hard card so I told him to offer it to the other guy at the price he mentioned and I let it be. Less than 5 mins later he called me back and said deal. As you can see from the pic above there's some front guard damage, pity, it's pretty straight otherwise! The engine wasn't working - reckoned it just stopped one day on the way to work and has been sitting like this for 6 months. I thought blown HGs straight up - empty radiator and creamy oil told the story. In the tub it had a rubber mat that concealed some foundation sand/packing sand (the orange stuff) that had held the moisture and rusted the middle of the tray. The main areas where rust shows up were pretty decent which I was happy about. After getting her home she moved around the yard a few times before making it into the shed for some work. Family photo: First up was pulling the engine - pretty easy in these things! I had to entertain dad as a decoy for his surprise 65th - he sat and watched for most of it :/ Once on the stand we drained the "oil": Second bucket: ~15 litres of water and oil in total. Now thinking major head gasket and a possible engine replacement. Continued stripping the engine before jumping to conclusions though. Heads removed, such a pretty sight (not!). Never seen this before: This was the culprit - and the previous owner's story checked out at this point: That's a Welch plug that dropped out, dumping the entire contents of the radiator into the engine, stopping things pretty quickly I'd imagine! After getting busy with work and other things (4wd trips etc) Dad came up and put the long block back together for me while I was at work - this saved me loads of time! Once the engine was all back together I got it running - it blew a lot of blue smoke and I shat bricks. It was also running as rough as guts. Turned out that I needed to adjust the valve clearances better than I did - it was running on two cylinders, just. Once all 4 were back online it blew more blue smoke. Not happy Jan! This finally cleared up and ran without any smoke. Very stoked. One of the things we had to do was remove rust from the bore. This was a cheap build for a daily cruiser - so instead of a rebuild or even a hone and new rings we hedged our bets and went this way. No1 cylinder had a couple of small pits at the very top of the cylinder so we left it this way and ran with it. Now it was time to look at other parts of the vehicle. Redback got her name when I was working on the rear end pulling drive shafts off that had probably never been removed before. While hammering away a redback dropped out from behind one of the rear wheels. Sorted that one quickly! It wasn't the last - I think there were five all up from memory, so a name was born for this beast. The rear bearings were an unknown and seemed rumbly and one of the rear brakes was leaking. So after a small investment in parts: This was done: Rear end being worked on: Rear diff was out as well, swapped in for one that leaked less instead of swapping seals! Home made tool for bearing retainer nut removal: All coming back together well: "New" rear drums were sourced from one of the parts bombs, the originals had a decent 2-3mm groove dug into them! The new ones barely looked like they'd been used! Then it was off to a mate's place for some detailing - 4 hours of degreaser and pressure washing! Only got a phone pic of that, it's not been uploaded At some point, either in the transit there or back I managed to get a stone chip in the windscreen, just a small one but right in the driver's view. Again, stole a windscreen from a parts bomb. This one cleaned up very well - I was stoked. This also gave me the opportunity to replace the old hard windscreen rubber and tackle the rust that I knew was under the front right corner: Putting the windscreen back in - always fun. Had to look it up on ausubi as to how I did it last time on Sunnie the Brumby. Once that was read the windscreen was in within 20 minutes: A new heater hose above the water pump was sourced - I use another unit from a Toyota Camry, just trim to size: A few other things along the way and it was time for a roadworthy inspection: ^ I didn't like the original rims, different offset and to me they didn't look that great on this brumby. I also had a set of black sunnies in the shed with my snow tyres on them which easily swayed my decision. I reckon they look way better even if they're only 13 inch and don't fill the guards. So she didn't pass first go. A few excited rookie mistakes: 1/ Didn't fill the wash bottle 2/ Didn't bolt down the passenger's windscreen wiper arm, so that didn't move! 3/ Apparently I had a front indicator that was blown - I didn't find it on my check so dunno where they got that from. and 4/ worn front uni joint on the tail shaft. I fixed the other easy little issues straight up, had to order in the uni joint so got two and did them both at the same time. I also smashed my thumb pretty good doing this - only now is the damaged nail almost grown out about 6 months after the event! Once those things were sorted the RWC was issued and I was off to rego. Vicroads now make it nearly impossible to get an appointment! I was pissed that I didn't get one before the weekend, but got one Monday and had to take some time off work to do it - just frustrating! The blessing was that my birthday/christmas/birthday pressie rocked up in the mail at M&D's (home base for important mail!) - so I was able to use them during the rego process, saving me some extra coin on not needing new plates: At Vicroads just after rego was granted: Back at home: Used her for driving to work, loved it! Didn't have to worry about rain (I'd been on the scooter prior to this!) And of course, hanging with the family members: Since this pic Dad borrowed Redback for a few months. I missed the old girl, the scooter's fun but there's just something about a brumby, plus it can do over 55kmp/h without trying hard. It's easier to speed in that Ruby Scoo IMO. While Dad had her M&D headed overseas and I had a conference close to their place, so my wife and I crashed there and I drove to the conference in Redback. The issue that came up after frying a few alternators (dad went through this issue) was a severe lack of performance - the exhaust would become blocked at certain levels of acceleration. This got worse until I was stuck on the way to the conference travelling at 60km/h, and that was before hills! Not fun! Pulled another Y pipe from the parts bomb and that sorted it. This wasn't an ideal fit due to some spacers on my EA81 for the ERG system that wasn't on the earlier year parts bomb, but it works and Redback goes very well for an EA81! I've also got to fix the choke - dunno what's wrong with it but it doesn't work properly. The carb could probably do a with a rebuild too, she runs too rich overall for my liking. I've solved the slop in the gear stick with the classic slot and bolt arrangement: The Welch plugs were sorted by Dad's idea - massive grub screws/threaded plugs: They've worked a treat! I've been hunting for a bullbar - found one in Talem Bend, South Australia, got a mate to pick it up for me. So I need to roadtrip to the city of churches to pick that up soon. I've since found an ideal bar that fits the bill for what I want. If all goes well the first one purchased might end up on Sunnie the Brumby if it's better than the one already on her. I've also been tossing up the idea of a lift kit, but it really comes down the right price at the right time - I don't want to go all out like Ruby Scoo lift/tyres. One thing I would love to do is make the engine run with the stock L series MPFI system. I'm a true believer in EFI over carb setups. I don't know if I can do this due to space constraints without converting the auxiliaries to the EA82 setup - not an easy task unless you've got the EA81 turbo brackets and crank pulley. Also an AWD gearbox would be great. Will have to build one up and fit it in at some point. EA casing an EJ gearbox can be done without issue over here with a dual range gearbox. Cruise and remote central locking would be sweet and I'd like to add a neat little tacho, oil pressure and coolant temp on the steering column in a manner that doesn't cover the other gauges. It's just a case of time and money for those things - after all this is meant to be a cheap build! Cheers Bennie
- 13 replies
-
- 4
-
-
- BRAT
- Brumby EA81
- (and 1 more)
-
So I had these pics posted in the "longtravel outbacks" thread. but I thought that since this is really an EA81 build, I would start my own thread. This is T-bone T-bone hop by Dans Subaru, on Flickr So here is the old EA 81 rear setup. Tired torsions and extra plateing and liftblocks, along with teh already low hanging EA81 diff, make the rump roast of this guy the biggest problem. Breakin axles and stubs....can't find any more good axles, so it's time to go. IMG_2594 by Dans Subaru, on Flickr I had thought about using an early Leggy or Forester setup.......but that would require full on strut mounts in teh back...which woud be lots of fab that there isn't room for. So I'm using the entire rear setup from an 03 Outback. Fitted with a Welded spider, 3.9 internal stub diff. Working on finding a VLSD for longer term road trip use. But for wheeling trips it's gotta be linclon locked for sure. IMG_3451 by Dans Subaru, on Flickr I modified this subframe to have equal length lower arms....hopefully better travel range possible once I get the right shock setup. For now it will use stock 03 outback shocks. IMG_3455 by Dans Subaru, on Flickr IMG_3445 by Dans Subaru, on Flickr IMG_3442 by Dans Subaru, on Flickr IMG_3461 by Dans Subaru, on Flickr IMG_3473 by Dans Subaru, on Flickr Here's the projected "full stuffed" point. IMG_3477 by Dans Subaru, on Flickr Here's the forward mounting of the subframe. Built mounting off of the old EA81 6" lift block (there is an EA81 torsion tube section between the body and the blocks) IMG_3486 by Dans Subaru, on Flickr IMG_3487 by Dans Subaru, on Flickr Sitting near ride height with wheels on. IMG_3489 by Dans Subaru, on Flickr And here is resting on it's own shocks. Literally it's just sitting on them....haven't actually made the shock mounts yet. Also need to finalize the Front trailing arm mounts and the sliders for them that will tie into the front/center subframe I have built. IMG_3491 by Dans Subaru, on Flickr
- 72 replies
-
- 2
-
-
- longtravel
- ea81
- (and 3 more)
-
Hi All! I'm still having trouble starting my 83 Brat GL, I thought it was weather related during the winter months here in NYC, but it's still happening in this hot, hot summer! I bought a $300 800 cca Odyssey battery, changed all the cables, and the car does eventually start, it's just very finicky from a fresh start. I was at a parts house last night and a guy heard me having the issue and said there is something called a pickup coil under the distributor, or that is part of it. Does that make any sense to anyone? Any help on this greatly appreciated. Once the engine is started and warms up, restarting it isn't an issue. It's just the fresh start. Thanks again!
-
 Hi guys Have inherited a 1990 brumby from my grandfather who passed last november. I absolutely have fallen head over heals in love with it. The 'brumble beast' had done 305 000 kms and has bugger all rust in it. Engine has been tinkered with by subaru 'specialists'. Ive noticed all the hitachi carb haters out there and I must say I love them! I have no mechanical experience at all but am very mechanically minded. I am determined to keep the hitachi however doing away with all the emissions garb. You guys have great pics etc however I'm in Australia and everything is backwards lol. Anyhow I'll post some pics and your guidance would be fab! Zeb
 -
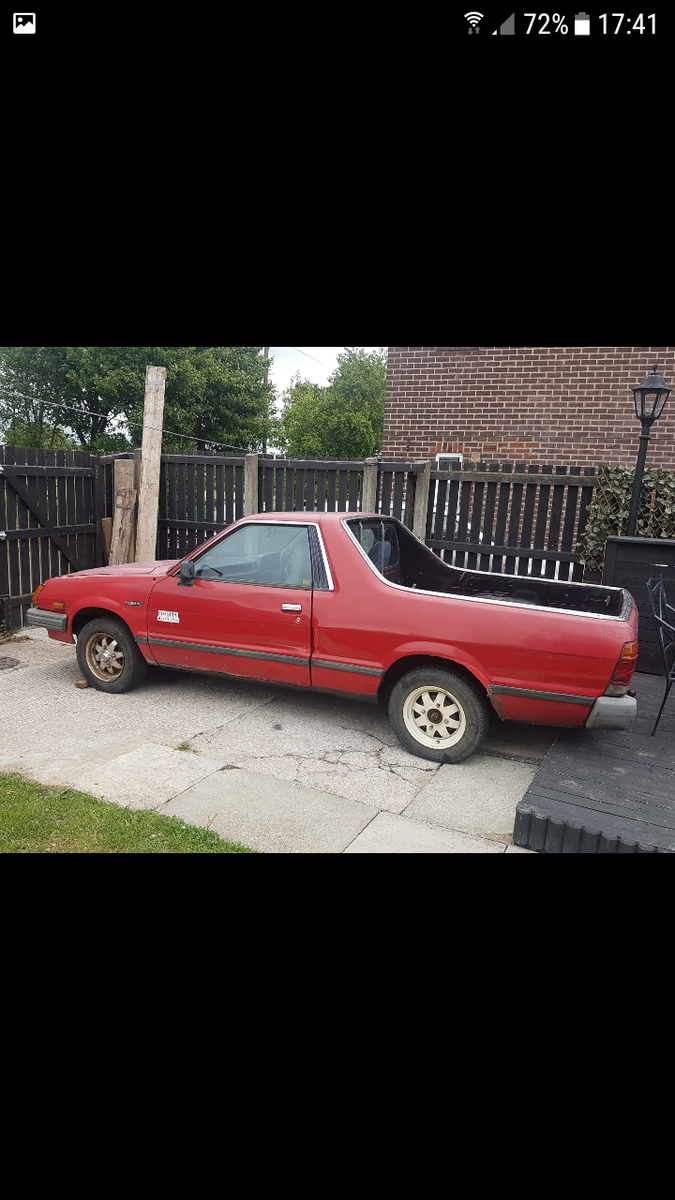
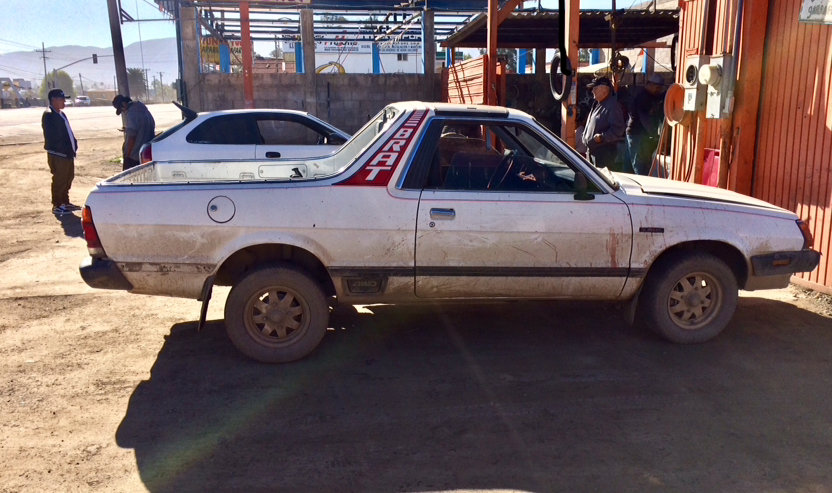
On my my way home from Mexico I found this guy on the side of the road... So i drove it back it back to Canada! let the fun begin. the good: almost everthing is there, jump sets and everything. No real body damage and no bad body rust from what I can tell. runs! Shifts pretty good(4spd) the bad: Torn cv’s lots of caked oil, Mexican wiring oil sender dosnt work driver side strut top is completely torn(found this once I got it home) leakying front main seal bad rad fan Truck bed leaks into cabin(when it rains) Plan: since I’ve been building my crazy off road poptop gl wagon, I thought it’d make this more of a daily driver. bushings upgrades 2 inch lift 215/75/15 Baja bfg on yota drilled 6 lug. camber/caster plates longer ish dual rate suspension Electric swap?!?!
-
 I installed a new Spanish Webber on my 83 GL two years ago and it ran great for a while. But around 6 months ago it started stalling when I turn left with the clutch pushed in. I recently put in a fuel pressure reg when it started flooding but I am still having the same problem. Any help would be greatly appreciated. Thanks.
 -
Warm engine, 1,000 rpm, 50+ psi, 4,000rpm, about 30 psi oil pressure. This seems bass ackwards! Is it a problem?
-
 I'm looking at this oil leak I have. Nothing major but it leaves a spot on the driveway and cruds up my engine bay (rust protection right?). The leak seems to be coming from behind the crank pulley and dripping down the front. It does leave some residue on the underside of the air filter housing. Anyone have any tips, tricks, videos, diagrams or such before I dive into this?
 -
Hey guys an introduction first. As of 3 weeks ago I'm the new owner of the Desert Fox! 1984 Subaru DL Wagon. I just replaced the throttle (accelerator) cable as it was binding up during the beginning of the pedal travel. Heres what happened afterwards. Let sit for about 30 minutes because the engine had probably flooded from me fiddling with the throttle getting the new cable on. Went out and started it without pumping the pedal at all. Car started but idled high, revved it up. Let it run a minute. Blipped the pedal and idle dropped down. I shut the car off. Started it again without pumping the pedal at all and it idled high. Let it run for a minute again. Blipped the throttle and it dropped down again. I shut it off. Pumped the pedal to the floor once, released, and started it. Idled high again. Blipped the pedal and it stayed where it was as far as idling. Let it run for a bit. Shut it down. Got out and adjusted the nuts on the cable sheath. Thinking that might have something to do with it? Tried to start without touching pedal. No start. Feathered the pedal as I cranked. No start. Fully depressed pedal and released. No start. Fully depressed pedal 3 times and released. No start. Adjusted the cable sheath nuts back to where they were originally. My normal starting process is pedal to the floor once and release and it starts right up. Even when is 20°F out its 30 today. Same thing with the no start. I'm going to let it sit overnight and try it tomorrow unless anyone has an idea.
-
22 degrees forecast for when I plan to start my ‘84 Webered EA81. I have never started this carb in weather so cold. 500 miles from home, with an old battery, also. Any suggestions for a cold weather start?
-
Two electrical connectors on my factory air conditioning drier. What is their function ?
-
So I got myself a 1994 Subaru Brat (RHD) with an EA81 engine and in the process of swapping in a Legacy Twin Turbo.. :-) Would any of you fine people have a wiring diagram for the Brat (Is it the same as the 1800 gl?) Thanks in advance John

-
Hello again. I ha e a ea81 1.8 engine sitting in my driveway. I removed this engine because i could not get cylinders 2 and 4 to fire. I did replace the engine head gaskets and cleaned the valves in headers and put it back together. When i installed engine back in car i was not able to get it to fire correctly. I have new wires spark plugs rotor and cap and nogo. I did pull the wires from cylinders 2 and 4 and did see a spark in them. Obly reason i know these two cylinders are not working is because the engine will have a terrible shake to it and by plasing my hand below the header were exhaust goes only one side was hot. Could it be that i have a bad distributor even tho i see sparks coming from wires 2 and 4? Thanks.
-
Hi all, thanks in advance for any tips you can offer. I’m not an experienced auto mechanic, but I can follow directions, work with tools, etc. I have a 1984 GL wagon, 4sp w dual range 4wd, 180k miles, that I acquired from a neighbor for cheap. It’s somewhat beat up, but I really like it- if you’re here I’m sure you understand the appeal. I’m lucky enough to live in Portland so Subaru parts and shops are relatively plentiful. I am willing to spend a little more than is rational, but don’t want to get too carried away. The car came to me with a bad engine knock. I tore the motor down and found the #2 rod bearing was very dead. Crank and cam look pretty bad, I’m guessing they’re irreparable, and there were bits of bearing in the oil pan. The block looks good, considering- a couple of the main bearings were a bit beat up, but didn’t seem to have spun or otherwise marred their seats. I don’t have the experience to do the ej swap, nor is the car clean enough to put that kind of money into. My initial plan was to find a used ea81 to plunk in there, but I’m not having much luck finding a viable runner. Now I’m wondering how these engines do after being rebuilt after rod bearing failure. Is it even worth looking into sourcing parts and having the block bored/decked? If I’m going to go to all the trouble, should I just start with a $300 junkyard engine that probably didn’t have as big a problem as mine did? The other option I see is to sell off the Weber and other decent parts for about what I have into the car, and start over with a different car. I really like the ea81 wagons and definitely want one, and am not afraid of doing some work to make one go. What do you recommend I do? Thanks again!
-
I have a 1985 Subaru Brat 3-speed automatic. My brakes were trash and squealed really bad so I replaced the pads and rotors and had to replace the calipers too because the Piston wouldn't go back in. Got those installed and went to bleed the brakes and the pedal goes straight to the floor. It doesn't build any pressure at all. I attempted to bleed the brakes anyway but like I said it doesn't build pressure and if you pump in a bunch of times in a hole to the floor and open the bleeder valve brake fluid just dribbles out. Figured I somehow messed up the brake master cylinder so I got a new one and installed it and no change at all. I bled the master cylinder and the calipers multiple times as well and it still just dribbles out. I know brake booster uses vacuum, so I think it has something to do with that because, when I hit the brake pedal air gets sucked into the carburetor. Also when the vehicle is running if I hit the brake it stutters and almost dies. I don't see any drips or anything from the brake lines, calipers, or MC. Any ideas what could be wrong? Do I need a new brake booster? I'm honestly kind of stumped.
-
Hi, this is my first post to USMB. My current project is an 83 Brat, 131k miles, sat for the last 10-15 years in Texas, probably in the direct sun. The oil pressure gauge shows nominal pressure when the engine is cold. Over the first 10 minutes of running, the oil pressure eventually drops to zero as the temperature comes up. Here's what I have tried: - drain the oil looking for sludge; fill with oil and sludge remover and run 10 minutes; fill again with new filter - switch to 20W-50 Didn't find any sludge. The heavier oil helps a little (I think), but still the pressure goes all the way down to zero. I'm convinced that the oil pump is working, else I should see zero pressure when the engine is cold. I could replace the oil pressure sending unit, but why would the sending unit malfunction only when warm? Has anyone else had this problem?
-
1984 4WD GL, I need to replace the axle shafts, front. 200,000 miles, seems like a good idea to replace the front wheel bearings and seals while I am at it. What else should I do on this job?
-
I have a bent valve in an 85 Brat A/T. I want to replace it but I can't find any place that specifically has the Large valve. Rock Auto says it has it but i looked and the 82 Brat in their catalog uses the same valve part number. And correct me if I'm wrong but pre 84 had smaller valves... I just don't want to buy it pull the head and find out its the wrong one.
-
I just did a clutch replacement on a 1984 4WD GL. I replaced the rear main engine seal, and the orange gasket featured in this video It looks like the oil pan gasket is leaking, and also I have some oil in the clutch housing. Can oil leaking from the oil pan gasket migrate up into the clutch housing? The bottom of the clutch bell housing is open. I am hoping it can, it would be an easy fix. Otherwise, I am looking at fixing a leak in the transmission.