
Search the Community
Showing results for tags 'Hood cable'.
Found 1 result
-
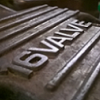 Well, the dreaded happened the other day. I went to go check the fluids and this is what I ended up with! So I ordered the new cable online (Park Suabru, ordered it Sun night and arrived Tuesday morn. $14.23. :rock: ) Hood Release Cable, part number 57331GA122 But there was a major problem. How the *%&^ do I open the hood w/o destroying the grille, hood or other stuff. (If your hood is open, then skip ahead to the cable replacement part) Well, for those of us with large hands, an A/C condenser or want to just make it easy, the ever useful slim-jim to the rescue! It was as if this tool was made for this job.. Available at ANY auto parts stores, can be had for around 7 bucks and has helped me and MANY stranded people. (Disclaimer: Never use this tool for malicious use. With a great tool comes great responsibility) Coming from up under the bumper using the notched spade-head side (not the fishtail side), on the driver's side, in front of the A/C condenser, angle the slim-jim at a ~45 degree angle and starting just below the assembly, slide up behind the latch mechanism. Now while flexing the tool toward the grille and dragging it outward toward the headlight, you should feel it catch. This is the latch release. Continue to pull the tool horizontally (toward the headlight, not down toward the marker light/ground) until the hood releases. Viola! Here are some images once I felt the slim-jim catch the release lever. (grille removed for clarity) Under car, looking up. Now that the hood is open, we can get to work! So I started by releasing the 4 plastic anchor clips that hold the cable to the inner fender and core support. Remove the 3 bolts that hold the latch to the core support (you will need to do this if part of the cable is still attached AND to hook the new anchor into the mechanism when installing the new cable) backside with the cable anchor attached Remove the 2 screws holding the cable shield to the latch and the core support. (Set aside the latch) Near the cable end, remove the tear-drop bracket attached to the old cable (you will need to re-use this). Be gentle, it will butterfly apart and then set aside. With patience, work the cable through the pass-through in the core support, around the battery and under the strut tower support plate. Now feed the old cable through the rubber grommet on the driver's side firewall until approx 6-8" are left in the engine bay. Move to the inside. Using a phillips screwdriver, Undo the 2 screws holding the hood release cable bracket to the bulkhead. Once free, take the head of the new cable and tape to the old cable. Wrap several times so the head will not catch on any wires or insulation. Back into the engine bay. Gently peel back the rubber rectangle grommet and pull the old cable up through the grommet until the new cable attached to the old cable is visible. Undo the new cable from the old. Push the old cable back through the grommet completely. Push the new cable through the open hole in the grommet. Push the grommet back into place on the firewall. Make sure to massage the edges well to get a good seal. Water DOES like to nest up there... Back inside. Attach the new cable/bracket assembly back to the bulkhead. The screw holes were very easy to find. Back outside. Feed the new cable following the route the old one took (Under the strut tower support plate, along the inner fender, UNDER the body grounding cable, UNDER the coolant resevoir feed tube and back through the hole in the core support) Be sure to put the protective grommet back around the cable BEFORE you attach the cable anchor to the latch assembly. With the anchor in the cradle of the latch, attach the latch to the core support. Replace screws to the cable shield. Finally, anchor cable to sheetmetal with the plastic retainers. DO THIS STEP LAST. Once the cable has the plastic anchors on, it becomes NEARLY impossible to slide the cable in the retainers. Test pull a few times checking for binding, lack of return or general badness (yeah, it's a word. ) BEFORE closing the hood. If all is good, close the hood to check for binding or excessive force. Grab a beer and enjoy the luxury of having a cable operated hood latch once again!