Search the Community
Showing results for tags 'install'.
Found 10 results
-
 I need to replace the clutch plate on my BRAT. While the engine is out, what else should I do?
 -
delete please
-
I was able to tap the axle spindle out of the bearing housing... that was pretty easy! ”How To Keep Your Subaru Alive” does not mention that as an option. A Youtube video shows tapping the housing back in to the spindle. Can I do this without harming the CV joint?
-
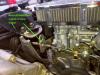
I am ready to put the engine in, but first I need to install the oil pump. "Keep Your Subaru Alive" says to not to use gasket sealant when installing the oil pump. The surface the pump will attach to is scratched, is "no gasket sealant" still the best course of action? Hopefully, picture below
-
Here is a video: The new and old clutch plates do not look the same. Will this be a problem? mkoch
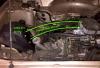
-
Front and rear sway bar install on my 2004 STi
-
Just a short DIY on installing Kartboy's front and rear endlinks.
-
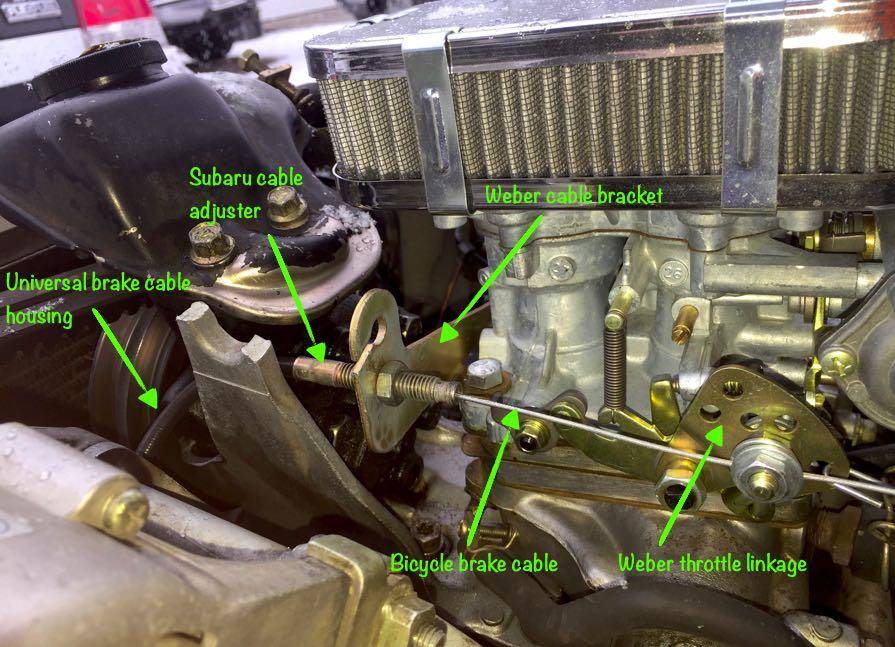
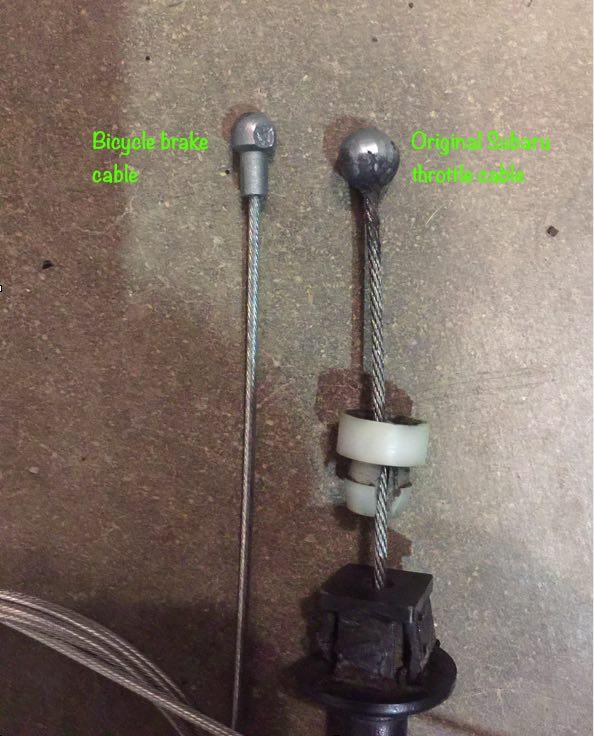
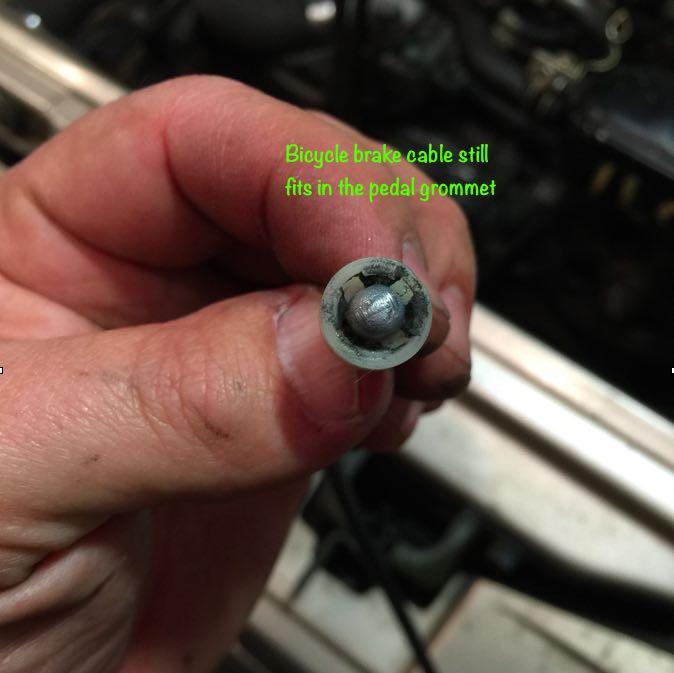
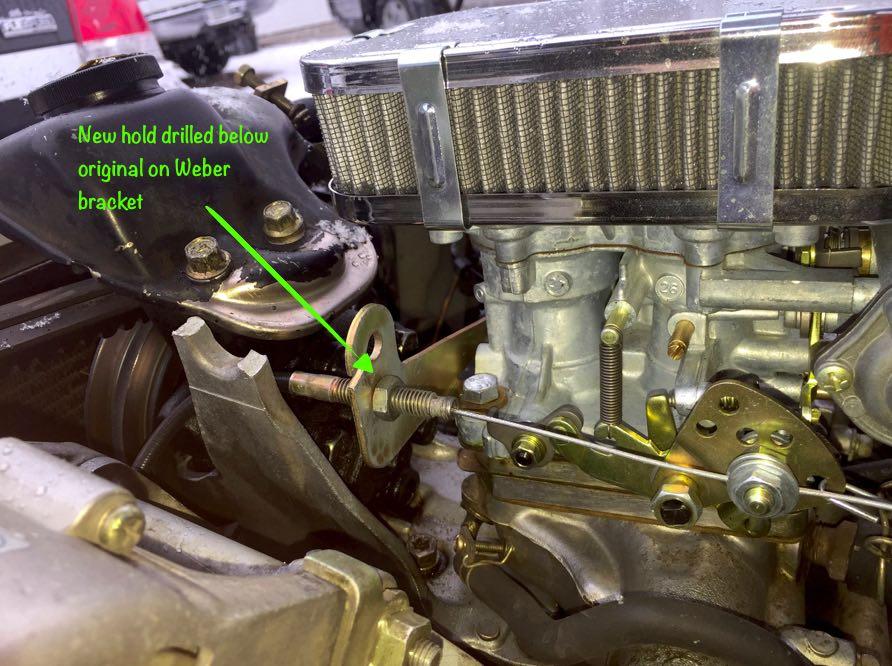
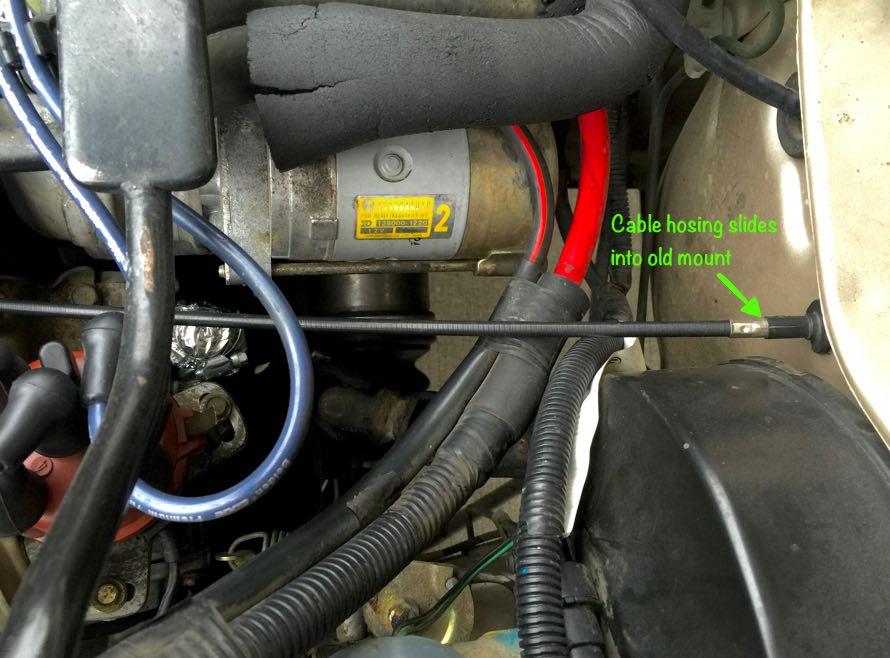
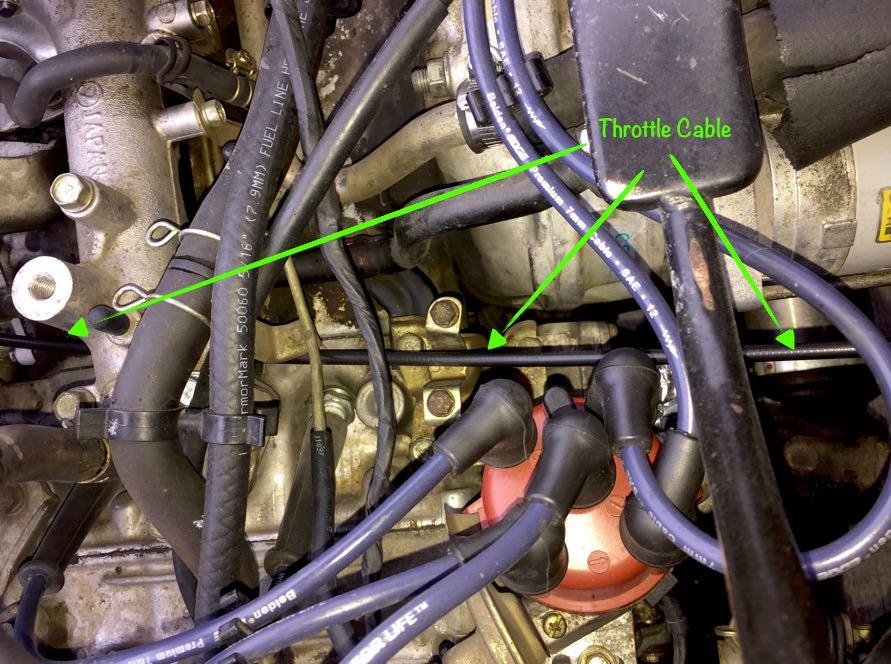
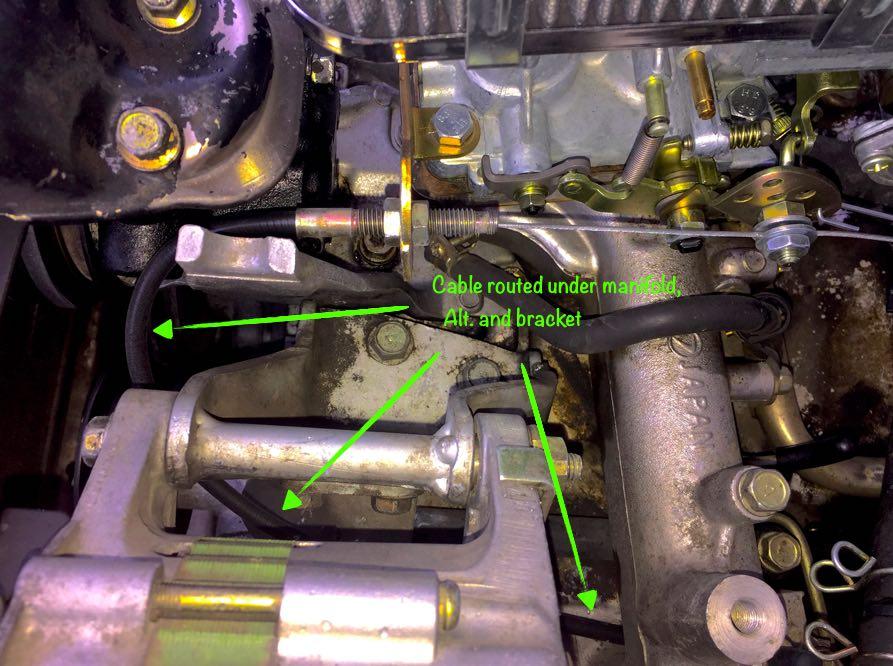
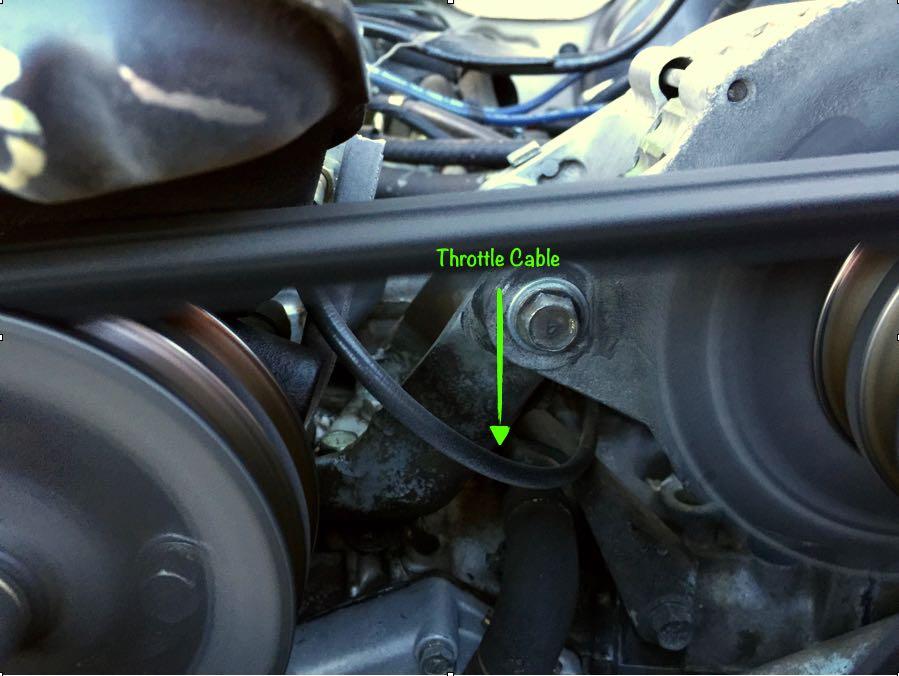
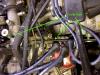
Many of us have done or are interested in upgrading our factory carbs to the Weber 32/36. But there is a challenge in fitting the electric choke version to our EA82 motors with the P/S reservoir right up front. Some have claimed they were able to dent in the back of this reservoir with out any ill effects. However I found a few comments made over the years stating that the electric choke wanted to intrude on the P/S more than a ball peen hammer can address. I am among this group. After installing the Weber/Redline adapter plates I found that the front of the electric choke wanted to be so far forward it would almost be touching the reservoir mounting bolts. There was no way I could bash in that much of the reservoir without causing big troubles. So I decided to install the Weber backwards. This of course caused a problem with routing the throttle cable. Once I found the best path the factory cable was not long enough to reach. So I made one. The parts I used were Brake cable from a road bicycle (think Tour de France) These have a similar ball end that you need. Universal motorcycle throttle cable kit (5' housing and assortment of fittings) http://www.amazon.com/gp/product/B00O1C2L7S?psc=1&redirect=true&ref_=oh_aui_detailpage_o03_s00 Old factory Subaru throttle cable Here you can see the different parts to make the throttle work. After cutting the universal throttle housing to length I re-crimped the Subaru factory adjuster to it. You can also see that I am using the Weber linkage instead of swapping the Subaru cam. I was unable to get the secondary to open with the Subaru cam link so I tried the Weber and it worked on the lowest hole. You can see that the ball on the bicycle brake cable is smaller but it is still large enough to work This is the grommet that captures the ball end of the cable to the gas pedal The factory hole in the Weber cable location bracket was to high and was causing binding, so I drilled a new one to keep it level with the throttle linkage. The universal housing slid snuggly into the grommet in the firewall. I routed the cable low past the distributor and under the intake manifold. I continued it under the Alternator out the front and under the lip of the P/S reservoir. There is plenty of clearance from the belts and pulleys no worries. I really don't like the small air filter that comes with the Weber. I don't see these things doing a very good job on dry dusty dirt roads. So I went down to the junk yard and pulled the air filter box off a similar year EFI engine. The air box bolts right into the carb engine bay. I am tracking down the parts to make this work with the Weber. The benefits will be better filtration and it will be easy to find replacement filters when needed. I will update this post with pictures when it's complete. I am using an aluminum air intake adapter on the air box. The hole in the EFI air box and the adapter are both 3" in diameter. http://www.amazon.com/gp/product/B00HG7D56G?psc=1&redirect=true&ref_=oh_aui_detailpage_o01_s00 I also advanced the timing to 12 deg while doing this conversion. I might advance the timing a little further.


-
 My legacy brighton doesn't have a tachometer. So I went to pick and pull and pulled a cluster out from another vehicle with a tachometer. I installed it and everything seemed to go okay until I drove home and had no speedometer. So I pulled my old speedometer out (thinking it was a loose connection in the back) and switched it with my new one. The speedo worked but now the tach did not. I'm wondering what the problem is with the wiring? Do I need to wire the tach through the speedo? Or should I try putting the tach in my old cluster?
- 2 replies
-
- 1
-

-
- Install
- Tachometer
- (and 8 more)
-
I haven't really seen any threads or pictures of Toyota inclinometers being installed into Subarus, so I figured I'd post. Today, I got in the mail an identical pair of these Toyota inclinometers: In case you don't know, here's some details on these gauges. Toyota sold them in their '84-'89 4WD pickups, 4Runners, and Tercels. But only on the SR5 models. The 4Runner inclinometer also came with an altimeter on the left, whereas the Tercel ones (like what I got) just had a 4WD indicator light that illuminated when 4WD was engaged. Near-new inclinometers go for ~$200 on eBay, so they're not necessarily cheap. Although I believe you can get them for real cheap at a junkyard, if you find an '80s SR5 4WD Toyota. If you don't know what an inclinometer is, it's basically a tilt gauge. One gauge tells you how angled up/down your vehicle is, and the other tells how banked your vehicle is (helps to avoid rollovers). Seeing as most of the people on here offroad, I'm sure most of you at least know what an inclinometer is. The nice thing about this one is it's entirely mechanical, besides the backlighting (and the 4WD indication light). Inside, it's basically just a set of gears and weights. Just like a Subaru, it's a pretty simple machine. When I first saw a picture of one of these, I thought they were really cool. I don't offroad to a point where rollovers and steep hills are a concern/possibility. But I thought it'd be cool to have one of these in the car, especially since it'd be another thing to make my car unique. So in this thread, I'll be posting about the installation of this, and I'd like to hear your guys' opinions. How do I put this in my Loyale? Well, that's a good question. It does have this "case" which is comfortably close in color to my car's interior. That flat spot on the EA82 dash would be a perfect place to put this. The only problem is that the flat spot isn't very big as you go towards the passenger side, so the only place the inclinometer fits is right in front of the clock. For most EA82 owners, this isn't a problem, since these clocks rarely work. However, since this is my daily driver, I do have a working clock in there, and I'd like to not cover it up. As you might be able to tell, there is a gap under the gauges, which is quite noticeable (and ugly) in person. However, the real problem with this setup though is the angle. I guess the Toyota dashboards are sloped, because sitting on the EA82 dash, the gauges are angled upwards. This is a problem for the pitch gauge, as you have to recalibrate it. But when you adjust it a lot, it's range gets screwed with. Properly adjusted, the pitch gauge reads about +/- 45 degrees. When I adjust it to compensate for the angle at which it's sitting in the above picture, the range is about + 75 degrees, -15 degrees. I have to get the gauges to sit flat for it to work properly. Easy solution is to pull it out of the case. This, as of right now, is how I'm going to install this. Reason being is it's short enough that I can still see the clock, flat enough for the readings to be good, and a good contact surface for me to put velcro down to hold it on the dash (I want this to be as minimally invasive/permanent as possible). The only problem with this setup is it's not super good looking, mainly because of the white case. Solution? Well, I decided to paint it black! Took out all the components of the inclinometer. Pretty simple. Time for paint! I'm just painting the outside of the case black. I'm leaving the interior of the case white because 1) it doesn't matter since you can't see it, and 2) I'm not sure, but the white might help with the illumination. Another thing is the wiring. For right now, I'm not going to wire up anything. I'm talking the bulbs/wires out. If I were to wire up the back illumination, I'd probably just tap into the cigarette lighter wires. I always drive with my headlights on, so they'd be illuminated all the time anyways. And the lighter is a switched power source, so it wouldn't drain power. Wiring up the 4WD light could also be a possibility, although I kinda see it as useless. What I'm thinking of doing is swapping the 4WD indicator light for another gauge--perhaps a voltmeter--since it wouldn't be hard to do so. But I won't worry about that for right now. That's as far as I have gotten so far. The perfect place to install this would be where the radio is, since it's the perfect width. But I have a working radio that I use all the time, so I won't be doing that. Interested in what you guys think, and maybe if you have done something like this before. I think it's a cool gadget, and I also read that it can be used as a g-meter. Accelerating/braking affects the pitch meter, and turning affects the roll meter. However, roads aren't perfectly flat, so it wouldn't be accurate. I'll post more as I make more progress. Currently waiting for the paint to dry, and it's not easy buying velcro at 10 pm, haha.