mrfixiter Posted August 21, 2022 Share Posted August 21, 2022 Hi everyone. My 1997 Legacy GT, MT, Station Wagon will crank but not will not start. i borrowed a fuel system pressure tester and installed it in between the fuel filter in/out hoses. I then cycled the on/off switch several times to see if the pressure would gradually increase. I could hear the fuel pump relay clicking but the fuel pump meter wasn't budging off of zero. I found a copy of the wiring diagram and discovered that fuse #16 (which measures OK) in the under-dash fuse box supplies power to the fuel pump relay coil and SBF-4 in the main fuse box supplies voltage to the pump after the fuel pump relay closes. I'd like to cut to the chase here and see if the voltage is making it to the fuel pump. I looked under the rear bench seat and found, what looks to be fuel lines going down into the body but there was no access panel. In the same area was plug R1 which, according to the schematic, is two plugs away from the fuel pump. Before I start pulling everything apart in the hatchback area, I'd like to get confirmation that there is an access panel to be found. Might someone know where the fuel pump access panel is if indeed there is one? Here is a link to the wiring diagram if you're curious. https://app.box.com/s/xfdukryspro91pthe106o1w3hgl9h0ee Thanks for your help. 😀 mrfixiter Quote Link to comment Share on other sites More sharing options...
jonathan909 Posted August 22, 2022 Share Posted August 22, 2022 I think the earliest fuel pump I've had occasion to have to get at was a '99, so I don't know if/how that differs from yours. Have you gone through the drawings at http://jdmfsm.info/Auto/Japan/Subaru/Legacy_Outback/1997/Service Manual/ ? Answer should be in there. Quote Link to comment Share on other sites More sharing options...
forester2002s Posted August 22, 2022 Share Posted August 22, 2022 This doesn't answer your question, but have you tried the following: - Open-up connector R1/B97, and check for 12V (to ground) on B97 when you try to start the engine? - Also, check for resistance/continuity on R1 (to ground)? These tests won't solve your problem, but may take you further down the road... Quote Link to comment Share on other sites More sharing options...
lmdew Posted August 22, 2022 Share Posted August 22, 2022 In the wagon it's just behind the rear seat. In the Sedan's it's under the rear seat. You'll see an oval panel with 4 screws in it. Pull the panel and you will see another oval panel with many 8mm nuts and the fuel hoses and electrical connector. Spray the fuel hoses with WD-40 or some other lube. Carefully remove the hoses, electrical connector and then the 8mm nuts. Pull the panel and pump. Get a Subaru pump. Even a used one is better than aftermarket. 1 Quote Link to comment Share on other sites More sharing options...
mrfixiter Posted August 22, 2022 Author Share Posted August 22, 2022 (edited) 2 hours ago, lmdew said: In the wagon it's just behind the rear seat. In the Sedan's it's under the rear seat. You'll see an oval panel with 4 screws in it. Pull the panel and you will see another oval panel with many 8mm nuts and the fuel hoses and electrical connector. Spray the fuel hoses with WD-40 or some other lube. Carefully remove the hoses, electrical connector and then the 8mm nuts. Pull the panel and pump. Get a Subaru pump. Even a used one is better than aftermarket. Thanks for that info. I just had another look at the service manual (link below) and the sketch at the bottom page 10 is pretty much what I saw under the bench seat. Another interesting fact is that the R1 connector had been labeled "R1" with a sharpie like someone who previously fixed the car needed to remember that. Getting back to the sketch, how is it possible that I was able to see the fuel lines and the connector without removing an access panel? Maybe it's missing? I also looked for the 8mm nuts that secure everything in place but didn't see those either. There must be something I'm not seeing here. I'm going to snap some photos of all this when I go visit the car tomorrow and post it here if I can't figure it out. Link to sketch in service manual: https://app.box.com/s/wm7eg83tt11hsmt0c85rmrdway12g822 See page 10 3 hours ago, forester2002s said: This doesn't answer your question, but have you tried the following: - Open-up connector R1/B97, and check for 12V (to ground) on B97 when you try to start the engine? - Also, check for resistance/continuity on R1 (to ground)? These tests won't solve your problem, but may take you further down the road... Excellent idea. Why didn't I think of that? 😀 3 hours ago, jonathan909 said: I think the earliest fuel pump I've had occasion to have to get at was a '99, so I don't know if/how that differs from yours. Have you gone through the drawings at http://jdmfsm.info/Auto/Japan/Subaru/Legacy_Outback/1997/Service Manual/ ? Answer should be in there. Yes, I did peruse the service manuals for my particular year however your prompting persuaded me to look again (see my reply above to Imdew). I will say that those online service manuals seem to be incomplete. For example these are the instructions for releasing the fuel pressure: Quote 1) Release fuel pressure. <Ref. to 2-8 [W1A0].> I can't find anything in the fuel section of the manual that is labeled, "W1A0" Thanks for all of your very helpful replies. 👍 mrfixiter Edited August 22, 2022 by mrfixiter Quote Link to comment Share on other sites More sharing options...
jonathan909 Posted August 22, 2022 Share Posted August 22, 2022 (edited) Hmm. Maybe the problem is that you haven't placed "No Fire" signs near the working area as directed. Seriously, though, sounds like you're just missing that cover plate. And though this may make me sound like a bit of a slob, I relieve fuel pressure by disconnecting the fuel line. There's only so much overblown ritual I can stand, even though I hate getting gas on my hands. Edited August 22, 2022 by jonathan909 Quote Link to comment Share on other sites More sharing options...
mrfixiter Posted August 22, 2022 Author Share Posted August 22, 2022 26 minutes ago, jonathan909 said: Hmm. Maybe the problem is that you haven't placed "No Fire" signs near the working area as directed. Seriously, though, sounds like you're just missing that cover plate. And though this may make me sound like a bit of a slob, I relieve fuel pressure by disconnecting the fuel line. There's only so much overblown ritual I can stand, even though I hate getting gas on my hands. I would think a cover plate would be one of those essential items you'd want to reinstall especially since there is a gas tank located a few inches below it. I agree that there is much "overdo" about nothing in the service manual but sometimes those links point to more essential information that has left me scratching my head when those links are nowhere to be found. Thanks for your reply. 😀 mrfixiter Quote Link to comment Share on other sites More sharing options...
jonathan909 Posted August 22, 2022 Share Posted August 22, 2022 (edited) 15 hours ago, mrfixiter said: I would think a cover plate would be one of those essential items you'd want to reinstall especially since there is a gas tank located a few inches below it. You might think so, but as you may have sussed by now: There are idiots. If you followed the recent discussion of the '01 H6 I just finished doing the head gaskets on, this is the car that, when I started driving it last summer, surprised me by running out of gas halfway through its first tank. When I lifted that cover I found a dog's breakfast of "improvised repair" that included hardware store brass plumbing fittings, epoxy, rubber hoses, and hose clamps, none of which (I suspect) you see on yours. Why? Because a PO had bottomed out that gas tank on something big, hard, and sharp, and punched a dent up in the tank - exactly beneath the gauge float (which is why it read "half full" when, in fact, it was "totally fuggin' empty"), but outside of a baffle so I couldn't reach it to try to pound it back down. Presumably, at that same moment, the fittings on top of the sender were all smashed against the cover you're missing, which, now that I think about it, is a compelling argument for omitting the cover. I wound up replacing the tank and the entire pump/sender assembly, a very unpleasant task since you have to drop the entire rear suspension to do it. Yes, There are idiots. Edited August 22, 2022 by jonathan909 Quote Link to comment Share on other sites More sharing options...
heartless Posted August 22, 2022 Share Posted August 22, 2022 7 hours ago, mrfixiter said: 1) Release fuel pressure. <Ref. to 2-8 [W1A0].> there is nothing incomplete about it if you understand what you are looking at. Granted, it is not the most intuitive system in the world, but it is valid. Ref. to 2-8 = section 2 of the manual, chapter 8 [W1A0] = the specific part of that section/chapter... If you look at the table of contents, there is a sub-chapter labeled "W" so W1, refers to the page number for that sub-chapter... A is the first heading, 0 refers to the whole heading subject if it was referring to specific line in a sub-chapter the reference would look something like [W1A3] or something along those lines. (that particular reference is for line 3 of the above sub-chapter & heading and reads "Disconnect connector from fuel pump") as for the missing access panel.. pretty obvious someone had been in there before and didn't bother to put it back - so yeah.. idiots. and for the 8mm nuts - is it possible they are nothing but rusted lumps? or are those missing as well (more idiot behavior)? (ie: possibly broken off?) if you do find some - i would recommend using a good penetrating oil and letting it soak for a bit before attempting to remove them. And when you do start on them.. exercise a ton of patience! the studs are rather small, and easily broken.. Quote Link to comment Share on other sites More sharing options...
el_freddo Posted August 22, 2022 Share Posted August 22, 2022 10 hours ago, lmdew said: Get a Subaru pump. Even a used one is better than aftermarket Unless it’s a known performance branded fuel pump. Don’t go overboard with higher rated fuel pumps either, they can be noisy! There’s a lot of god advice about removing the pump and those little nuts that hold it in place on the tank. Luckily where I’m from (down under) we don’t see rust issues like you guys state side do in the salt belt! I recommend cleaning the top of the tank area around the fuel pump plate as much as possible to avoid fine dust and small rocks from falling into the tank. Hopefully you won’t need a replacement tank as I can attest to @jonathan909‘s account that removing and replacing a fuel tank is a right royal PITA and should be avoided at almost any cost (unless absolutely necessary)! Cheers Bennie Quote Link to comment Share on other sites More sharing options...
laegion Posted August 22, 2022 Share Posted August 22, 2022 14 hours ago, mrfixiter said: Hi everyone. My 1997 Legacy GT, MT, Station Wagon will crank but not will not start. i borrowed a fuel system pressure tester and installed it in between the fuel filter in/out hoses. I then cycled the on/off switch several times to see if the pressure would gradually increase. I could hear the fuel pump relay clicking but the fuel pump meter wasn't budging off of zero. I found a copy of the wiring diagram and discovered that fuse #16 (which measures OK) in the under-dash fuse box supplies power to the fuel pump relay coil and SBF-4 in the main fuse box supplies voltage to the pump after the fuel pump relay closes. I'd like to cut to the chase here and see if the voltage is making it to the fuel pump. I looked under the rear bench seat and found, what looks to be fuel lines going down into the body but there was no access panel. In the same area was plug R1 which, according to the schematic, is two plugs away from the fuel pump. Before I start pulling everything apart in the hatchback area, I'd like to get confirmation that there is an access panel to be found. Might someone know where the fuel pump access panel is if indeed there is one? Here is a link to the wiring diagram if you're curious. https://app.box.com/s/xfdukryspro91pthe106o1w3hgl9h0ee Thanks for your help. 😀 mrfixiter Yours should be the same as my '95 was. There are two access hatches behind the rear seat under the rear cargo area. One on the drivers side that just has a fuel tank sender and one on the passenger side with a sender and the fuel pump assembly. They are both under oval covers that are under the carpet. Quote Link to comment Share on other sites More sharing options...
mrfixiter Posted August 22, 2022 Author Share Posted August 22, 2022 1 hour ago, laegion said: Yours should be the same as my '95 was. There are two access hatches behind the rear seat under the rear cargo area. One on the drivers side that just has a fuel tank sender and one on the passenger side with a sender and the fuel pump assembly. They are both under oval covers that are under the carpet. My station wagon's rear seat is a bench seat which has a looped piece of fabric in the center. When you pull up on this "handle," the bench seat rotates 90 degrees into its up position. Directly underneath the passenger side of the vacated bench seat, is some sticky material (it did seem like the material was OEM) covering the spot where I saw fuel lines going down into what I believe now is the gas tank. Is that how your '95 was? 4 hours ago, heartless said: there is nothing incomplete about it if you understand what you are looking at. Granted, it is not the most intuitive system in the world, but it is valid. Ref. to 2-8 = section 2 of the manual, chapter 8 [W1A0] = the specific part of that section/chapter... If you look at the table of contents, there is a sub-chapter labeled "W" so W1, refers to the page number for that sub-chapter... A is the first heading, 0 refers to the whole heading subject if it was referring to specific line in a sub-chapter the reference would look something like [W1A3] or something along those lines. (that particular reference is for line 3 of the above sub-chapter & heading and reads "Disconnect connector from fuel pump") as for the missing access panel.. pretty obvious someone had been in there before and didn't bother to put it back - so yeah.. idiots. and for the 8mm nuts - is it possible they are nothing but rusted lumps? or are those missing as well (more idiot behavior)? (ie: possibly broken off?) if you do find some - i would recommend using a good penetrating oil and letting it soak for a bit before attempting to remove them. And when you do start on them.. exercise a ton of patience! the studs are rather small, and easily broken.. Thanks very much for the detailed explanation about the sub-chapters, headings, and line numbers. Now it makes sense to me. 😀 If the 8mm nuts give me any resistance, I'm going to use PB blaster and then leave the vicinity for a while because those fumes are powerful. 4 hours ago, el_freddo said: Unless it’s a known performance branded fuel pump. Don’t go overboard with higher rated fuel pumps either, they can be noisy! There’s a lot of god advice about removing the pump and those little nuts that hold it in place on the tank. Luckily where I’m from (down under) we don’t see rust issues like you guys state side do in the salt belt! I recommend cleaning the top of the tank area around the fuel pump plate as much as possible to avoid fine dust and small rocks from falling into the tank. Hopefully you won’t need a replacement tank as I can attest to @jonathan909‘s account that removing and replacing a fuel tank is a right royal PITA and should be avoided at almost any cost (unless absolutely necessary)! Cheers Bennie Regarding the replacement fuel pump, I hold off on that discussion until I determine the old one is defective. Thanks to all you for your replies. mrfixiter 1 Quote Link to comment Share on other sites More sharing options...
laegion Posted August 22, 2022 Share Posted August 22, 2022 3 hours ago, mrfixiter said: My station wagon's rear seat is a bench seat which has a looped piece of fabric in the center. When you pull up on this "handle," the bench seat rotates 90 degrees into its up position. Directly underneath the passenger side of the vacated bench seat, is some sticky material (it did seem like the material was OEM) covering the spot where I saw fuel lines going down into what I believe now is the gas tank. Is that how your '95 was? Thanks very much for the detailed explanation about the sub-chapters, headings, and line numbers. Now it makes sense to me. 😀 If the 8mm nuts give me any resistance, I'm going to use PB blaster and then leave the vicinity for a while because those fumes are powerful. Regarding the replacement fuel pump, I hold off on that discussion until I determine the old one is defective. Thanks to all you for your replies. mrfixiter No. As I said the access is in the cargo area under the carpet behind the seat back. 1 Quote Link to comment Share on other sites More sharing options...
heartless Posted August 22, 2022 Share Posted August 22, 2022 3 hours ago, mrfixiter said: My station wagon's rear seat is a bench seat which has a looped piece of fabric in the center. When you pull up on this "handle," the bench seat rotates 90 degrees into its up position. Directly underneath the passenger side of the vacated bench seat, is some sticky material (it did seem like the material was OEM) covering the spot where I saw fuel lines going down into what I believe now is the gas tank. yeah, you need to fold the seat back down (lift the bottom to the upright position first, then pull up on the knob on the seatback, close to the windows) you may need to remove a strip (could be metal or plastic) that goes between the seat back carpet and the cargo carpet and holds both down, but if someone was in there before you, it may already be gone... just behind the seat back, lift/fold back the carpet, and you should see the access covers - there will not be any sticky material (sound deadening) over top of them. in a wagon, the access covers are BEHIND the seat, in the cargo area - not under the seat. 1 Quote Link to comment Share on other sites More sharing options...
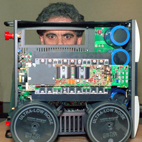
mrfixiter Posted August 22, 2022 Author Share Posted August 22, 2022 2 hours ago, laegion said: No. As I said the access is in the cargo area under the carpet behind the seat back. 1 hour ago, heartless said: yeah, you need to fold the seat back down (lift the bottom to the upright position first, then pull up on the knob on the seatback, close to the windows) you may need to remove a strip (could be metal or plastic) that goes between the seat back carpet and the cargo carpet and holds both down, but if someone was in there before you, it may already be gone... just behind the seat back, lift/fold back the carpet, and you should see the access covers - there will not be any sticky material (sound deadening) over top of them. in a wagon, the access covers are BEHIND the seat, in the cargo area - not under the seat. Yes, you are both correct. I was working on it a few hours ago and realized that I had to lift off the carpet/panel in the cargo area and then I found it. Here is what was under the bench seat that confused me earlier: https://app.box.com/s/2ba0lyu86mzqgkzg2ac2blo6i2rsw9wo What I'd like to try next is to connect 12V via an external power supply to the pump before I remove the eight nuts. Would I be able to hear the pump if it's running? Any idea what the current draw is on the pump? Thanks for your help. mrfixiter Quote Link to comment Share on other sites More sharing options...
lmdew Posted August 23, 2022 Share Posted August 23, 2022 Just turn on the key. The pump will come on for a few seconds. 1 Quote Link to comment Share on other sites More sharing options...
heartless Posted August 23, 2022 Share Posted August 23, 2022 yeah, if you have the carpet back, and things are reasonably quiet around you, you should hear it when you turn the key on... it does not run continuously, it runs in a short burst to prime the lines then shuts off, so what you should hear is a brief hum only for a second or so when you turn the key to on another option for testing fuel pump function is to disconnect the fuel line from the engine, and stick the end in a clear bottle, then turn the key on... you should get fuel out of the line 2 Quote Link to comment Share on other sites More sharing options...
el_freddo Posted August 23, 2022 Share Posted August 23, 2022 19 hours ago, mrfixiter said: Regarding the replacement fuel pump, I hold off on that discussion until I determine the old one is defective With the age of the vehicle and/or if it’s sat around for a long time with old fuel in it the fuel pump will be cactus. It might move fuel, but it won’t pressurise it enough for the injectors to properly squirt it into the intake as a fine mist. If you just want to determine if you have voltage at the pump you could hook up a light to come on that you can watch when you turn the key. With the hatch and all the carpet removed you will probably hear the pump make noise if it’s working. It should be a constant noise, not a wavering one. How many miles on your Legacy, and does it look like someone pulled the fuel pump out previously? Be careful with any plastic tabs - electrical or fuel. I’ve read about ppl snapping a plastic fuel line into the pump but I’m not 100% sure which one this is or if it’s an internal item. Cheers Bennie 1 Quote Link to comment Share on other sites More sharing options...
mrfixiter Posted August 23, 2022 Author Share Posted August 23, 2022 (edited) 5 hours ago, el_freddo said: With the age of the vehicle and/or if it’s sat around for a long time with old fuel in it the fuel pump will be cactus. It might move fuel, but it won’t pressurise it enough for the injectors to properly squirt it into the intake as a fine mist. If you just want to determine if you have voltage at the pump you could hook up a light to come on that you can watch when you turn the key. With the hatch and all the carpet removed you will probably hear the pump make noise if it’s working. It should be a constant noise, not a wavering one. How many miles on your Legacy, and does it look like someone pulled the fuel pump out previously? Be careful with any plastic tabs - electrical or fuel. I’ve read about ppl snapping a plastic fuel line into the pump but I’m not 100% sure which one this is or if it’s an internal item. Cheers Bennie Thanks for the warning about the plastic tabs. See the rest of my comments at the bottom of this post. 18 hours ago, lmdew said: Just turn on the key. The pump will come on for a few seconds. 16 hours ago, heartless said: yeah, if you have the carpet back, and things are reasonably quiet around you, you should hear it when you turn the key on... it does not run continuously, it runs in a short burst to prime the lines then shuts off, so what you should hear is a brief hum only for a second or so when you turn the key to on another option for testing fuel pump function is to disconnect the fuel line from the engine, and stick the end in a clear bottle, then turn the key on... you should get fuel out of the line The car has 189k miles on it and it's only been sitting for two weeks. I don't see any evidence that anyone has ever taken out the fuel pump assembly. Under the top panel, there is lots of dust which of course I will vacuum before I start removing the nuts. I already performed a fuel pressure test before this whole adventure began and the gauge didn't budge so if there is 12 V going to the plug at the fuel pump, the mystery will be solved. By the way, here is a picture of the plug that goes into the fuel pump assembly. Have I correctly identified pin numbers 1 and 4 as the test points for the 12 volt input? (See page 20 of the manual for reference) One other tidbit of information I'd like to share regarding the wiring diagrams and the abbreviations that are used for identifying the wires by color. This chart displays the abbreviations for each color. Who knew that "L" was the abbreviation for Blue? Thanks for all the helpful information and replies. mrfixiter Edited August 23, 2022 by mrfixiter Quote Link to comment Share on other sites More sharing options...
jonathan909 Posted August 23, 2022 Share Posted August 23, 2022 (edited) Oh - this was before they switched to the plastic quick-connect couplings for the fuel lines. That simplifies things. The connector: The place you get pin numbering is in the electrical schematics. At the bottom of each page they give you a picture of the connectors referenced on that page and what the pin numbers are. Also, if you figure you have the right pins, put a meter on them, power it up, and you should see your +12V. And yeah, there are some dopey colour codes. CH for brown? Did some smartypants think that CHocolate was a good mnemonic? Edited August 23, 2022 by jonathan909 1 Quote Link to comment Share on other sites More sharing options...
mrfixiter Posted August 23, 2022 Author Share Posted August 23, 2022 Yes, the schematics do show the connectors and their numbering but it would have been helpful to indicate which end of the connector is being shown. Is it the view from the end that plugs into its companion connector or is it the view from where the wires are inserted? I think CH could also stand for charcoal but that's not very close to brown. Thanks for your reply. mrfixiter Quote Link to comment Share on other sites More sharing options...
1 Lucky Texan Posted August 23, 2022 Share Posted August 23, 2022 maybe L is for lavender? Quote Link to comment Share on other sites More sharing options...
jonathan909 Posted August 23, 2022 Share Posted August 23, 2022 (edited) 1 hour ago, mrfixiter said: Yes, the schematics do show the connectors and their numbering but it would have been helpful to indicate which end of the connector is being shown. Is it the view from the end that plugs into its companion connector or is it the view from where the wires are inserted? They're usually the view into the "business end" of the connector shell, that is, of the pins themselves and not the wires where they enter the connector body. If you look closely, you may also find the pin letters/numbers molded into the shell. Edited August 23, 2022 by jonathan909 2 Quote Link to comment Share on other sites More sharing options...
heartless Posted August 24, 2022 Share Posted August 24, 2022 3 hours ago, mrfixiter said: Yes, the schematics do show the connectors and their numbering but it would have been helpful to indicate which end of the connector is being shown. Is it the view from the end that plugs into its companion connector or is it the view from where the wires are inserted? 2 hours ago, jonathan909 said: They're usually the view into the "business end" of the connector shell yup, typically the business end, as jonathan says.. if you go to the beginning of the wiring section, it will tell you how the connectors are viewed & labeled, and how to tell a male from a female in the drawings. as for the color abbreviations... you cant have "B" stand for several different colors - ie: black, blue, brown... so some other letters need to be chosen to differentiate. B is usually reserved for black... blue is sometimes BL or Bl, but not always.. I have seen brown listed as Br before... 3 hours ago, mrfixiter said: I think CH could also stand for charcoal but that's not very close to brown. lol, charcoal is not a wiring color, tho.. so probably not 1 Quote Link to comment Share on other sites More sharing options...
lmdew Posted August 24, 2022 Share Posted August 24, 2022 I've had intermittent fuel pumps caused by the fuel pump relay. It's high up under the dash on the drivers side. Larry 2 Quote Link to comment Share on other sites More sharing options...

Recommended Posts
Join the conversation
You can post now and register later. If you have an account, sign in now to post with your account.