


JGromada
-
Posts
76 -
Joined
-
Last visited
-
Days Won
1
Content Type
Profiles
Forums
Gallery
Store
Posts posted by JGromada
-
-
Thank you for your input. I ended up fixing the problem, but it took removing the front bumper cover to do it. Let me document the steps so that anyone in the future might benefit from my thread and make it a bit easier to proceed. Let me reiterate this was for a 2011 Impreza but i am thinking the WRX in the model series would be the same as well.
1. Start by removing all push-pin clips from the side wheel wells. I used a small phillips to slightly turn the clip and then a small flat blade to pry each of these out.
2. Remove all clips from under neath the bumper cover. There are ones at each corner and some more that were underneath the car. I had at least one that was missing. I used a special tool i had gotten from Harbor Freight which made this much easier. (i have another one from Blue Point) and this one is just as good)
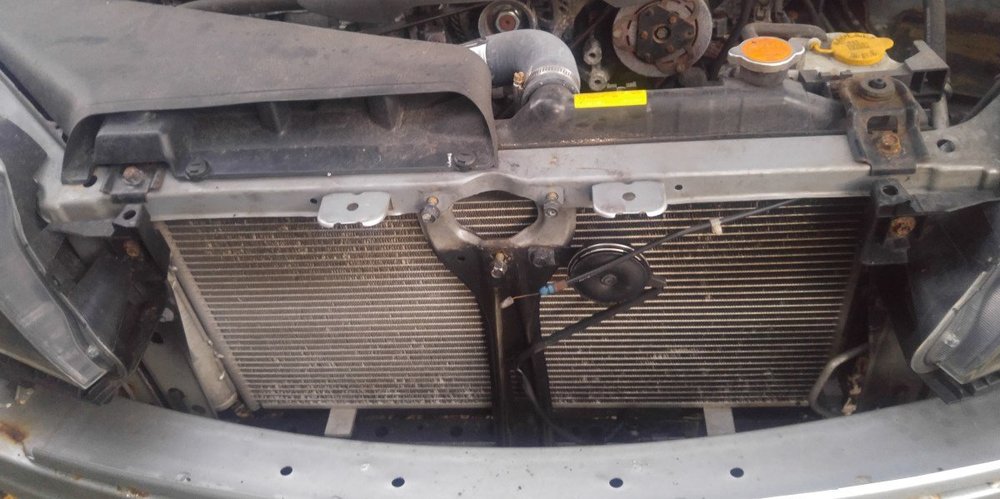
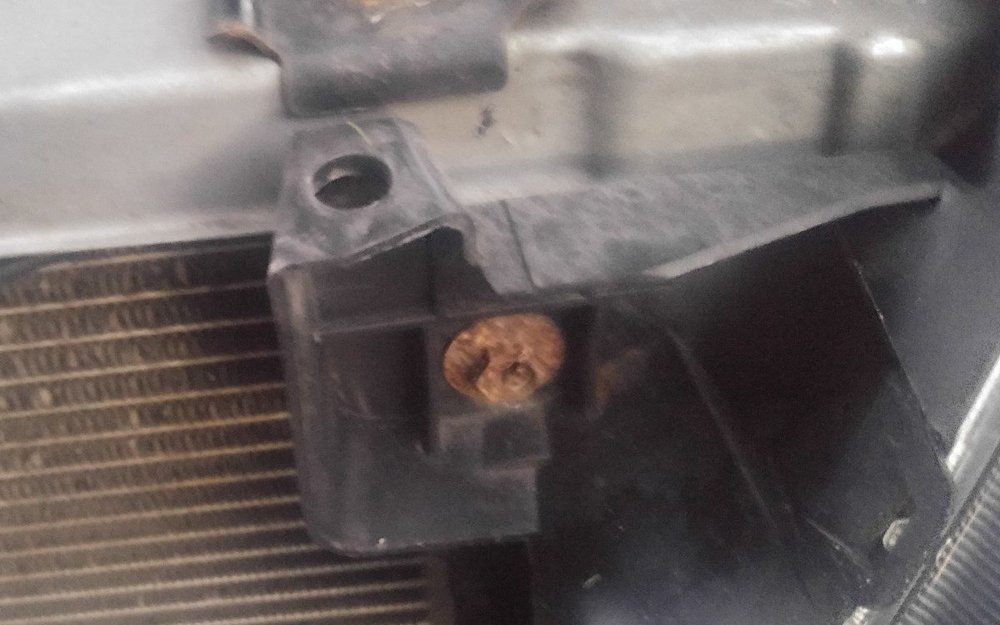
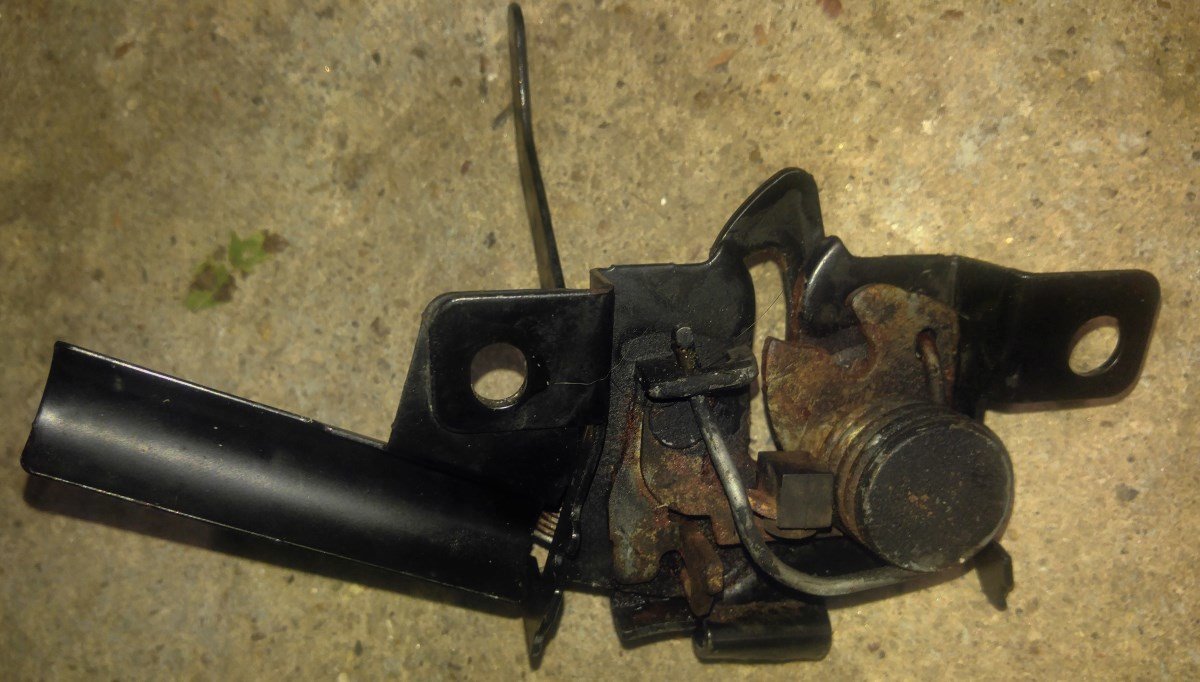
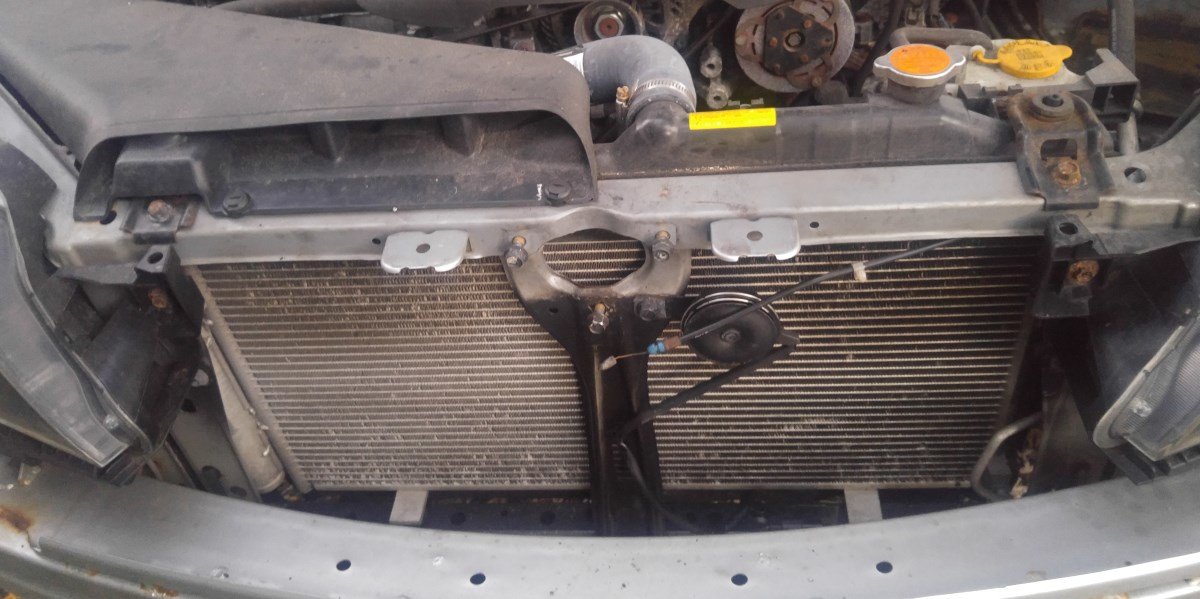
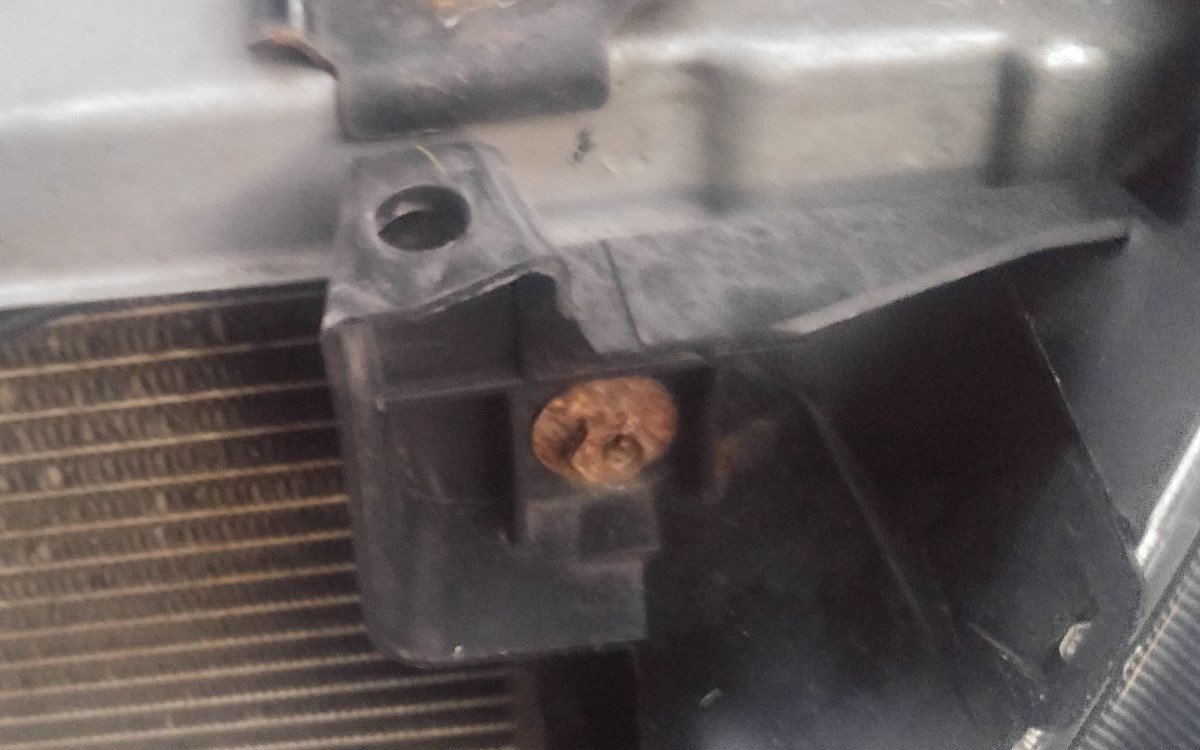
3. I then removed the four push pin connectors from the top of the grille section by reaching in from the bottom. I did jack up the car and put it up on jack stands for extra clearance. The center two are pretty easy to get out and even fell below once i pressed on them. I have a picture of the grille-less front of the car to show where these push-pin clips are but you can easily see the center two from below. The side ones are much trickier. They are kind of tucked away into the bracket that also holds the headlights in place, I added a picture to show how it configured. I had to basically break away the bottom part of the push-pin clip to remove these clips. (I am planning on replacing any clips that were messed up or missing anyway)
4. At this point bumper cover is still in place being pinch by the hood. If you watch any of the myriad bumper cover removal videos out there they show the process which sounds like you are "ripping" the cover but the two sections basically clip together and you are just pulling them apart. If you successfully remove the top 4 clips you can start pulling the bumper cover directly away from the car. Before you completely remove it you will want to disconnect the fog lights connectors (if you have fog lights).
5. With the grille removed it is relatively easy to remove the 3 bolts holding the hood latch assembly. This was impossible with the grille in place and in fact the following steps would have been impossible with the grille in place.
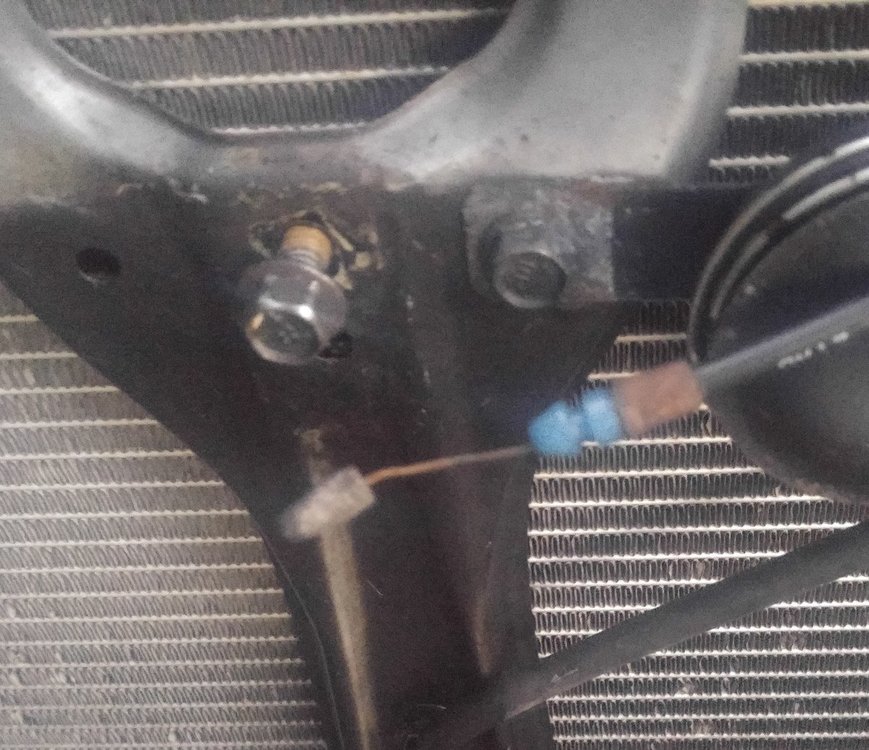
6. Now the hood can move up a bit but is limited by the hood release cable that is still attached. Getting this off was a bit tricky since the cable is attached to the rear of the latch you cannot see. I got a mirror to help me a bit there. I removed the first part of the cable from the right hand side of the latch and this gives you a bit more slack in the cable. Removing the clip which holds the cable in place to the top of the radiator support gives you a bit more support as well.
7. Eventually after fiddling around with the end of the cable I was able to remove it entire from the latch assembly and the hood was free! I am leaning towards replacing this cable as the end looks kinked and a bit rusty although I do not relish doing this task.
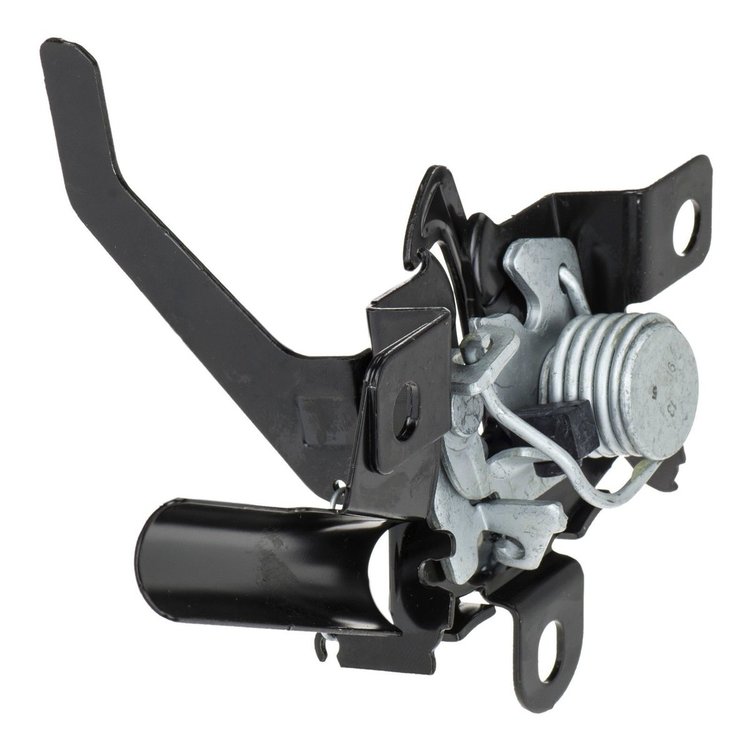
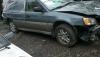
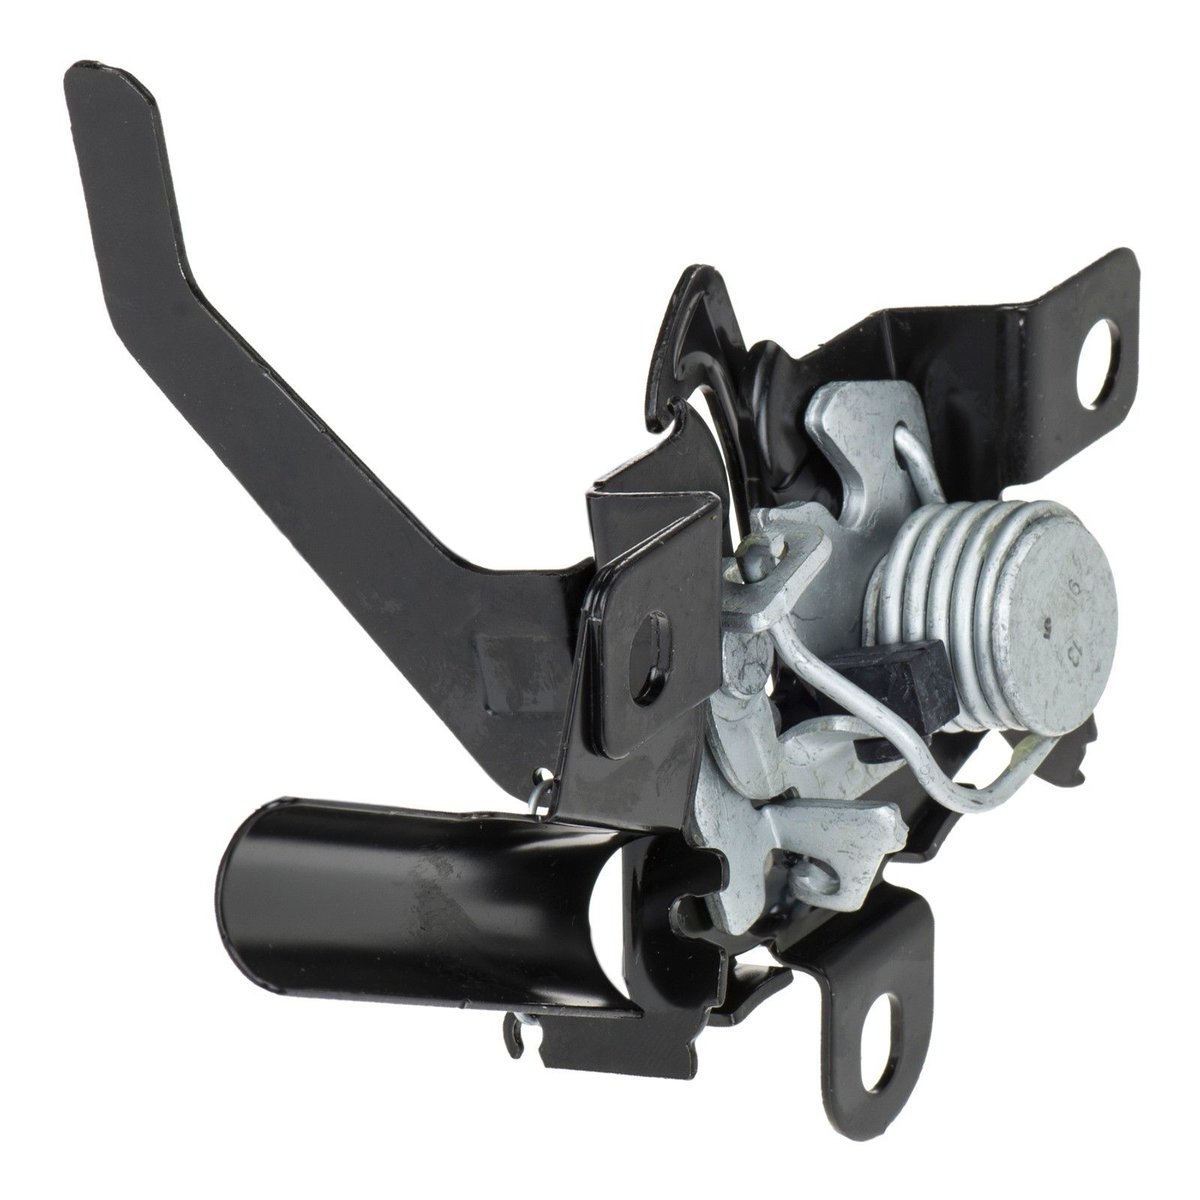
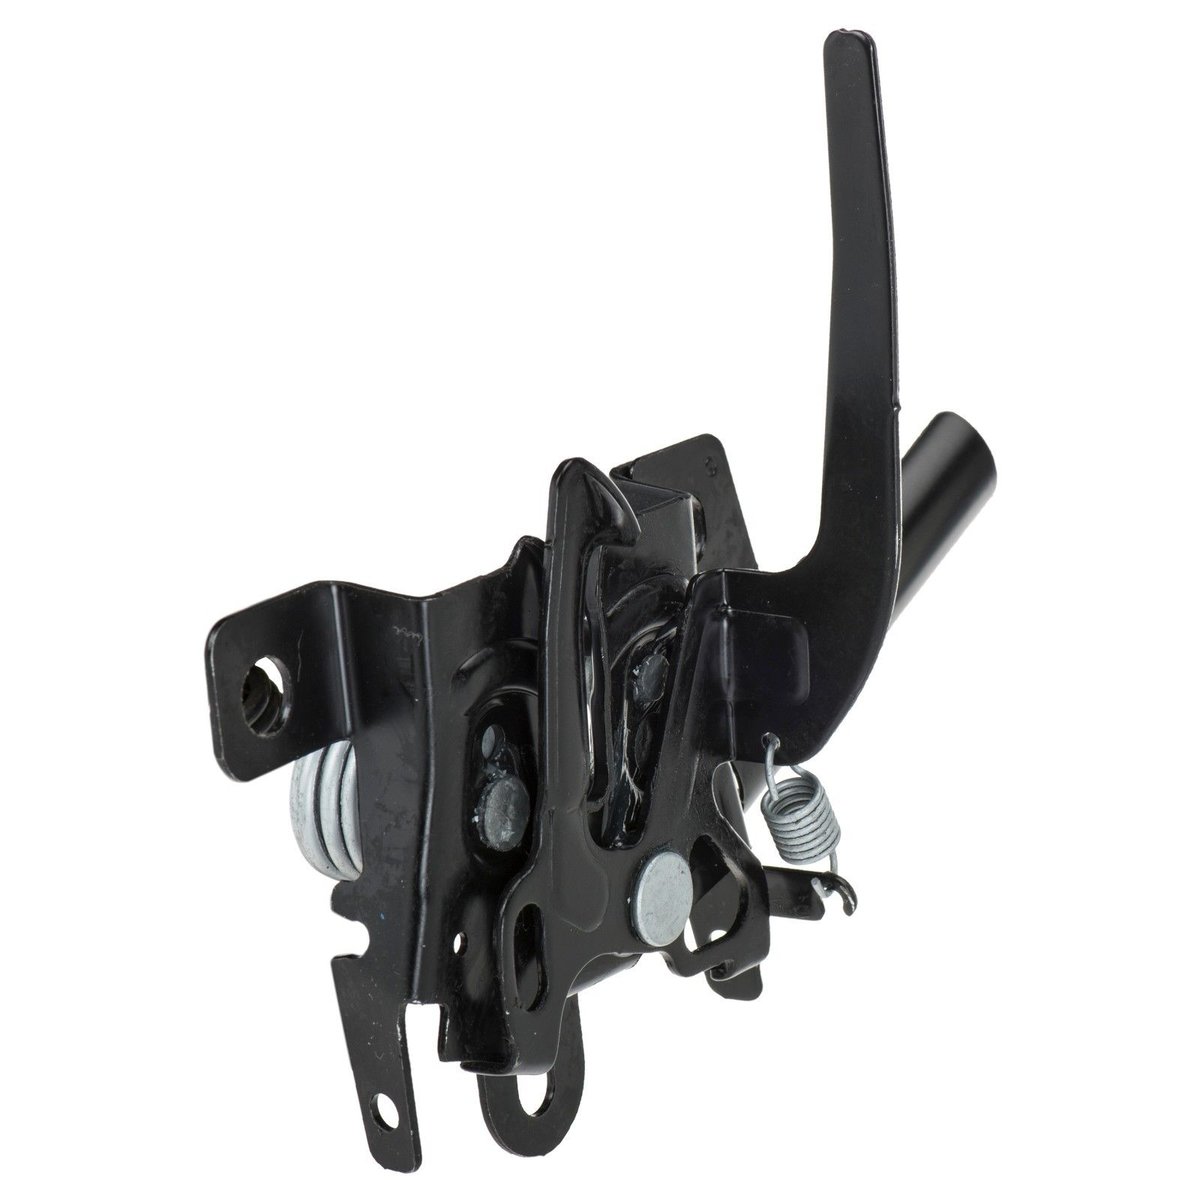
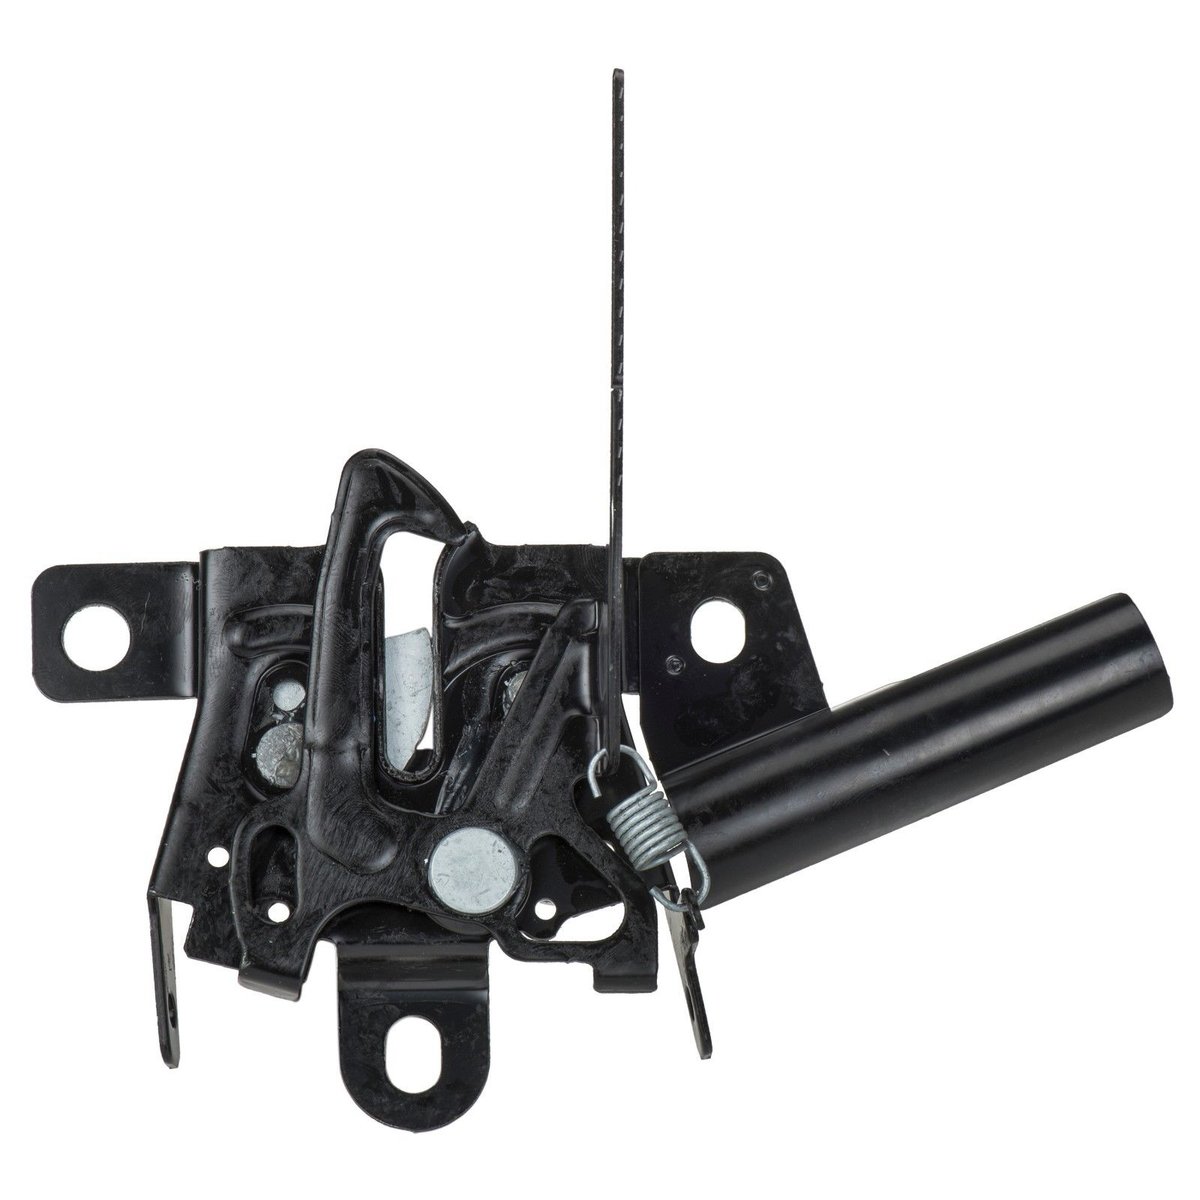
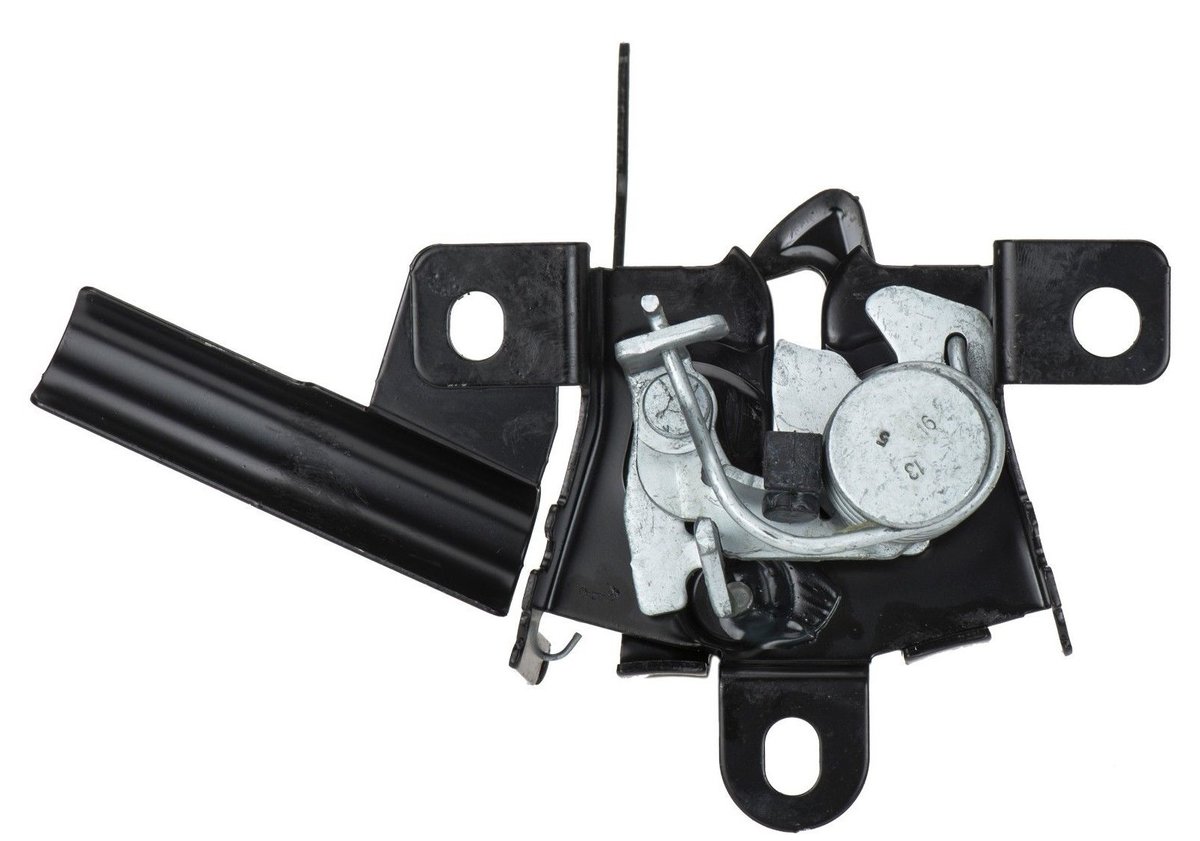
8. So now the hood is open but old latch is still attached to hood the piece of hood that is retained by the latch. To remove this I took a pair of large "channellock" type pliers and squeezed between the two points where the cable was attached. It took a considerable amount of force to squeeze this together as the latch was very rusty. I included a picture of the rusty latch below. This obviously had not been visible prior to its removal.
9. So it is evening now and I am going to have to order another latch assembly, push-pin clips and a hood release cable as i mentioned. I did see a video that ChrisFix did where he suggested that the new cable be drawn in from the hood release inside the car after taping the new cable to the old cable. I shall try this.
Let me know if anyone has any questions, but as they say this worked for me!

-
 1
1
-
-
Just now, brus brother said:
have you tried having someone push down on hood while trying to release using the cable?
yes i have, didn't help
-
I have a huge problem right now. Have a 2011 Impreza with about 120,000 mi. A few weeks back i was having problem with hood latching (primary latch). I sprayed hood latch assembly and after a few tries the hood solidly latched. The other day I wanted to check the oil and found hood would NOT unlatch. I pull the cable which seem like it is still intact (much tension) but it will not release.
With a flashlight in hand I can see secondary latch can move freely when i pull it with a long screwdriver, but primary latch is jammed. I have been trying a variety of things this morning to no avail. I have been trying to bang the latch with long hammer and punch, more lubricant, pry bars etc but no good.
I was trying to see if i could remove 3 bolts holding on latch assembly (12 mm) but that seems next to impossible as well. Any combination of wobble extensions and universal joints cannot get socket on bolt.
I was trying to see if removing bumper cover would be a help but i see in instructions you need access to top of grille and obviously with hood closed that would be difficult.
Anyone have a suggestion , this has become more critical as in the past few days it seems like i have developed battery problems as well!! Thanks in advance.


-
hmm interesting thread. i share most of the sentiments about HF. That being said i have bought some stuff because of cost (for instance wanted to keep an extra set of basic sockets in my old BMW, as you never know when you might need them) and other times the sheer convenience of HF being so close come into play. I haven't had anything outright fail on me, but i did buy an electric impact wrench that doesn't seem to create as much torque as i would have thought.....
-
Wow sorry to read that. To be honest from the very first post that is what was in the back of my mind that it was HG.
So what are you going to do? Are you going to get it fixed? Seems like HG technology has come a long way with the MLS gaskets from a number of vendors
-
that's what i am doing. Bought the mounting pads (Landing Pad 11) already and just need the towers. That is the only generation of Yakima hardware that supports the way they can use the factory mounting points. The thing i have learned about the towers is that they have changed much. Q Towers are no longer the model, its the Control Tower now.
-
Looks like I am getting a 2011 Impreza! Left a deposit and hoping everything goes through this weekend. My 98 Outback looks like it will get sold off as a rolling shell since I have no time to do the HG these days.
Anyway this Impreza is really nice, a 5door. The only thing it lacks is a roof rack. I would like some advice from those that have put an aftermarket (or purchased and installed the factory rack). From looking at the Thule and Yakima catalogs it looks like it bolts to mount points on the roof. Is this true? Is that my best option?
I would probably be leaning towards the Yakima product since i have an old Yakima rack from another car. So i think i would only need the mount adapter and upright piece. I would be able to resuse the crossbar, ski mount and also Yakima Rocketbox i already have.
Does anyone else have any suggestions or issues i need to think about? thanks
-
i agree. I joined on there just so i could see picture attachments to articles I was interested in, but in general there is an attitude that just plain sucks.
on the other hand this place is the best! no attitudes only people who want to be helpful!
-
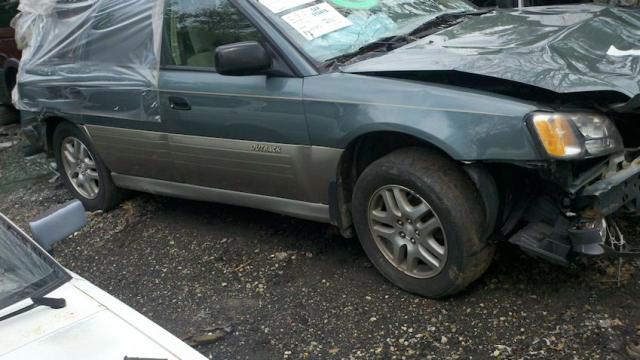
I am not selling these. I was at the junkyard today getting other stuff today and found this car. the junkyard is Glory Days junkyard in Clarksville MD. a smaller yard. They sell em for $30 a wheel, not too bad.
I checked the wheels out and they look in great shape all around. Seems a shame when a nice Gen II is totalled out by the Insurance Company.
Like i said I am not selling them only came across them today and posting this in case someone is looking for new wheels for a Legacy, OB or Impreza.
-
thanks for the advice. i think i am definitely pulling the engine because like i said this is intended to be a winter project.
-
just getting back to this project. Just finished up rebuilding the front end on my old BMW.
Looks like i can get an engine hoist ( i have no garage) for about $160 from Harbor Freight. I do have a space i can move the engine to ( i have a stand for the engine now) and work on it over the winter.
I appreciate everyone's comments and encouragement. This board is great! and very helpful. (the people on the BMW board are a**holes for the most part, sad to admit that)
Don't have a good source for a 2.2 around here so I am planning on rebuilding the 2.5. maybe when i start digging into it i will have more questions.
Tips for separating AT from engine? i heard of the 4 bolts 2 were a real bear. Also i suppose i need to support AT from above once separated.
-
As far as oxygen sensors, I think all the Subaru applications have heaters built into the oxygen sensor itself. As for generic replacements I know not all brands are equally as good. There are 1-wire, 2-wire and 4-wire generics. I believe only the 2-wire and 4-wire ones have heaters in them.
I put a non-Bosch O2 sensor in someone's VW and that worked ok, but it was post-cat and they don't do much in the overall scheme of things.
But for the Suby and a BMW i have i have only used Bosch O2 sensors and one was a model I had to use the splice and it too worked fine. I would say buy Bosch since it is a pretty neglible price difference from a truly generic.
-
Just curious did you ever do it? (I like when people close out their threads
 )
) -
wow i was pretty impressed with that last photo. what does that engine weigh about?
-
Thanks for all the great advice.
Is the 2.2 a direct swap? Does anything else need to be changed? Where would you suggest looking for one? I am outside of Baltimore btw.
If i decide to go the head gasket route I have some time to work this out. Its not like i have to do this over a weekend or anything. It sounds like i need the engine hoist to do either the swap or remove the engine to do the head gaskets. I guess thats the main reason i was thinking doing head gasket in car.
-
Ok this is not so good news on my wife's 98 OB wagon. (192K mi, AT)
I drove it on the highway the other day. First time in a while. The temp gauge started climbing for a while but then subsided. It never got over 3/4 level. Once it cooled I checked the coolant level in the radiator and it was really really low. I had looked at the overflow once it was turned off and still hot and it was really sludgy, bubbling and almost up to the top.
I topped off the coolant off and later drove home and the temp never changed. I stopped off at the mechanic first and inquired about what it would be for a head gasket. The service writer really strongly talked me out of doing this repair. He said its just not worth it. The car with 192K is worth at most $2500 , the repair would be $1500-1700. This car already had a head gasket done by them at 117K mi. He also thought with the amount of oil in the coolant could suggest a problem in the block, although that would be hard to say. Obviously a lot of repair dollars that would have been made so i appreciated his honesty with me.
I am almost thinking i would maybe try to do the head gasket myself. any thoughts? Is it possible to do this without removing the engine? I am sort of resigned to getting something else for her to drive right now, but maybe keeping the Suby and trying to do this repair myself. I know its maybe $200 in parts which is no big deal.
-
Interesting response Gary. Let me clarify what happened.
I went to a tire place to get new tires. I asked for an alignment as well.
In the process of doing the alignment they said the left tie rod was bad. OK replace it was my response.
Well they did that but in trying to do the alignment they said it couldn't be brought into spec. Well somehow in trying to adjust it the bolt going into the outboard steering knuckle got broken. At this point they said i needed a new steering knuckle (not something the dealer stocks) so it came from a junk yard. He said he charged me cost for the knuckle and half price for the labor on this. I can't say I was real happy with the situation although i do know from my own experience sh*t happens...
Wondering what anyone else thinks about this?
-
actually these came from the autoparts placeI wouldn't use a hardware store nut anywhere on a modern car.Get a proper nut from some helpful mechanic or go see the wreckers and they will give you one for sure, they usually have nail boxes full of nuts and bolts they sell for scrap metal prices or not too much more.
-
The size of the spanner is not really important(other than, if it had a sixteen mill spanner nut on there the nut had been changed to a N.F. one).

The thread size is 10 x 1.25. The nut can be a seventeen spanner size, without the flange on the bottom of it, or it can be a fourteen spanner size with the built in flange. The seventeen mill spanner sized nuts are rarer, the fourteen with flange are common as on all japanese cars and are excellent nuts, hard, don't dig into aluminium and don't work loose.
thanks then this might just work out well as that is exactly what I bought!
-
thanks John that last comment especially made me smile!oh yeah, about the time you get the new nut tightened up, you will no doubt find the old one.

-
Let me clarify, This is the lower nut that goes on the bolt that is in the block. The starter hangs off this bolt until you tighten up the top bolt. As i recall these might be two different sizes. I thought the bottom one might have used a 17 mm socket I need to check that i still have the deep well socket sitting on the ratchet downstairs. I bought an M10 nut from Advance Autoparts so we will see if i got that right.
oh BTW i did find an interest Endwrench article on Starter service here
& not to give a plug for another web site but here is a nice writeup on contact replacements with some nice pics
Thanks everyone! Happy New Year!
I will report back tomorrow. I did pick up some retrieval tools at the Ace Hardware store, a magnetic pick up and one of those claw things for like $5! wish i had it before and i wouldn't have been in this mess.
-
this was going well until I dropped the bottom bolt putting the new starter on. Stupid me! It dropped near the steering rack and has now been lost.
I went to the dealer hoping they would have the bottom nut. No way! The dealer did not have the nut, didn't know anything at all about the specifics and would have to special order it!
Does anyone know anything about the bottom nut holding the starter in place? I want to try a hardware store tomorrow. thanks
98 Subaru OB AT
-
i like the Icons i just bought
-
i found a swivel joint extension when used with the spark plus socket is just the perfect length. I use that combination in particular to insert a new plug by hand (no socket wrench) into the engine. A swivel joint is nice because you sort of need to bend the extension to get the plug (& socket) to go in othewise you bump into the sidewalls of the engine compartment.
I have always found inserting new plugs much, much trickier than removing the old ones. The spacing is just soo tight. and its not a whole lot easier trying it from under neath the car.
I Like threads like this because you get some good ideas.

HELP! Can't get hood open on 2011 Impreza
in 1990 to Present Legacy, Impreza, Outback, Forester, Baja, WRX&WrxSTI, SVX
Posted
Yes I would advise. At least on this model you need to remove the 3 bolts and pull the latch off slightly so you can get to the back for grease.