


waldoz
-
Posts
152 -
Joined
-
Last visited
Content Type
Profiles
Forums
Gallery
Store
Posts posted by waldoz
-
-
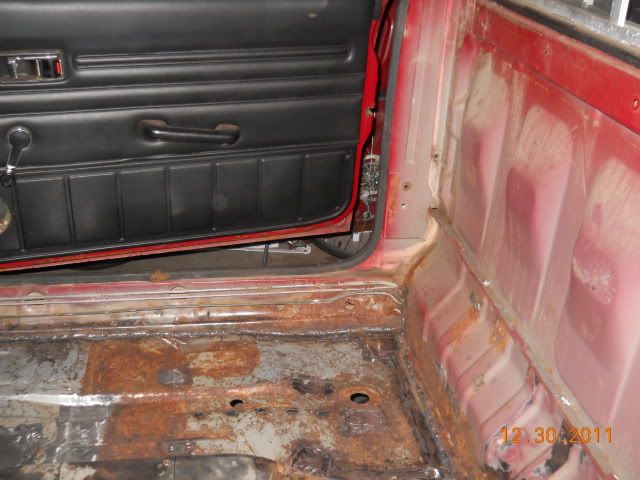
Follow where that water came in from - thru the cowl , passenger side , and you'll probably see pinholes along a seam on the far right. Or worse. Obviously you're right there now. Subaru3 - Todd - is the best at describing where that water comes and goes.
Can you get a pic looking down thru the cowl area?
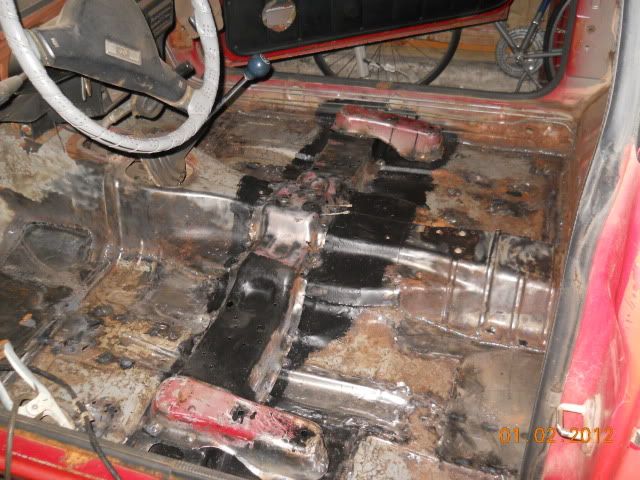
I am trying to figure out how to fix what I got. There does not seem to be any holes just mostly surface rust. The way they set this up was just waiting to leak.

-
I will have check it out. I have not really seen the pin holes but there is rut on the seams. If you have Ideas where to look let me know and I will take some picks.
-
Ok, times up. I tell you I don't know what they put in that window seam but it was like super glue. I have a mess to clean up inside anyways after I took the dash out. I might have to find another dash that is more solid. The good news is there is no giant holes in the firewall. The window sill is all good so that is one place it was not leaking. I had an offer for a window and now I will need it after I get the inside done. I am looking for a dash on the cheap side or try to fix what I got. Anyways prob going to wire wheel the inside and paint it. I do know that I need to get a bottle for the welder as I have some other small spots to take care of. I might end up doing that this next week. If I wait to use the one at work again I will not get anything moving along as I would like.
Widow seal is still sticking on
You can still see some of the glass that is in there that windshield is heavy!
I really don't like that tar stuff they put on it really sucks to take off. I do however have some good stuff to put back on that is really inexpensive.

Prob going to strip the pedal assy down and paint that I will need to take pics of that thing before I tear into it.
-
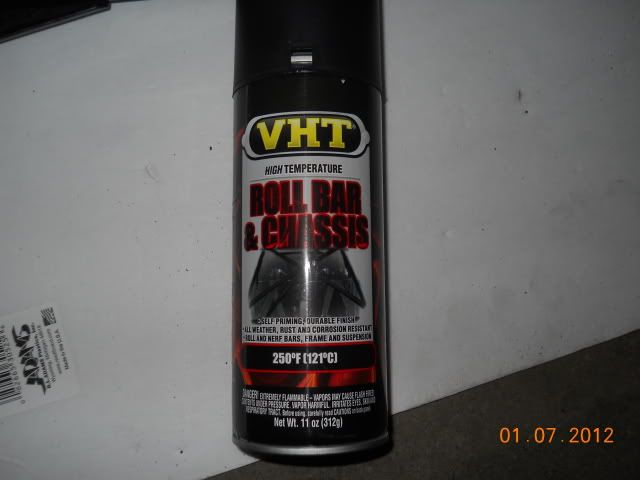
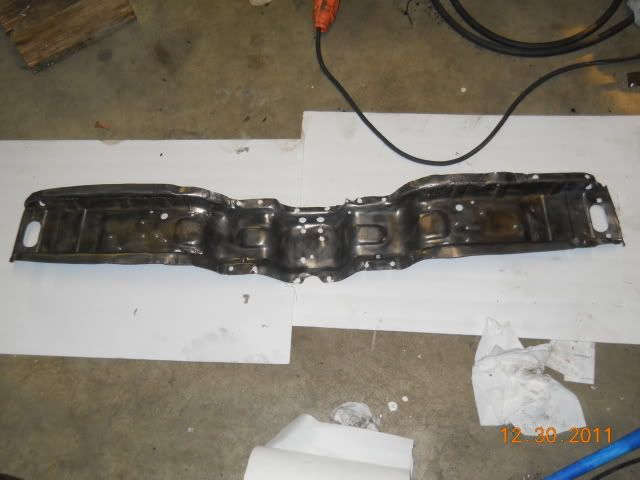
Well I have a small update. I also forgot to do before and after pictures of the rails. Three of the mounts had to be replaced on the rails. They were good but I felt better with some 12ga tabs on there instead. I just need to go get some new bolts washers ect. and mount them see how they do. Also need some lithium grease in a spray can as I hear that is the best. So I cleaned them up pressure washed them with hot water and then cleaned them with rubbing alcohol. Taped them with that 3m trim tape and spayed some VHT. I think they turned out decent but I will have to wait 7 days if I want to respray.
I also just found out I got some free time in the garage so back out to clean up the interior and maybe remove the dash. I called the "Just Dash" place and the said $800 to redo it.
 Does anyone have a cap or a good replacement?
I noticed that the springs were in good looking order so I did not spray them. I like the detailed look it gives the sliders.

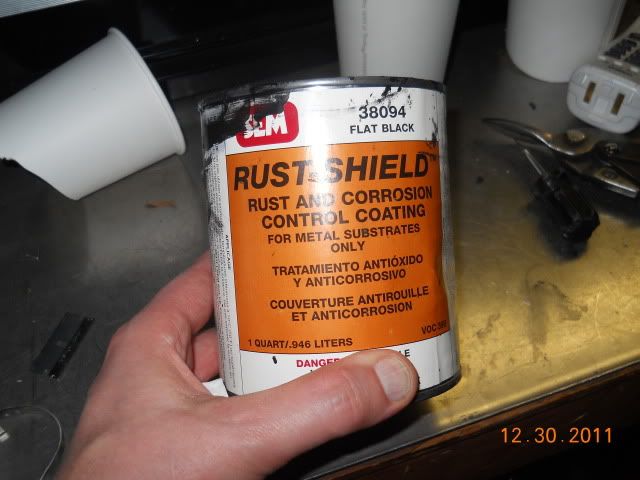
This stuff is self etching and seems to be pretty good. I got it from a guy at work for $5 used. Its like 10 -15 a can. I used this on my gn Volvo for headers and block and worked pretty good but you need a lot of prep to make it stick.
All for now.
-
Does anyone know how to take apart the seat rails? I think I need to rework mine little rusty. I need to add a new tab on one as its a little thin.
 I want to coat the whole thing too while I am at it or powder coat it.
-
Well here are some pictures:
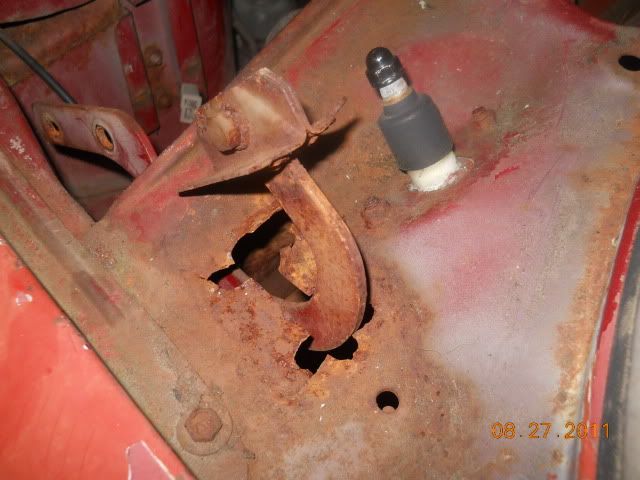
Before hood hinge:
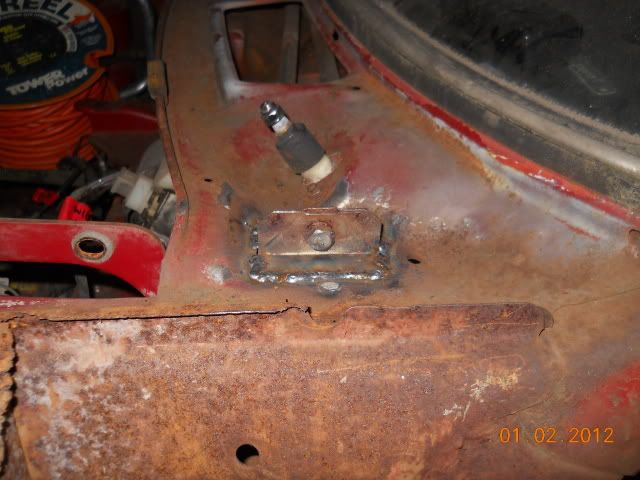
After hood hinge:
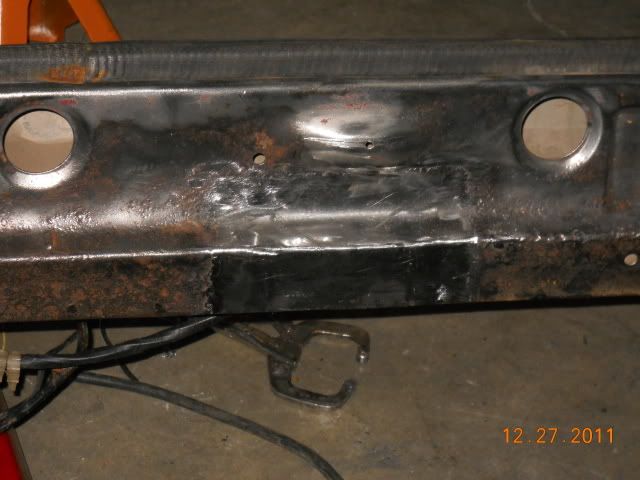
Then I thought heck might as well weld the other one up.
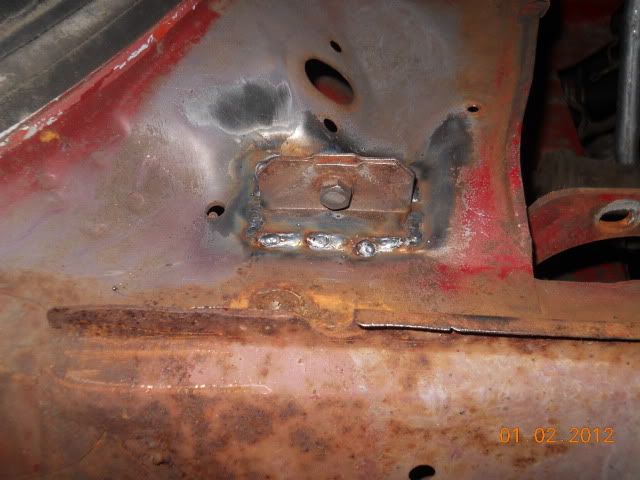
Got the brace all welded in I think its off just a little but I can fix that. After the metal was bent a bit getting it out plus working with nothing after the rust bucket had to be rebuilt. It might be little high.
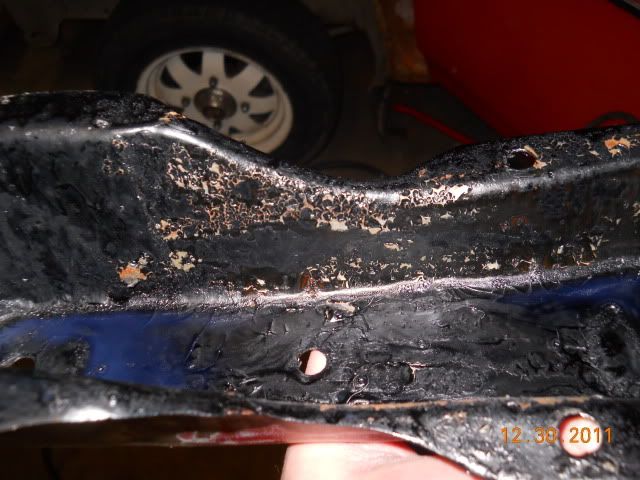
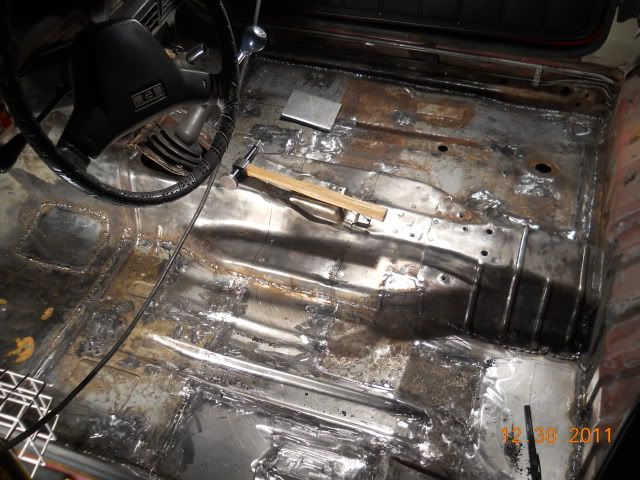
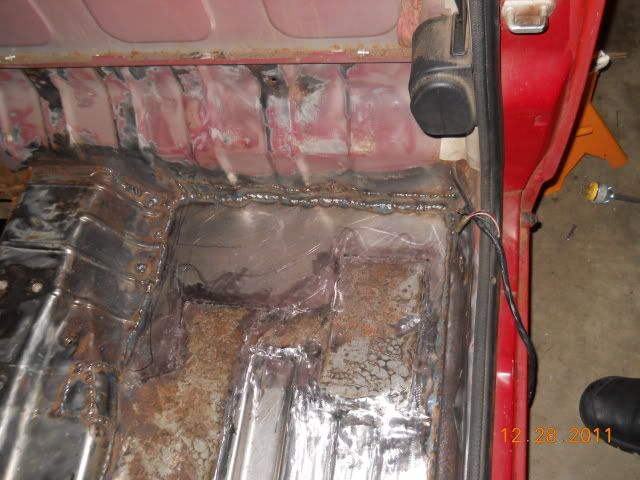
I was going to paint the whole inside but I ran out of time so I just did the section under the seat mounts. So I tried to coat everything just to make sure.
That is one reason the braces look so bad under the car. They are coated on the inside though which should out last the Brat.
Drivers side:
Pass side:
I don't think it went too bad so far will have to address the rest of the cabin and paint it ect.
Its prob going to be a bit before I can post some more pics progress.
-
Mostly done I had to change a few plans but the seat rails are in and the hood hinges are welded up. Will post pictures later. There is a lot of clean up work to do but I have to take all the tools back to work mainly a full size bottle of 75/25 gas.
Its done for now. Now going to spend time with the family before I have to get up for work tomorrow.:cool: -
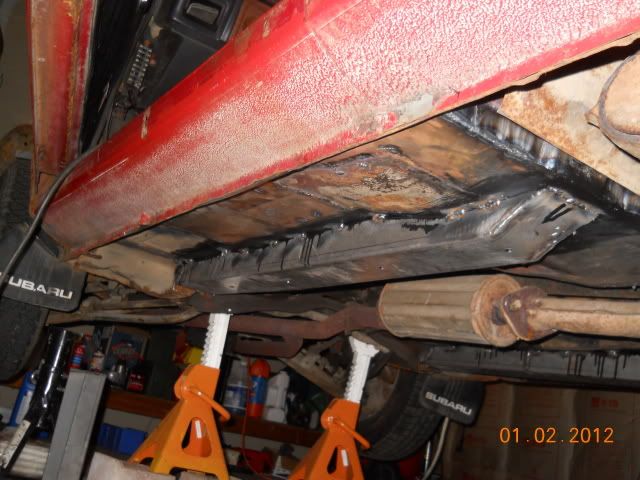
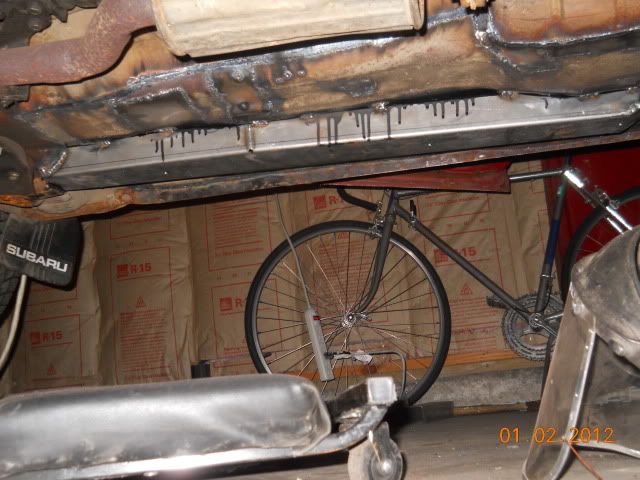
Well not much going on but I tried to get more done but family calls. So spent most of the time fitting up bottom braces. Patched a lot of pin holes and welded up the braces.
Also Cleaned and painted the drivers side so the brace can be welded on Monday.
This is not professional bodywork but its done.  Happy NEW year!!
-
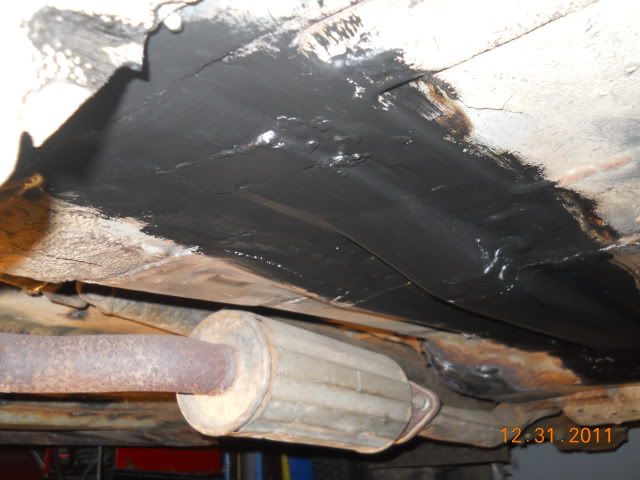
Well I have today and Monday to finish up so it going to be a mad dash to get it done. I have to coat the underside where the braces are and the indside of the braces. Then coat the inside. Then I have to grind some off and weld , then coat. This is the only way that all the surfaces get coated.
-
Sweet its up. Ok had some problems with the coating. It seems the Corroseal really likes rusty rusty spots and not so much clean areas.
It seemed to peel and crack and got to the point of flaking off.


So I thought can't just leave it. So I took it all off

That took some time but it was worth it. My friend at work gave me a can of:
All I can say is this stuff is sweet. It tacks up in 15 min and dries in 16hrs I am prob going to do the whole in side with this stuff and the really rusty areas with the corroseal. Its not bad stuff it just needs something to stick to and smooth metal it does not like.
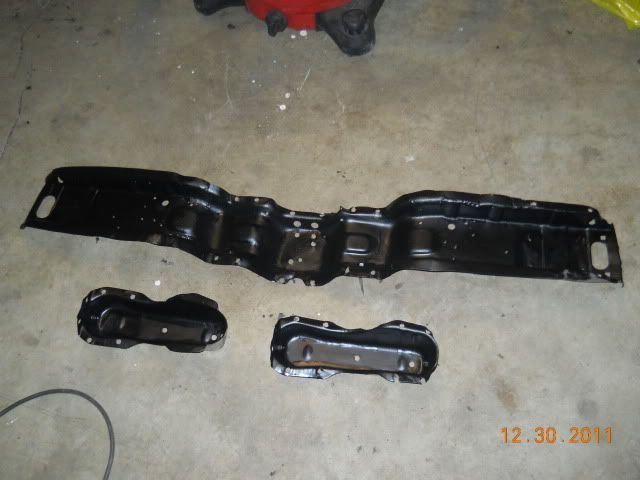
So painting it up, yes very messy.
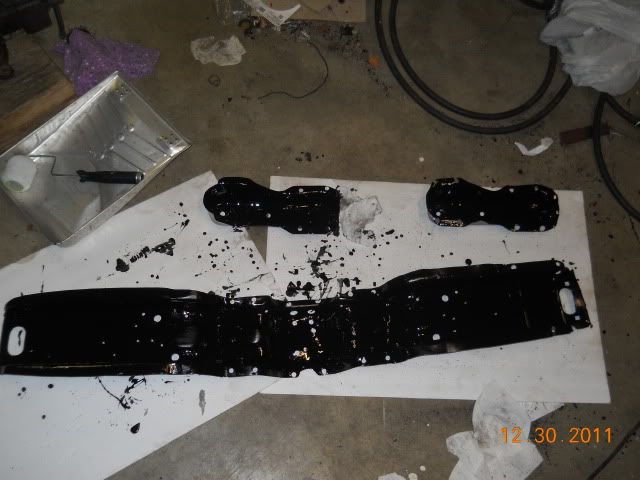
The results though are worth its weight in gold.
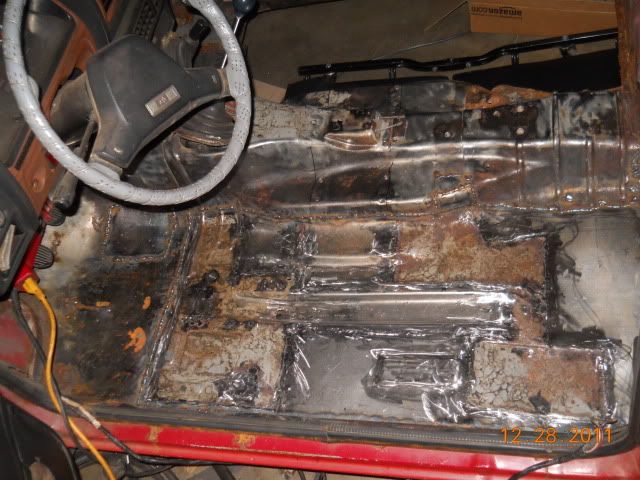
So I was trying to figure out where I was going to have my paint line. I think just at the bottom of the back panel shelf and take it all the way around. I am prob going to do the fire wall but I will have to take out the whole dash and that is a spring project. Also cleaned up a lot of the welds but still need to do some more.
Got started on the underside braces I think these are going to turn out really good. I actually got a tone done just a before 11 but so you don't get to see the full work till tomorrow.
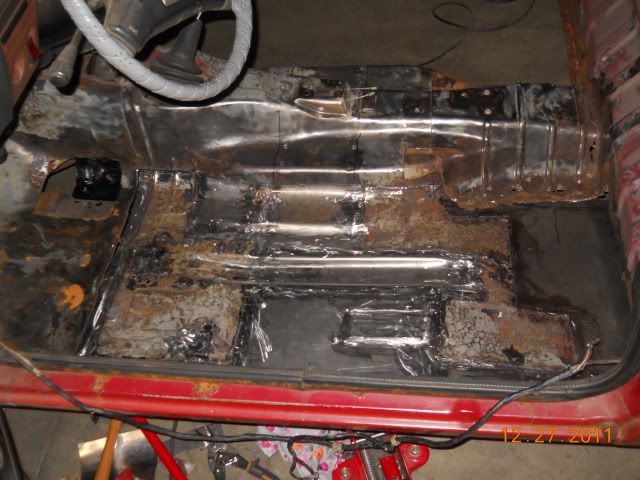
I just love this picture because the pans are in and Its not a Flintstones mobile anymore.

All for now.
-
As for tracking down parts, I thought that the subie guys had it easy. There is not much for parts which sucks. The GN set up was just like that parts are expensive if you can find them. I am really tired of that
-
I don't know about hard work LOL I still don't know how committed I am to this thing.
 Yes its fun from time to time but I think this is a rust lesson learned
 -
Good to know. :cool:
-
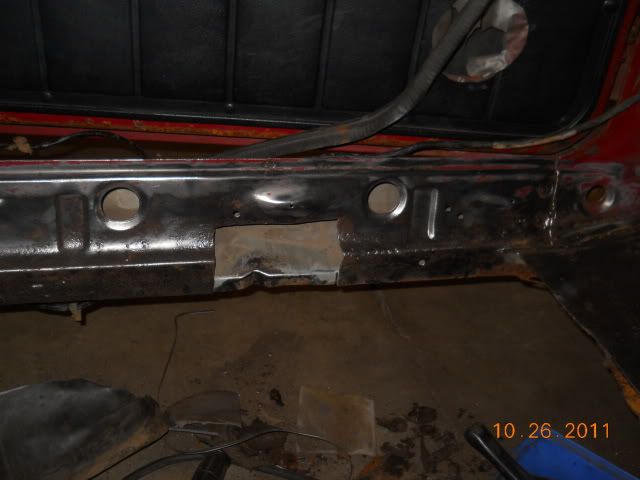
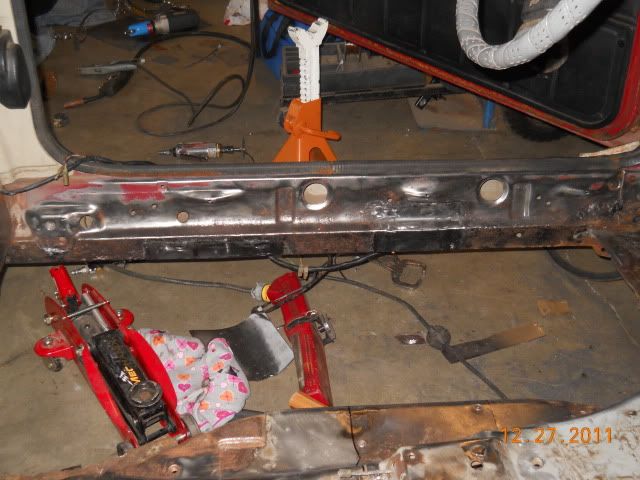
So I prepped the cross brace to get ready to weld in. I am having complaints about working to early in the morning so I have to do stuff that does not make noise.
Also got that other hole that had some rust in it.
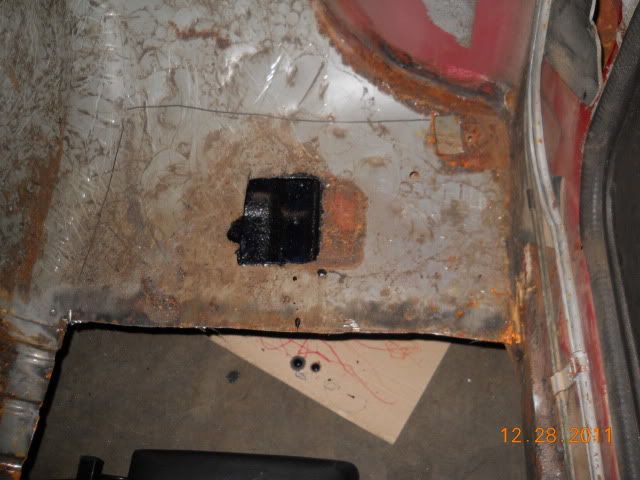
Mind you I was called into the house but I got it in and it all still needs to be cleaned up. I will prob do that after the other sides in.
The back of the panel took more time than I wanted and it really needs to be sanded down a lot just like the other welds in the bay.
Now if I can get the other pan in I will be on target to get the eng bay spot done.
The other pan though is not as clean as the first and will take a bit more time to fit up. The good thing is I wont have to patch the back wall like I did on the drivers side.Is anyone watching this thread anymore?
-
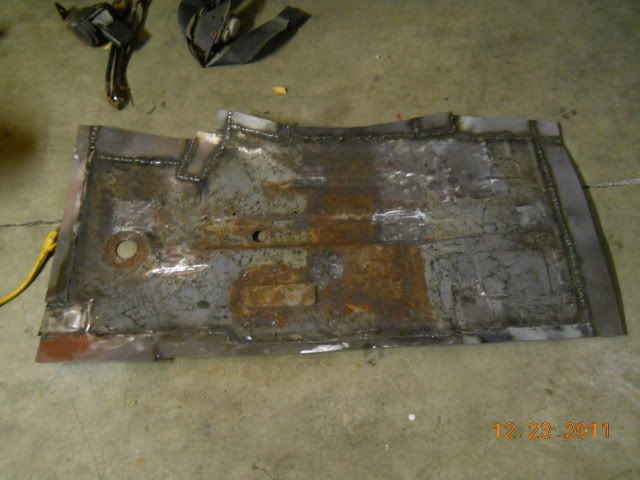
Got some done not as much as I would have liked. I had to take the welder apart and fix some hoses and the gun lead. Seemed to be not turning on the gas before the wire started. So fixed that and finished up the drivers door channel. If you can't tell I love before and after pictures.

Before:
After:
As for the Corroseal that stuff works great. I put a layer on there started to bubble then put the light on it for about 20 minutes and it hardened up really good black and shinny
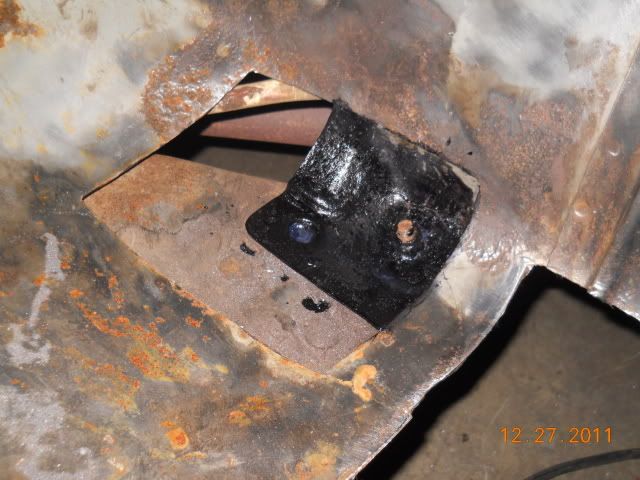
Also started to fab up the patch for that one little tricky
I plugged some holes that I drilled through with the spot weld drill bit. I went to far so I had to patch those up.
I am hopping to get the drivers pan in tomorrow. If not I will be behind dead line and will not get all I want to get done before my vacation is over. I spent prob hr or more just fitting it in there. It still needs prob more time on that.
Almost forgot I had to cut out a section instead of filling the holes though I don't know if it took longer to put fresh metal in rather than patch. But I was getting a lot of porosity with the holes I was fixing and the metal was really thin.
its that patch on the left.
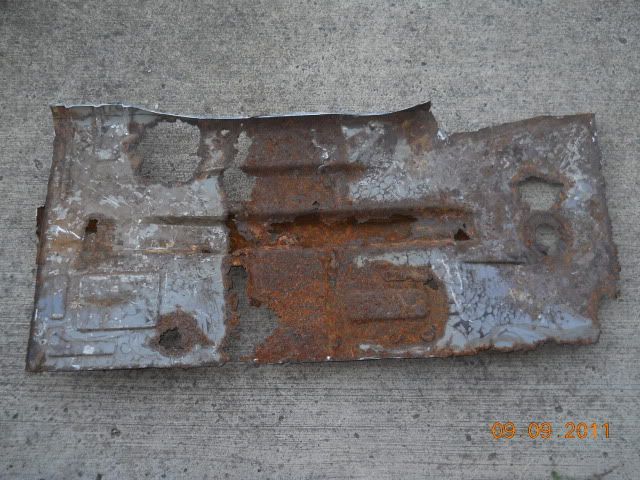
Before:
After:
All for today
-
Well I have to say I am little disapointed in my self for slacking off so much and not working on the pans for a week or so. I could have gotten more done so I would just take and weld in. So I will have to finish this up at home, which I really did not want to do. On a positive note I scored!
Yeah was working on my pan and The guy who hired me 15yrs ago asked what I was going to coat it with. He said he had this stuff that coats rust and converts it and seals it.
He said he had some I could use. 2.5 gallons to be exact!!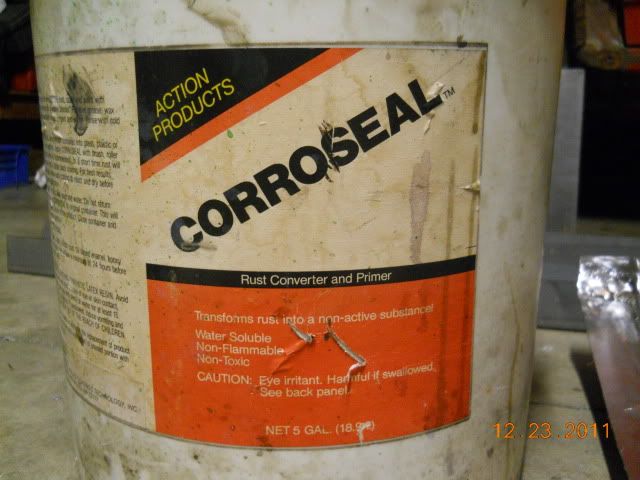
All I can say is this brat is getting a bath in this stuff. I tried a really rusty scrap that I cut out. turned black with a hard coating on it and it dried pretty good. All for now better keep an eye out cause I will be posting every day I hope this next week and should see things move fast.

-
Its been a while but the deal is going down! I still am working on the pass side pan still at work but will finish tomorrow I hope.
Drivers pan before:
After:


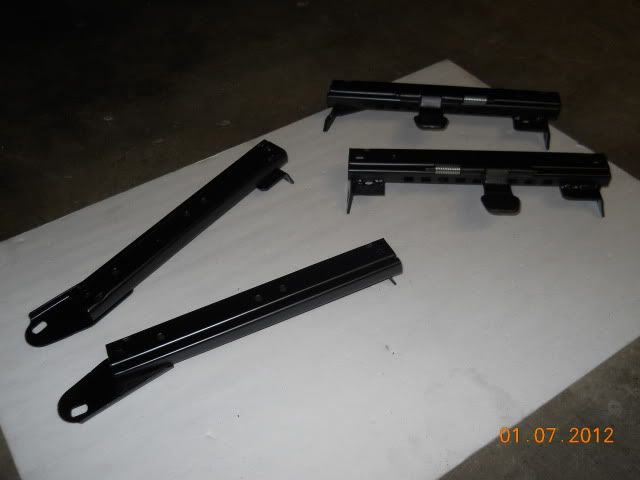
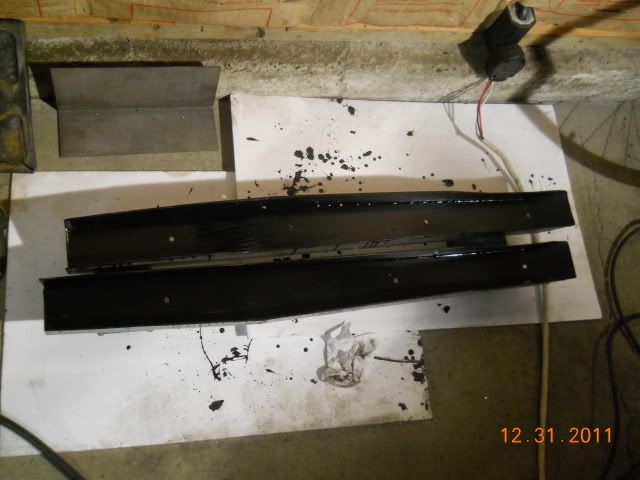
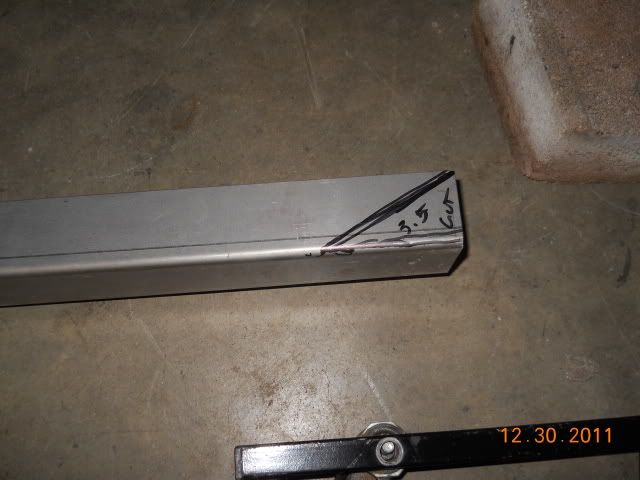
I was going to rebuild the cross braces under the pans but I thought what would I do that when I can put these under there.
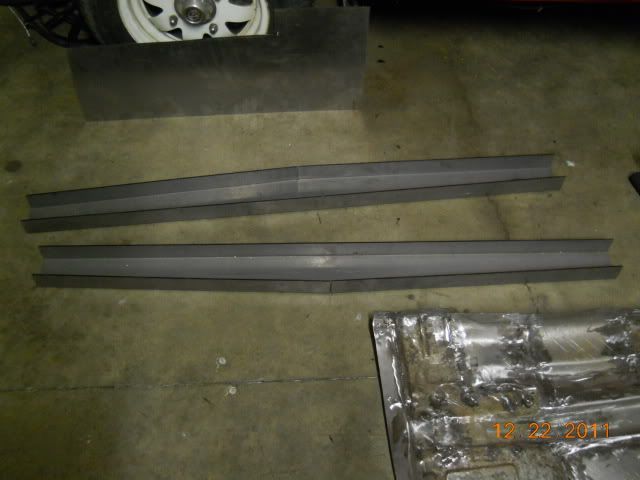
12 Ga. Beefieness !!
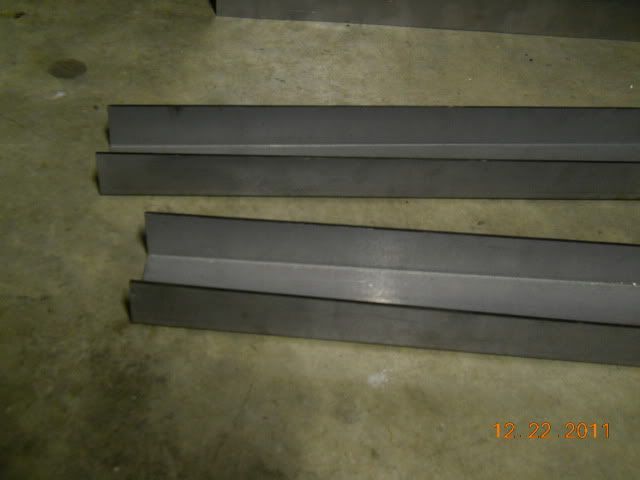
I figured if I wanted to jack the car or put brush guards on the sides these would be perfect. I will have to cut them down and prep them for some sealer But is should be good. I have the whole next week off and the floors are going in no matter what. I will also try and get to the engine bay and patch that one spot but will have to see if I have enough time for that.
All for now and Merry Christmas!!:cool:
-
I am trying to figure out where that is at in my mind. This I think is a fun little project to keep me busy. Don't know if I will keep it too long after its cleaned up. I don't want to take the dash out but after I get the floors in I might do that. Still need to fix the front caliper as it is sticking. That stuff is easy though get most of the major rust done and move to the mech stuff.
-
what did you want for those 2 items anyway?
-
Funds are low, though I do need one. Maybe after the first of the year I need to get the pans in and por15 the crap out of it.
-
Yeah I sold it 2yrs ago when I smoked the trans. It was a money pit and I lost my tail on it sold everything for $2500 and got out of debt.
Best thing I ever did. -
I was into Volvos for along time I put a Buick Grand national motor/transmission in there with an 8.8 rear end. I almost have the drivers pan redone so its slow but going.
-
Well got the old nasty wire wheel out. Man this thing almost tore my finger off and I was wearing thick gloves.
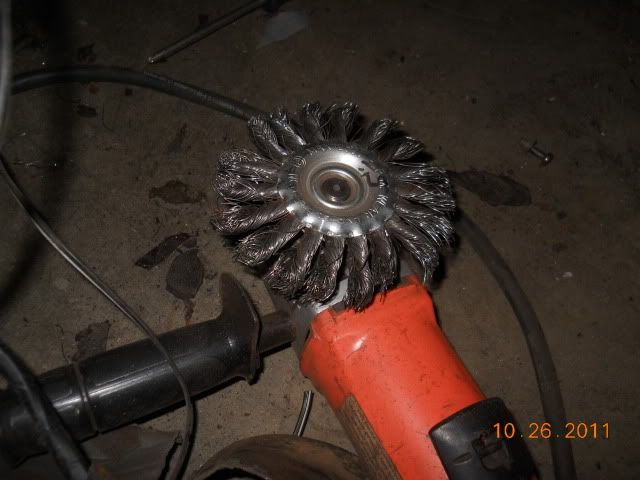
Does a pretty good job. I had another round one but that sucked so I kept using this one.
I was expecting more cancer when I pulled up some of the foam but it was just surface.
cleaned up pretty good. It will be a lot easier welding this stuff in.
The hump area was pretty bad got some holes down there trying to figure out if I want to patch or cut them out.

Some more of the other areas
Well that is all for now the good news is the drivers pan fit up at work is almost done. Maybe few more days during my break should finish up next week I hope.
-
Well I cleaned up my free century mig welder. Its got a fan also that is bonus, help run longer if you need. The pan is going ok I reformed the channel and working my way out. I hope to have the drivers side pan ready to install next week. The pass side will be a lot easier.
Oh yeah also taking the brat for a drive around in front of the house I thought the tranny was binding in 4 x4. My friend said he pulled two trannys to find out that's how they are LOL. I remember going around the corner and having the tires bark.
I am noobie Just brought this home tonight!
in Historic Subaru Forum: 50's thru 70's
Posted · Edited by waldoz
Well took some pictures of the pile of Brat. I also went down and got some gas for the welder. $150 for small bottle. prices have gone up for sure.
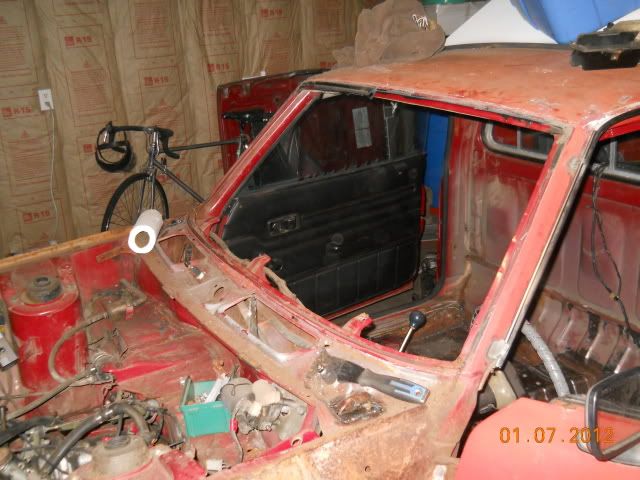
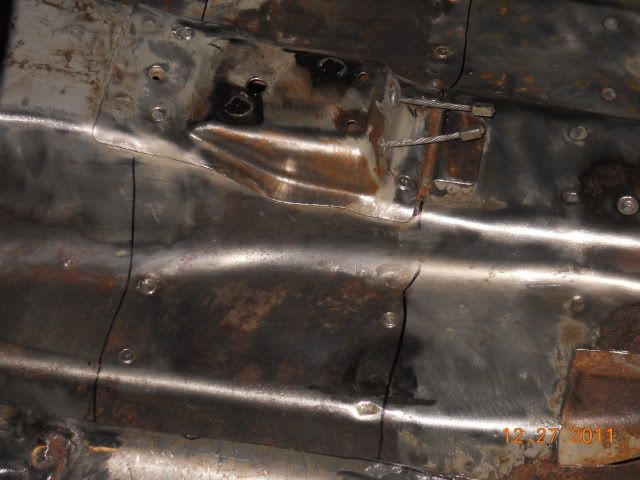
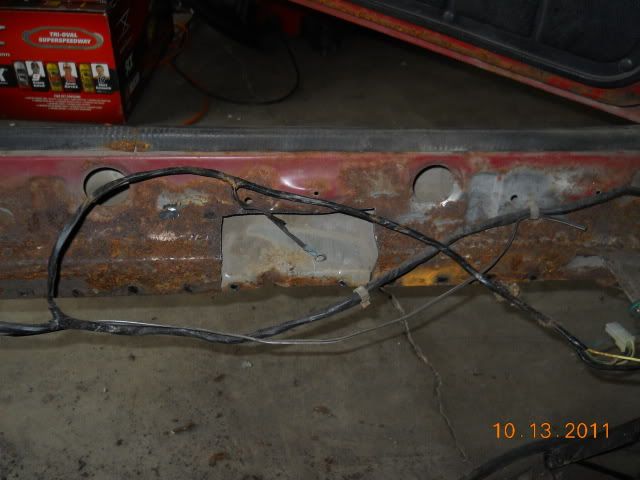
Here is the shot of the pillar and dash area I think you guys were talking about.
I call this the vent hole, at least I will be able to get in there.
It looks pretty good here.
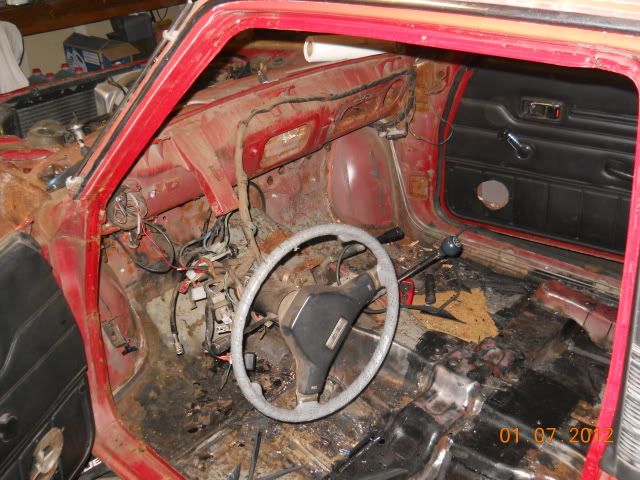
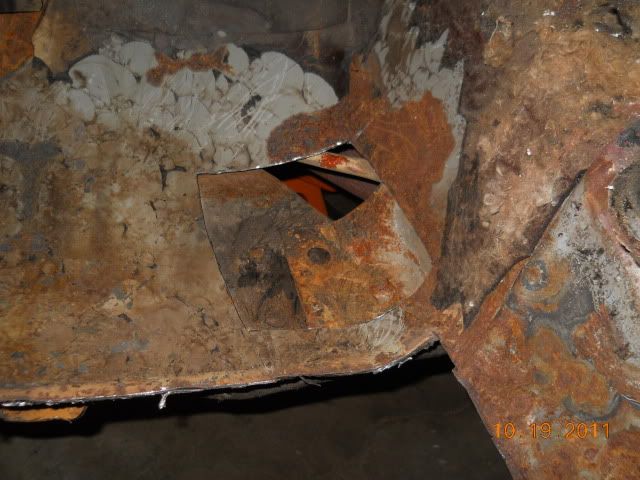
So this is where the holes are. It does not seem too bad to fill or cut small area out.
Inside:
Outside:
Here is the vent cover its not as bad as it looks.
Back:
Front:
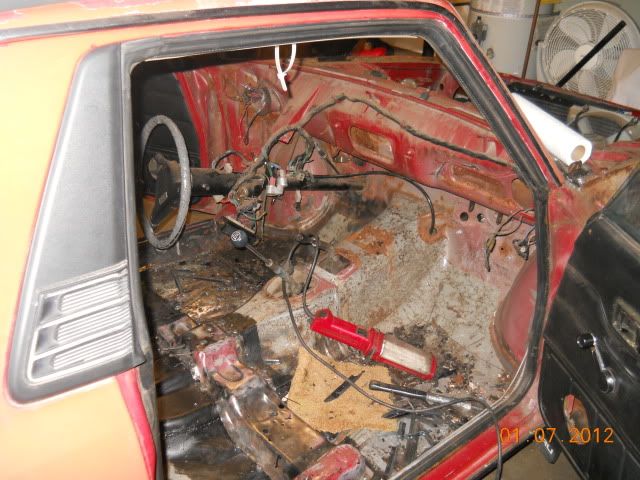
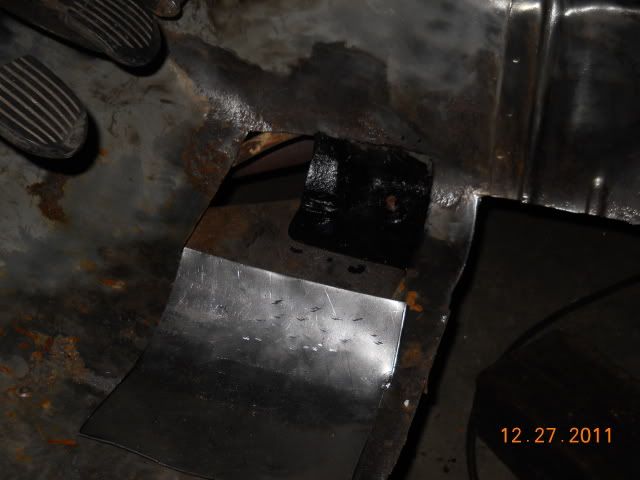
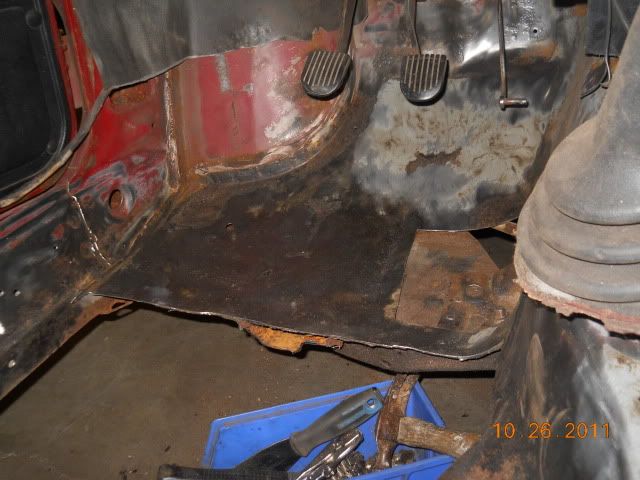
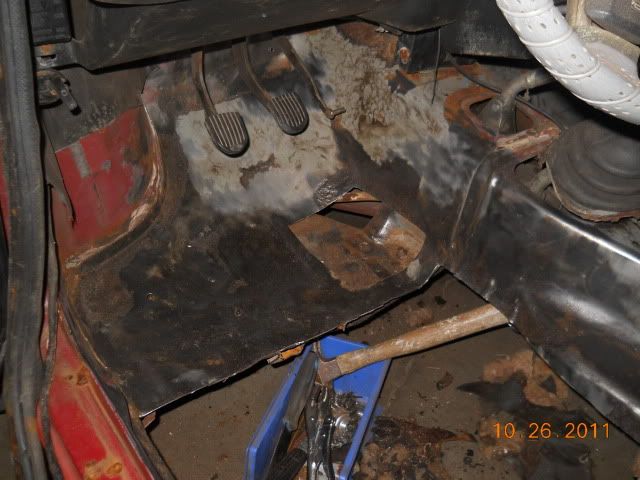
Here is the pedal set up, Its not bad either. That switch is there a replacement I can put in there? I have not taken it to work yet but will have to strip it down and coat it.
Not much going on but I will prob replace the heater core while I have it out. It does not leak though.
Now it looks like mine has a valve. Where can I get one of those also?
I found one but does this look right?
http://www.ebay.com/itm/New-Heater-Valve-Subaru-Brat-77-78-79-/220900273167?_trksid=p4069.m7&_trkparms=algo%3DLVI%26itu%3DUCI%26otn%3D3%26po%3DLVI%26ps%3D63%26clkid%3D5501020696519750548