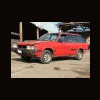
asis Posted March 28, 2010 Share Posted March 28, 2010 Since I have seen some recent activity in the oldies forum, I thought I would post and track the progress of my lil buru refurb here as well. Refurbish and not restore, to begin with it has already been upgraded to an EA81 D/R 4sp. It runs strong, drives straight and leaks no engine oil...ENGINE oil Found the gear oil in the tranny off the dipstick after a 1000 miles however, and since I filled it, I now get some drips where I park it...but not major just another item on the list. I say refurb, not restore, because while I do want it to be a BRAT and reconcilable as such, I just want it reliable and functional as a driver. Largely for my retirement driving to morning coffee but mainly for my daughter to drive to high school in a few years. I think the young fella I bought it from is or has been a member here so hopefully he will see this and chime in sometime. This is what I had from the start It did have a clutch cable issue or so I thought initially, but, figured it was just the cable or the routing from my previous experience with my 86' GL wagon. Turns out it was the cable even after I found.....This crack in the pedal assy A visit to GD and his hospitable cruise to the JY for a EA81 pedal assy, aquired me a new clutch cable and pedal assy for the partial the price of a new cable. The pedal assy would not work without major modding but I did replace the cable with the one we pulled and... butta baby:grin: I am still in the market and on the look out for a gen 1 pedal assy. Not particular what shape it is in just need a model to get material and plans to fab or strengthen one. Now here is where I get lucky, I found another 80' BRAT for sale with all the other lil spiffy goodies this one didn't have. Granted it didn't run, was painted flat black and lime green, but for the price and the body hmmm I feel lucky... This is about where a new post should start me thinks Link to comment Share on other sites More sharing options...
asis Posted March 28, 2010 Author Share Posted March 28, 2010 Goodies from the bargain BRAT Push bar High Bar Jump seats w/head rests barely scuffed toyo tires on stock 13" gen 1 spokes BIG bonus-Radio Shack specials, speakers that fit behind the seat with room for storage right front fender door hinges tailgate latch rod with clips others to come surely as I continue the rape Link to comment Share on other sites More sharing options...
asis Posted March 28, 2010 Author Share Posted March 28, 2010 So I have some other pics floating around other threads, so up to date here with the bed stripping. Initial scouring to find the real problem areas. Wire brush the blisters out and find the holes what need fillin... I am actually thinking about a dark maroon color for final paint, that blue I still love and had left over from my Land Cruiser.... Boundary of TSF My old front yard Link to comment Share on other sites More sharing options...
bendecker Posted March 28, 2010 Share Posted March 28, 2010 Great posts! Keep 'em coming. Keeps me motivated :-) -Ben Link to comment Share on other sites More sharing options...
biffanyus Posted March 28, 2010 Share Posted March 28, 2010 Very nice... Im jonesing!!! Let me know if you part some stuff from the extra brat. I might be in need of interior carpet and other small parts..... Let me know please... Link to comment Share on other sites More sharing options...
asis Posted April 4, 2010 Author Share Posted April 4, 2010 Got my high bar out again and did some more welding on the base. It was fairly flaky around the base but I added enough wire from my welder and grinded enough and added more, should hold a head wind and a couple of lights now. Think I already mentioned my final color. Wine, Maroon, Burgundy, Dark Red......just DON"T call it purple For the side brackets, I cut a couple of slabs from my daughters old goloshers and used some auto cement to glue the rubber to the brackets. Once I get the bar bolted down, I might just use some pop rivets into the sides. Cold temps so things just held in place and the pics are in a dark barn so....will get some next time I see the sun. Link to comment Share on other sites More sharing options...
biffanyus Posted April 4, 2010 Share Posted April 4, 2010 Looking good!!!! You think you might have extra parts from your parts brat?? I might need the rubber window strips that sit on the upper outer door where the window slides up and down. Please let me know. Thanks, Tommy.... Link to comment Share on other sites More sharing options...
ecky Posted April 5, 2010 Share Posted April 5, 2010 I like it, I'd almost have to say you can read minds cuz thats about what I have planed for my '80 BRAT. Link to comment Share on other sites More sharing options...
asis Posted April 5, 2010 Author Share Posted April 5, 2010 The "extra" BRAT is more of a donor than a parts rig. Mainly got it because it came with the jump seats/bracket and headrests as well as the highbar and pushbar like new tires on original gen 1 wheels. I do intend on keeping it complete and now with a spare EA71 as well, eventually a nearly complete and drivable rig for someone else to have fun with. Link to comment Share on other sites More sharing options...
asis Posted April 5, 2010 Author Share Posted April 5, 2010 I like it, I'd almost have to say you can read minds cuz thats about what I have planed for my '80 BRAT. I didn't really intend to get this far this soon but since I have... The panels and high bar are just sitting there "drying" at this point. I do think I will go ahead and pull the chrome strip and finish the bed, leaving the floor in black primer as I plan on herculining it in the end. Link to comment Share on other sites More sharing options...
asis Posted April 11, 2010 Author Share Posted April 11, 2010 Made through the initial run/inspection of the bed. Only major areas that need attention are the rear corners under the chrome and a few spots in the rear of the bed where the carpet strips go. Still have to do some work on the high bar. I cut the brackets off that were on the side. Just nothing I really like for mounting. I will fashion some brackets to mount to the rear of the cab. I cut some v-blocks out of 2x4 and wedged in front of the bar and it really shores it up so... I can start gathering material and dreamin up ideas for the seats now. Have to run down a few screws for the panels and the chrome strips, not too bad though only about 5 to drill out or aggressively remove Still debating whether or not to swap the tailgate with my spare or just ruff this one down. Couple of character dents and surface rust in some good scratches, but the other one is all ready cleaned up and painted flat black...:-\ Would have done it already but the wiring for the license plate deterred me for now. Link to comment Share on other sites More sharing options...
asis Posted April 16, 2010 Author Share Posted April 16, 2010 Console caddy and dope light fully operational must... not.... fashion...zzz... cupholders Link to comment Share on other sites More sharing options...
asis Posted April 17, 2010 Author Share Posted April 17, 2010 Soooo...for my bracket mount for the jump seats, I am thinking about possibly adapting a minivan or Suburban type removable seat, flush floor mount... Have to do some parusing..... Link to comment Share on other sites More sharing options...
rxleone Posted April 21, 2010 Share Posted April 21, 2010 Keep going mate, and keep the photos up! Love seeing these old Brats restored, and yours is looking beautiful! Good work! Link to comment Share on other sites More sharing options...
biffanyus Posted April 21, 2010 Share Posted April 21, 2010 That paint came out looking really nice. Nice and shinny. What did you use? I plan on doing the bed of my brat all in black. Want to know what type of paint and sprayer... Link to comment Share on other sites More sharing options...
biffanyus Posted April 21, 2010 Share Posted April 21, 2010 Oh and btw if you paln on putting in the rear seats a custom way and you are not going to use the original rear seat bracket... Im interested in it if so... Link to comment Share on other sites More sharing options...
asis Posted April 22, 2010 Author Share Posted April 22, 2010 That paint came out looking really nice. Nice and shinny. What did you use? I plan on doing the bed of my brat all in black. Want to know what type of paint and sprayer... Bare metal primer and Krylon 5 ball burgundy * A premium spray paint with the ultimate ease and control. * Fastest dry - 10 minutes or less * Features EZ Touch 360°TM Dial Spray Tip * Exceptional durability, adhesion and smoothness. * Dry to Handle in One Hour and one of these Link to comment Share on other sites More sharing options...
biffanyus Posted April 23, 2010 Share Posted April 23, 2010 You plan on saving the bracket for the bed seats??? If not Im interested in it. Thanks, Tommy... Link to comment Share on other sites More sharing options...
asis Posted April 23, 2010 Author Share Posted April 23, 2010 Sorry Tommy, but, yes, I need the seat bracket to effect a mounting system. It could be duplicated but it is much easier to use an existing one. Sides, don't you have other issues to deal with? Link to comment Share on other sites More sharing options...
biffanyus Posted April 23, 2010 Share Posted April 23, 2010 Yes I do. I have plenty issues to deal with thanks.... Just thinking ahead of the game.. maybe too far ahead. Keep the pics coming on your project.. Looking sweet!!!! Link to comment Share on other sites More sharing options...
asis Posted May 10, 2010 Author Share Posted May 10, 2010 (edited) Not much if any progress...grass is growing and so is my work load in my shop. I have been using the heck out the lil buggie tho. Everything from hauling small riding mowers and other OPE to fix, from racing Honda's, Accura's and Toyota's with fat ole fart pipes hangin out their rear, round these foothill roads Found out the lil bugger will hit the last dash on the speedo...(85MPH/140KPH@5000RPM ) Looking for some wood trim to finish up my console caddy. Still need to remove the screws and get some brads to finish up where any glue didn't hold as well. Edited May 10, 2010 by asis Link to comment Share on other sites More sharing options...
biffanyus Posted May 11, 2010 Share Posted May 11, 2010 Well please post more pics when you get more work done on it. Its looking to be a sweet ride.. Oh and thanks for your support on my issue. Link to comment Share on other sites More sharing options...

Recommended Posts
Please sign in to comment
You will be able to leave a comment after signing in
Sign In Now