

iluvdrt
-
Posts
867 -
Joined
-
Last visited
-
Days Won
1
Content Type
Profiles
Forums
Gallery
Store
Posts posted by iluvdrt
-
-
Man this is beautiful. I enjoy following it here just as much as FB.
-
 1
1
-
-
I have one of his lifts, I have yet to install it though. It is very well made. From what I gathered going with a 4" is that you will have to modify the shifters, steering shaft, extend the brake lines and get new Rancho shocks for the rear.
-
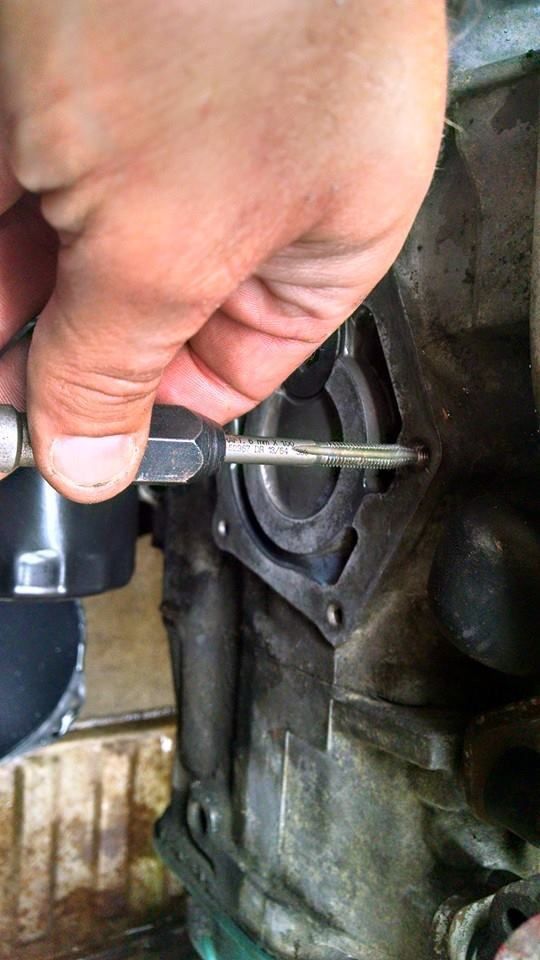
I always just clean mine with a wire brush and chase the threads on the bolt and in the block with a tap and die. Cover it in a little anti-seize and reinstall. Never had an issue. They don't torque very tight.
-
I just figured out this problem yesterday. Huge fail on my part.
So over the summer I rebuilt my Brats engine. During the rebuild when I was painting the block I capped all of the openings with take and rubber plugs. Installed the engine and everything went perfect...except my heater didn't work. Not a huge deal in SoCal until it started getting cold the past few days.
I checked all of the heater hoses and wasn't getting any flow out of the heater core. Naturally I assumed in was the heater core that was bad. I spent an entire day pulling out the dash to replace the heater core. After reinstalling it and being happy with my fix, I fired it up and there was still no heat. The coolant just wasn't flowing. I began to remove the water pump heater return pipe and as soon as I popped off the little rubber heater hose on the water pump.......there it was. A rubber plug I forgot and placed the heater hose over LOL. I painted the block black and the plug was black so I must have not seen it lol. All of that, pulling the dash and everything and it ended up being a quick 5 minute fix haha
-
Saw this on Facebook, looks excellent!
-
I would be very interested in buying new reproduction items. The badges on the outside could also very easily be 3D Printed. I'm tired of buying faded or "slightly" broken pieces haha
-
1
-
-
You can turn off the chime. I did it on mine. No matter what it will chime for a few seconds when you start the car but it will turn off and not come back on even if you are unbuckled. There is no legal thing I am aware of for it being off and it doesn't hurt the warranty. It is a dealer programmable feature.
To turn it off you have to turn the ignition switch to on (all the dash lights should come on) and fully cycle the seat belt in and out of the latch 30 times in 1 minute. It took me a couple times to get the timing down right, but it does work. I did the same thing to my 2012 Outback (that's where I learned the trick) and it still applied to my 2015 CXV. This has only worked for the driver seat. The passenger seat will still chime if unbuckled and it has a passenger in it. I am not sure if the trick will work for the passenger seat as I have never tried it.
-
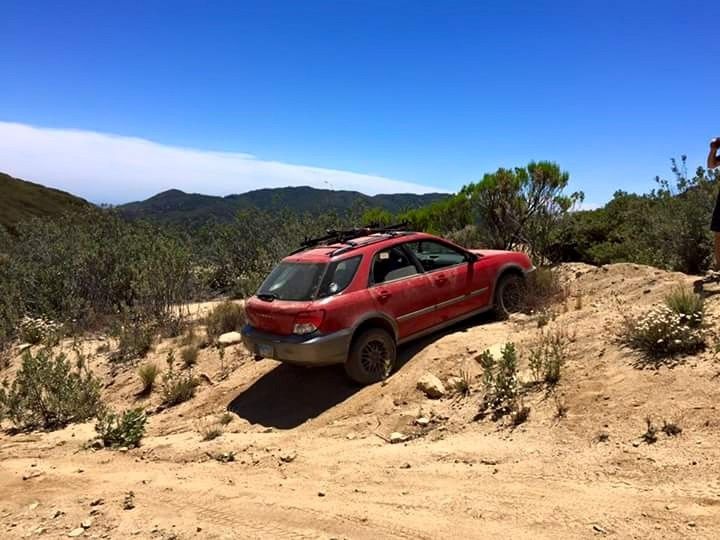
The problem isn't so much the parking brake size, but the actual suspension layout, the WRX uses struts in the rear so the rear hub looks allot like the front hub. The Baja uses a multilink suspension that places a large steel vertical hub carrier right where the bracket needs to be. I have a set of STi rear hubs with backing plates and it may be more trouble than it is worth to cut those off and then see if they align before welding them on, might just be easier to fab one up. But since I need the truck for the winter it will be a spring project, right now it stops WAY better than stock with STi fronts and EBC reds in the rear.
Yeah I thought about that later, how they changed the rear suspension geometry. My bad
-
That is a very nice Brat, and you've done an Awesome Job with it. Congratulations!
So, you want to Lift it 4" + add bigger Tires, isn't it?
Keep us updated, Kind Regards.
Love your attention to detail. Great work so far. I've been a supporter of you installing the lift since you got it lol. Glad you've decided to. Doesn't mean you need to wheel it! I look forward to seeing progress!
Yeah I decided to lift it. It probably will never go off road, or at least anything serious. I also plan to add power steering as well. Ill do the 6 lug conversion and runs some 14's with probably a 215/ 70/ 14 AT tire. I don't want anything too big that will hurt the power of the engine as right now it runs great.
-
I finished up some details last night; pitch rod mount, rear wheel well trimming, refilled the coolant, re-installed the intercooler and took it for a spin around the cauldesac and it feels very solid. The STi front brakes are on but I ran into a glitch on the rears so they are stock for now. The issue is the hub carrier is present exactly where the adapter bracket for the Brembo needs to go, that part is not present on a WRX which is what the adapter is intended for. So Brembo rears are not a bolt on. I am going to have to pull the hubs and fabricate a caliper mount so that will likely get bumped to the end of the project. Next up is front wheel well mods and then drop it at the exhaust shop to get a 3in to the tail bent up.
Look on other Subaru car forums for a part out of 2006-2007 WRX's. Buy the rear hub assemblies with the backing plates. Its a direct bolt on even for the e brake and allows for 2004 STi rotors (only because theyre 5x100) and any STi brembos. I did that conversion on a 98 Legacy wagon several years back.
Cost about $200 from a wrecked car.
-
Man this is so cool. I love those axles!!
I cant wait until I can get mine to the body shop.
-
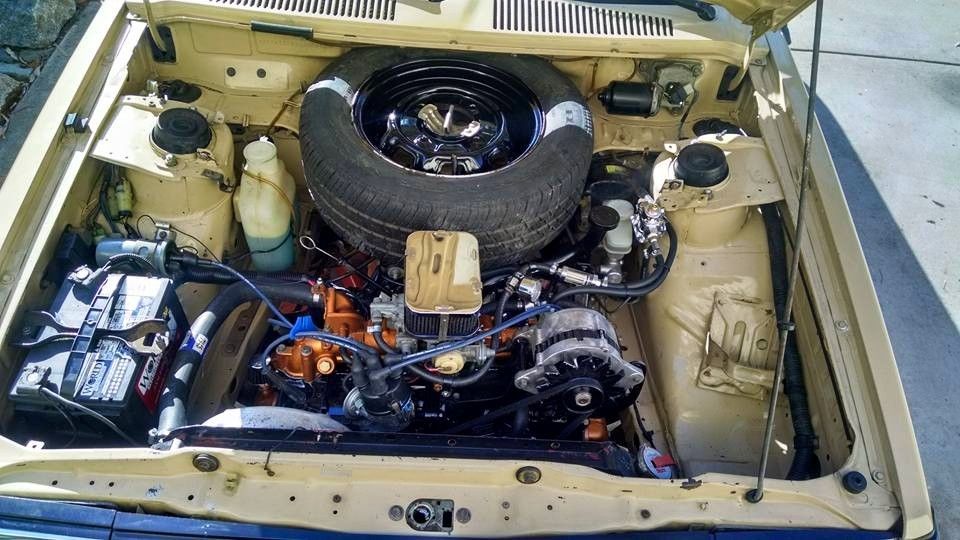
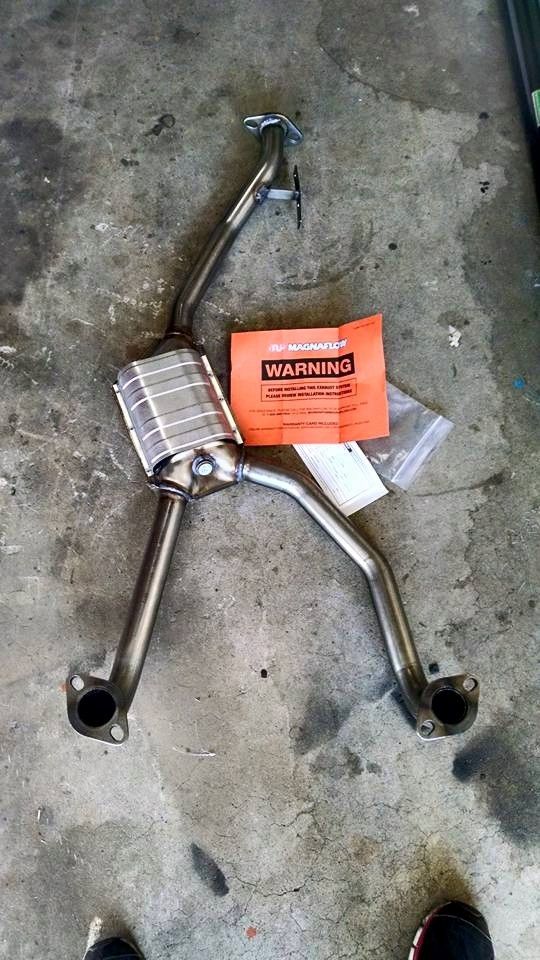
Beautiful engine too! Where did you find the Magnaflow?
Thank you. I got it from Summit. It cost me a fortune because it isn't Cali legal so I had to ship it from Cali to my dads house when I bought it, and then he shipped it to me since Summit wouldn't ship it here.
It sounds beautiful, and Im trying to load a sound clip. It is stainless steel and JET coated.
-
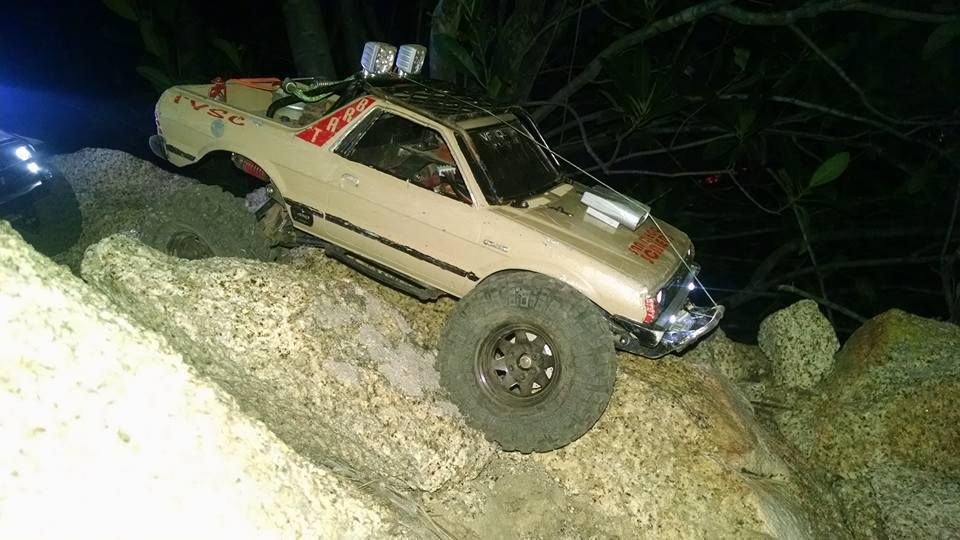
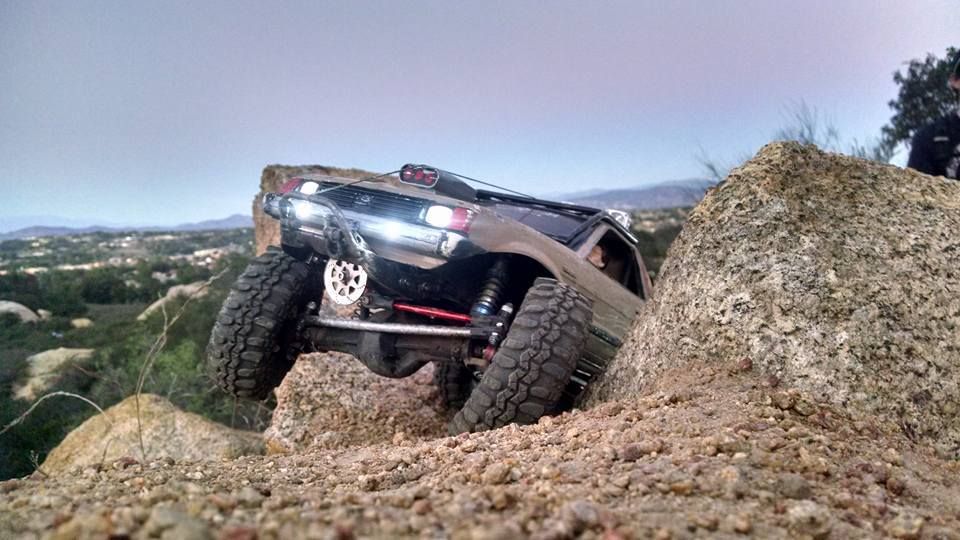
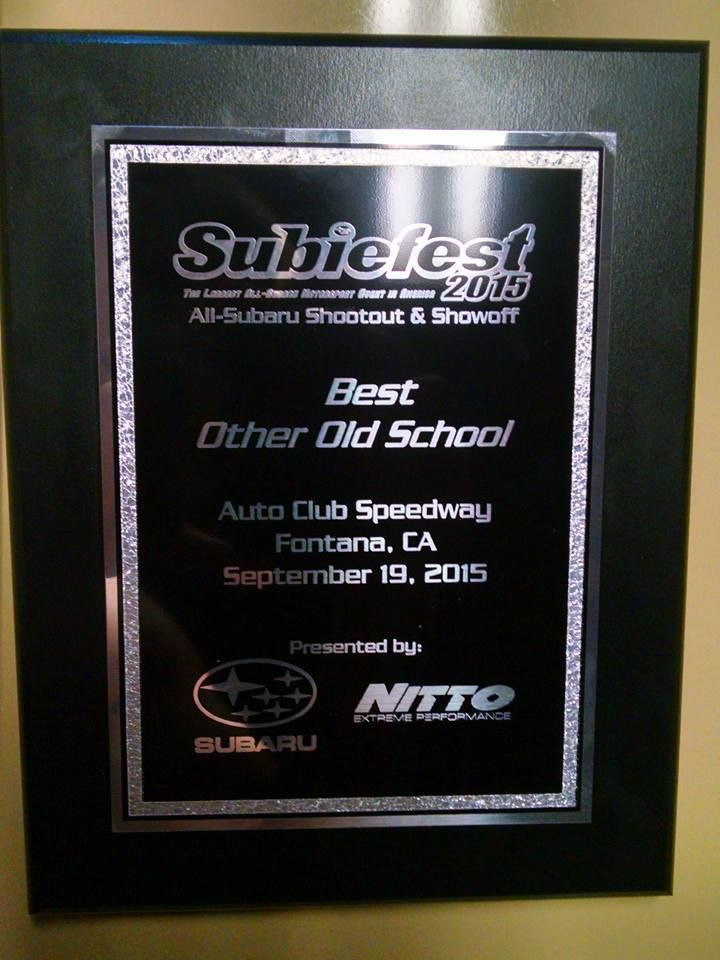
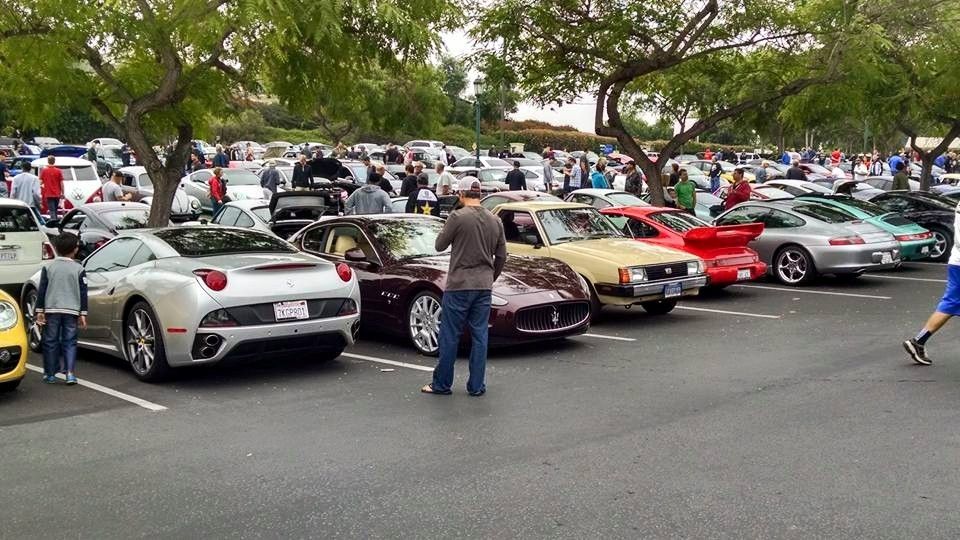
Subiefest was coming up, so I decided to enter the Brat into the car show with my Brat SCX-10 RC Crawler I made too
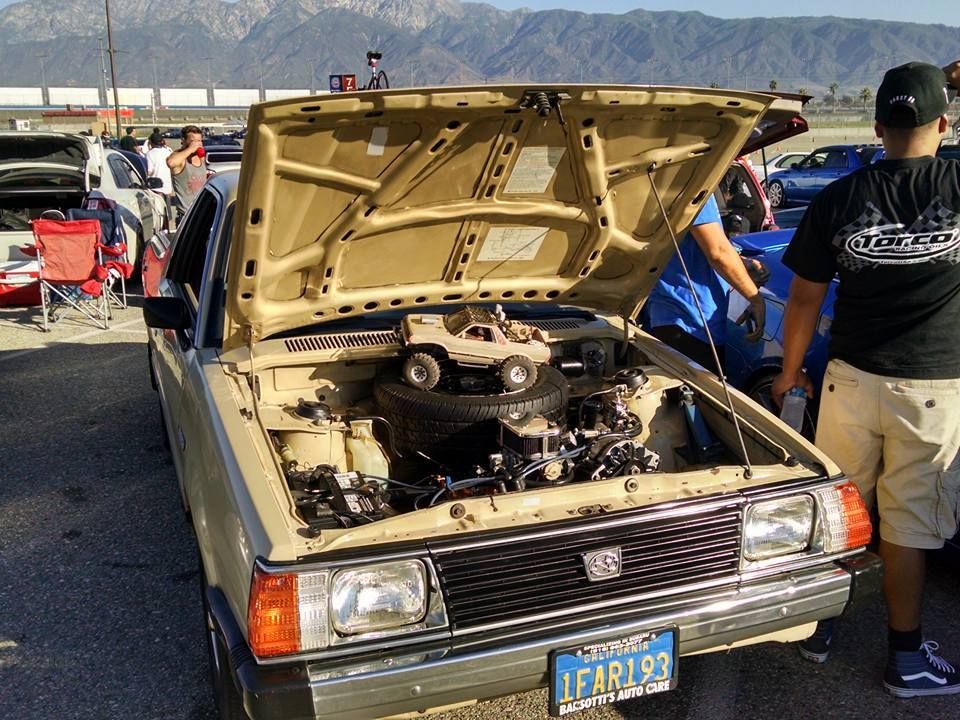
Close up of the RC in case youre curious
Anyways, back to Subiefest. Lots of tough competitors there

My beautiful wife of 24 years (total time together) supporting my crazy habbit lol
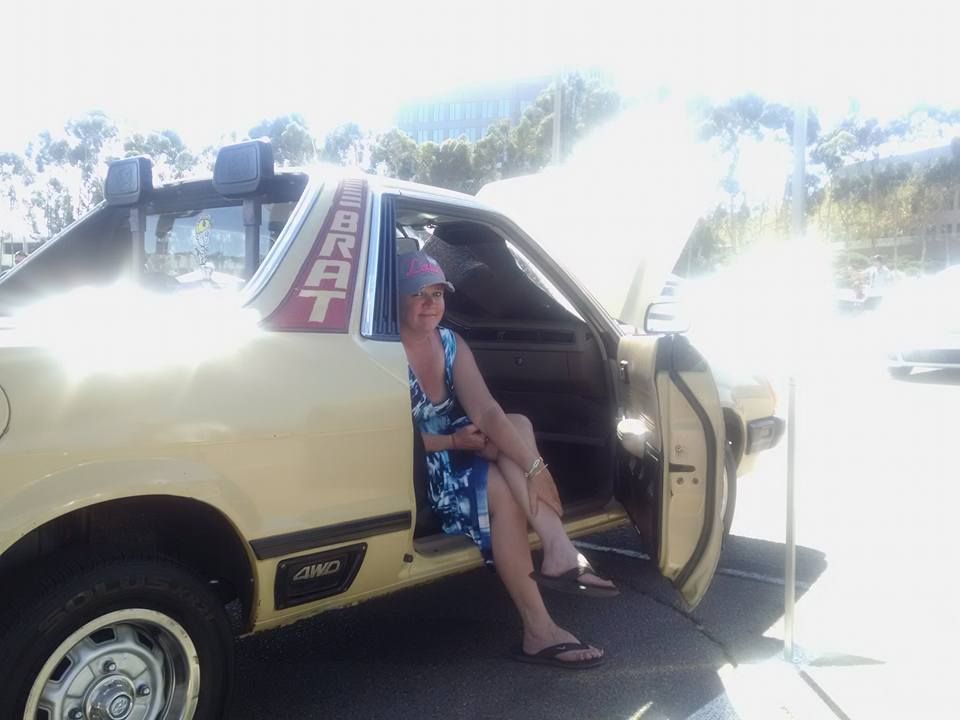
And.......I WON!!!
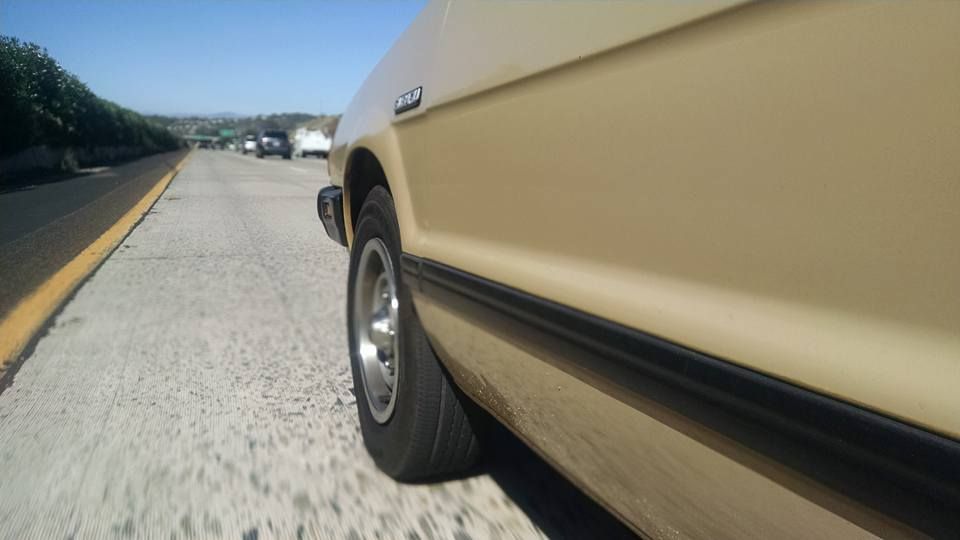
Good cruise home
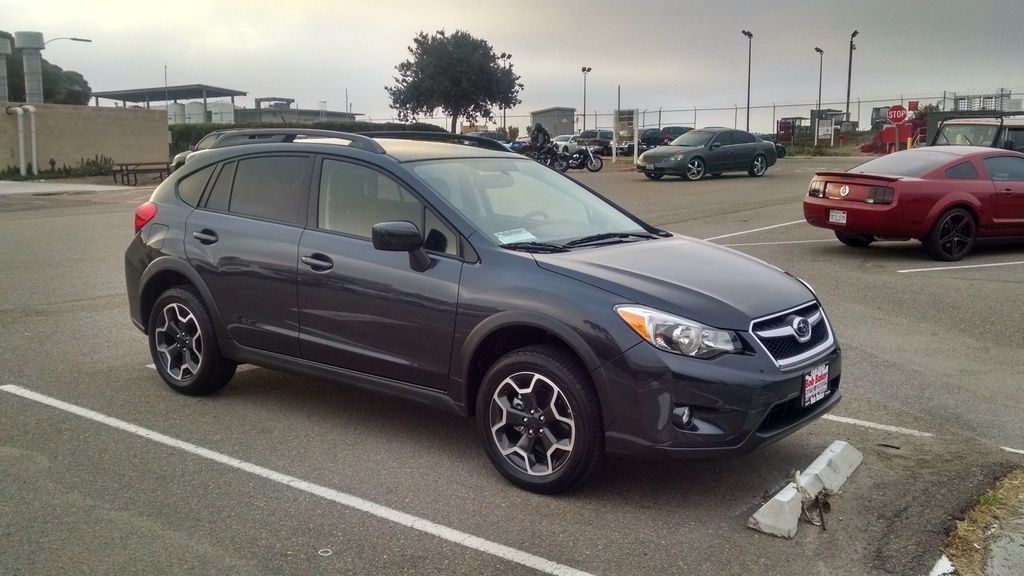
That's it so far. I bought a ADF 4" lift for it so Ill be doing that soon, but funds are a little tight since I also bought this a couple months ago
And I still have this for wheeling
-
3
-
-
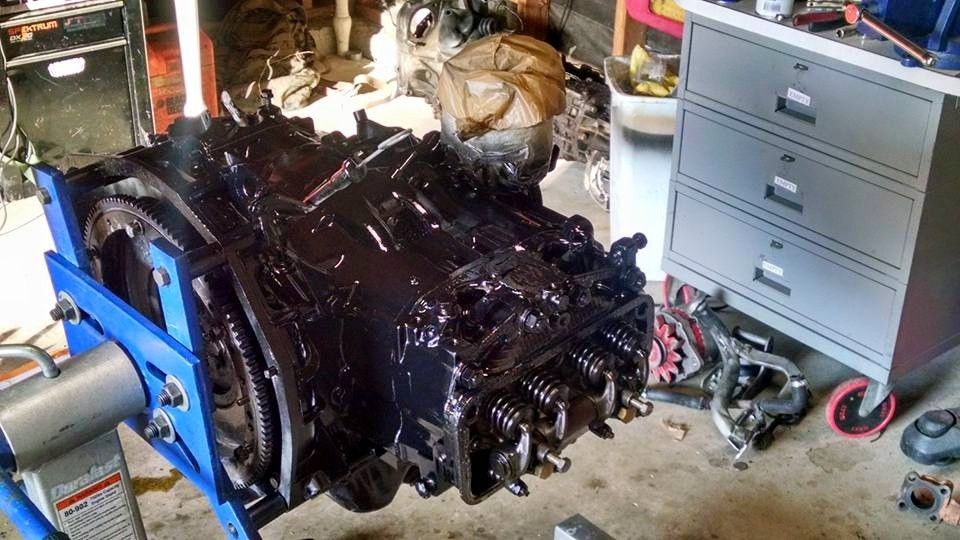
Engine is back in and everything is ready to go!
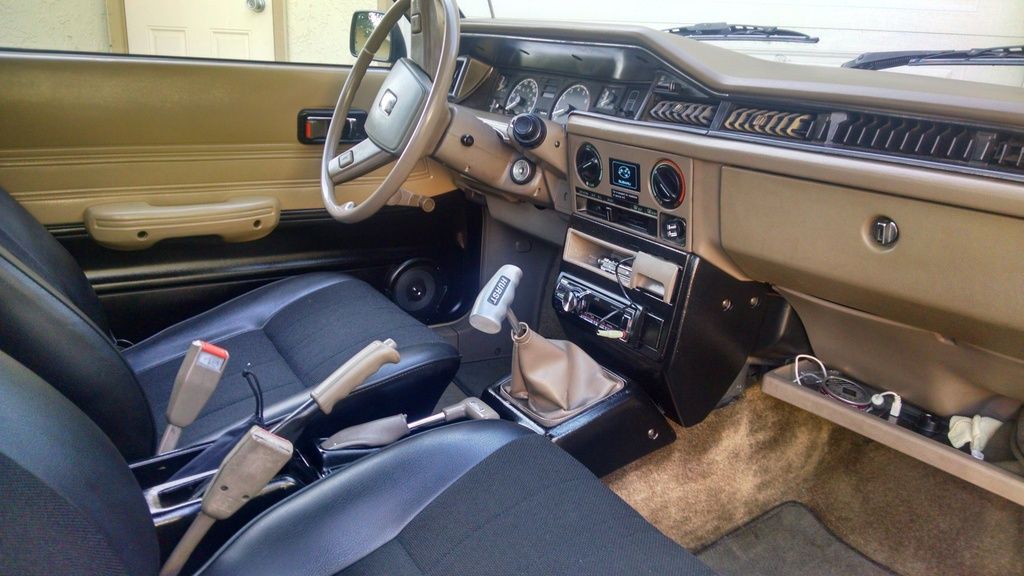
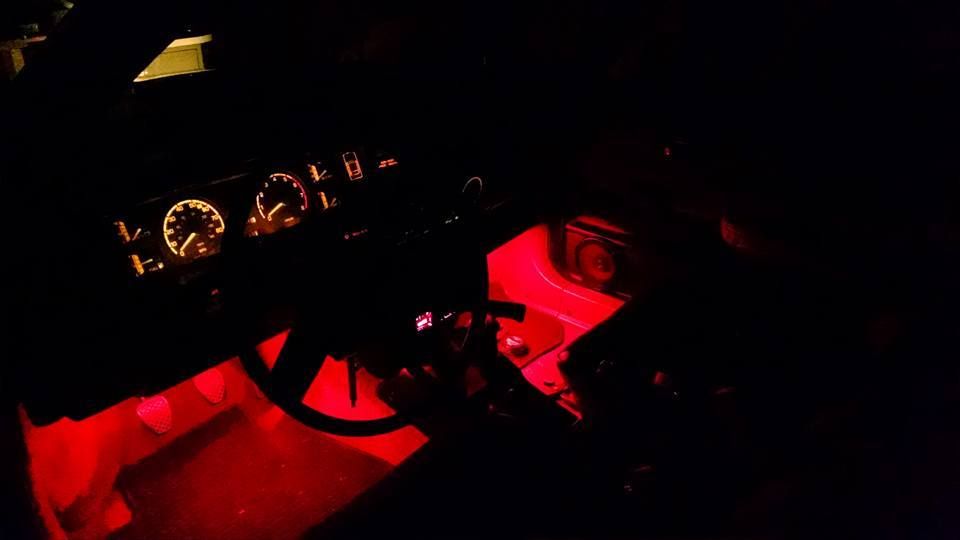
Since I had the interior out, I figured I would update it a bit too. Plastidipped some stuff and installed a JVC MP3 player, kenwood speakers, and some lights inside....just like the 80's!!
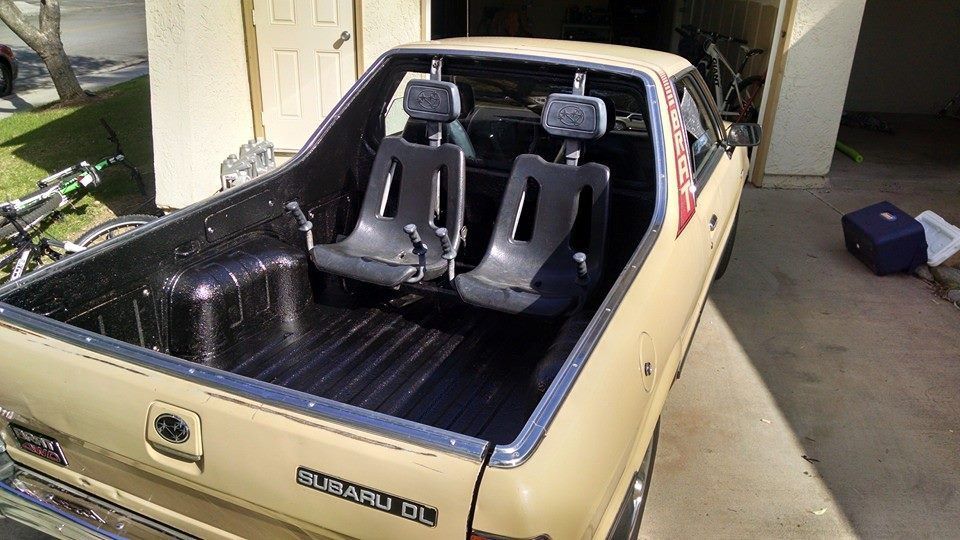
I decided to rhino line the back too
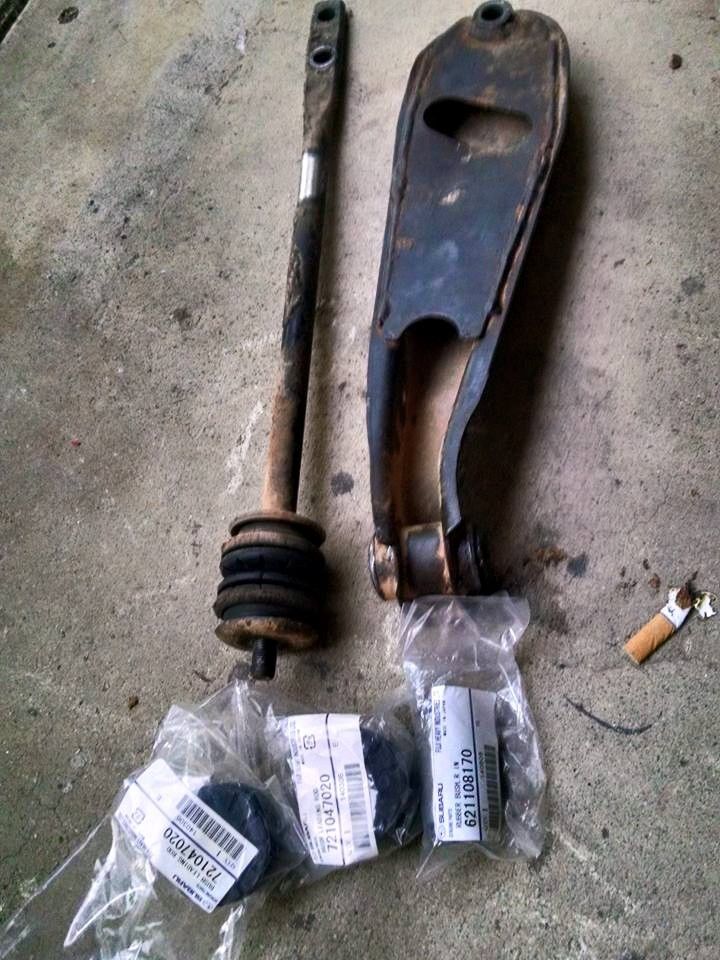
And do the control arm bushing since it squeaked.

-
Ready for install
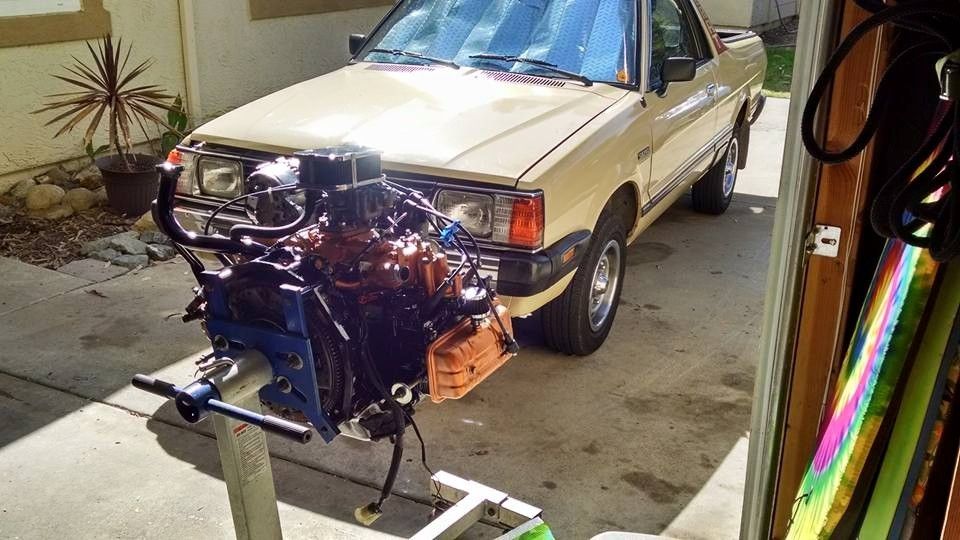
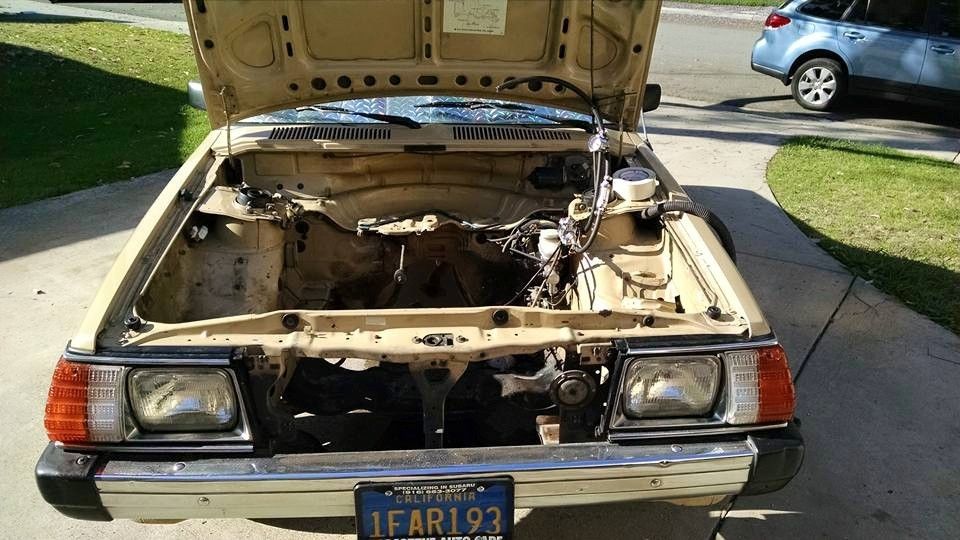
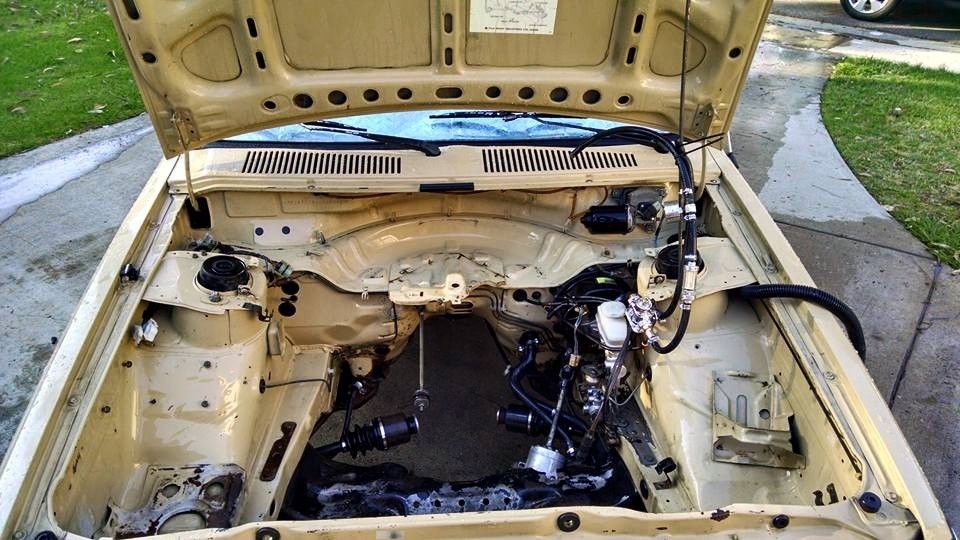
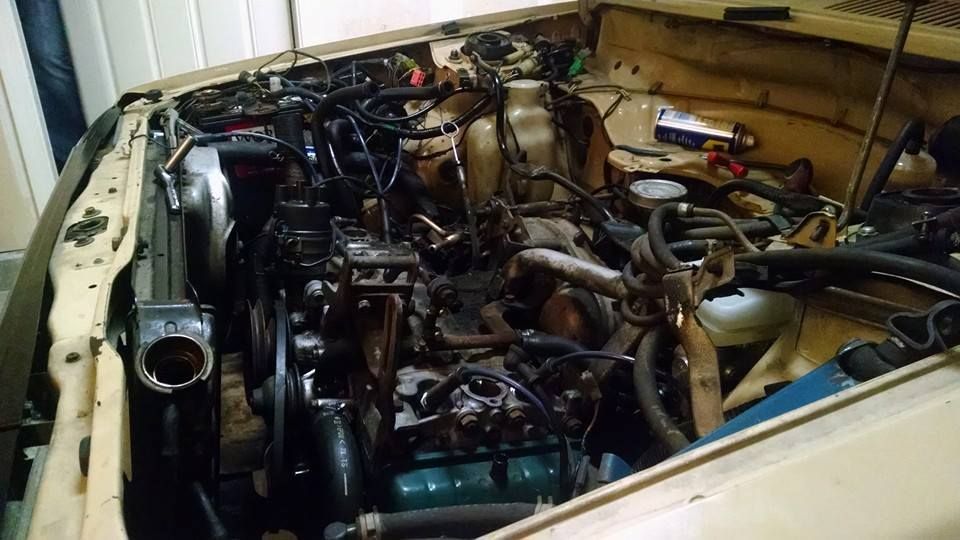
The filthy engine bay
Clean engine bay. After it dried, I touched up all of the paint.
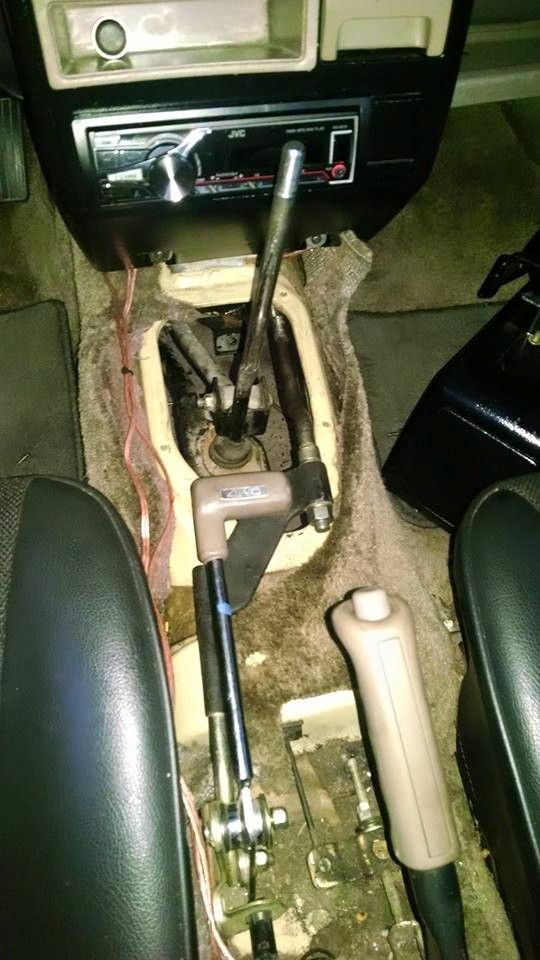
5 speed install!!!
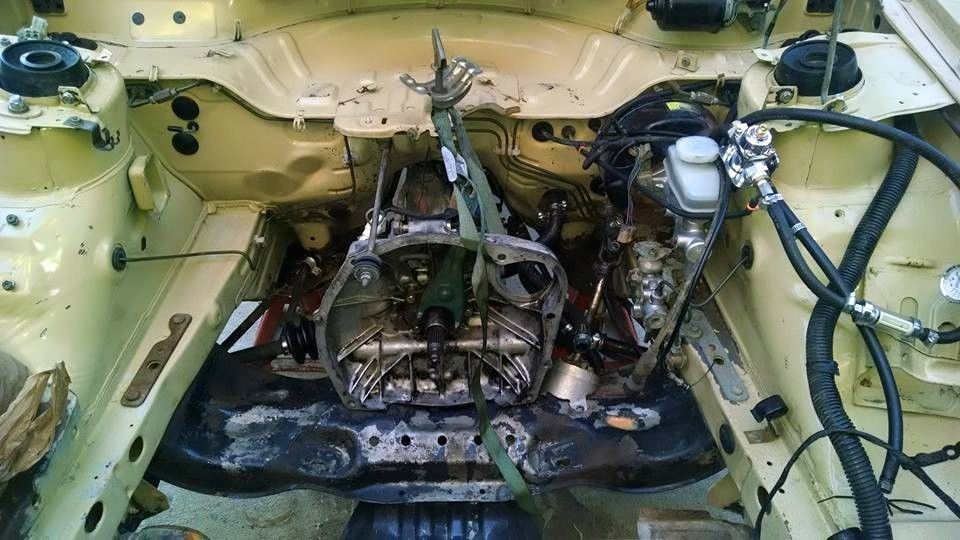
Installing the shifters Jerry made. His workmanship and help with this were top notch! He helped me a lot over the phone.
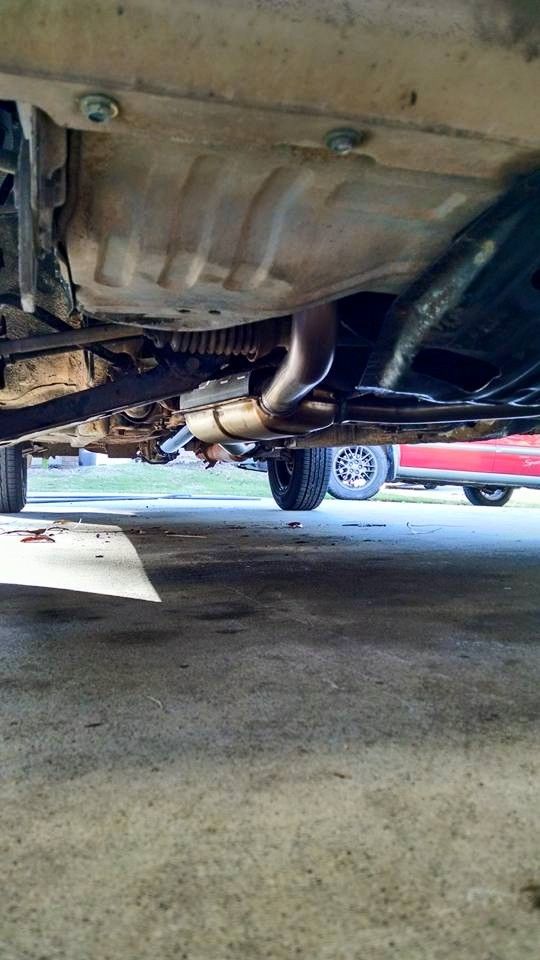
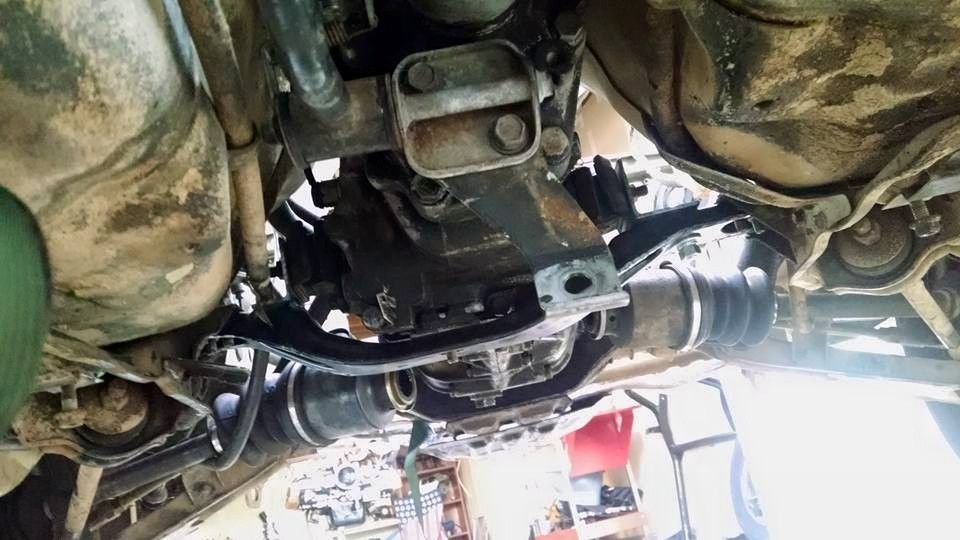
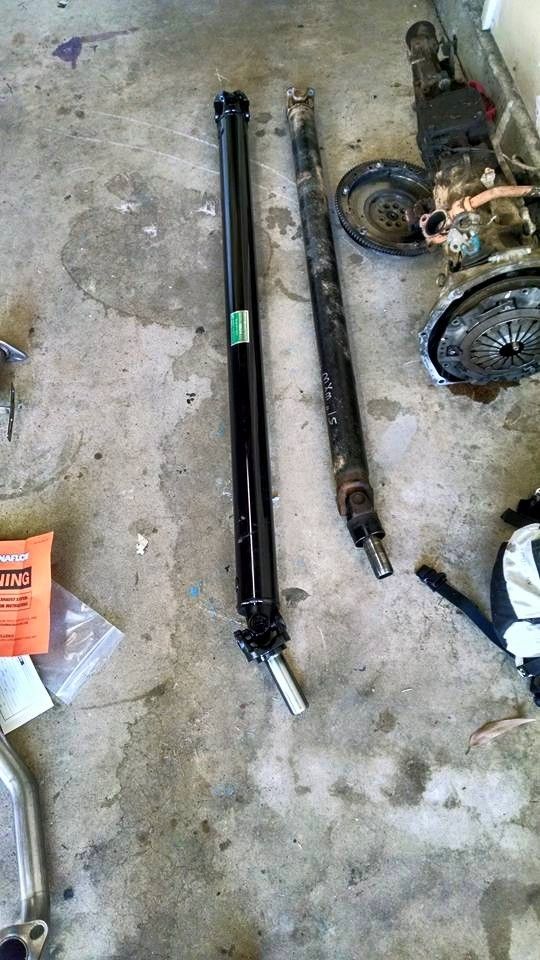
New custom driveshaft. It uses 1 ton Spicer 1460 U-joints and is rated to 600 HP LMAO!
I also ordered a Magnaflow header too
-
1
-
-
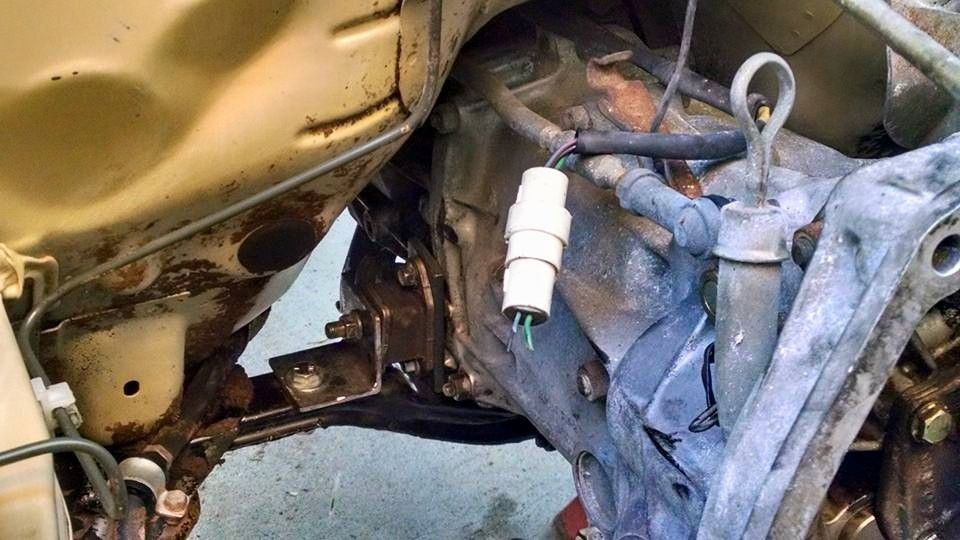
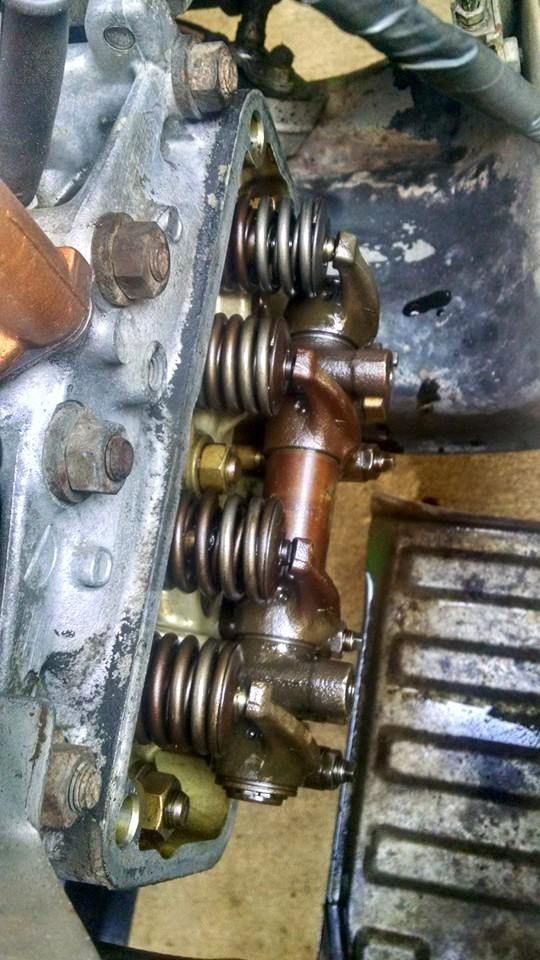
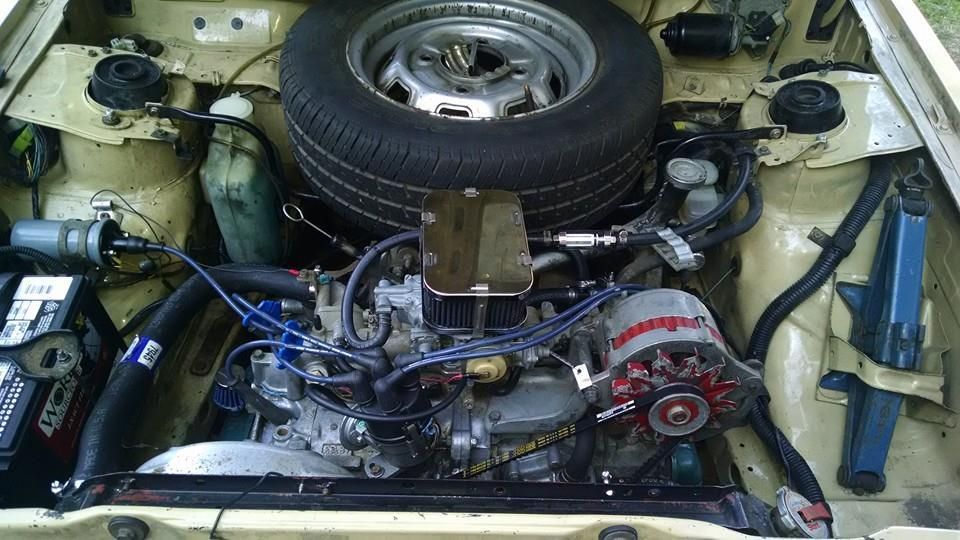
Later I realized the 4 speed can't handle the speeds of California traffic, so I opted for the 5 speed conversion. I just happened to find one at my local junk yard still in a GL wagon for $150, so I pulled everything I needed, contacted Jerry for a Jerry's kit, and went at it. During that time I noticed the water pump was leaking, so I ordered a new water pump. I figured why stop there, so I also decided to pull the motor and reseal/ clean it. I also went ahead and ordered a Redline Fuel pump, Summit fuel gauge, Holley fuel pressure regulator, and decided to degrease/ wire tuck the engine bay.

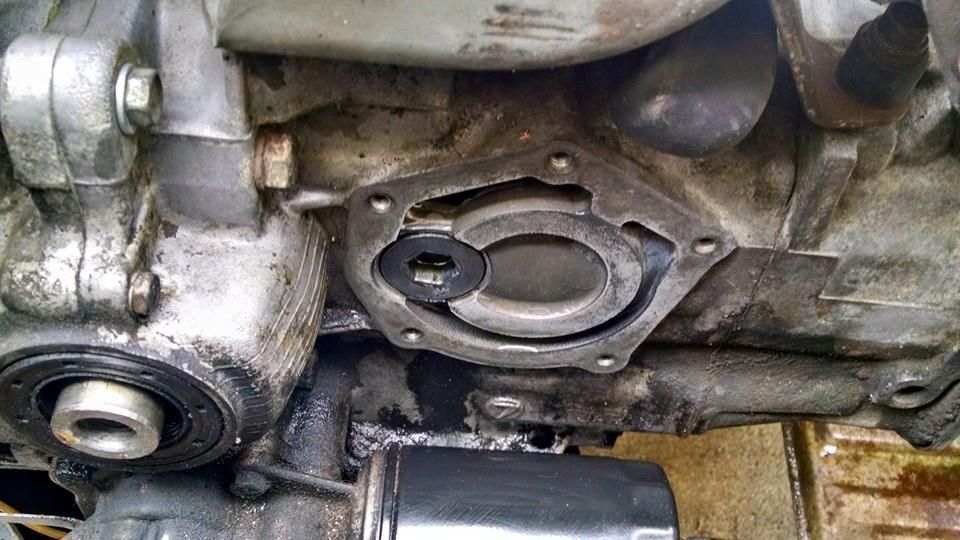
I always chase holes with a tap, and the bolts with a Die.
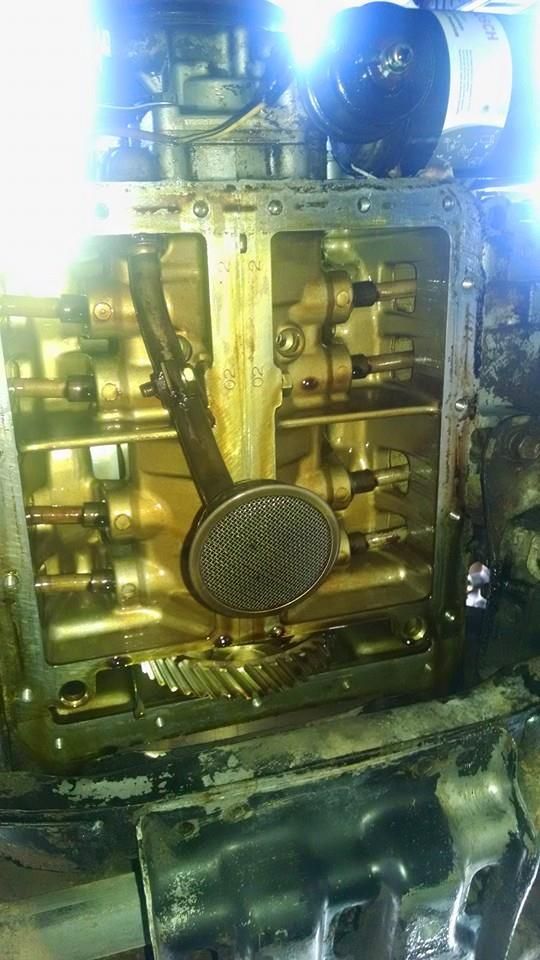
Cleaned and painted
-
I relaxed for a bit and took her to some car shows.
It blended right in!!!
-
1
-
-
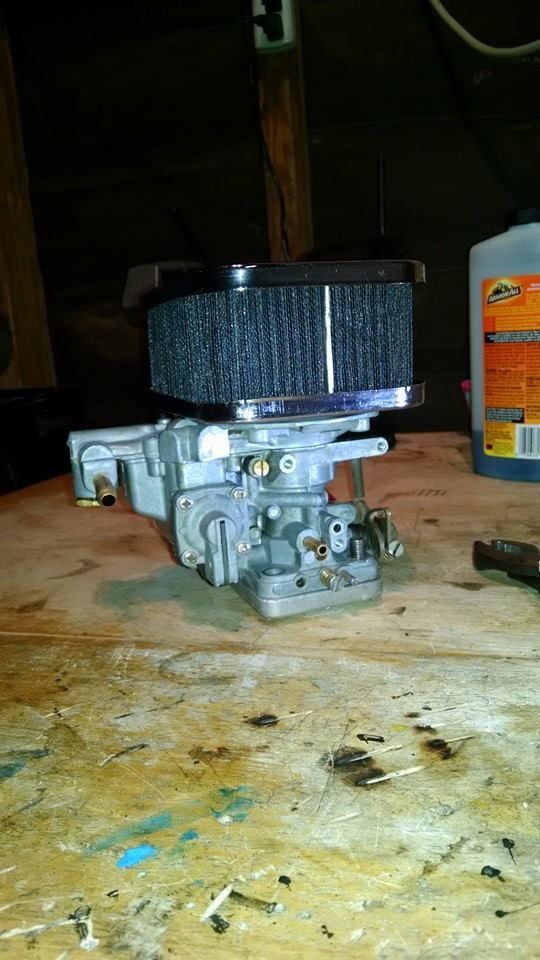
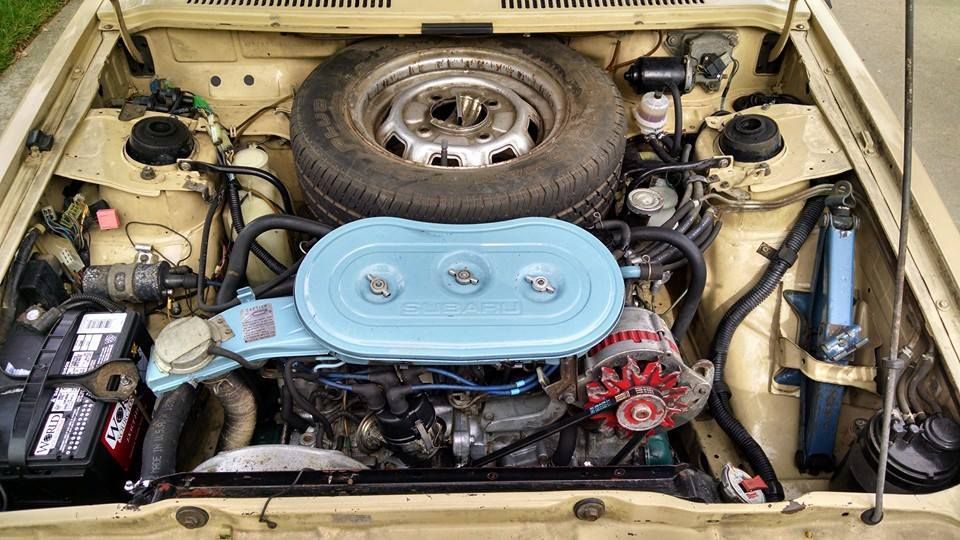
Now that she was somewhat clean, it was time to focus on the other things. The brakes were horrible. I changed all of the lines, the pads, rotors, shoes, and gave her some Lucas synthetic DOT 5 brake fluid. I also turned to getting the car running better. The crappy 1 brl carb and all of the emissions stuff was really robbing her of power so I sourced an old weber from a member on here and rebuilt it. After some extensive searching for weber parts, and me trying to remember how to tune a carb engine I finally got her running good enough.
I also replaced both rear shocks, the springs, struts, strut mounts with all new Sachs parts, and replaced both front CV axles with EMPI ones as well as all of the bearings and seals. I kept the original axles to rebuild later. I also changed the distributor to a new A1 Cardone one, all the plugs, wires, cap and rotor, coil, and fuel filters.
The rebuilt Weber 32/36
-
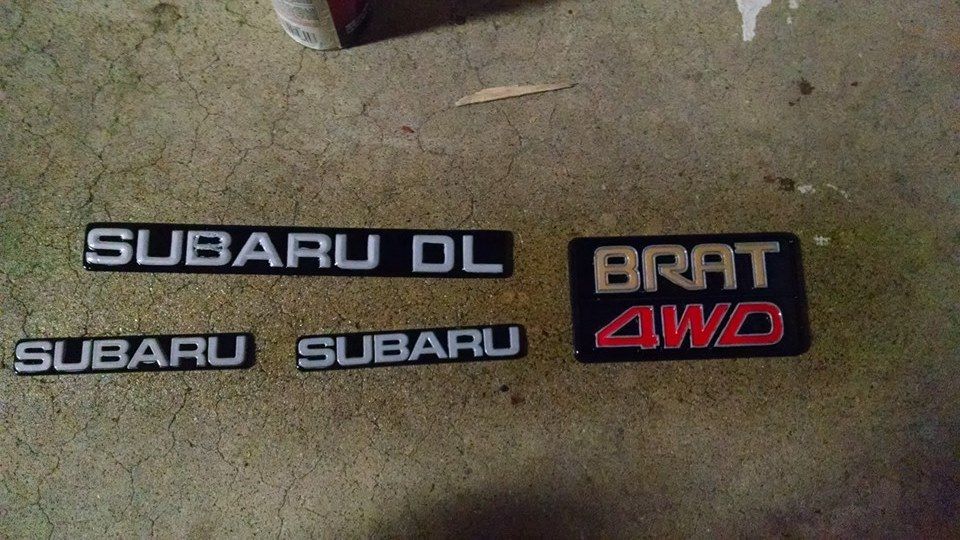
Now that I had it home I had to start right away fixing her up. I pulled all of the badges off and repainted them by hand. Along with the grill and side louvers. I also used a Mothers 3 step buffing wax to try and restore some luster into her paint.
Here she was after that
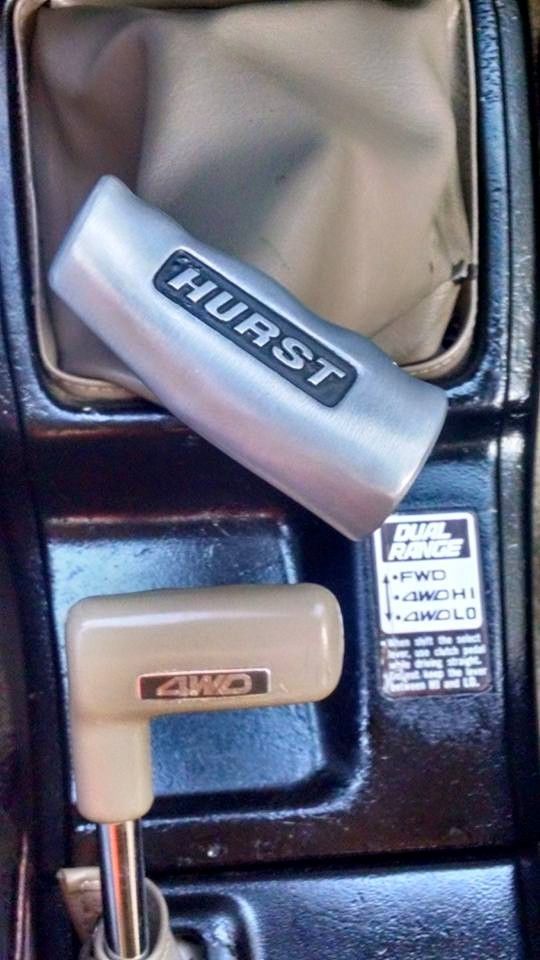
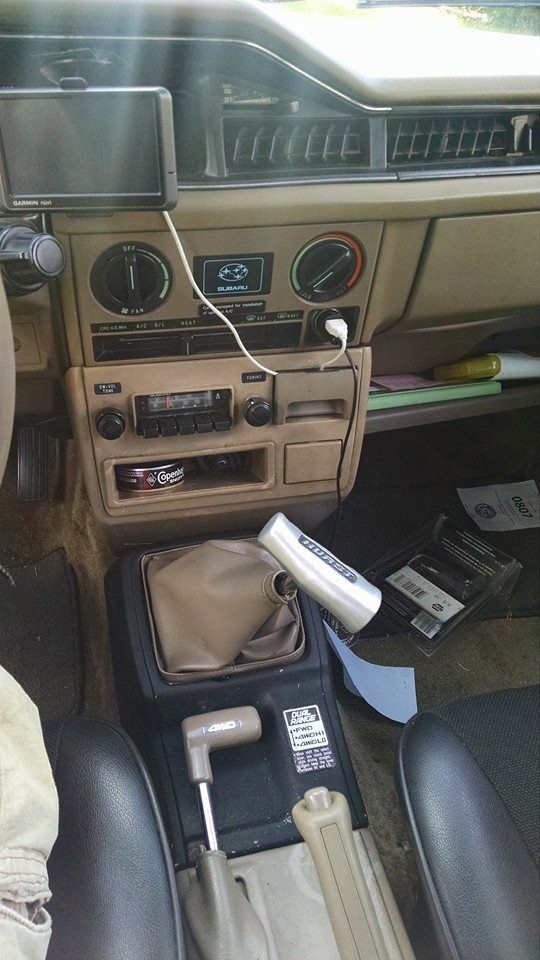
I also cleaned the interior (which took a gallon on simple green) and installed my old Hurst shift knob. Its been in every car I have owned the past 20 years. I did have to get some adapters for it though since the last car it was in was a Toyota Truck.
-
Now that I finally upgraded my OS on my computer I can post pics, so I am going to start a journal of my Brat.
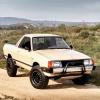
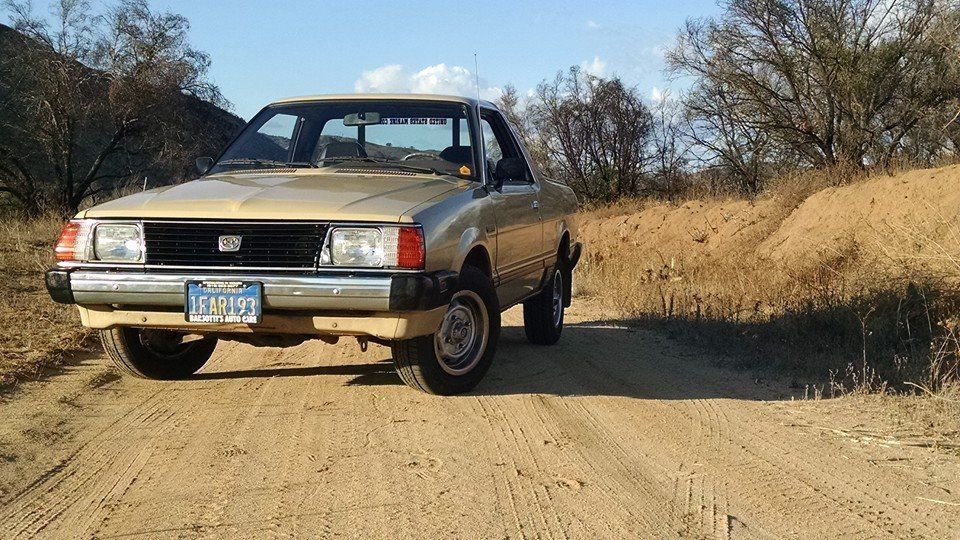
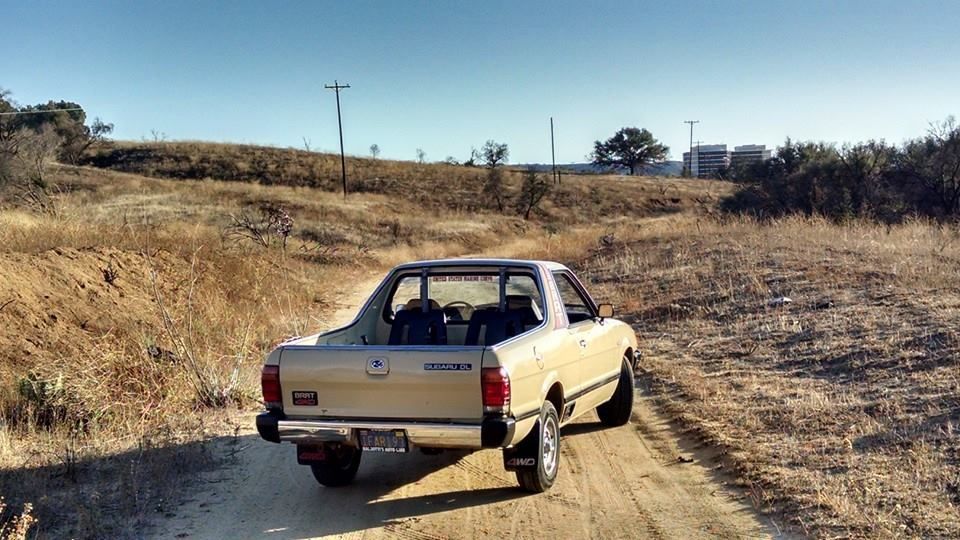
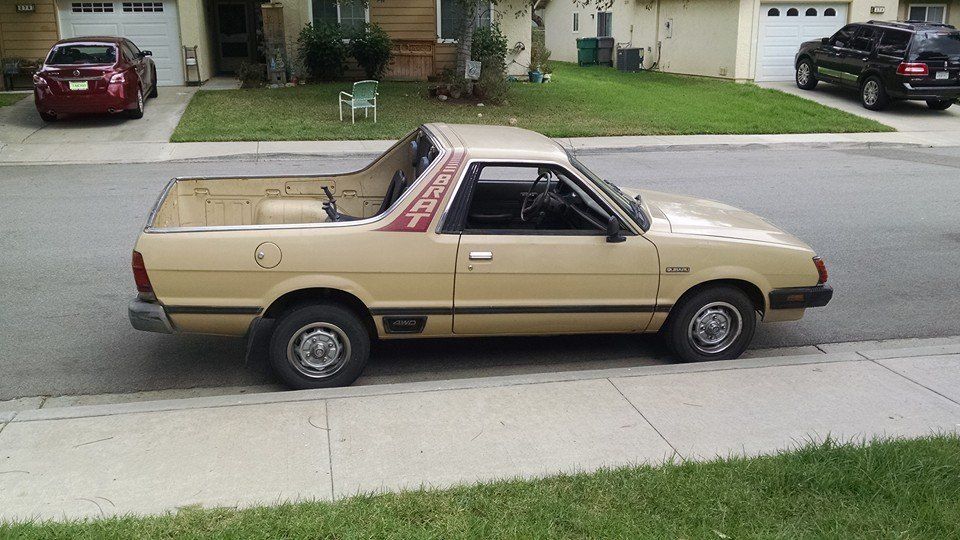
So, I have been into "Old School for awhile and have always wanted a Brat. They are just hard to come by where I used to live in the North East. after almost 16 years of searching for a good one (I hate rust), my buddy found one for sale on NAS**C and he hit me up. It was located about 40 miles North East of Sacramento....430 miles from me. I figured I only had a couple more years here in SoCal so Friday after work a friend and I made the trip to get it over the weekend. What a trip it was. Long story short I bought it after a 5 mile test drive and drove it that day all 430 miles back home at a comfortable 60 mph (LOL). The seller was a great guy and owns a small Subaru shop. He was nice enough upon hearing of my plan to give it a good run through and even replaced a few parts on it for me to ensure it would make the trip. I became the 3rd owner of this 82 Brat DL. This is the day I got it home.
-
Well after upgrading my OS on my computer I can finally post a pic for you guys. Ill be doing a members journal soon on it to back date all of the things I have done. Anyways, it is an 82 and has quite a bit of stuff done to her already so stay tuned in!
-
3
-
-
Yeah Ive been following those pages. I got a PM from some guy, but I don't think anything will come of it.
-
I have a 100% OEM barn find BRAT in my avatar. I had to change it out to a weber and magnaflow (among other things). The issue with the Ca emissions is that none of it can be purchased new. It creates vacuum leaks and robs performance (what little there is). Also, my 4 speed began having issues, and once again, no one has a 4 spd rebuild kit. (found out later the trans wasn't the issue)
It literally started to become undrivable and I am not wanting to waste money buying parts from "Bob's" parts stash in Michigan or South Dakota that may or may not work.
BRAT's and many EA81's are modified to simply just keep them on the road. They have to evolve so to speak lol.
-
1
-
-
Yeah, I think I am getting too old as well. The BRAT was definitely out of place.
Don't get me wrong, it was fun talking to people and meeting other Subaru guys, but the whole event was poorly done I think.
Refresh of a very interesting 1982 Brat
in Members Rides
Posted
I believe he used Duplicolor vinyl and plastic paint. It is what I have used in mine as well. Its pretty durable.