

davidsain
-
Posts
6 -
Joined
-
Last visited
Content Type
Profiles
Forums
Gallery
Store
Everything posted by davidsain
-
 Had almost the same happen - chewed up idler bearings. Found a lot of metal dust and none of the missing bearings when I pulled the cover. Replaced all the pulleys with new except the tensioner pulley - I repacked that one because it was still good. You might at the minimum re-pack the bearings in all of them. Not too hard to remove the seal without damaging it. Good job on the belt in a parking lot!
 -
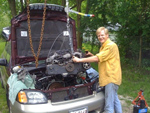
Presslab, this was setup about 100k ago by a Subaru dealer (Kevin is a good mechanic) and was quiet as could be. For a couple of weeks it started humming and then exploded one night last week. I'm driving my old chevy truck for now, but considering just getting a pulled trans which is way cheaper than doing another rebuild. Probably fix the hard cold shift too. Maybe I should just yank the engine and swap it into the old 78 DL wagon I have here. That would be a fun project, but there isn't really enough room up front for an EJ251. Wonder what would fit...
-
Ah, the '03 Baja has an EJ251...
-
V - Good for you for wanting to help a friend like that. This is a pretty easy job, but I'd consider sending the heads to a shop for a valve grind and milling the heads (agreeing with Fairtax4me on this). I've pulled my engine twice, once to rebuild after a spun rod bearing and the second when I found the Mech that decked the block put the alignment pins in the wrong spot causing head gasket oil leak. Pulling the heads in the car never looked doable in my 2K wagon. People talk about it, but I don't know of anyone who has actually done this. I pulled the covers in the car and just doesn't seem like enough room to do anything useful there. I highly recommend the factory service manual. Or maybe Strongly Advise... To pull the engine, battery, washer tank, air box (to give you room to work). Remove air ducting. Remove the exhaust y pipe from the block (6 nuts), remove the engine mount nuts (two more nuts), remove the fans shroud and radiator, take the alternator out. Unbolt the AC compressor and power steering pump, leaving the hoses attached and move aside. Remove the starter motor (and I made a bracket of sheet metal to keep the flywheel from turning - in the FS manual they show this 'tool' and it mounts into the hole where the starter motor came out of using one of the bolts or nuts from the starter motor to hold it in place). Remove the intake manifold by disconnecting the fuel lines and electrical connections (being careful to relieve the fuel pressure but you know this). Use blocking under the transmission (or a floor jack) to hold it in place while the engine is removed. Unbolt the engine from the transmission (I think 4 bolts, an anti-pitch bracket at the top and two nuts at the bottom). The long block should be mostly free - look for ground straps or anything else. I'm going from memory from about 3 years ago. At this point, if you have a strong back you can stand in the engine compartment and lift the long block out and set it on the radiator frame support, balancing it, step out of the engine compartment and carry the block into the house (that's what I did). I did weld up an engine stand out of rebar to keep from resting it on the oil pan. I can pull the engine in less than two hours and I'm not a mechanic. To turn the crank, I made a tool from a pipe with two bolts welded to it. One could do this also by drilling through at the correct spacing and place two bolts through with nuts to retain. Use the biggest bolts that will fit into the holes on the harmonic balancer. I spaced my to go into two adjacent holes so I could keep the crank from turning while removing the bolt on the balancer. No puller is needed for the balancer. This tool is necessary when installing the timing belt. Or go by the Subaru tool at no small expense. I like to fab up stuff from old bits if I can save a bunch of money doing it. Last time I had the timing belt exposed was due to failing bearings in some of the idler pulleys. One was fine - the tensioner, but a little dry so I took the seal off and re-packed it. Been fine for over 30k miles so I'd call it good. The only other tools I needed were common sockets (14mm, 17mm, 10mm, 12mm), ratchet, extensions. I did use plastic bag and paint marker system to label all parts, bolts, etc. Maybe not necessary now that I've done it a couple of times and recognize all the parts, but I'd advise it to anyone. I kept all parts in the back of the car so nothing would be misplaced in a garage. I haven't looked here but I imagine there is a way to PM me. I might have some documentation to share from a 2k legacy. EJ25 engine specs should be all the same (block should have EJ25 cast into it), however there may be some minor differences as I have an EJ251 and don't know what that Forester has in it. David
-
The HEGO sensor has a heater in it that it needs to function. When the heater circuit fails, the sensor can no longer burn off deposits. I've replaced a few on my 2k wagon - they fail through normal catalyst depletion. Replace this first, clear your codes and see what happens. As the sensor has a buildup of deposit, it won't read correctly. There is a rear sensor to determine catalytic converter performance and the failed front could cause this. If you do end up replacing the cat, realize that a bargain cat isn't a bargain. A bargain basement cat will have less precious metals that make it what it is and can have a significantly shorter lifespan than OEM. Replacing cheap cats every 50K miles is more expensive than once every 150K.
-
I know this is an old topic, but I've experienced this failure twice now and thought I'd share the answer. The front differential is in a housing attached to the front of the transmission called the Torque Converter Clutch Case Section. The input shaft shaft passes through this case (inside of the Seal Pipe) - the provides motive power from the engine to the transmission which is then transferred back to the Center Diff via the pinion gear shaft. R&R requires removal of the transmission and removing this Torque Converter Clutch Case from the front of it. This does NOT require disassembly of the transmission as another poster suggested unless one wishes to call this case removal "disassembly of the transmission". As long as the pinion shaft seal between the diff and the transmission has not been compromised, it's doubtful there is any damage to the innards of the transmission. The whine is caused by damaged teeth on the ring and/or pinion gears. Once a couple of teeth have sheared off, you get the big "thunk" when the pinion gear turns and hits a mismatch in the alignment with the ring gear. It's a fairly costly repair - around $1000 to replace the gears and bearings. When draining the transmission, it is recommended to see if there is any loose metal in the fluid that may have bypassed the seal and damaged the transmission. As I've experienced this twice in my 2000 roo that 237K miles on it, I am wondering why this happens. It's an automatic, so there's no dropping of the clutch to add extra punishment to the center diff. These gears should be strong enough to last the life of the car. In all this time, I've never experienced any issue with the rear diff. I do have a hard shift between 2&3 when the transmission is cold that's been there since I bought the car in 2006. Maybe that's part of the problem... David