
83subaruGLchick
-
Posts
143 -
Joined
-
Last visited
-
Days Won
5
Content Type
Profiles
Forums
Gallery
Store
Posts posted by 83subaruGLchick
-
-
I have a pin diagram but they don’t number up to 85 or anything it just goes through like 1-26 depending on the size of the pigtail? Am I just stupid? Can someone PLEASE shed some light on this. I feel like a idiot and am so beyond frustrated with this whole thing I DONT KNOW ANYMORE
-
On 7/7/2017 at 12:22 PM, Gloyale said:
Yeah, the wires from 17 and 18 need to be tied into ground. that is likely the issue.
Make sure pin 85 is connected to Ig. switched power.
Ground pin 81 IF you have a Neutral switch in your trans. Otherwise I'd recommend leaving it in AT designation (open) It will idle better.
Fuel pressure and solenoids and level sensors you can leave out. Will throw codes but not needed to run just great. Can get rid of a few of the codes with a couple resistors to ground. But I kept always getting a "MNFC. Controlled Equip" code using a 96 OBD II Outback 2.2 computer. Same pinouts I believe.
Also disregard the pins mentioned here by SkiShop. He's talking about Bosch type relay configuration with standard 30/85/86/87/87A type designation. Not applicable to the hitachi/matsuba relays on a subaru.
Does anyone have a diagram of the ECU pins? I’m chasing the same problem in my swap. I have a 83 GL I’m putting an OBD1 EJ222 out of a 92 legacy in. Not getting any pulse from the ECM to the injectors I’ve gone over the wiring over and over. Got the harness trimmed by SJR but he left a lot of stuff not labeled so I’m not sure what everything is…. Engine was in a AT but I got the right ignition coil for a MT… might be worth mentioning I wired my fuel pump to a switch for more anti theft, hoping there’s no way that could be the cause for my headache… getting to the point where I want to push the car off a cliff and cut my loses. Any help is alpreciated
-
Good Morning Everyone,
Another update!!
The car is SO CLOSE!! Check out my Instagram @83adventurewagon for updated pictures since I cannot post anymore here...
I have the new tires on, the transmission in, the new custom aluminum radiator in(working on plumbing currently), the custom air intake, the new driveline, the custom made exhaust, new bushings all the way around, new off-road lights, and the interior almost put back together but before I finish that I am going to make sure it starts with no wiring issues.
I am currently having some starting issues I have not quite figured out what all is wrong yet, although it seems fuel related so I have some things I am going to try this weekend to see if I can get it worked out. The car is so close its on its own weight and ready to be driven!
-
 2
2
-
-
My 1983 GL Wagon Base model nothing fancy has a green clock. And orange dash lights but white gauges with no illumination.
-
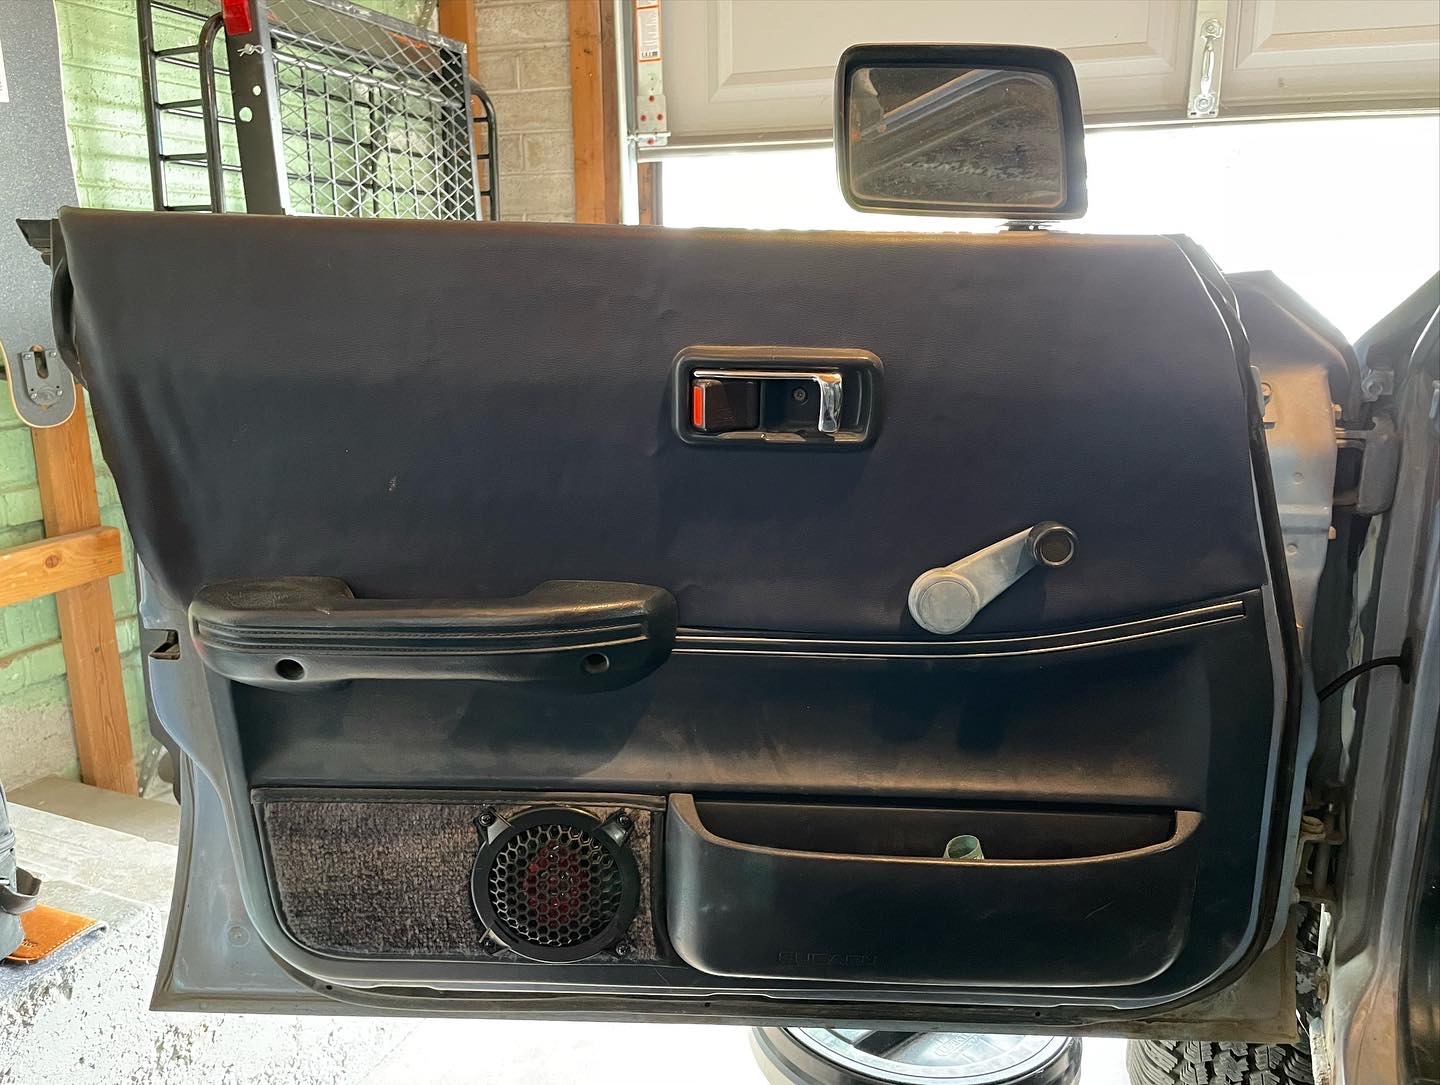
Speakers in front doors installed with grilles so they’re protected. I ran the wiring through the factory grommet, I just cut a small hole so that it protects against water still. I also ran the wiring through loom for longevity purposes.
-
1
-
-
Hello all!
I realize it has been a long time since I have updated anyone on here…. The car is still not done :/. I know I should have finished it by now but life got away from me, needless to say I am focusing on it hard now and want to have it at least firing by August 1st! I have the engine installed and wiring in, lately I have been finishing up other wiring on the car like a backup camera, the radio, the new coolant and oil pressure gauges, and everything I also have other things to button up wiring wise then clutch in, transmission in, driveline built, exhaust done, intake piping, and other misc engine bay things! I am trying to take my time and not cut any corners on this build but it will all be worth it in the end!-
1
-
-
Center console gauge cluster/stereo piece
.jpeg.3ca33fcff597807df6cb2fbe342b48ef.jpeg)
-
1
-
-
Interior in shambles
.jpeg.020a81fb50b824ef0d140a3722960b2a.jpeg)
-
-
https://www.facebook.com/83adventurewagon/photos/?ref=page_internal
I have a Facebook page that has an album as well and an instagram build page if you guys want to see more pictures! @83adventurewagon
-
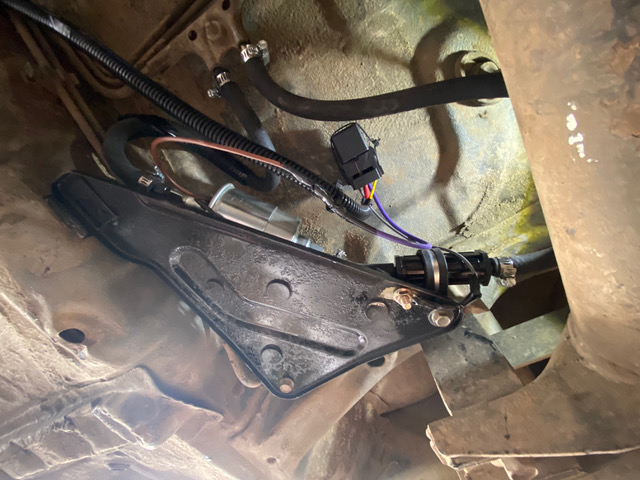
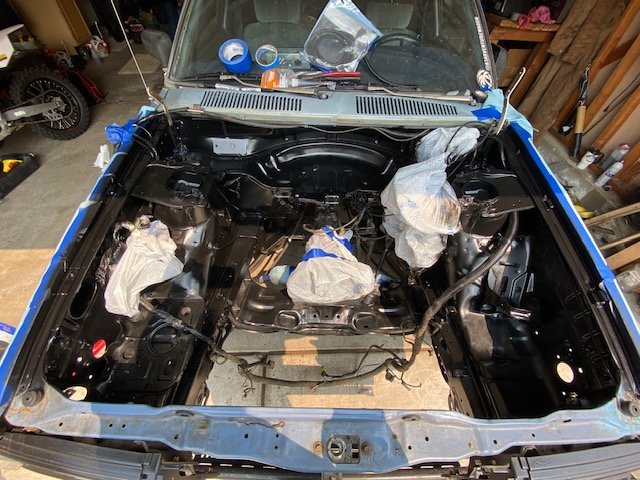
Here is the engine bay now, on the far right is the fuel filter, still don't have the flywheel but when I get it the transmission will be able to go in.
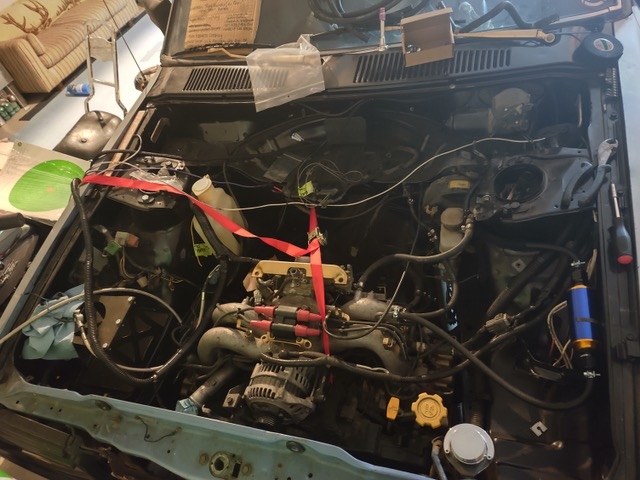
-
Here it is all installed
-
Using the stock fuel filter mounting plate after I cleaned it up and painted it here is me installing the new fuel pump, filter and fuel pump relay which I then loomed the wiring and tucked it and ran it up the transmission tunnel to the engine bay.
-
Good Morning Everyone!
Just wanted to post an update with y'all since I haven't posted in a while on here on where the car is at... I have started the EJ222 swap but I am doing a lot more than just that, I am also putting in a 5 speed dual range and upgrading and adding a bunch of other things too I won't be able to list every little thing because I honestly don't remember every little thing but as I go I will talk about quite a few of them.
First things first;
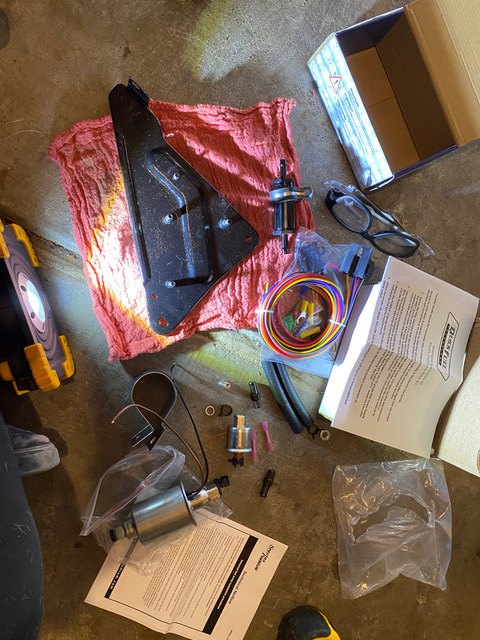
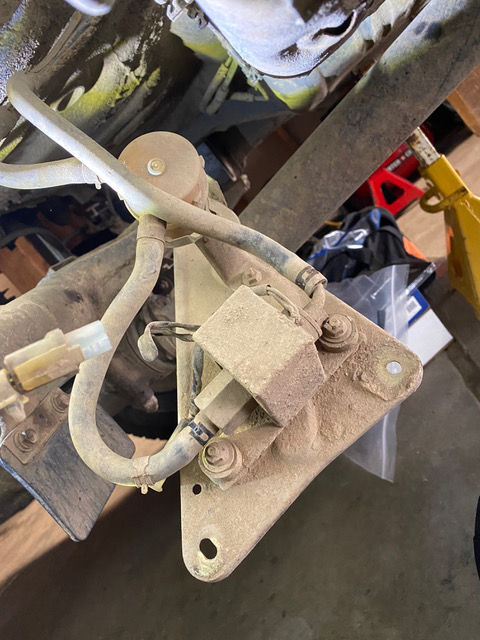
The next 3 pictures are of when I took the stock fuel pump, filter, and hoses out of the car and replaced them with a universal fuel pump, fuel filter and 5/16's fuel injection lines and clamps. I have also installed a cool fuel filter in the engine bay with the engine that you will see uploaded here as well.
I will also upload pictures of the dash and other random engine bay interior pictures of where I am at. Currently the entire dash is out of the car, I am redoing all of the foam under the dash for the HVAC system as well as the dash pad just for mounting it and noise reduction. I AM IN SEARCH OF A HVAC PIECE THE ONE THAT HAS THE BLOWER MOTOR IN IT MINE IS ALL CRACKED WHICH IS WHY I CANT CHANGE MY BLOWER MOTOR LOCATION.
Currently working on tying engine bay together and interior which consists of soldering wiring together, tucking, cleaning and figuring out where I am routing stuff(like my engine bay fuel filter that took me a while) and like next is where I am going to route my air filter. I am not going to put my dash back on though until I fire it and make sure wiring is proper and everything works. I am installing an aftermarket voltmeter, oil pressure and temp gauge, all other gauges are staying stock. Also will be installing aftermarket stereo, speakers, cigarette lighter, and switch port. I will upload a picture of my gauge cluster as well.
Exterior wise I will be doing different tires and a front bumper for sure since I have no front bumper of any type right now.
-
1
-
-
Hoping these are something that is still available...I will be wanting to do this to my car
-
1 hour ago, moosens said:
Do you have a good used pad you’re swapping in ? Just curious.
I am about to do the EJ and 5 speed swap and thought I had to take this dash off to cleanly do wiring. Also trying to get to the speaker on the driver side.
-
On 6/4/2014 at 6:10 AM, jono said:
I did a write up years ago, when you need it by ?
Few tricks. The grille removal to access the top three M6 bolts, I then drilled 1" homles for them, rubber bung plugged for next time
1/4" sockets are excellent, all sorts of the drivers to reach and undo with screen in.
The centre piece in Oz delivered has hot/cold and fan switches, plus selector, plus fresh or recylce air. It can remain in place just by juggling it in through its hole through dash and leave it hang thre. Quite a few wire ties along the inside for loom stuff.
Drop steering column and is easier without wheel, just beware any airbags
 actually I recall undoing splined knuckle under bonnet and pulling whole column out, no chest injuries then, more room!
Do you have this write up? Could you send it to me I’m taking mine apart now and I think I’m on the wrong track after reading this I have the glove box out and surround all around gauges and the vents out. 83 gl wagon
-
Did a YouTube might start regularly posting to it if it gets enough attention and people enjoy it!
-
1
-
-
On 3/24/2015 at 6:58 PM, skishop69 said:
Direct fit, no. Will it fit? Yes. You have to grind the bottom of the block side of the bell housing, use the flywheel and clutch from the 5spd, modify the cross member and build shift linkages. You'll also have to mod your wiring for the hi/lo 4wd lights on the dash. Search 5spd swap. There are some good write ups on it. Jerry sells a kit for it. Way easier if you don't have a welder, proper tools and fabbing skills.
Who is jerry and how do I contact him for this kit?
-
-
Well the time has finally come!!! I have commenced the EJ222 swap I have been wanting to do for years! This last I pulled the engine and detailed and painted the engine bay. Today(Monday) I have cleaned and starting putting things back into the engine bay as well as cleaning up old wiring and putting new tape loom zip ties etc on the harness. I’m hoping to get the EJ at least in sooner than later and then do every other little thing I want to do to it. I’ll upload some pictures of the progress and other things I’ve done.
-
1
-
-
I have a build thread on here if you're interested.
-
SJR is a lot better in my opinion, plus you're really supporting a guy that is a big part of this community and has helped make a lot of these mods possible. I have a 1983 that I put the 4 inch SJR lift on, I had to install longer brake lines up front, and extend the pitch stop and steering shaft. Did not have to do anything with the Speedo cable but no one else besides me it seems had to extend brake lines so it seems everyone's is a little different. It does not come with instructions though but if you spend a little time its fairly easy to find out what goes where. Good luck with the lift I love mine! Next up is the EJ swap.
-
1
-
-
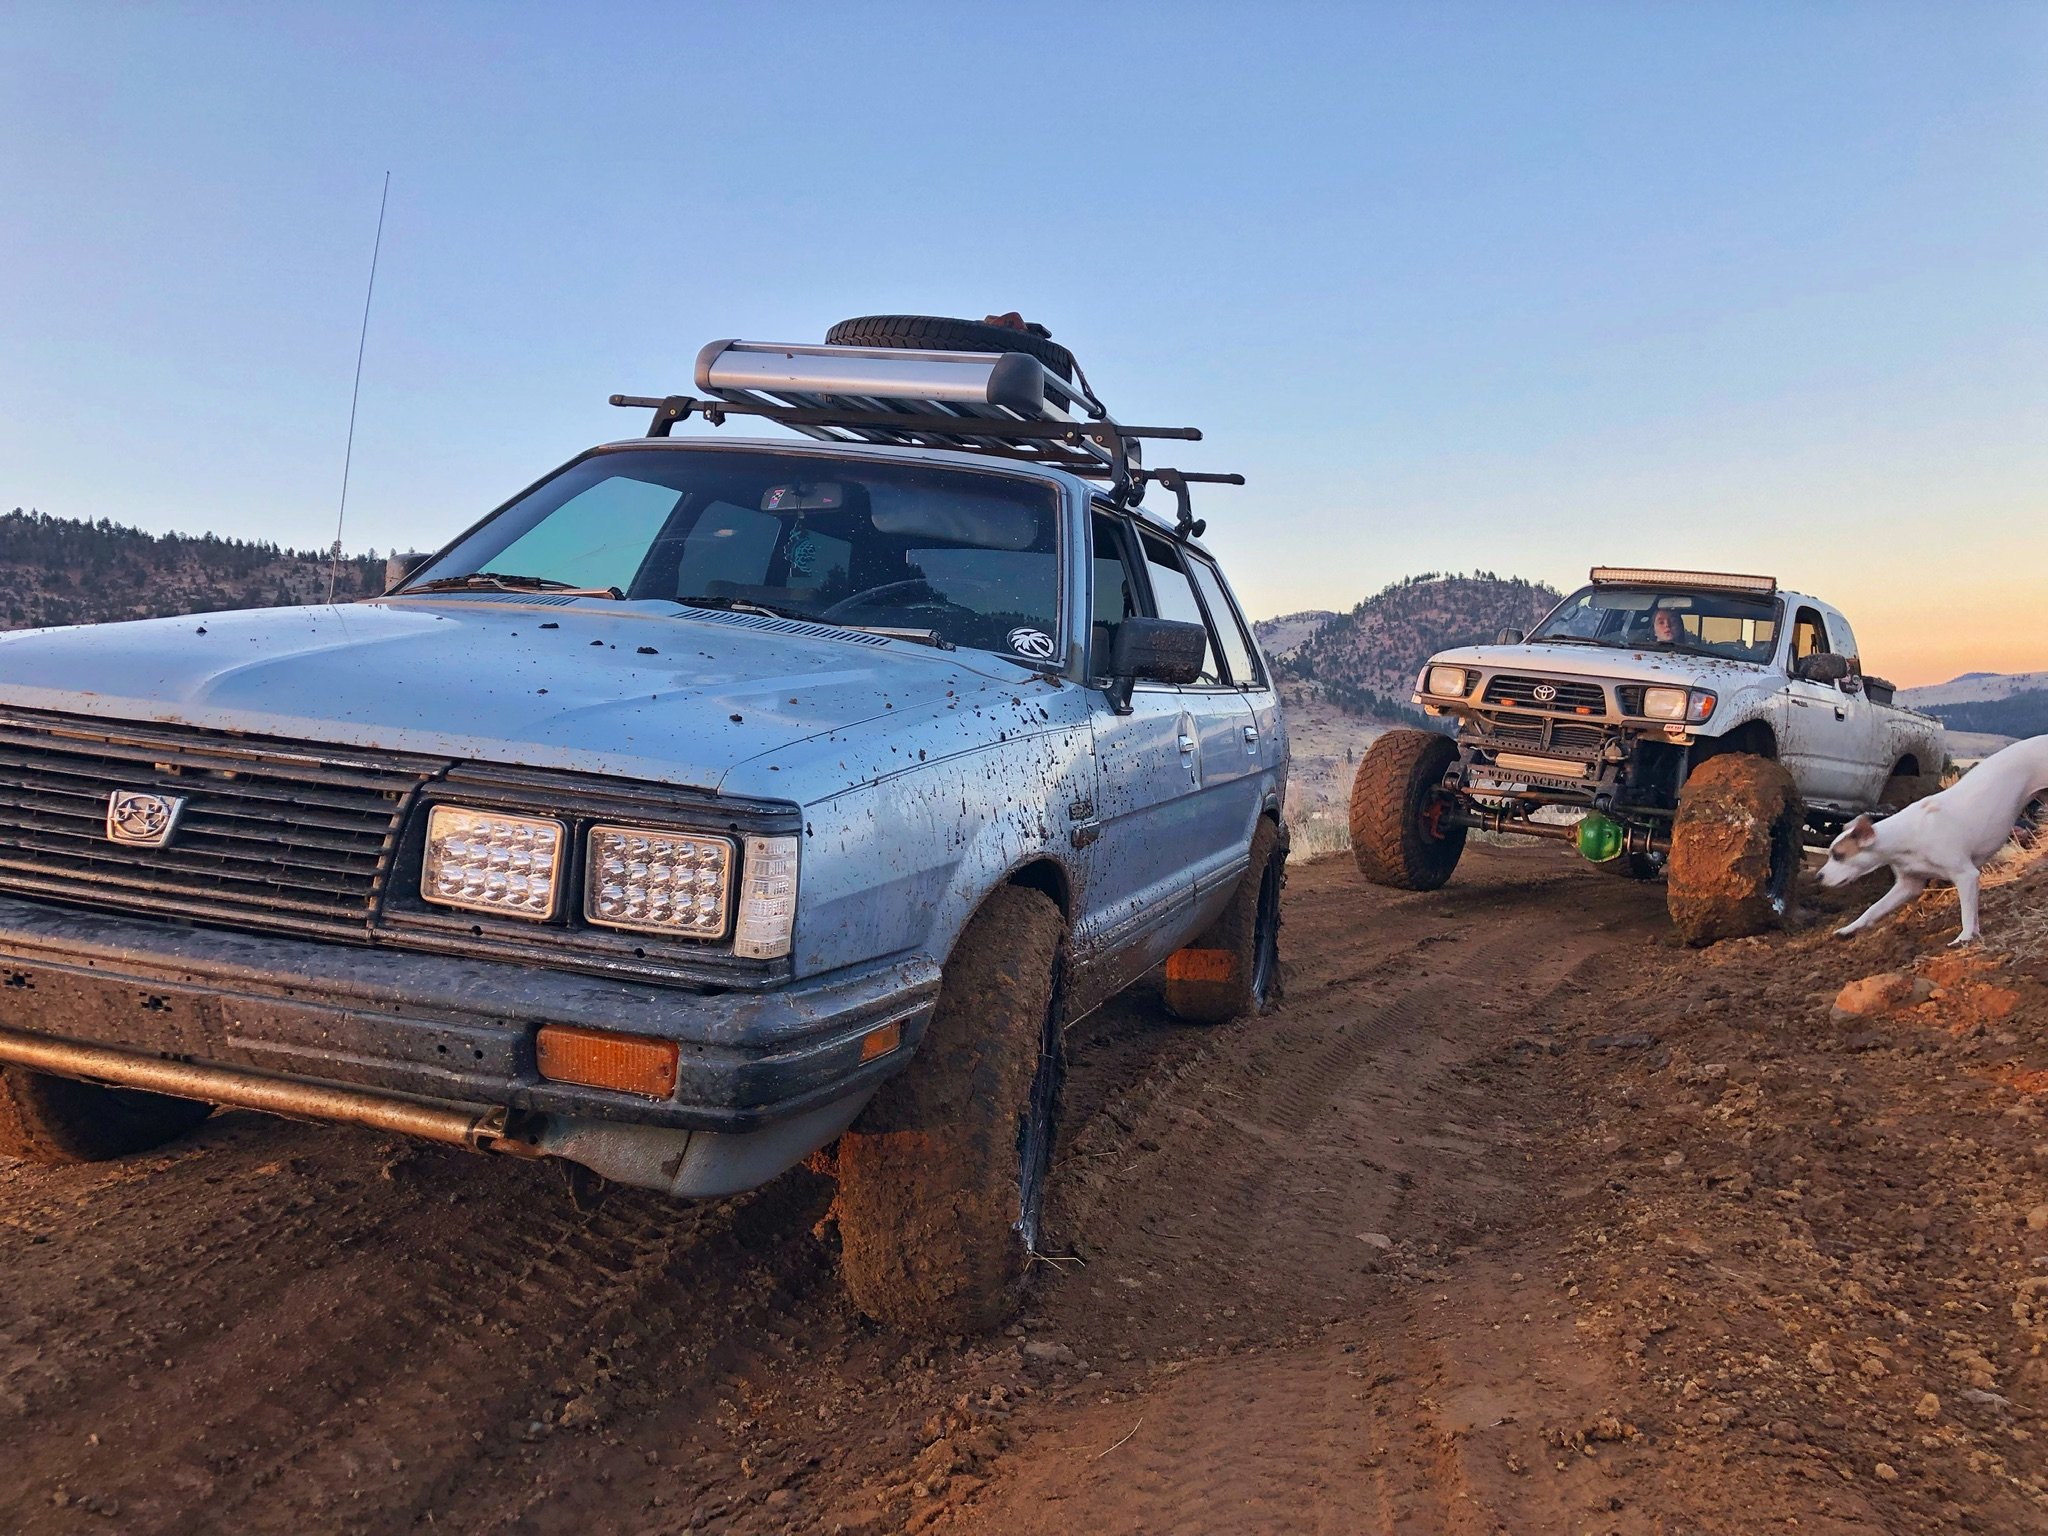
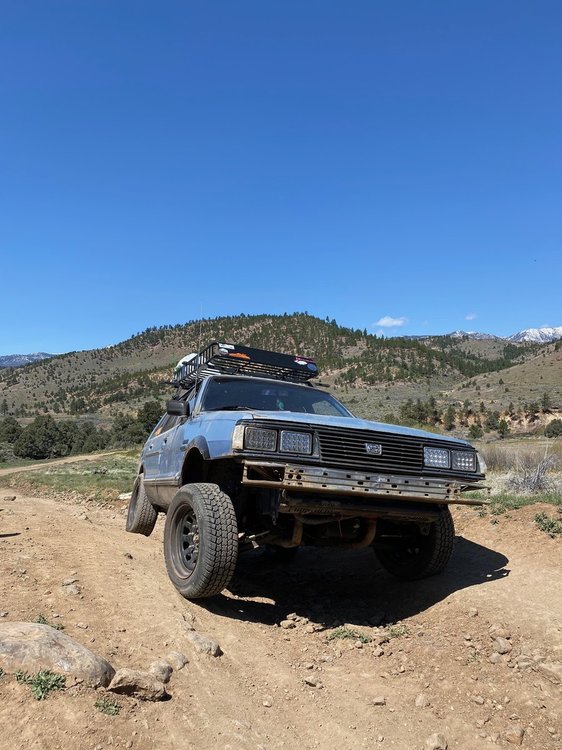
Last picture for today, took the thing on a trail run and she didn't skip a beat no overheating or axles breaking, worst thing that happened was I myself may have broke my exhaust getting too cocky.
Thanks for following all!
.jpeg.77642dffe1a36dc52468e7880e855d70.jpeg)

EA to EJ woes
in Old Gen.: 80's GL/DL/XT/Loyales...
Posted
At this point I’ve read 2 of them at least a dozen times collectively…. At a major stand still and can’t figure it out.