


Rampage
-
Posts
682 -
Joined
-
Last visited
-
Days Won
25
Content Type
Profiles
Forums
Gallery
Store
Posts posted by Rampage
-
-
Check or replace the battery in your multi meter. The battery is used for OHMS and to power the display.
-
4 hours ago, suprunner said:
Measuring the resistance at the coil, I get 0.0 -0.4 ohms between terminals 1/2, and 0.4-0.6 ohms between terminals 2 and 3.
With a fluctuation like that, I would blame the meter probes or cables or an electric motor or something running nearby producing a magnetic field that your meter wires are picking up like an antenna. Or, the windings in the coil could be picking up magnetic or RF signals. Been there a few times.
OHMS on a meter works with a small voltage applied to a circuit by the meter and the meter reads the resulting current flow and then displays it as OHMS. The best way to check any coil is with an Impedance meter, but a good one is not cheap. It uses AC and will show impedance and reactance of the coil. It will show if the coil has a shorted winding somewhere in it. An OHM meter will not show that, unless the short is real close to the two connectors.
Hold the two probe tips together and the meter should read 0 and not change. Wiggle the wires and see if it changes. Every so often I have to repair my probes because some of the strands of wire break. When they get too short I get a new set. You can also unplug the cables from the meter and jump the two sockets with a short wire and see if it stays on 0.
My multi-meter has probes with screw on alligator clips. They make better contact than using the probe tips. I use them a lot.
Hook one probe onto pin 2 and test 1 and 3. Then hook the other probe to pin 2 and test 1 and 3. Try to not move the meter wires while testing. You should get a reading that only changes by one digit if it changes at all.
-
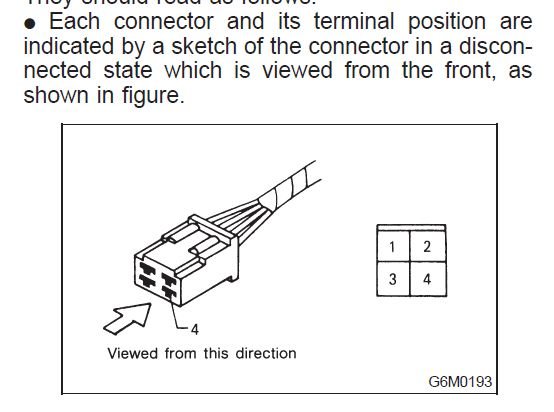
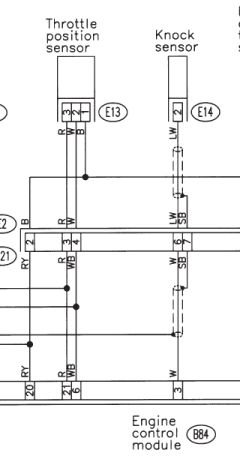
You need to count the pins from the other end of the connector. The picture of B84 is the Connector side Not the Wire side.
Pins 6, 20 and 21 are for the TPS. Pin 6 is the one you adjust the TPS to .5 (one half) volts. Key on, engine off, throttle closed. I use the center pin at the TPS connector.
My scanner live data shows 0 for the TPS at idle. Never checked it at full throttle.
-
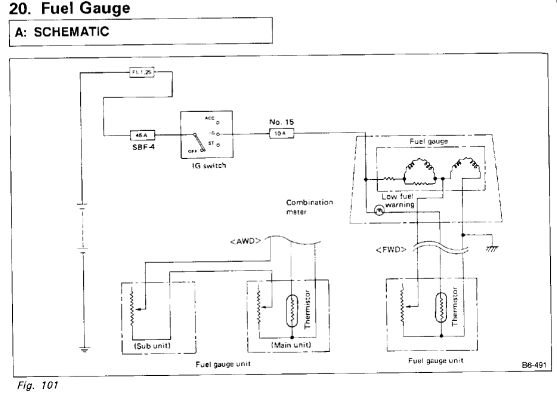
Yep, the two float assemblies are wired is series.
VERY IMPORTANT - The main float assy. unit (the one mounted with the fuel pump) MUST be the one for AWD for the fuel gauge to read correctly when wired with the sub unit. The FWD unit has a different resistance value.
Example: I'm going to use made up numbers here. Both AWD and FWD use the same fuel gauge. The fuel gauge is supplied voltage and the other side of it is looking for a ground through the variable resistor of the float assy. The gauge will show Full at 0 ohms and Empty at 100 ohms.
FWD one float assy. measures 0-100 ohms.
AWD with two float assy. each will measure 0-50 ohms and hooked in series will measure 0-100.
When you hook two resistors in series, the ohm value of each is added together for the total value of that circuit.
In case you don't know what series is, when you put batteries in a flashlight, you are hooking them up is series.
-
 1
1
-
-
Might as well throw this idea into the mix. If whatever fluid he put in, or the mix of two different types caused it to foam, it could push enough fluid out the vent on top and make the fluid low enough for the tranny to not work correctly. Also, the tranny will not work with foamy oil, it must be a liquid.
-
Sorry, we have a 95 and 97 Legacy wagons RHD (mail cars). Just a plain radio, nothing fancy. We use a cigarette lighter adapter to charge the phone and run GPS when needed.
Electronics does not like heat. It is hard on the solid state components. I worked with electronics for many years and for an intermittent problem I would use heat and freeze spray to locate the defective part. It's been probably 20 years since I worked on a car radio.
USB is 5 volts, so they will have voltage regulators to provide it. Most USB devices draw less than half an amp so maybe they designed the regulator to supply a half amp. You would think they would have a regulator for each port, but maybe not.
-
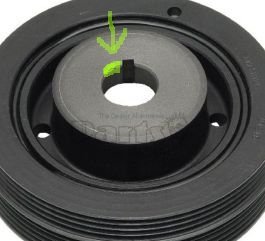
The rubber could be going bad and the center hole could be reamed out from the bolt being loose. Had it happen on our 95. I replaced ours with a new Dorman part from a local auto parts store and it works good.
Remove it and look at the center hole for ware from the Key like in the picture. The Key is hard and normally does not ware, but it will chew up the pully.
Maybe someone knows of a good one that is cheaper, but this is what I used. First Dorman in the list.
-
1
-
-
9 hours ago, SiriusBlack said:
So my question is, does anyone know if a different window motor will work for this door?
RockAuto has the Right side window motor, so I guess you need the Left side.
I looked at RockAuto ( "interior, window motor" ) and found that other models use a different part number for the motor. The XT 85-91 use the same Cardone 474108 (left front) part number. Look at the images and you will see the difference.
If your local junk yard uses Hollander reference books, they might be able to tell if another OEM used the same window motor.
Here is a LINK to Hollander Parts dot com. I used your zip code 68333 to search for the left front window motor.
Looks like there are none listed close to you, but a lot of them will ship. You will have to call each one to see if they still have the window motor, because some yards forget to remove the listing after they sell the part or scrap the car. I have run into that, but eventually find what I want.
-
Click the following link to download the FSM for your 2001 Forester in one zip file. Go down to 2001 and across to Forester and click on SF in that block. A new tab will open. Click the big green button (upper right) to start the download. Another window will open with an add, click the X to close it.
https://sl-i.net/FORUM/showthread.php?18087-Subaru-Factory-Service-Manuals-
Unzip the file to its own folder. There are 8 PDF files.
Open the Fuel and OBD II pdf file.
Page 7-10 shows piping and location for Emission components.
Page 182 shows testing for P0442 code.
In the Engine Section PDF file the first 18 pages has Emission component info. Scroll way down to section 2-8 (top of page) page 4 and subsequent pages for fuel tank, fuel and emission components and EVAP Lines.
When you find the pages you want, right click on a blank area of the page and print them (current page). It will save you a lot of time scrolling up and down and going between manuals.
-
1
-
-
Several reasons for odd behavior of head gasket leaks.
Expansion and contraction from heat and cooling changes the volume of the leak.
Carbon deposits can break loose inside the cylinder and plug the leak into the cooling system until the carbon is burned and then pushed through the leak.
Trapped air bubbles around the water pump vanes causing it to not move the coolant, and air around the thermostat causing it to not open.The coolant flow powered by the water pump, with a closed thermostat, is engine and heater core going past the thermostats coil end, with part of the coolant tapped off to go through the Throttle Body and Idle Air Control Valve. Air tends to collect there and in the heater core and when that system is full of air the pump does not have water to pump.
If and When the thermostat opens the radiator is added to the inlet of the water pump.On a side note: most people (even videos on YouTube) think the car thermostat spring is bimetal and moves when heated or cooled. Wrong. At the center of the thermostat coil is a sealed copper colored cylinder with a piston inside that is fastened to a rod that goes through the valve and connects to the peak of the thermostat. The cylinder is connected to the valve. The inside of the cylinder is filled with wax. When heated the wax liquefies and expands rapidly and pushes the cylinder away from the piston and rod and pulls the valve open. As it cools the wax shrinks and the spring pushes the valve closed. Originally, Bees Wax was used.
-
2
-
 1
1
-
-
Download the FSM with the following link. As you can see, it is for an 89, but I think they are the same or similar, at least for power distribution. Put the cursor on the link and click the right mouse button. Then left click on "Save Target As", or "Open In New Tab". That option depends on what web browser you are using. If you have to click on Open in new tab, once the PDF is loaded you can right click on a blank area on the page and go to "Save As or Save" and select a folder.
Once you have the pdf file saved, open it. Scroll all the way to the bottom for the wiring diagrams. There are 8 different diagrams for 8 different models. Find the one for your model (upper left corner of each page, also lower left) and look at the bottom right corner for Battery, Fusible Links, IGN switch and Fuses. Follow the wires to the ECU and other items that do not work.
Some of it is hard to read but you can zoom in.
-
6 hours ago, Cfoust said:
one snapped off and the other looks rusty at the top of the strut like it has been bent.
Had the same problem on our 95 Legacy wagon. The aftermarket "Strong Arm" lift supports are "too strong" for the design of the mount. When the hatch is closed the mounting brackets bend and eventually break. Sometimes they break the lower cup and jump off the ball mount. I have 4 broken ones. Actually, just one of them will hold the hatch open.
Check here https://www.subarupartsforyou.com/v-1996-subaru-legacy--outback--2-2l-h4-gas/body--liftgate. They show both in stock.
-
If you have a volt meter, check the battery voltage while it is sitting and then while running.
About four years ago on our 95 all the dash warning lights came on and off several times. Turned out to be a broken broken brush in the alternator. I fixed that and a few months later the battery stopped holding a charge so I put a new one in. Two weeks later the new battery developed a shorted cell and burned out the alternator, so I had to replace both. Of course, the battery warranty does not cover collateral damage.
-
The purpose of the Dowel Pins are to line up the head gasket and head when mating with the block so they are in the correct position. The pin should fit easily into the head, but tight into the block.
I have made similar ones from bolts or a steel bar ground down and then cut to length. Hardware stores usually carry metal dowel pins, but probably not the right diameter and a short pin is hard to grind down to a smaller diameter. You can hold onto a steel bar while grinding it down.
A machine shop can turn one out pretty quick.
-
1
-
-
7 hours ago, ThosL said:
How do you know if the hub is damaged?
The only place I've seen real damage on a hub is the surface that is pressed into the two inner races of the wheel bearing. When the wheel bearing goes bad the rollers tend to bite and cause the inner races to spin on the hub making two grooves in the hub. You won't see that unless you press it out.
If you find a used steering knuckle ( FSM calls it a Housing) ask them to leave the wheel bearing, hub and the ball joint in it because the bearing is what you need.
If you find one and replace it, Mark the top bolt (adjustment bolt) where it mounts to the strut. I use a hammer and a small chisel to make a mark on the flange of the bolt head and the strut underneath it. Or, use a center punch. When putting it together line up the marks. The lower bolt is a regular bolt. It may or may not need a wheel alignment afterwards.
If you can, get Subaru wheel bearing and seals and hub (I use the Dorman brand hub) to repair the old knuckle so it is ready when the used one fails.
I tried 2 different brands of aftermarket wheel bearings with new hubs on the right front of our 95 RHD Legacy Wagon and they lasted 3 to 14 days. I put in 3 of the one brand, then I got a knuckle from a yard and that lasted over a year.
The Subaru bearings (both sides) have been in for close to 10 years now. I needed them for our 97 RHD Legacy Wagon. The dealer did not have them on hand and said to go to napa. They have been in for 2 and a half years now and seem fine.
Both cars are rural mail cars. The 95 has 473 k miles on it and the left rear wheel bearing is still the original.
-
1
-
-
Last week I did the valve cover gaskets on our 95. I used pliers to wiggle them out and they were so hard they kept breaking.
-
Try a quart of Lucas Motor treatment. It may not stop the leak, but should slow it down. I use it in our EJ22s.
There are several snake oils that work, like the little red tube that stops cavitation in older GM torque converters.
And the Trans-X that I learned about here for our power steering leak. I was adding fluid every other day, now it is just a little once a week. It did not cure it, but it helped. Our RHDs are going to retire the end of August, so I hope it holds up till then. If not, I have the kit to rebuild the rack.
-
I use a thick 4" putty knife (with a flat edge) (not sharp like a knife) to scrape the surface and stay as flat as possible on the surface. The most important thing is a flat surface. If the surface is flat with a straight edge now, and you work at those "stains" you will end up making depressions in the surface. Previously, if there were depressions in the surface, the gasket or sealer filled them. So, if those "stains" are not protruding from the surface and it is flat, you're good to go.
-
1
-
-
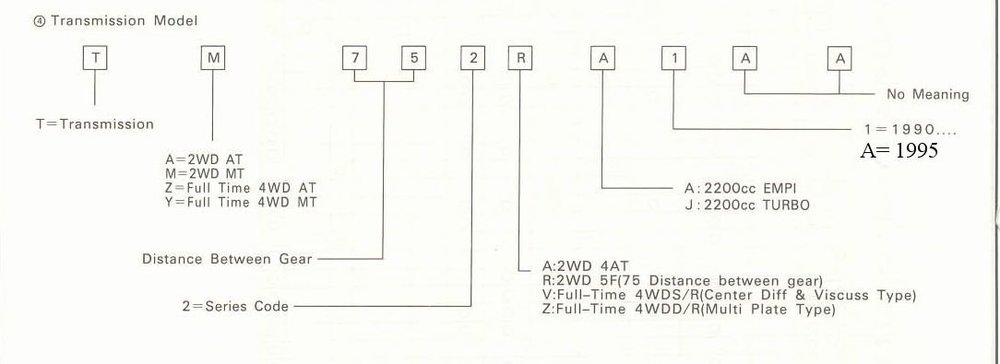
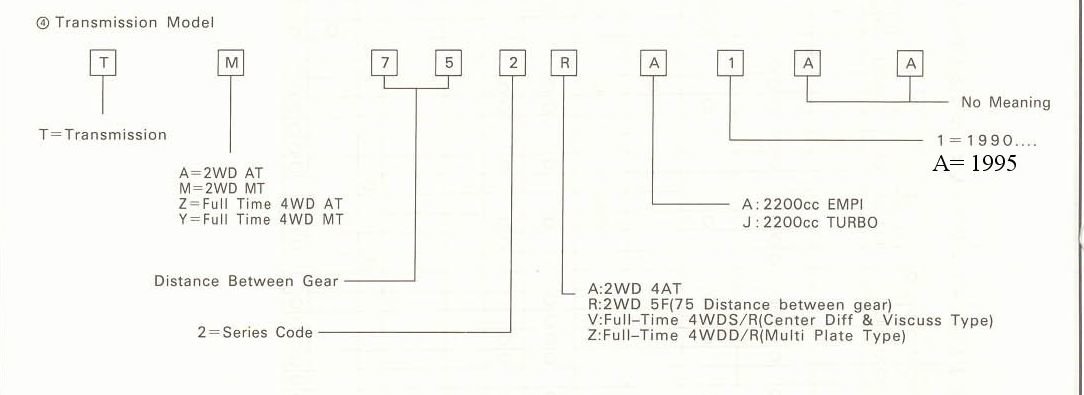
About those stickers on the tranny. The first 6 digits must match your original transmission. The 7th letter A means 2.2 non-turbo.
-
1
-
-
There have been cases with a bad seal and the diff oil leaked into the tranny.
There are some synthetic tranny fluids that I think have a terrible odor.
-
1
-
-
When I do a compression test, I use a push button switch wired from the battery to the starter solenoid. No need to pull the fuel pump fuse or disable the ignition coil because the key is not used.
Remove all spark plugs and block open the throttle. The engine cranks easier and faster and is easier on the battery. Also, (not in your case, but down the road) if there is a leak in the head gasket between two adjacent cylinders both of them will read low and leak down. Hook up a battery charger if the battery is questionable.
Normally I do 3 pumps per cylinder for a reading. Sometimes I do it again with only 1 pump per cylinder, just to nit pick.
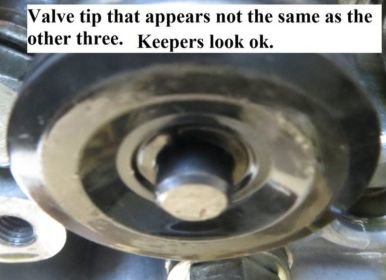
If you do pull the head and remove the valves, stand the valves up and compare length, groves for the keepers and the grind. Also compare the grind on the valve seats.
-
1
-
-
In this pic you posted, the keys (keepers) look recessed in the spring retainer. What do the other three look like? Flush or recessed.
If the hole in the retainer is enlarged only a tiny bit, the retainer will move up on the keys.
-
That clicking noise does not sound good. The part you are turning is the clutch and it mounts on a splined shaft to run the compressor. It sounds like the splines are worn or something is loose inside the compressor. The pulley runs on a bearing and should not wobble.
There is a coil mounted inside the pully that when voltage is applied will pull the clutch in and make contact with a flat surface on the front of the pulley. With the fuse being blown, that coil may be shorted.
If the system is low on Freon there is a pressure switch that will not allow voltage to get to the coil for the clutch.
I would replace the compressor and add a little of the proper PAG oil, pump the system to a vacuum and then charge the system with Freon. When you start adding Freon the pressure switch will activate and the clutch will pull in and run the compressor.
-
1
-
-
Well, you have done a super good job so far, because it runs.
I hope you find the missing link.
I've got a lot of work to do tomorrow, swap two front axels, charge the A/C in the van, put a window air conditioner in the house and finish up a laptop. Got to go.
Another TPS question and FSM
in 1990 to Present Legacy, Impreza, Outback, Forester, Baja, WRX&WrxSTI, SVX
Posted
It may not be out of spec. using OHMS.
Most everything expands with heat. Think about this a little bit. Copper wire of a certain gauge has an OHMS rating per foot. The longer the wire, the higher the OHMS reading. An ignition coil is made of a very long thin copper wire wound into a large number of coils for the primary that you are measuring. The secondary has way more turns. When heated the coils will expand basically creating a longer thinner length of wire which would read higher in OHMS. When it cools, it shrinks and the OHMS drops in value. One thing to consider is, the coils may have stretched and are not returning to their original size. "Maybe" when someone measured the first coil for the FSM, they were sitting in a clean, air-conditioned room and would get a low reading. The expansion and contraction will eventually break down the insulation ( it is like enamel or varnish ) on the copper wire and create a short between adjacent coils. That is what an OHM Meter will not show you because the difference in OHMS is very tiny. If that short occurs it will put extra load on the Ignitor that controls the coil and the coil will have less output voltage (less spark).
The only time I had to replace a coil on our 95 was when it developed a crack on the bottom and was arcing out to the metal core. That was a Diamond, so I got the same from a yard.
Did you pull any codes for the misfires or anything else?