NorseKode
-
Posts
38 -
Joined
-
Last visited
Content Type
Profiles
Forums
Gallery
Store
Everything posted by NorseKode
-
A bad ground that is common to both circuits, that's what. Sometimes I'm a little slow. Kalo
-
I have spark, fuel, and air. Still won't start
NorseKode replied to NorseKode's topic in Old Gen.: 80's GL/DL/XT/Loyales...
Yeah, I was wondering about the purpose of that sucker when i changed the coil. So... Coil is energized from positive side, through primary and out negative, which is connected to the collector (let's say) of the ignition amplifier. ECU sends firing signal through the base of same, which complets circuit from collector, through junction, through emitter to ground. Primary and secondary are hot, ECU discontinues signal, fields collapse. Yeah, worth a look. Think I'll get the original coil out of storage and pack it around for a while just to be safe. Kalo -
I have spark, fuel, and air. Still won't start
NorseKode replied to NorseKode's topic in Old Gen.: 80's GL/DL/XT/Loyales...
The way my luck runs, that was _not_ the root cause of the problem, just the neccesary fix to get running again. I mean, I suppose that coil could have been a turd right out of the box, but is that the smart bet? What causes coils to burn out? Besides poor factory QC/QA? Voltage spikes? Nah, that'd blow out the ECU first. Dying spark controllers? Any thoughts? Kalo -
I have spark, fuel, and air. Still won't start
NorseKode replied to NorseKode's topic in Old Gen.: 80's GL/DL/XT/Loyales...
That little afterthought about the coil was a nice addition. I just happened to have a new Accel coil in the back of the car (bought for a Chrysler that turned out to have a broken camshaft.... still trying to figure out how I did that) so I pulled out the _month_old_ Accel coil I was using in the Sube and measured from the output to the side terminal. Nothing... totally open circuit. Measure the new(er) one? 8.5k Ohm. Toss the new(er) coil into the gap and BAM! The little engine roars to life. Then it starts getting rid of the excess fuel I've been putting into the intake for the past three hours. I never would have suspected the coil because it's new. How stupid is that? Thanks again. When I start embracing the Honda dream you can be sure I am either depressed or low on blood sugar. Thanks to everyone that responded, and Calebz especially. Kalo -
91 loyale ea82 no turbo The problem started last week. A little sputter at idle, not a big deal, but I noticed. Then it would hesitate from a stop. Let the clutch out in first and second and the whole car would buck and stutter for the first few seconds, then smooth out above 2000 rpms. Then it stalled and was almost impossible to start. It _felt_ like a lack of fuel, or maybe air. Like it was starving. When it did catch (after stalling) I had to listen really closely to hear it running... not because it was going so well, but because it was missing whole series of cylinders at a time (or just running at 10 rpms). Had to coax it up into the hundreds. Throughout all this, two things were solid: Cold startup was a breeze. Just as normal as can be. AND, highway speeds were fine. since these two states are 95% of my driving, I just increased the idle cam screw to give a base throttle of 1600 or so. If I never dropped below this range, everything was fine. Last night, I changed the O2 sensor, turned the rpms down and jerked the throttle cable a few dozen times. There was a slight hesitation on a couple of pulls, but basically, everything was great. So I left the idle rpms down at about 750 and drove it. Worked great around town today. Maybe 30 miles total. Then it died. Motor cranked just fine. No catch. Not even a hint. Someone pushed me over the crest of a hill and I bumped it to life. For the next mile, it stumbled and bucked at 3000+. Then it smothed out. I parked it for an hour. Started it cold. It warmed up. It died. It's been hours. Still cranks just fine. I have spark. Plenty of fuel pressure to the throttle chamber. ECU gives a single 6 (which is normal for a California car), Open air delivery chamber. But no catch. None. Just about ready to join the Honda revolution.
-
I'm a couple of hundred miles short of retorquing the heads in an ea82 (1000 mile target) in which I'll almost certainly remove the cam cases. Yes, I did grind a socket that will allow me to torque the heads with the towers in place, but the lifter noise is really getting to me. I cleaned all four on the drivers' side, split the retaining ring on two of them (don't ask) and am now running two cleaned and two new on that side. Sounds just like a Volkswagen. Not exactly what I had in mind. Also, my oil pressure has been acting oddly. At cold start, it jumps above the '45' mark and stays there until the coolant guage comes up. Then it drops to almost an eighth inch under the '45'. At idle, it damn near bounces off the horizontal. Anyway, at minimum, I'll have to look at the O-ring passages, if only for piece of mind. My question (at long last) is this: has anyone tried _not_ removing sealant from the cam case grooves? I mean, can I re-use the existing cam case sealant just like a good valve cover gasket? It's just that working that stupid groove with wooden q-tips and toothpicks gets a little time-consuming. Anyone? Thanks Kalo
-
Properly installing timing belts on EA82?
NorseKode replied to viceversa's topic in Old Gen.: 80's GL/DL/XT/Loyales...
For those of us who happen to possess a perfectly ordinary belt tension guage but don't have access to your fancy schmancy spanner adapter for Subaru ea82 cam sprockets (part no 998374598734-a), if I have new belts AND a new head gasket, BELT TENSION should be in the 35-55 ft lb range. And if either of those things is other than new, BELT TENSION should be 24-46 ft lbs. So far, so good. But where should I measure the tension? Right next to the tensioner? On the other side? And for new belts, when should I measure? Should I turn the crank a few times first? This is more than idle curiosity. After doing the full head gasket ordeal, I find the parts folks at Kragen have given me one correctly sized belt (#2), and something entirely different. Sooo.... I need specs and procedure for a half-assed job. Help? Kalo -
The upshot is you don't _have_ to use either if you have gaskets. If and when you pull the cam cases, you _will_ need some, but that's a problem for another day. That said, to make assembly (and subsequent disassembly/inspection) easier on your patience, you should feel free to use a good, high temp RTV on the outside part in both cases. By this, I mean in the groove inside the valve covers (you'll see what I mean) will hold the gasket in place while you mount the cover to the cam case. Likewise, when you are rotating the oil pan to fit back under the block, it will be helpful to have a bead between the pan and the new gasket. If, at some later date, you decide to remove any of these pieces, you'll find the gasket and outside part come off and reinstall as a single, discrete part. Try the Permatex "Ultra-Black". No complaints here. HTH Kalo:D
-
Ground the coil? Why? I've always just let the coil wire hang. Without a completed circuit, the field should never collapse. Right? Kalo
-
I haven't actually _looked_ at my ASV stuff. From the descriptions in the other thread, I'd say taking the system completely off-line is your goal for the test. If that is what you've done, then great. Then try to duplicate the backfire conditions. If you can't make it backfire, leave the system off-line until you find your exhaust leak(s). HTH Kalo:slobber:
-
Just keeping you honest, Torxxx. Kalo
-
Try this : http://usmb.ultimatesubaru.org/forum/showthread.php?s=&threadid=6817&highlight=backfire+valve HTH Kalo
-
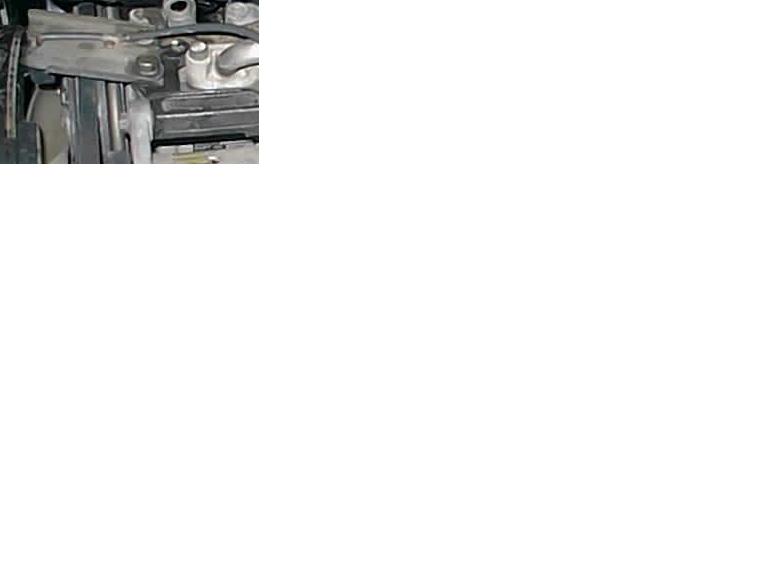
This is what the mounting looks like on mine.

-
This sounds like a short to ground. Odds are, it's either the switch, motor, or relay. If you have a loose wire with an in-line fuse, and another for ground, you can rule out the motor fairly quickly. Just run the ground side to a ground (block, battery, whatever) and the hot side (with an in-line fuse) to the positive post of the battery. If the fuse blows, the motor is gone. If the fan turns, remove and bypass the switch. If the fan still turns, replace the relay. It is highly unlikely the wiring is bad unless rodents have been making a home in your dash (it happens). It's also pretty unlikely a bad realy would blow a fuse. So, unless you know something about the problem you're not sharing, I'd suggest testing the motor and switch first. Kalo
-
I picked up a '91 Loyale 4WD wagon about a month ago for $1200. Very clean interior (except where the previous owner's dog had chewed on the seatbelts), a couple of minor dings, and a handful of odd mechanical quirks. It had 142k on it. I have fixed most of the mechanical stuff and put 3k on it in the past month. I have taken round trips over Donner summit twice. Basically, the engine feels a little underpowered on hills. I intend to make an intake (and possibly exhaust) change to see if I can squeeze some balls out of the top end. I have driven over several inches of slush and snow on I-80 and have yet to slip or skid. Underpowered or not, I feel entirely in control of my new ride at all times. If it were me, I'd buy the car. I'd certainly buy this one again. Kalo
-
Can't bust crank pulley bolt (just a whine)
NorseKode replied to NorseKode's topic in Old Gen.: 80's GL/DL/XT/Loyales...
About 135 psi, a 12" extension, and a wobble socket. Still, though... I'd expect at least a couple of hundred ft lbs with this setup before full twist and bounce resets the hammers. I hadn't really thought about the torque limiting factors of the add-ons before you mentioned it, though. Thanks for Kalo -
Can't bust crank pulley bolt (just a whine)
NorseKode replied to NorseKode's topic in Old Gen.: 80's GL/DL/XT/Loyales...
You rewired the firing order, didn't you? -
Can't bust crank pulley bolt (just a whine)
NorseKode replied to NorseKode's topic in Old Gen.: 80's GL/DL/XT/Loyales...
And how, exactly, did you get the engine to turn the other way? It seems (if possible) likely this is how this sucker was put on. Given the 500 ft lbs that 3/4" gun delivers, and the torque spec of 79 ft lbs AllData recommends, I'd say the last wrench on this thing was a little extreme. Kalo:-) -
Can't bust crank pulley bolt (just a whine)
NorseKode replied to NorseKode's topic in Old Gen.: 80's GL/DL/XT/Loyales...
I will save that for a day when I have two vehicles. For today, I'm just going to swap out the passenger side stuff and various o-rings. Yeah, I guess the starter ought to do the job, but what if the last ******** to wrench on this vehicle crosthreaded or otherwise welded the crank bolt in place? Then the starter breaks the bolt head off, and the scope of the project changes drastically. You'd have to pull the block (at minimum) to drill that turkey out. No thanks. This thing is back to 500 miles a week on Monday. I actually started out wanting to fix just the oil leak in pass. side head gasket, but kit came with both sides and project just sort of gathered steam from there. So I'm just going to downshift to the original parameters for success and wait till I pick up another car (or encounter catastrophic failure on this one) before using the ol' bump wrench. Cheers. Kalo -
Let's see..... '91 ea82 loyale 5spd 4wd The idea was, I'd replace my leaky head gaskets today. While I was at it, t-belts and all upper engine gaskets and seals. But I can't get the damned bolt off the crank pulley. Not for love or money. I put it in 5th and used a brake pedal depressor, then got a 1/2" breaker bar and two foot cheater pipe. The engine turned at the same rate as the bolt head. Not a big help. Hosed the area with wd-40. Dropped the A/C condenser four or five inches, removed the hood latch and the vertical support bar for same, reached through the grill with a wobble socket, 24" extension, and 1/2" impact wrench. Nothing. All sound and fury, no progress. Ooookay, more WD, and switch to the 3/4" impact wrench. No idea how much torque this thing kicks out, but it certainly dances in my hands. Which is quite a bit more action than the bolt head exhibited. Bupkis, negative nada. Got a little ticked off and started going backwards and forwards with 3/4", looking to break the 'sieze'. My brain kicked in after three or four switches. If I break that bolt head, I will be truly frigged. So. Can't pull the middle timing cover (belt are in good shape, which is a good thing, since I can't change them), but I can pull the valve covers, cam cases, and heads..... so the project goes on. That crank bolt thing bothers me, though. Oh well, End of whine. :boohoo: Thanks for stopping by. Kalo
-
ea82 '91 loyale 4wd 5spd TBI I've looked for vacuum leaks everywhere and replaced all vacuum hose. No change. Cleaned up the IAC with BrakeKlean. No change. Checked the IAC assembly with 12V and some jumper wires. Seems to work just fine. Freakin' idle is still 1300 when warm. Temp guage never climbs aboce the "C". Also, at idle, the throttle cable is very slack. At least an inch of pedal travel before throttle is pulled back. Is this normal? Kalo
-
1300 RPM at idle, IAC screw at end of adjustment
NorseKode replied to NorseKode's topic in Old Gen.: 80's GL/DL/XT/Loyales...
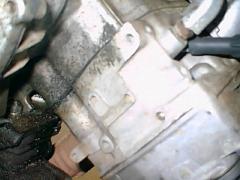
Uhhh.... it occurs to me somewhat belatedly that the EGR valve is located directly above my head gasket leak (see attachment). So the 'smoke' I pressurized my vacuum system with for to find the leaks may just have been rising from the head to the EGR. Now that my valve mating surfaces and gasket are cleaned of carbon, maybe I should concentrate on the _real_ vacuum leak, no? :brolleye: Kalo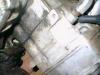
-
Diodes, and the many uses.
NorseKode replied to Adam N.D.J.'s topic in Old Gen.: 80's GL/DL/XT/Loyales...
You can get much cheaper bright LEDs on ebay: http://search.ebay.com/search/search.dll?cgiurl=http%3A%2F%2Fcgi.ebay.com%2Fws%2F&krd=1&from=R8&MfcISAPICommand=GetResult&ht=1&SortProperty=MetaEndSort&query=led+bright+mcd Just add a resistor in series with each to limit current. Figure a max voltage drop across the LED at 3.6V with a max operating vehicle voltage of 15V gives 11.4V across the limiting resistor. So, for lights that operate when the engine is running, shoot for 20 - 50 mA across some resistance. Ohm's law states that resistance is equal to voltage over current, so 11.4V/50mA, 20mA = a resistance between 228 and 570 ohms. A 470 ohm resistor dropping 11.4V at 50mA would dissipate a little over half a watt of power, so. . . . a 1 Watt, 470 ohm resistor in series with your LED should work pretty well for warning and idiot lights. Since you want to have nominal brightness in the rear compartment when the engine is off, figure that at 12.8V - 3.6V = 9.2V. 9.2V / ~40mA =~ 230 ohms. Call it 220. This gives about three eighths of a watt dissipation. Just use a 1 watt resistor for simplicity and piece of mind. Of course, if you are willing to add a zener diode into these arrangments, the input voltage will be more stable, and your calculations more precise. Actually, now I think on it, putting three 3.6V leds in series with a 1/4 or 1/8 wat resistor makes a lot more sense. Ummm.... 3.6 times 3 is 10.8, which leaves 1.2V across some resistance to get ~40 mA. 1.2/.04= 30 ohms. Err... try it the other way for common resistor values..... 1.2V/22ohm = 55mA (pretty much the max current for a long useful life in these things.) 1.2V/47ohm = 25mA. This would yield a useful life of something like 10,000 hours of illumination from these leds. Anyway, if you find this less than clear (and who could blame you) feel free to pm me, and I'll try a more structured explanation. HTH. Kalo -
1300 RPM at idle, IAC screw at end of adjustment
NorseKode replied to NorseKode's topic in Old Gen.: 80's GL/DL/XT/Loyales...
Ok. So I walked out and looked down in the injector assembly just after posting that last. Obviously (now) since the injector is completely isolated (at rest) from the intake by that butterfly plate, airborne fuel is not necessarily cause for concern. Hmmmm.... in the process of pushing my luck, I chose to remove the injector cap. Naturally, the gasket cracked and broke. Luckily, I have yards of gasket material and a great shop. Here's the thing, though: there was a live ant right at the injector mount. I have noticed ants in the engine compartment a number of times in the past week. I thought they were from my apartment complex, but now I am starting to wonder. Is it possible something in there is food for an ant? Anyhoo, the leak is running through the injector gasket bushing. That is, two wires go into a rubber thing which mounts in a pocket under the cap gasket. On the other end of this bushing, the same two wires continue on to their destination. Fuel is running down the two wires, through the bushing, and out of the housing (still down the two wires) and allowing air to flow the other way. I'm going to try a dab of RTV to seal the outside, I guess. Thanks agian for all the help. Kalo -
1300 RPM at idle, IAC screw at end of adjustment
NorseKode replied to NorseKode's topic in Old Gen.: 80's GL/DL/XT/Loyales...
OK. I have leaks at the EGR valve and the injector cap. I took the EGR off, cleaned the valve body and seat as well as the mating surface, gasket, and intake surface. Damned thing still leaks at the valve seat. As for the injector cap, there's a lead (injector?) running out the radiator side, just under the gasket. I can see (now that I'm looking) this lead has been acting as a fuel 'channel' for some time, giving airborne fuel an escape path. I don't know a lot about injectors or carbeurators, but shouldn't all the fuel be trapped on the other side of the injector o-ring? There was a fairly thick film of fuel "varnish" built up on the injector cap yesterday. I cleaned it off with carb cleaner, q-tips, and a blue towel. Is this varnish indicative of a failing injector or it's o-ring. Thanks so much for your help so far. This board is a phenomenal resource. Kalo :santa: