DeltaWye
Members
-
Joined
-
Last visited
Everything posted by DeltaWye
-
Be really, really careful tightening those valve cover bolts back up. http://www.ultimatesubaru.org/forum/topic/160895-managed-to-bust-out-part-of-the-casting-on-the-cam-tower-not-sure-whether-to-replace-or-repair/
-
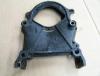
I had to do a search for that as well. It seems to be the brace that runs from the bellhousing to the cowl area to limit how far the engine moves/stresses the mounts. I was wondering what that thing in my way was when I was locking up the flywheel while undoing the crankshaft bolt.
-
Yeah, the kit I got came with the light too, I forgot.
-
Well I may have been wrong about the solenoid being the cause of the hesitation, it was quite a while ago and I wasn't the one working on the car at the time.
-
No kidding. Well that would be handy to have, maybe I'll give it another shot.
-
Ah, that rings a bell. We had this code come up about 10 years ago and I remember now that it was hesitating pretty badly when you'd hit the throttle. Went on for a long time before the code came up. Don't know what the repair involved as I didn't work on cars at the time. It did fix the problem though and has never done it since.
-
Also, if the problem only started right after the work they did, wouldn't it be reasonable to ask them to give it a once-over?
-
I think sometimes there's corrosion between the cap and rotor, you could try a scotchbrite pad and some contact cleaner and see if it helps things. Just make sure you don't mix up which wire goes where. If it helps, a new cap and rotor are pretty cheap, I got the Beck/Arnley ones and they were made in Japan. I think the NGK (9350) FE27 wires are the correct ones for these cars.
-
I tried the dye trick last summer but couldn't see anything, of course I didn't have the special glasses at the time. I bought a set at NAPA when my primary car's A/C went out this summer, but of course I didn't need them since I could hear hissing at the condenser where a rock had hit it. The Subaru will have to wait until next year as there are things that need fixing right away for the winter (rear window defroster has only 2 wires that work) and the front right wheel bearings are shot. Apparently they can go bad while the car is just sitting there for 4 months. Waiting on parts from Subaru now because NAPA couldn't get the inner seals. I don't think these cars run the A/C in the winter for defrost like the new cars do so there's not much motivation to get it going right now. I know it's bad for the system to not use it from time-to-time but I just have too much to do and screwing up that cam tower really set me back.
-
Thanks, I guess that makes sense. I thought maybe it was specifically for the Canadian market but maybe all cars headed to the North part of the continent had it done at the dealer and cars headed to the South had it done at the factory? I'm in my 30s and I remember back in 1994 A/C was still a luxury, at least on economy cars. The original A/C still runs on this car when I charge it with an aftermarket refrigerant but it leaks out in hours. It's on the list...
-
-
I couldn't agree more. I have only had one work once, every other time it failed. Usually they just wind up spinning freely in the hole you drilled but sometimes they snap. As you said, if you break it off, the problem is now much, much worse. They should be banned and I'm not a fan of banning things. I broke one off in a metal shear once. Wasn't even seized, I just tightened it without backing off the lock nut first, just a duh moment. Because they are hardened it becomes almost impossible to drill it so it sat for over a year. I finally found something that worked - a diamond burr in a die grinder. A decent one was around $20. If you're in Toronto, go to Atlas Machinery. Mind you this was a 3/8" bolt so I had some leeway, but it did a surprisingly good job of getting my previous off-center hole back on center and hogging away the Ez-out and bolt. This was in thick steel though so even though the first few threads took a beating, there was still plenty of grab and it was just a set screw. Left threaded drill bits are worth trying, though they can also break off and make the problem worse if you're not careful. Much, much better than EZ-outs though since they aren't trying to wedge themselves in. Of course the Big-box stores around here don't carry them, they just carry the crappy EZ-outs. That's probably why I seldom go to Big Box stores anymore. I tried the welding trick once (on the shear) but it didn't work for me. Would probably work better for a steel bolt in aluminum. Then again, I can't weld for S___. Here's the video I watched that made me try it:
-
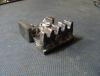
I can't really offer much help to source the part other than to try Subaru. Even if the original part is no longer available, they may have a superseded part that will work. Or put a request on the looking for parts forum. Since the only problem seems to be a mechanical one, I'm thinking but it may be worth trying to fix the relay, at least to get it going. You can't drive the car now anyway, right? I'd make a diagram of the terminals if they aren't numbered and label all the wires and remove it from the car and have a close look at it on the bench. Then I'd put a multimeter on it and figure out what each pin does before I started messing with it. Maybe someone has a wiring diagram for this car? That would help source a substitute relay/relays. If there's enough metal exposed you could try to solder a terminal or some wire to what's remaining. If you can overlap it enough to make a good electrical connection, you can put epoxy around the repair to secure it. You'd need to verify a good connection with the meter. Last ditch effort would be to open it up, it's probably sealed so you'd need a dremel tool, and try to repair it inside.
-
Just reading some of my earlier posts, I did use the air ratchet to run the pump before I put the timing belts on. Hopefully it got some oil into the new camshaft before start-up. I ended up putting everything back together before I started the engine - I figured it was either going to work or it wasn't. I didn't use any sealant on the valve cover gasket and there's no sign of any leaks either there or on the sealant-only joint between the cam tower and cylinder head. I used this stuff: https://www.amazon.ca/Permatex-51813-Anaerobic-Gasket-Maker/dp/B0002UEONM You don't get much for the money but someone here recommended 'anaerobic' gasket maker for this job. It was very hard to squeeze out until I cut the nozzle back further. I probably put it on a little too thick but I put it more towards the outside edge so it would squeeze out there. I put a thin bead between the O-ring and the main cavity, also recommended by someone here.
-
-
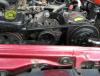
Whenever I see a picture or watch a video of a Loyale, the alternator is beside the battery and the AC compressor is in the middle, between the alternator and PS pump. However, on our car they are reversed: I ordered a belt for the AC from Rockauto last year and it was the wrong length and that's when I realized there are two different configurations, but nobody at the parts store seems to know this. I had to take the belt to the store last week to get the right one. What's the deal?
-
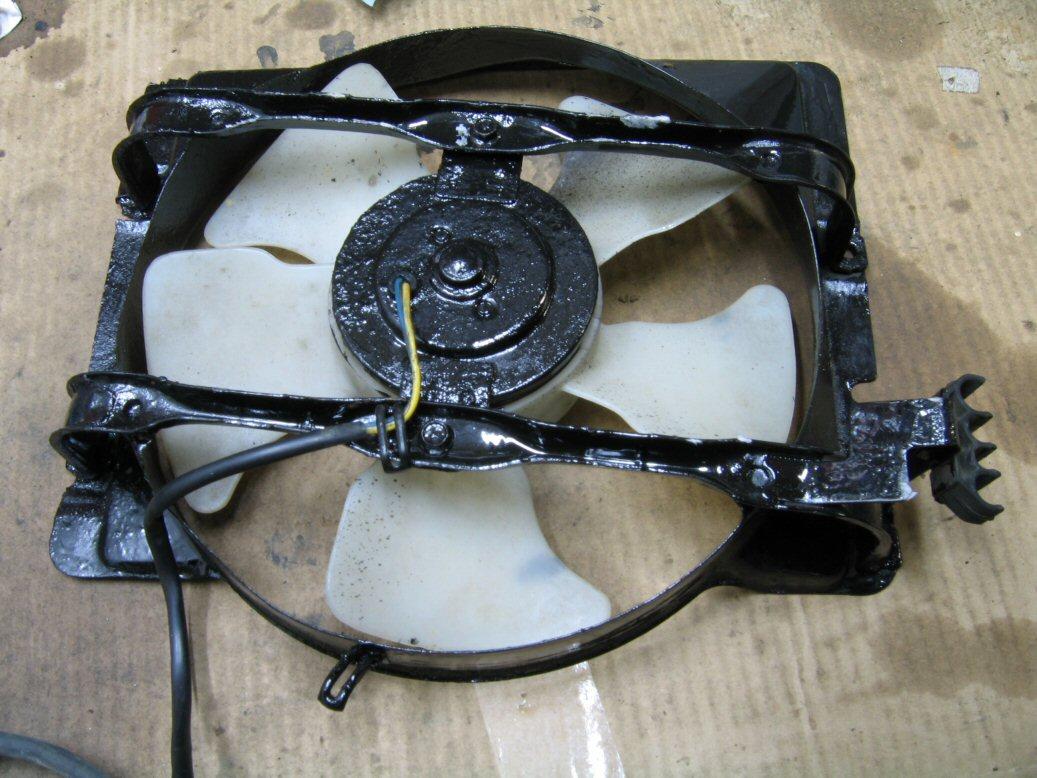
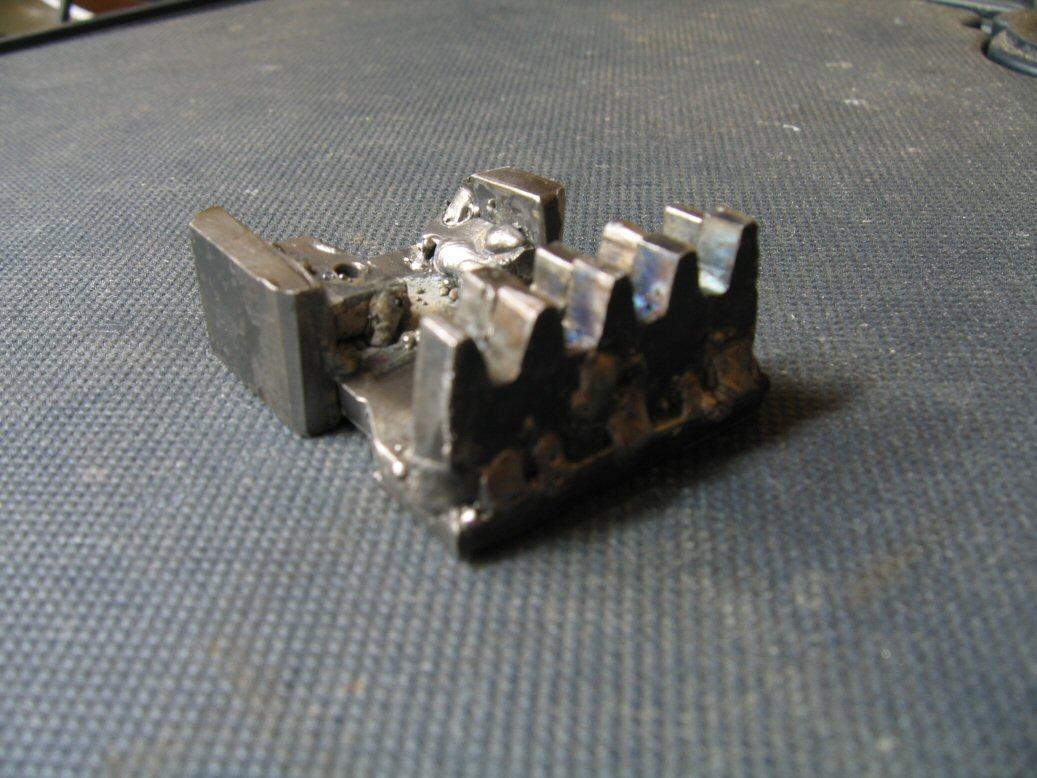
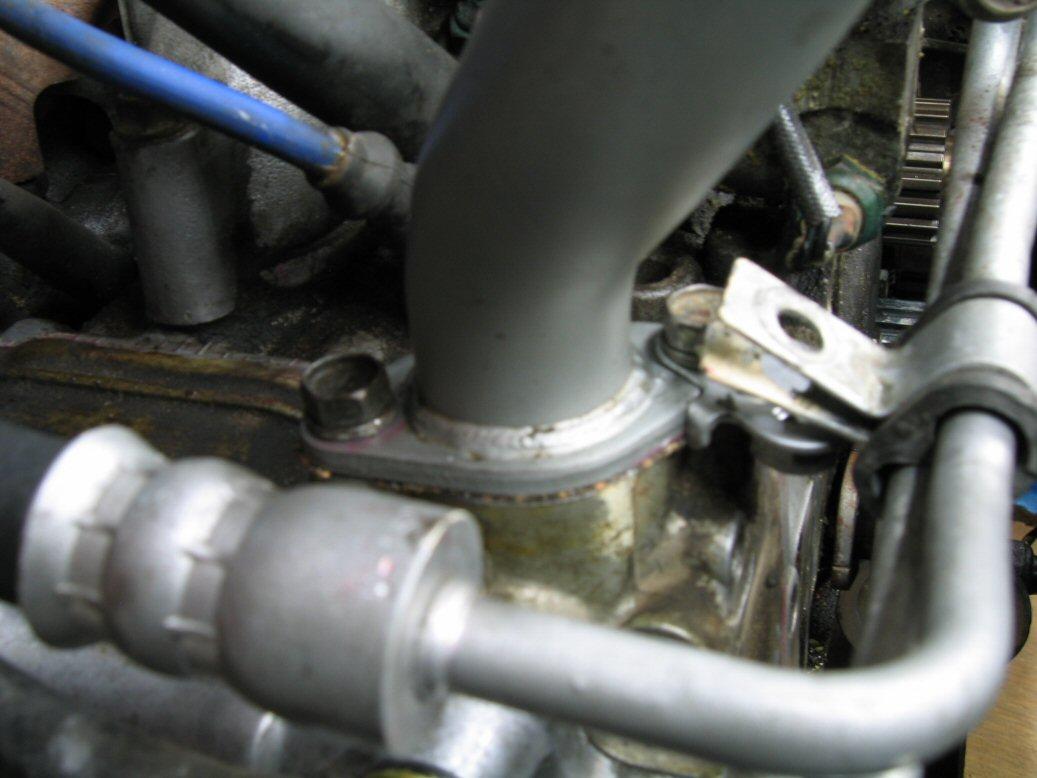
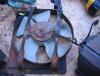
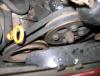
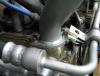
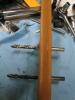
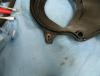
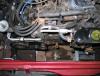
I also took the time to paint everything that I took off that was rusty. Some of the parts are so rotted that even with new paint they still look bad, but hopefully it will slow the rust down a bit. Also painted the radiator frame, battery hold down, charcoal canister holder and the water pump and crank pulleys. They obviously wind up with water and/or salt sitting in them and the crank pulley was really bad: Didn't get an after picture but just wire-wheeled it, sprayed some rust converter, masked off the bearing surfaces and sloshed some oil-based paint on it. Also put on a new belt for the A/C, although the system has a leak somewhere and I haven't had time to chase it yet. The two big problems I had were with the engine mounts and a coolant leak. When I lowered the engine down, the studs were not lined up with the holes in the crossmember. The engine was too far forwards. I wound up tilting the jack towards the back of the car and using a pry bar between the exhaust pipe flange and engine mount studs. I got the driver side one to line up first and just lowered the jack a tiny bit at a time and worked the other one with the pry bar until it lined up to. Wasted a fair bit of time until I came up with a plan. The other problem was that I stupidly connected the radiator hoses to the engine before I had lowered it. Wrestling with connecting the lower hose to the pipe with the 90 degree bend that connects to the water pump caused the pipe to leak where it goes into the pump. I wasted two hours fighting to remove the A/C compressor to get at the pipe mount to take it apart. The O-ring seemed okay and I realized that nothing was worn or broken, it was just the fact that I had put too much stress on it connecting the hose and the mount doesn't really hold the pipe very solidly. I would disconnect the lower hose at the radiator next time. I also broke a ring terminal off a wire and had to fix that too. I guess it's to be expected that when you do major work on a 22-year-old rust belt car, you're going to have a whole bunch more things to fix along the way. Almost forgot, I cobbled together a little tool out of some scraps to keep the flywheel from turning while I loosened and tightened the crank bolt. Can you tell I'm not a welder? Probably overkill, but I didn't want to risk breaking something off and having it fall inside the bell housing. Anyway, thanks to everyone who helped and I hope some of this info will be helpful to someone.

-
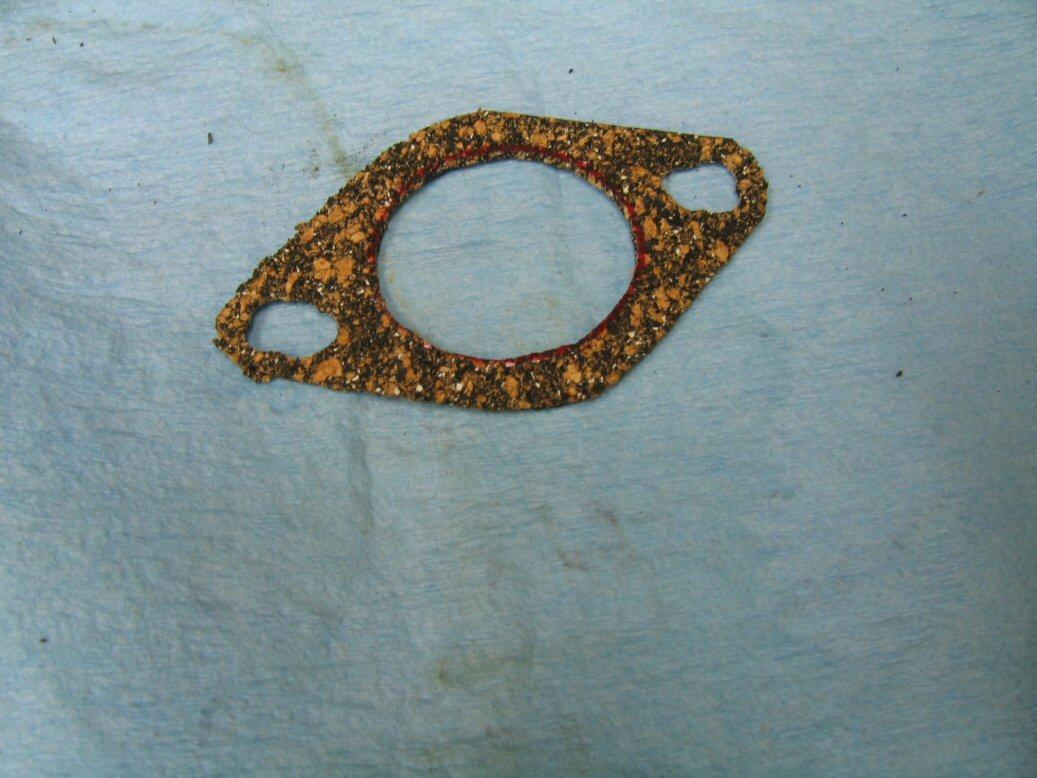
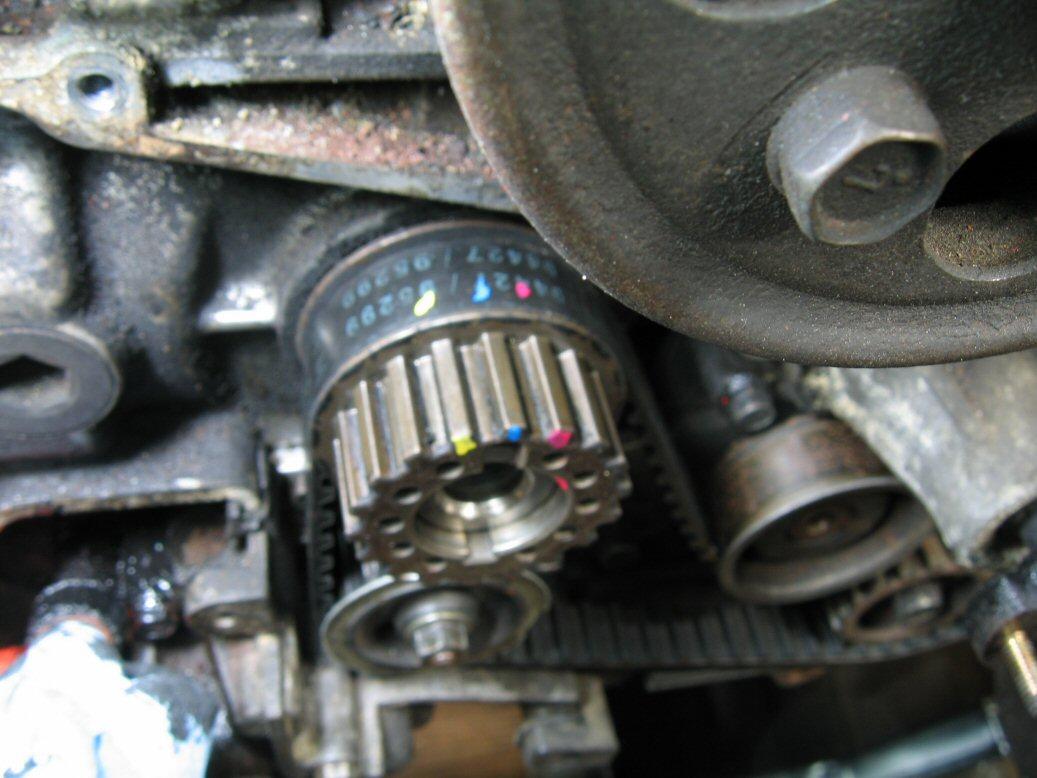
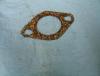
Another issue I had was with the oil filler neck. At the bottom where it bolts to the cam tower is a black plastic gasket and screen. Part of the screen was broken off but there was still 5 or 6 pieces of tin foil from oil bottles over the years. I made a new gasket out of cork for now I may order the part if it's cheap and available. Clever to put a screen there though it probably should have been made of metal. Do most engines have this? I also marked the front edge of the timing belts and a few teeth on the camshaft and crankshaft sprockets with a paint marker. It made it easy to make sure they didn't get flipped around and that they didn't jump a tooth while I was putting them back on (which happened a couple of times until I got the technique down). I didn't have the factory tool for putting tension on the belt, so I improvised with two 5/16" drill bits and a scrap piece of wood.
-
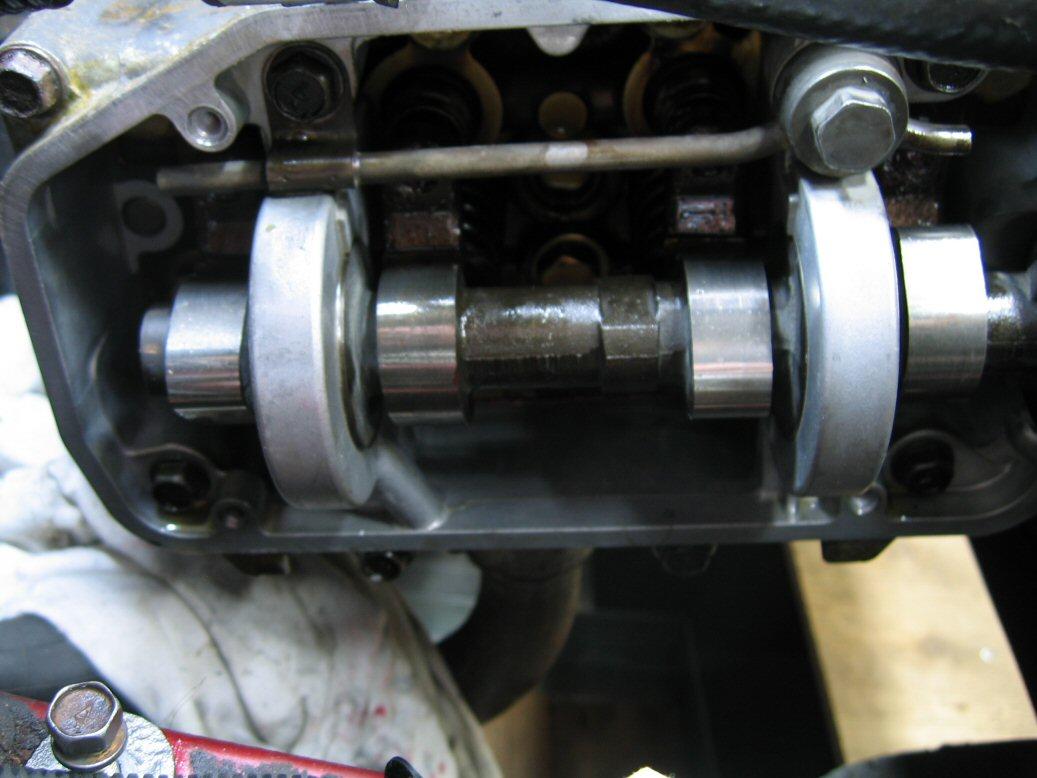
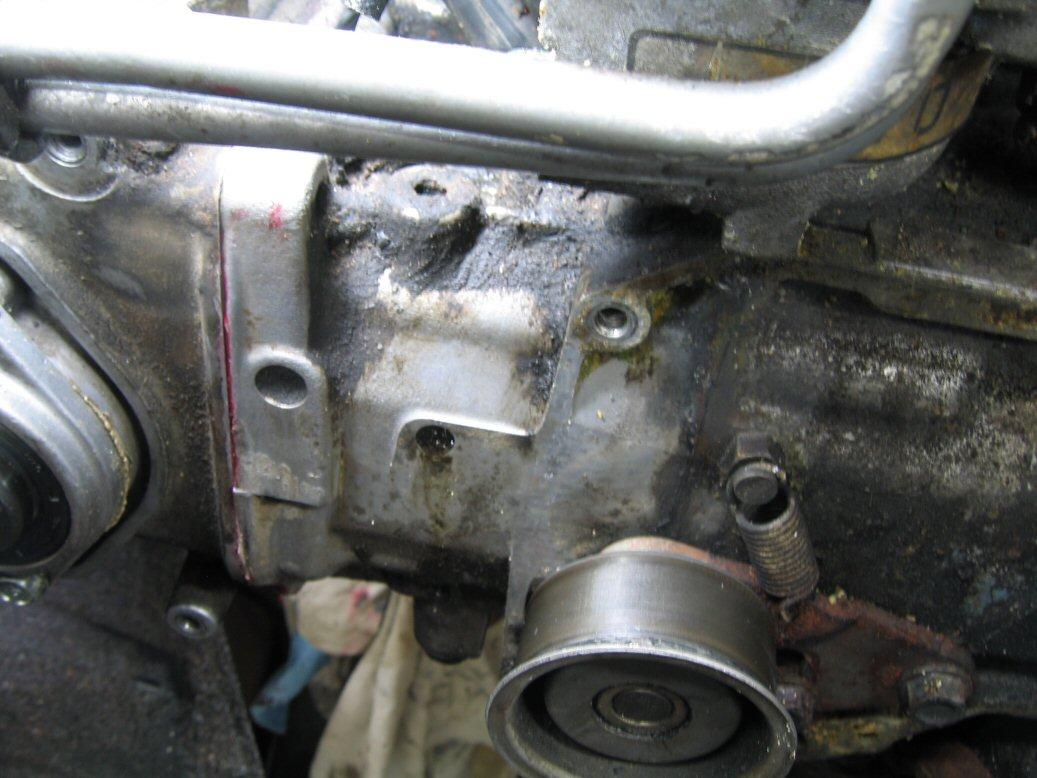
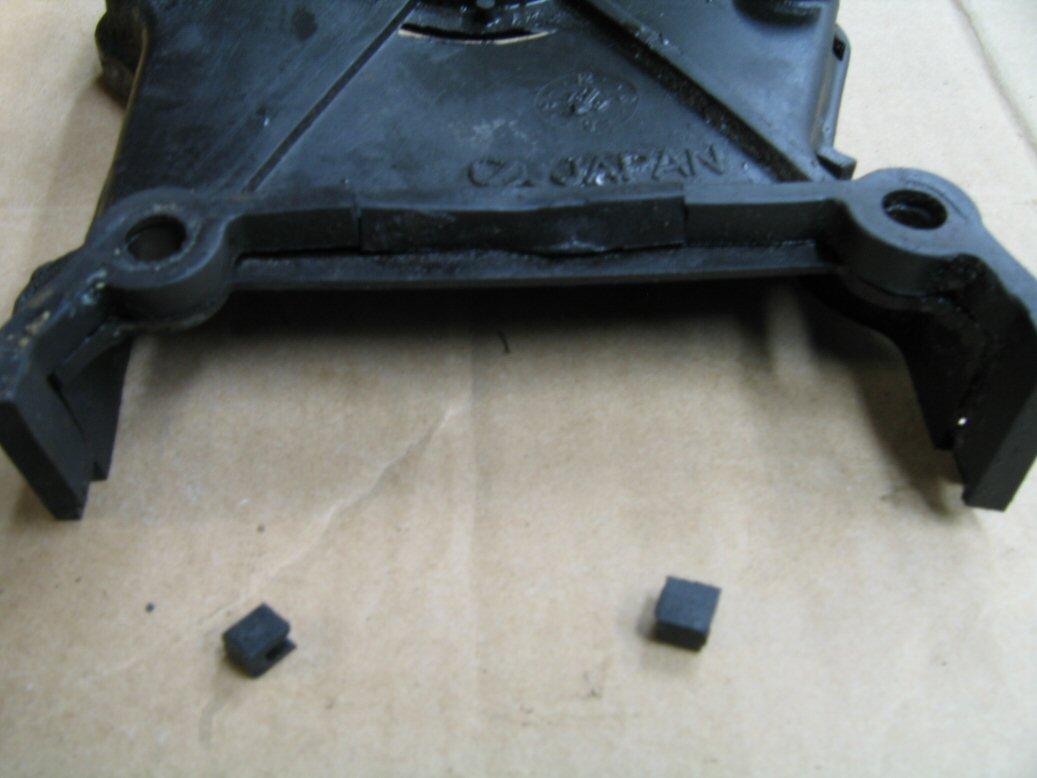
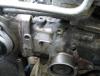
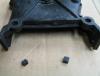
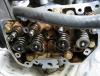
Here's the new cam tower installed I noticed a bunch of white foamy stuff on this part of the cylinder head, I forgot to take a picture before I wiped it off. I think it's from a coolant leak which I may have found the source of I put the valve cover on next. If you're doing this job, throw away the torque wrench for this part. I think the rubber affects the reading too much. I just tightened them up to a reasonable torque and figured if it leaked, I could snug it up a little or remove it and add sealant. I decided to put the inner timing belt cover on even though I planned to leave the outer covers off. It had a couple of problems. First, it had warped a bit and the camshaft sprocket had chewed a groove in it. I fixed that with a heat gun until the middle was bowed slightly in the other direction, which would flatten out once it was bolted to the engine. The other problem is that the rubber edging must have swelled, because it was about 3/4" too wide: So out came the snips. The whole mess was gummy enough that I didn't have to worry about them falling off. I also decided to epoxy the one insert that had broken out at some point. I'll probably never put the outer covers back on so it was kind of a waste of time but I wanted to fix it while I had the chance (though since it was on the bottom outer corner, I could have fixed it after it was installed, oh well).
-
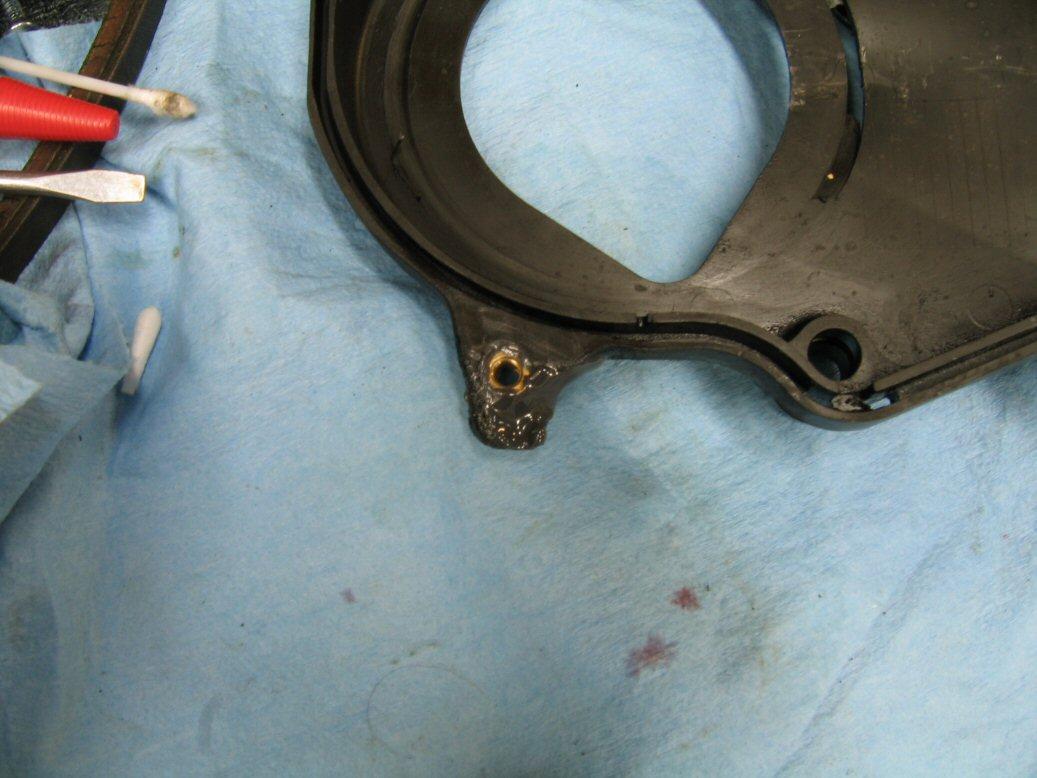
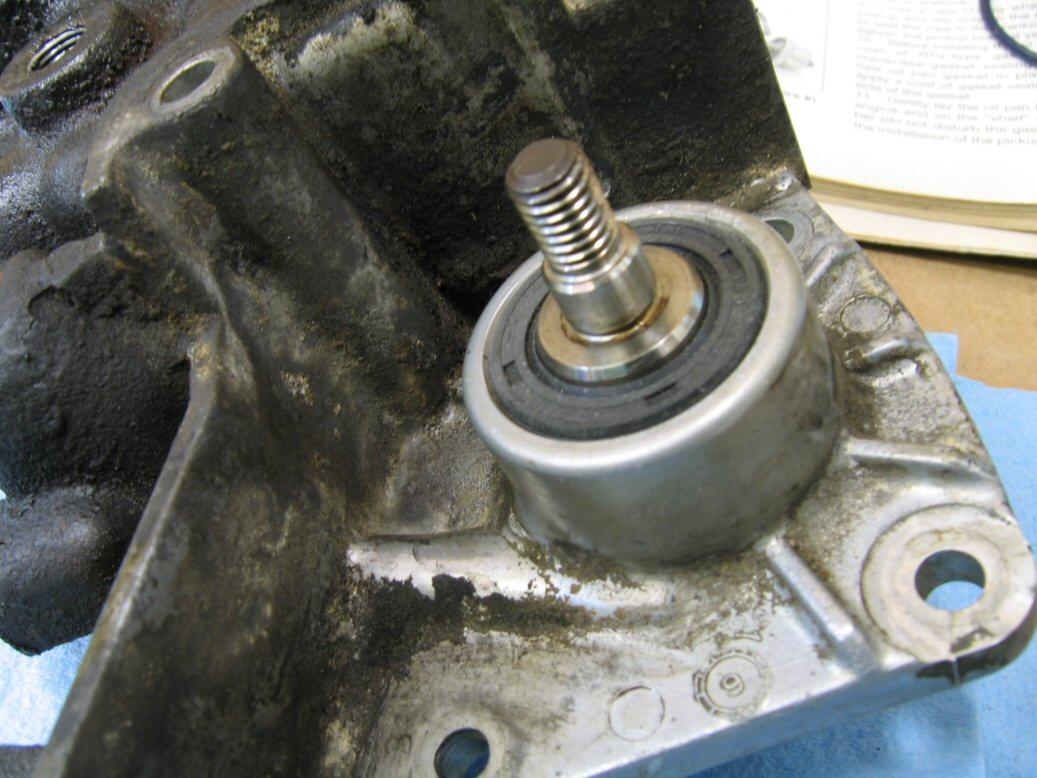
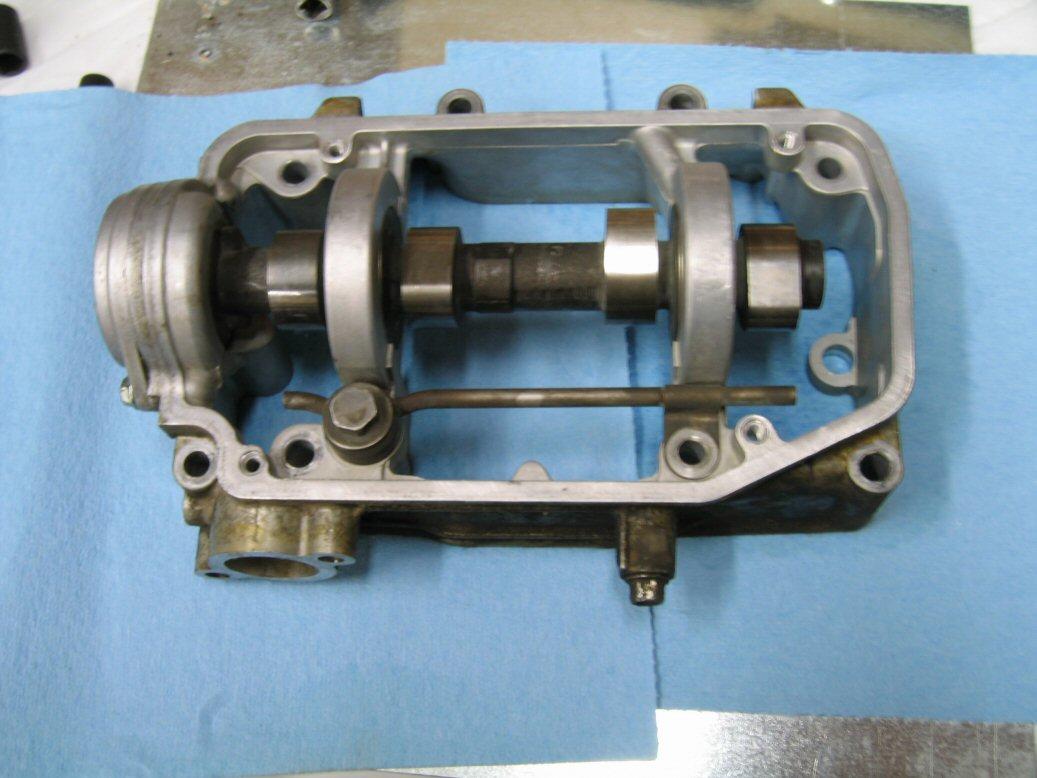
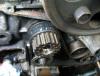
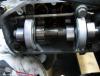
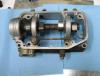
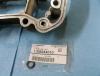
The oil pump - the difficulty here was getting the pulley off which you need to remove to change the shaft seal. The Haynes book says to hold the pulley with channel locks with a rag over it. It needed two people and a lot of effort to get it free. However, two of the three spot welds on the one side were broken, not sure if it happened while I was trying to get it apart or it was already like that. Here's my amateurish welding repair: If you have to do this, you need to grind the welds right down because it doesn't have much clearance when it's installed again. Here it is with the new seal installed. I used a socket and a rubber mallet to work it in.


-
Finally fired the car up at 8 pm today. Was louder than usual at first, definitely ticking on the passenger side but it settled down after a few minutes. It came back and then went away again. Ran into some issues while putting things back together which I'll explain in more detail. I'll give a bit of a write-up in case anyone finds this helpful in the future. Here's what it looked like once I had everything but the old cam tower out. I wound up removing the charcoal canister and bracket and all of the air intake parts before I swapped cam towers - easy to do and only took a few minutes. Plus, I was able to paint the old rusted bracket. Here's the new cam tower cleaned up and ready for sealant. Here's a view of the cylinder head with the old tower removed and the lifters having dropped onto the rag that the book said to put there. I realize that this is a disadvantage of horizontally opposed engines. Here's the O-ring ready to go in it's spot.
-
Awesome, thanks guys. Yep, the gasket is a brand spanking new Fel-Pro, that's what I was working on in the first place when disaster struck. Oh, and I bought an air ratchet, was 50% off at Canadian Tire so only $40.
-
Got the cam tower on, the rockers kept falling off no matter how much assembly lube I used, and the garage wasn't even that warm but it was still thin enough to flow out. Wound up using a bit of axle grease which did the trick, afterwards I saw the factory manual says to use grease I tested the torque wrench this time, tightened everything up to 14 ft lbs. Going out now so I'll do the cover later tonight and get everything put back tomorrow. Should I use some sealant along the bottom edge of the valve cover or just rely on the rubber gasket?
-
Okay, thanks. I can't drive it directly because the engine is in the car and the condenser is in the way. I will figure out a way to do it though. I wish I had an air ratchet right now, I might buy one. Maybe I'll leave the covers off for now. I suppose I could hose off any salt spray. That would save a lot of time and I want to get the car e-tested (smog) before the winter and tomorrow is supposed to be the last warm sunny day. I won't get the car running today but it's probably not a bad idea to let the sealant cure overnight.
-
Not sure how I'd do that. Maybe I could use the old worn out A/C belt (that I bought a replacement for today) around the pump sprocket and the drill chuck? Not even sure which way it rotates. Okay, I wouldn't have known to do this. I don't get why, but I'm inclined to go with the oil pump plan anyway. Okay, in that case maybe I'll put the radiator back on and put new coolant back in before I run it. I'll probably put the air intake stuff back too. Reinstalling the belts (they look great and so do the tensioners) isn't worrying me too much, I just need to make sure I get the tension right. I have a FSM for the 90 Loyale but I haven't even read that far yet. I'm probably crazy but I was going to put the outer covers back on, we get so much salty road spray here I think I'd rather have them on. Thanks for all the advice you and others give here, and I know how frustrating it is to respond to someone's problem and never get a resolution. One thing that's interesting is that the shape of the casting where the cover screws go in is different on the cam tower I got from Tom than the one that came off the car. On the replacement one they're squared off and on the original one they are bullet shaped. I'm sure it will work fine but I'm surprised there would be any difference. I will take some pictures. Wish me luck!