
loyalematt
Members
-
Joined
-
Last visited
Everything posted by loyalematt
-
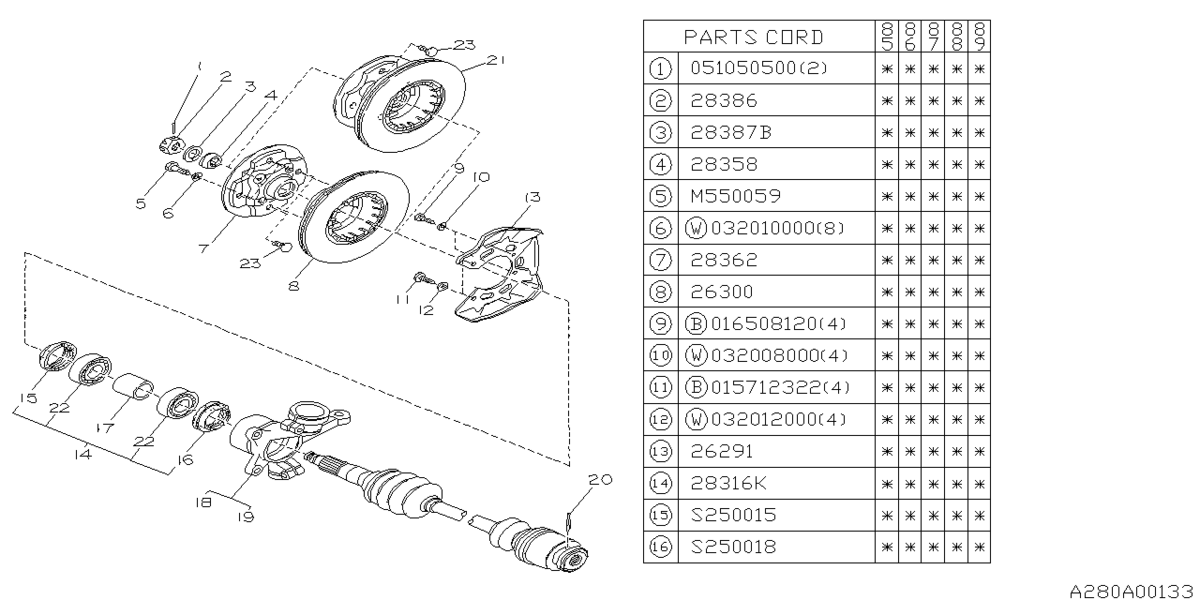
Manual says to remove the hub and driveaxle together, but I don't remember having to do that. I loosened the axle nut, tapped it with a soft faced hammer, and it slid right out. Replaced the bearings and seals and reassembled it.
- 7 replies
-
- 87
- dl
- corner light
- wheel assembly
-
Tagged with:
-
The bearings on these are relatively simple. I have replaced them on all wheels on my loyale, and they are identical to what your DL uses. I'm not sure what spindle you are referring to since the axle shaft passes through the hub/bearing assembly. It is a press fit application, so if you have access to a shop press or a reputable shop, you should be able to remove the hub, remove the old bearings, install the new with new seals and put it right back together. I lightly coat the bearing surface on the axle and it will push right back through the new bearings. Tighten your axle nut to spec, and you are good.

- 7 replies
-
- 87
- dl
- corner light
- wheel assembly
-
Tagged with:
-
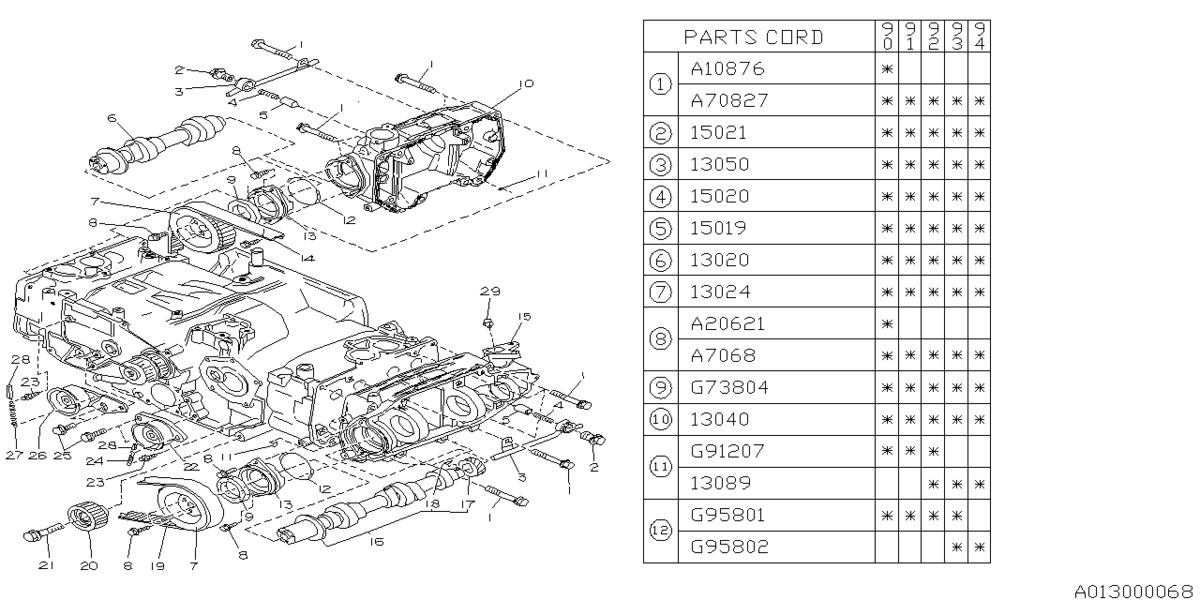
Yes when I initially looked at the diagram I thought it was the heads, but when I magnified the image realized it was the cam and housing assembly instead so looking at the picture in the service manual, I had a lightbulb moment. Haha. I did order the oem o-rings and got a couple extras given the increasing scarcity of parts. Now it's just a matter of waiting on them to get here. I did clean out the reservoir and refilled with fresh coolant to attempt to verify the condition. You are correct that these tend to collect alot of junk in the tank no matter what. My concern came from the fact that even though it has floating junk, when I poured the contents into a clear bottle it left a film on the bottle at the top, and it smells like burnt motor oil instead of the usual sweet antifreeze scent along with being somewhat murky instead of light green.
-
I see what you are saying now. The o-ring you reference is on the camshaft housing assembly, which attaches to the other side of the head. The picture in the service manual its easier to see than in the diagram.
-
I will look and see if I have a spare parking lamp assembly that will fit. On the other hand, as far as the passenger side wheel assembly, what indicates that you need to replace the entire setup? Have you considered just replacing the wheel bearings, or is there some type of unrepairable damage to it?
- 7 replies
-
- 87
- dl
- corner light
- wheel assembly
-
Tagged with:
-
Where exactly is the cam tower to head joint? Looking at the diagram, it is showing the part # given, which is #11 in the diagram, on the block side of the head where that copper portion of the head gasket would be positioned. Are you saying that the OEM type reinforced O-rings should still be used at that location? I've done about everything else on these motors except for head gaskets, so pardon my lack of firsthand knowledge on the specifics for it. I do want to make sure it is right the first time to avoid future problems. I appreciate all the input. I was always told when you stop learning something new, it's time to stop doing the job. This forum has a wealth of knowledge on these vehicles.
-
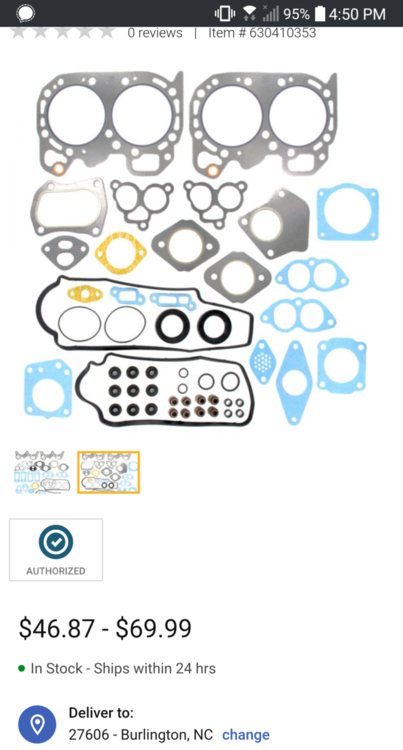
Just throwing this out there, but looking at the head gasket they sent, it almost looks to me like the hole for the oil galley you guys mentioned where that oem type o-ring goes, the head gasket itself is either made of copper there or it has a special coating for that galley alone. It appears orange/copper colored (bottom left in the pic). Am I correct about that, or looking at the diagram wrong? Perhaps they made it that way to relieve this issue with the rubber o-rings? It is #11 in the OEM diagram. And I believe the intake gaskets in this kit are stamped metal with a coating from what I can tell. Made of the same material as the exhaust gaskets on the head.

-
It seems pretty decent. The head gaskets are graphite coated, along with valve seals, and the assorted metallic gaskets, cardboard/paper type gaskets, and O-rings.
-
I wasn't aware of the service bulletins on this issue, and I sincerely appreciate sharing it. That's very good information to know. I still have the engine, so perhaps its not as fubar as I thought. Lol.
-
I didn't know that DaveT. Figured a crack in the head between valves, it was as good as ruined. So if that's common, it doesn't cause driveability issues or leaks?
-
I just got the kit from APEX, but had already gotten some Victor Reinz seals and o-rings for the cam towers. Are you still able to get OEM for those? Do you happen to have the part #'s handy for them? I've invested alot of $ and wrench time into her. They are absolute tanks and extremely dependable. The age and corrosion are starting to catch up to her, and parts are getting harder to find.
-
If you are lucky it will just be the head gasket. A family member owned mine before me and I knew it had been overheated before and was why it was parked. When I pulled the original engine out of my 90, and swapped what I needed to over to the donor, I took the time to pull the original apart and see if I could use it as an extra drop in engine or atleast for parts. What I found was that on one of the heads, when it overheated it also successfully put a hairline fracture between two of the valves and was literally pumping compression into the coolant. It did that same bubbling you are talking about. Hopefully it isn't that severe for you.
-
That's what I was figuring. The rate of loss doesn't seem to be very quick at this point but I will start checking it every time I have to drive it. If the weather will cooperate I may only have to drive it a few short trips over the next couple of weeks. I have a head gasket set on its way, its just a matter of temps being warm enough, weather not calling for that white stuff, and having time to do it all. Always has to happen in winter. Lol.
-
-
I am interested, but 275 miles away on the VA/NC border closer to the west end of the state. No way to haul it back. If you have a way to deliver it, I would definitely be willing to discuss it.
-
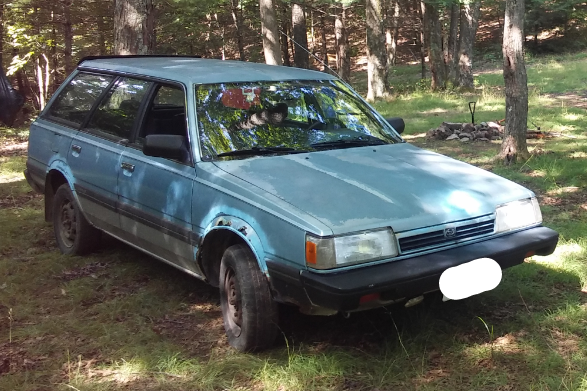
Hey all. Just a quick question. Have a 90 loyale 1.8 5spd 4wd. I noticed the old girl running a bit hotter than normal headed to work the other day, although she never got in the red. Slowly twisted the radiator cap and everything was still under pressure so don't think it has a leak. However, when I pulled the cap on the reservoir there was a layer of black gunk floating on the top. Me being me, I stuck my finger in it to see if it was all the way through and was much greener below, but the residue on my finger smelt and felt like burnt motor oil. So I checked the level later after it cooled off and the radiator looked low so added some, but when I pulled the reservoir cap again it was almost to the top. I did check the engine oil and fortunately no milky residue on the stick or under the fill cap so I don't think there is any antifreeze making it into the oil. I have noticed that there is quite a bit of white smoke especially after a cold start. So here lies the question. I've seen alot of folks say that if it actually is oil in the coolant, its the first sign of the head gaskets giving up. Explained as oil pressure is higher than coolant pressure so it forces oil into the coolant but doesn't allow coolant into the oil yet. I did take the reservoir out, drain it and refill to see if it happens again. So, is a head gasket(s) about to blow completely, and if so, should I try to avoid driving it until I get the new ones in? They are calling for some wintery weather and this is my 4wd tank. But I don't want to ruin the engine if its bad enough that it can't wait a week or so.
-
Google search pulled up an oem site. Plugged in vehicle info and the correct part popped up. Since they are still available, I went ahead and ordered a few to have myself. It's the smallest things that are hard to find for these gems.
-
Here is the OEM part # in case you have any issues or prefer to stick with original parts.
-
That should work perfectly. The roll pins are the same on multiple models. I may have to get a few of those to have around myself. Lol.
-
I have a set of generic clip hardware I got from autozone(has clevis pins, snap rings, roll pins, etc.) and the larger roll pin is perfect for these axles. I destroyed mine getting it out last time and replaced it with no problem. I will try and get you the info on the assortment as soon as I step out to my shop.
-
You can try filling the filter halfway with oil and returning it to the pump to see if it helps but this seems like a bigger issue. If you refilled the engine and started it the filter should have filled itself within seconds. Are you sure there is nothing blocking the passageway on your pump assembly(which the filter and sending unit is part of)?
-
They aren't horrible as some i've had in my day, but there is definitely much left to be desired. As I use it alot for offroad and winter weather, the brighter the better. Also hooking up some waterproof led fog/driving lights to assist.
-
DaveT isn't kidding. Luckily I managed to stockpile a few parts from an old GL and DL that met their demise, and have a parts car although it's only FWD. Even more common parts are getting harder to find now. I just put on new brake drums and could only find them at oreillys or ebay. Ebay search turns up very little results and OEM is almost nonexistent now.
-
And im pretty sure there is alot of backfeed between them. While bulb swapping and checking for loose connections, I noticed the passenger bulb wouldn't come on at all with the driver side removed. Either the passenger side was wired directly into the driver, or a previous owner had made it into a single circuit like christmas lights. Either way, it's fully functional again and my next step is upgrading to led bulbs. Wattage is lower draw on the electrical and I might actually be able to see more than 5 feet in front of me. Lol.
-
All fuses were good. I did find a body ground just below the harness. Tried cleaning with a wirebrush and no change. So I started pulling back the wiring protector on the entire passenger harness almost all the way back to the driver side. No visual damage and no change going down the wiring bending to see if it was an internal short. I finally got tired of chasing it and just wired it into the driver light harness with some quality heat shrink crimp connectors. Back to nice and bright.