
loyalematt
-
Posts
86 -
Joined
-
Last visited
-
Days Won
3
Content Type
Profiles
Forums
Gallery
Store
Everything posted by loyalematt
-
1981 Subaru FWD won't start.
loyalematt replied to spamanon's topic in Old Gen.: 80's GL/DL/XT/Loyales...
I would start with this approach. Spray a little starting fluid or carb cleaner in the top of the carb, or pour a little gas in there and see if it will start and run for a few seconds. If so then its a fuel problem. If it doesn't, check the ignition system next, which it sounds like you done partially with the timing light. However, if you have a weak spark issue it may trigger the timing light but not be strong enough for the vehicle to run. -
Timing Belts/Kit '88 EA82 Tricks or Tips?
loyalematt replied to subaru1988's topic in Old Gen.: 80's GL/DL/XT/Loyales...
I would replace both belts to be on the safe side, and be sure to check your tensioners while they are off. With the flywheel at the center III mark, line up the passenger side cam sprocket timing mark with the notch in the rear timing cover. Should be straight up. Put the belt on and adjust tensioner to proper setting then tighten the bolt. Now rotate the crank 1 full revolution. You should be back at the center III mark, with the passenger cam sprocket now pointed straight down. Line up the driver cam sprocket timing mark with the notch in the back cover (straight up). Put the belt on and then adjust the tensioner to spec then tighten the bolt. Now I usually rotate the crank atleast 2 full revolutions by hand, then realign the center III mark on the flywheel and check the cam marks. One should be straight up aligning with the notch in the back cover, and the other straight down. Recheck belt tension and you are good to go. Also, the cam seals can be done in the car as they are removed from the front as an assembly. Simply pull the timing covers (which you will already have off), then both cam sprockets have to be removed. You will need something to hold the cam sprockets in place when you break the bolts loose to remove them. I would recommend lining up the sprockets as if you were doing the timing belts first, or atleast mark them in reference to the back cover for when it is reinstalled. Remove the back timing covers on both sides, then you can pull the cam seal housing off (3 bolts if I remember correctly). This is also the best time to check that water pump in the vehicle. There is an o-ring on the pipe that seats in the side of the water pump your hose connects to that is notorious for leaking on these. You can also check for excessive free play or rough bearings in the pump, along with any potential leaks. That o-ring would be my first suspicion. Then simply reinstall your cam seal housings, back covers, cam sprockets, and the timing belts as mentioned above. Another note, since you had one of the belts break, if you get your timing belts aligned and then go to start it and it fails to start, don't fear just yet. You may have to rotate the distributor 180 degrees ( it may be 180 degrees out of time. This sometimes happens with these when a belt breaks and the belts are replaced opposite of how they where before. Ex. pass belt was straight up, driver straight down before, now pass straight down, driver straight up). This is a non interference engine so even if you slip up somewhere, you shouldnt damage valves, piston, etc like interference motors. Best of luck with it, and keep enjoying that vehicle. They are awesome. -
If you're dropping an EJ22 into an original EA82 loyale, you'll have to have the wiring harness, etc. to go along with the different engine/trans combo also.
-
1985 GL Wagon questions (24 hours of Lemons)
loyalematt replied to basuraman's topic in Old Gen.: 80's GL/DL/XT/Loyales...
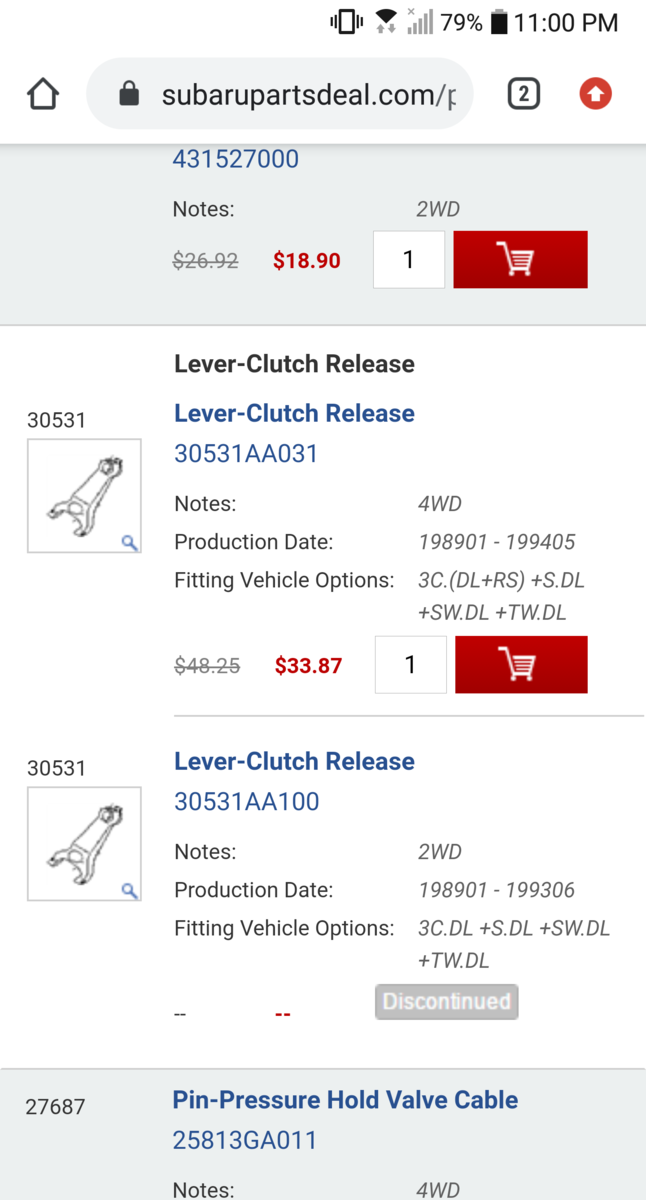
Check subarupartsdeal.com, but my guess is not extremely likely. Parts are becoming very scarce for these vehicles, especially drivetrain components. If you are only using it for the lemons race, rev it up and just skip 2nd altogether. Lol. -
1991 Loyale clutch release fork
loyalematt replied to rickyhils's topic in Old Gen.: 80's GL/DL/XT/Loyales...
If you end up needing one for sure, i've got a 92 fwd I use for parts. Engine is out of it, but the trans isn't really useful to me since mine is 4wd. PM me if you need it and I can probably send you the clutch fork out of it. -
93 Loyale front end
loyalematt replied to Loyalew/cheese's topic in Old Gen.: 80's GL/DL/XT/Loyales...
Be sure to check your wheel bearings also. If they are bad enough, they can give you some noise and since you just done the front axles, they had to pass through them so could be related. Congrats on the good find. These things are tough and run forever if you can feed them the parts and care they need with the age. -
1991 Loyale clutch release fork
loyalematt replied to rickyhils's topic in Old Gen.: 80's GL/DL/XT/Loyales...
If it's 4wd, you may be in luck...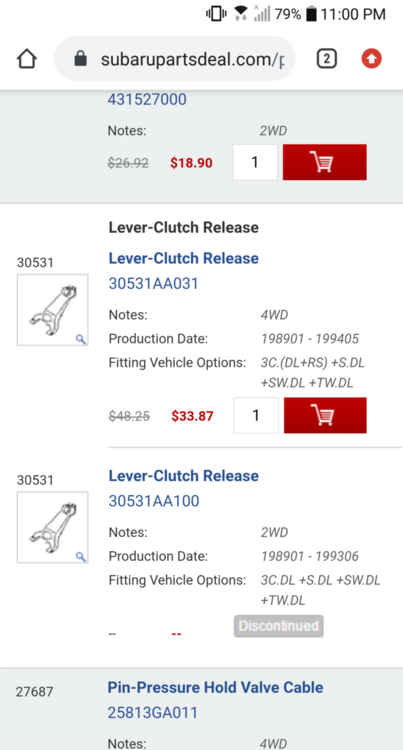
-
All of mine are j hook on the 90. Haven't bothered looking at the 92.
-
What exactly are you referring to as the ignition coil transistor? Within the distributor? If it's what I think you are referring to, check this out.

-
91 Loyale Clutch 4WD ?? =(
loyalematt replied to gizmonix's topic in Old Gen.: 80's GL/DL/XT/Loyales...
It could just be 5 or 6 years of wear and tear on the clutch. The 4wd light being on is definitely worth investigating as these weren't designed to be run in 4wd on pavement, etc. Only in slippery conditions such as wet grass, loose dirt, mud, snow. I am curious why it will cost so much? You can get the clutch kit for these relatively cheap and installing them is a breeze, although in my experience its alot easier to pull the engine out than to pull the transmission. If you have access to a lift or other means to lift all 4 wheels off the ground safely, I would verify that it isn't running in 4wd first by raising all wheels off the ground and putting it in gear to see if the rear wheels turn along with the front. -
I think I will go more with the slowly-MC-doitright-the first-time in the backyard. Just done the HGs and the kit had the thin cardboard type gaskets I used for right now to get it back in service. I now have the OEM gaskets I need to change out and wanted to verify I had to drain the coolant I just put back into it. Thanks.
-
Just wondering if you have to drain the cooling system to change the intake gaskets where there is a coolant jacket there on the EA82s. Thanks.
-
Got it back in the car and put back together, in 30 degree weather no less. Just used cheap oil with about half quart of Marvel mystery oil and filled the coolant up checking it several times until it no longer dropped. Quite a bit of ticking to start but quieted down after a few mins. And for the first time in a couple years, no noticeable oil leak from it which is great. Let it idle for a while keeping an eye on the temp gauge and ran right where it always has. Made a short trip to make sure everything was good and performed very well. Thanks again everyone for the helpful tips along the way. I will only be changing out the intake gaskets for OEM in the near future but otherwise finished.
-
I ordered the subaru gaskets, part #14035AA150 that superseded original part#14035AA000. Should be here next week.
-
The old ones seemed like just a black cardboard composite material. I did clean both mating surfaces extremely well and put anaerobic sealant on both sides of the gasket prior to installation, but I will try to order the OEM gaskets asap and swap them out.
-
Have the engine back together. Used the anaerobic sealant on the intake too along with the gaskets provided for extra sealing protection. Appears to work very well and seems more trustworthy than RTV. Unfortunately it was just a cardboard/paper type gasket instead of the reinforced type. I did drain the oil pan the rest of the way, and was sure to lift it straight and tilt it so as to remove as much as possible. Was mainly just residual oil but I did see a small amount of coolant come out. Now just waiting on the rain to stop so I can get it back in the car. Everything should be sealed tight by the time I can do that so I will be able to add fluids immediately and test it out. By the way, I want to give an extra special thanks to DaveT for his info in a separate thread. I noticed on both heads and all 4 cylinders those little cracks between the valves. Without the info you provided on it being a normal occurence and non-issue, I would have been freaking out about finding some heads, so many thanks for that.
-
Managed to get through the drivers side. Wasn't expecting the massive level of surface prep but better to do it right the first time. Unfortunately, I'm pretty sure that some of the residual antifreeze that was still in the block managed to run into the oil pan when I started seperating the head so I plan to drain the pan after I get the other side finished and add some cheap oil initially, drain, then add cheap again with a filter change. Drive it for a few miles. Then change it again with good oil and new filter.
-
I did manage to pick up a tube at the local advance. It was the only one they had. Believe I timed it about right too. The oil was still clean when I drained it but noticed that removing everything to pull it out, the crankcase tube to the valve cover on the driver side had a nice creamy oil/water residue on the inside, so I think it has been burning off any water so far but is on the verge of catastrophic HG failure. The engine is sitting in the garage now awaiting its cleaning, inspection, and new gaskets. I will update once I am able to tear it apart, put it back together and get it put back in. O-rings are suppose to be here tomorrow. Thanks everyone for the tips.
-
I tried to find permatex anaerobic sealant at the local autozone and they didn't have it. They had about 50 different types of RTV but not one anaerobic sealer besides threadlock.
-
What type of sealant would you guys recommend for the cam carrier assembly? Just red RTV? I know the graphite HGs don't require any type of extra sealant on them.
-
Much better diagram. Is that adjustment screw capped? Seems like I recall it being covered, so you had to drill the cap and pull it off. I could be mistaken.
-
Definitely sounds like the crush washer, so it will go further in the case than it should.
-
Glad you got it figured out. Always good to see success.
-
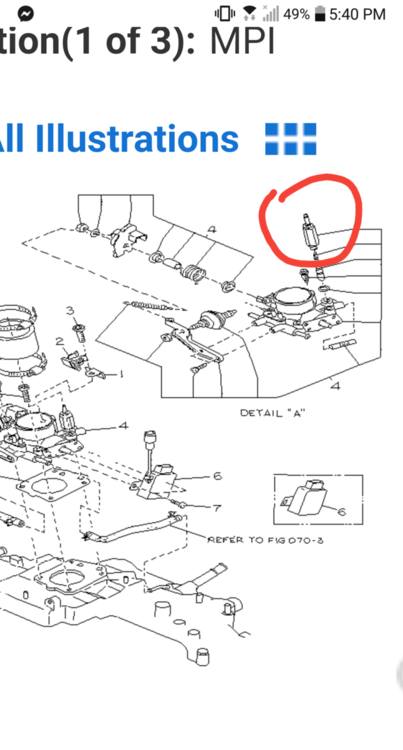
I believe he is referring to the vertical brass screw illustrated here... Be sure to verify that your idle air solenoid is working properly, as well as your O2 sensor(s). These give feedback to the ecm to control air/fuel ratio, and you don't want to turn that adjustment screw unless you know that that there are no vacuum leaks or other issues affecting your idle first.
-
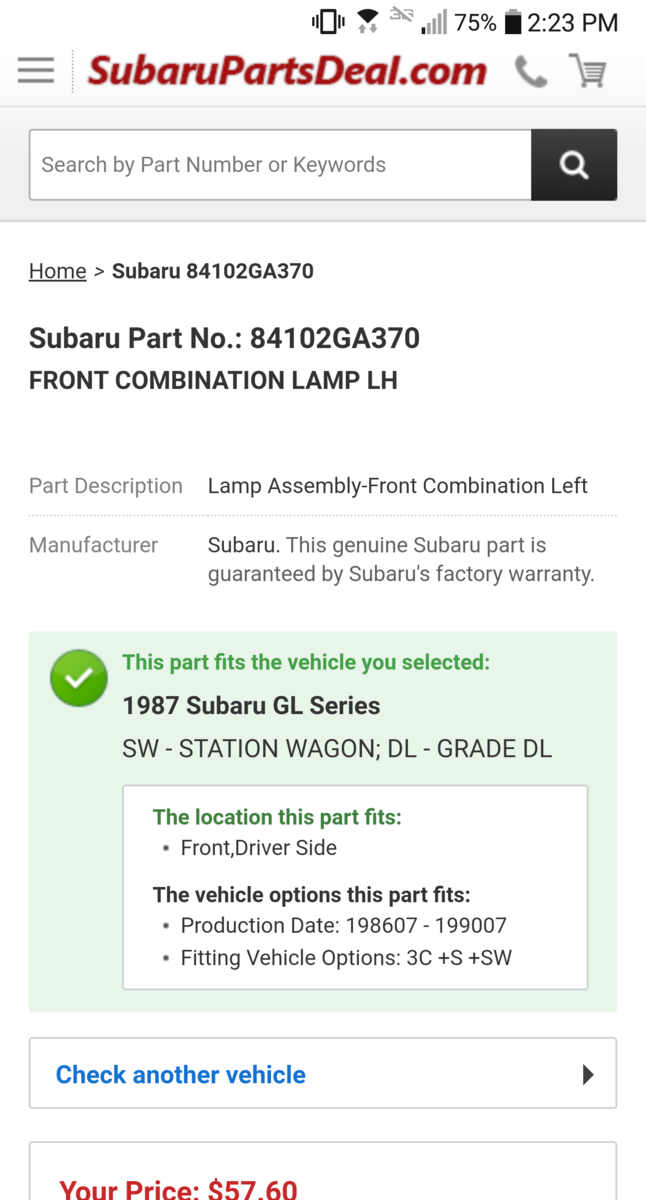
You can apparently still get the lamp assembly. This is listed under the GL models, but is for a DL sub-model.