Loyale_93
Members
-
Joined
-
Last visited
-
Thanks for all the information and help. The car has been sitting for a while and a shop checked a bunch of things and found one valve on cylinder #1 missing the rocker arm and had no compression. At home, I found that the valve at the front of the engine (intake?) is stuck in the open position. The rocker fell off in is the bottom of the cam case. I plan to pull the engine, take the heads off (again) and remove/lap all the valves. The heads had been cleaned and resurfaced at a machine shop. I suspect the cleaning process, that left some white powder inside some passages did something to make the valve stick. (The valves were left in when it was cleaned.) Questions: Will replacing the valve oil seals help? Can I reuse the head gaskets that I put on a few months ago (the engine has not run since then)?
-
Update - The plug wires are set for 1-3-2-4 like they were when it ran and matches the service manual. I checked the belts again and the alignment is spot on: one side up with the other down and 1 sprocket tooth different would be obviously out of line. With the passenger cam at 12 o-clock, the distributor is about 45 deg past the #1 post on the distributor (another crank rotation would put it 45 deg past #2). I did find the picture I took of the distributor position before I pulled it out. The picture showed it rotated nearly to the end of the adjustment travel in the clockwise direction. While trying to start it, the distributor was about at the middle of the adjustment travel. That was easy to change. The unfortunate thing is that the electrical system stopped turning the starter just before I changed the distributor setting. It acts like there isn't enough voltage (power seat belts don't move or move haltingly, dash warning lights are dim, parking lights don't turn on). With a jump from a running vehicle, the accessories work but the starter moves very slowly. I had the battery checked at an auto parts store but they said it was file, recharged it until fully charged and the car did the same thing. No fuses blown in the fuse box. This doesn't seem like a starter motor problem. Any ideas? Any input on the idle switch to set when setting the timing (once it gets running)? Where do I find the test mode connector? Thanks for the input.
-
I'm trying to start a '93 Loyale with SPFI that has had the heads off. The problem is that it won't start. It gets fuel - have seen the injectors spraying in the intake. The #1 spark plug wire fires a timing light so I think there is spark. The engine ran rough for a few seconds initially and now won't run. There have been a few ignitions when I hold the gas pedal all the way down thinking that the problem is that the cylinders are flooded. I'm sure I got the timing belts on correctly - but I will recheck. (Cam sprocket mark up when the flywheel in on the ||| mark.) What I am not too sure of is the initial position of the distributor. I followed the EA82 Service Manual directions in section 2-3 on page 26. I turned the crank to #1 at TDC as noted by the flywheel mark and the cam timing mark being 45deg left of top-center (Fig 44 of the manual). I aligned the marks on the distributor shaft to set the rotor to the #1 cylinder and this matched the #1 spark plug wire. When I insert the shaft into the cam housing with the "feet" of the distributor lined up with their final posiiton, the beveled gears cause the shaft to turn a bit in the clockwise direction. This puts it off the original position. Is that what is supposed to happen? What I did was inserting the distributor so that after it is in and lined up in the ballpark of how it is screwed down, the rotor is pointing to the #1 cylinder terminal. I used the timing light while the engine was cranking (not running, to test connector set), the timing was close to the timing mark at 20 deg BTDC. Is this what is supposed to happen? Also, I don't know where this idle switch is or what the test mode connector is. There are 2 connectors near the fuel filter that were disconnected and I don't remember disconnecting them. Both ends of the wires come out of the same wire bundle at the same point. Under the dash, near the SPFI controller, there are 2 connectors hanging down with nothing to plug in to. Suggestions appreciated.
-
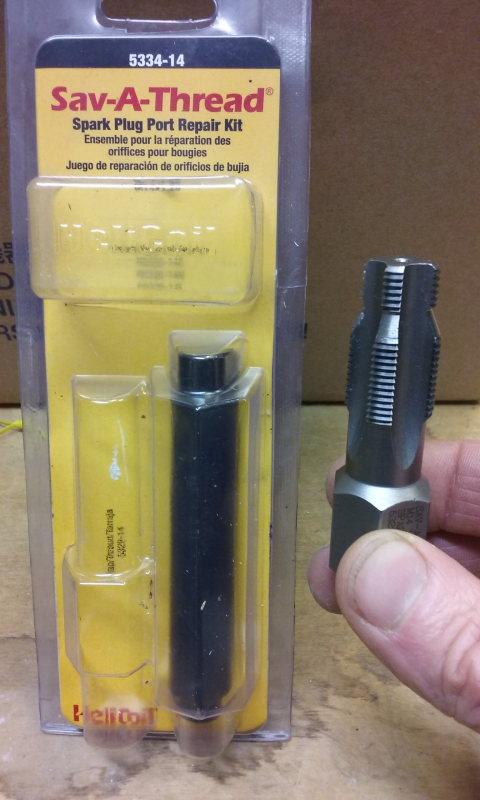
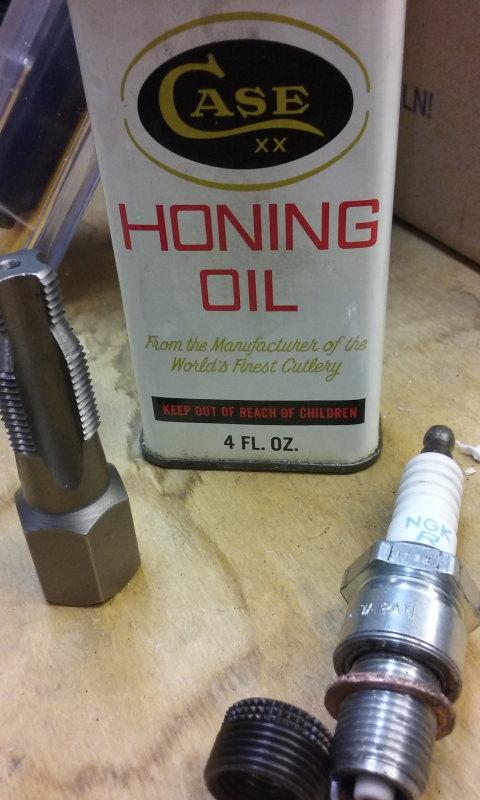
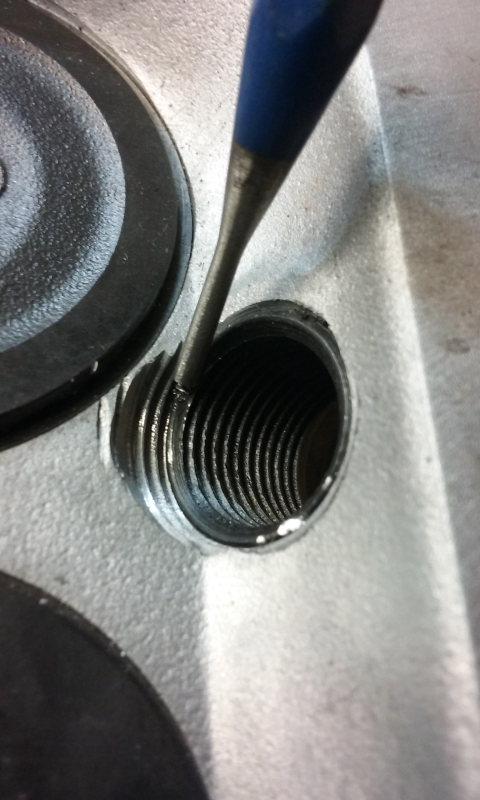
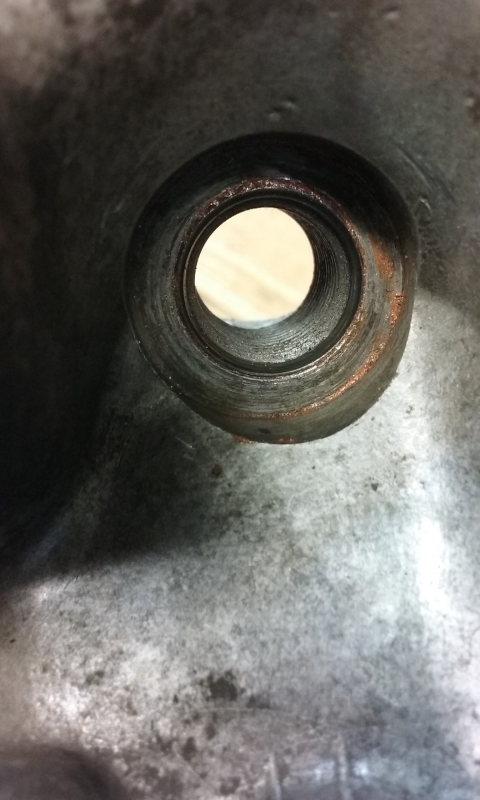
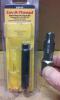
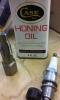
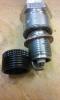
Here are some notes from my project to replace bad spark plug threads with Helicoil thread inserts. I did this work on a 93 EA82 with the heads off the engine. Hope people find this helpful. I used the "Spark Plug Port Repair Kit" that is available in autoparts stores for about $50. See the first picture. The kit includes 3 thread inserts but only one of the 1/2 inch size needed to match the spark plug threads. Extra inserts are about $3. I did all 4. The tap starts with M14x1.25 threads which matches stock spark plug threads. It follows existing threads to guide the cutting of the larger threads. No drilling required if threads aren't completely gone. The tap produces a lot of chips. I'm sure glad I didn't do this with the heads on the car but others say it can work. I started by using WD-40 and that worked fine for the first 2 holes. On holes 3 and 4, the cutter seemed to get dull and was considerably harder to turn. The tap has a 3/8" hole for ratchet. Looks like a spark plug socket will work but I didn't try it and I think it may jam up on the chips. I ran the tap through holes 3 and 4 again with light honing oil which worked much better than WD-40. It was easier to turn and cut more metal. On the first hole, the insert spun in quite easily, less so on hole #2 and very hard on 3 and 4 until I retapped them with the honing oil but still not as easily as the first. The cutter comes very close to one of the valves but misses it and still keeps what seems to be plenty of metal around the valve seat. I drove the insert in using a spark plug. I did some trial fits first before putting hi-temp RTV on the insert threads as noted in the directions. Most of the RTV gets rubbed off and left at the top of the hole so very little is needed on the threads. To drive the insert in, I put a washer on the plug because the plug's crush washer gets stuck on the insert making it nearly impossible to leave the insert in place when the spark plug is removed. I got a copper washer sold as an oil pan plug washer and filed it to fit over the spark plug threads and not extend much past the plug diameter. This last part is needed so it fits into the spark plug recess without binding. See the second and third picture. To help the plug come out with the insert in place, I learned to put oil on the spark plug threads. On the most stubborn one, I also put some lateral force on the plug to put more friction on the threads as I backed out the spark plug. This put enough friction on the insert-to-head threads that the oiled plug threads release first. When the plug is out, the insert can be set permanently in place. On the first 2 holes, where the insert spun in more freely, I was able to get them further in the hole by using a punch to spin the insert a fraction of a turn by tapping the piston-side end on a notch I had previously filed. See the 4th picture. The idea is to get the plug-side edge down below the surface that the crush washer seals to. Seems like a good idea. Be careful not to close up the final thread, like I did, by hitting too hard or too much. This method didn't work when the inserts were hard to drive in. The last step is using the heavy "punch" included in the kit to flare the knurled plug-side end of the insert out into the head to secure the insert from spinning when running plugs in and out. It seems like a number of medium strength blows with a hammer is enough. The finish job is in the 5th picture. I am looking forward to the confidence of installing plugs without worrying about damaging aluminum threads.

-
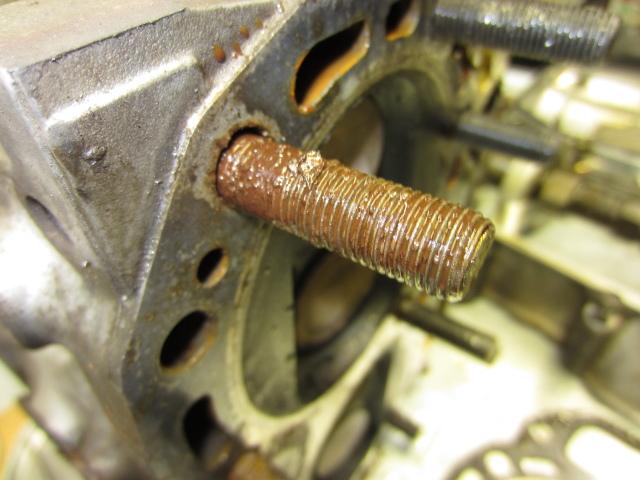
Thanks for the replies. I'll look closely for cracks. I don't know if it got overheated since I recently bought it as the 3rd owner. The previous owner just had it for a few months to help a friend sell it. He replaced the water pump and radiator so it wouldn't surprise me if it did overheat at one time. Not doing it now. I left the head bolts in the head so I wouldn't lose them or get them mixed up. I plan to clean them up and put them back in the same spot. (I'm not looking for long life or heavy use where replacement would be a good idea.) The bolts came out cleanly and with appropriate torque. Thanks for the info on the EGR and Air Suction.
-
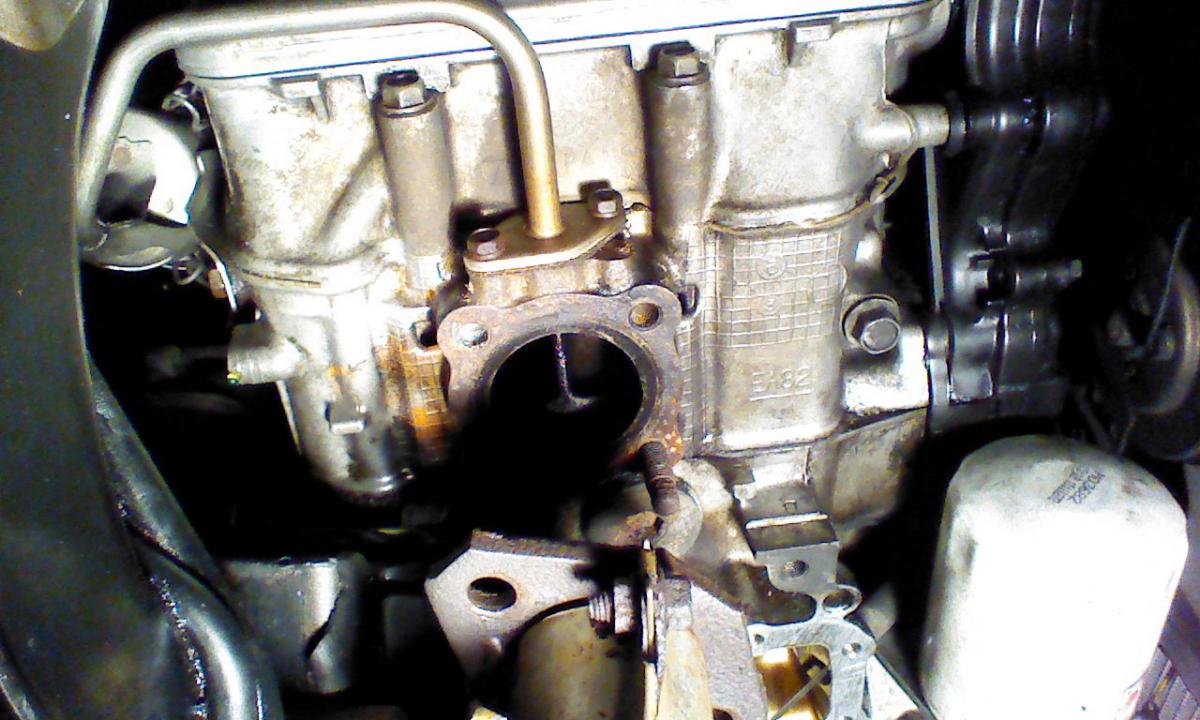
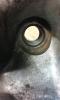
I am trying to solve coolant leaks on the passenger side head of a 93 Loyale. Before dismantling, I saw coolant on the top of the head from the intake gasket when I pressurized to cooling system - engine off. There was also coolant coming out (slowly) from the rear cylinder exhaust port. It had leaked into and around the exhaust pipe rusting the bolts. Now I have pulled the head looking for issues inside. The head gasket looks fine but the top row of head bolts are rusty. Probably from the intake leak on the top of the head. Anything else to look for? I hope the head isn't cracked. Could the intake leak cause all this? (I'll try to attach pictures or link to my gallery) This is a JDM engine. The EGR pipe routes to a cannister that isn't connected to anything on the other side (just plugged). Is that the best thing to do?

-
-
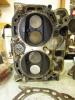
I removed the passenger side head for another issue. I turned the crank so the flywheel was on the 3 marks and the passenger cam pulley had the timing mark pointing up at the timing cover mark. My question is what is going on with the driver's side cam pulley. It has 2 marks on it - one pointing up and the other down. See the picture. On both pulleys, a mark is on the 5th hole (the small one) and it is aligned with the spring pin that locates the pulley on the cam. But on the driver's side, this 5th hole is pointing down!!! The previous owner installed new belts. Did he line up the drivers side 180 deg off? Can the engine run that way? (It did run but not the greatest power. Didn't sound bad.) Are the two pulleys supposed to be marked differently but mine are not? Thanks for your help. (Trying to get the photo to show up)