NorthCoast Posted April 24, 2012 Share Posted April 24, 2012 I got a PM from Scott saying my lift kit was ready so Thursday after work the family and I went for a little road trip up to B-ham to pick it up. It was pouring down rain but we still had fun. When we got home I put a coat of primer on the parts, waited for it to dry, then the first coat and went to sleep. The next morning the second coat. While waiting for the paint to dry I got started jacking up the car and pulling it apart. I must be a glutton for punishment because it seems like I did everything backwards on this project. Besides putting in the lift I am also putting in a Frankenmotor I just finished putting together. I should have started with the motor swap but couldn't get a hold of my brother to pick up the hoist because I was waiting for my new phone to arrive. Why the motor swap first? Because the hoist didn't go high enough to get it out of the bay! Of course this is all in hind sight. Another thing I should have done first is start with the rear. But I like to make things difficult for myself so I started with the front. My reasoning was that I needed to know the extension lengths for parts so that I could source them on the one free weekday I had. Getting everything disconnected was easy as was getting the cross member lift blocks and strut spacers in. Getting it back together was a little more difficult. Since I had the whole front end disconnected, the cross member twisted and the driver side slide back. This is where I definitely could have used some help but with no phone there was no one to call so I dealt with it as best I could. After wrestling with it for a couple hours and having the car fall off the jack stands three times I finally got the front mostly back together and on the ground. I say mostly because I still need to go to the junkyard and pick up some miscellaneous hardware. My car may be a 91 Legacy body but under that she was a 98 OB with strut spacers. Had my car been stock or the top hats still had their original hardware this project would have been a breeze. With the car back on the ground I took some measurement for the new radiator hoses and steering link extension and called it a night. Quote Link to comment Share on other sites More sharing options...
NorthCoast Posted April 24, 2012 Author Share Posted April 24, 2012 I didn't take took many pics on day 2 because the Mrs giving me grief about helping with the rear strut towers and I was too busy fighting with the struts. I was trying to get them in without unbolting themfrom the A arm. I tried to use a crowbar to wiggle them in until my hand slipped off the crowbar and I punched myself in the face. I must have knocked some sense into myself because I gave up on that idea and unbolted the struts. So much easier that way. This was another spot where have stock hardware would have made it a breeze. If I had the original top hat studs I would not have to had unbolted them and they would have slid right into place. I finished the passenger side and then moved over to the driver side. When on the driver side I finally found a use for my stock jack! That made it so much easier to squeeze in the rear cross member block. Trailing arm bracket in... and the rear assembled. Then it was on to the anti-lift and trans blocks. Those were a breeze compared to everything else. Now onto the engine. Stock 2.2 to come out... I decided to just flip up the intake and leave it in while I swapped long blocks. I should have made that chain shorter because I didn't have enough height to get it all the way out. It's a good thing these engines aren't that heavy because I had to pick it up out of the engine bay and lift it over my brush guard. Swapped over the flywheel and clutch. When tightening the pressure plate bolts I misread the torque specs in the Hayne's manual and ended up snapping the head off a bolt. After that I had had enough and called it a day. Quote Link to comment Share on other sites More sharing options...
Red92 Posted April 24, 2012 Share Posted April 24, 2012 This is where I definitely could have used some help but with no phone there was no one to call so I dealt with it as best I could. After wrestling with it for a couple hours and having the car fall off the jack stands three times I finally got the front mostly back together and on the ground. Yikes! Be careful... Quote Link to comment Share on other sites More sharing options...
splitboarder Posted April 24, 2012 Share Posted April 24, 2012 Thanks man. Mine Kit came in last night. I have been looking at the install pics, and it all seems cut and dry. Glad I can follow your progress along as it goes. Did you cut your fenders? Looking good Quote Link to comment Share on other sites More sharing options...
NorthCoast Posted April 24, 2012 Author Share Posted April 24, 2012 (edited) It's on all 4 now with only the smack to the face as the only mishap. Rear fenders were cut long ago when I had my old tires. They aren't trimmed much but I still wish I hadn't cut them. Edited April 24, 2012 by NorthCoast Quote Link to comment Share on other sites More sharing options...
splitboarder Posted April 24, 2012 Share Posted April 24, 2012 Have you cut your steering linkage yet? How much do you need to extend it? Did you use brake line extensions? And, how much longer did your radiator hoses have to be? So stoked today. Gotta go buy paint and then she goes in the garage. Quote Link to comment Share on other sites More sharing options...
NorthCoast Posted April 24, 2012 Author Share Posted April 24, 2012 I did do the steering linkage already. I extended it 4 1/2". I haven't tested it out though. The brake lines were just unsecured from the struts and look like they'll be fine. For radiator hoses I got 18" and 20" flex hoses. Those will be going on tonight so I'll let you know if they're the right lengths. The one thing I haven't looked at yet is the shift linkage. Quote Link to comment Share on other sites More sharing options...
splitboarder Posted April 24, 2012 Share Posted April 24, 2012 Oh Man, shift linkage......completely forgot about that. Wonder what I am going to do with an automatic tranny Quote Link to comment Share on other sites More sharing options...
wagonryan Posted April 25, 2012 Share Posted April 25, 2012 the car is lookin good! have you put the outback spacers up for sale yet? Quote Link to comment Share on other sites More sharing options...
Gloyale Posted April 25, 2012 Share Posted April 25, 2012 Oh Man, shift linkage......completely forgot about that. Wonder what I am going to do with an automatic tranny Automatic is easy. You will just need to make an extension for the end of the cable and possibly a new mount to hold the cable case to the trans at a higher angle. Manuals are a bit harder. Gotta cut and weld a longer stay and shift rod. Quote Link to comment Share on other sites More sharing options...
NorthCoast Posted April 25, 2012 Author Share Posted April 25, 2012 the car is lookin good! have you put the outback spacers up for sale yet? Did you want just the body spacers or the strut spacers as well? Quote Link to comment Share on other sites More sharing options...
wagonryan Posted April 26, 2012 Share Posted April 26, 2012 just the body spacers and the hardware for it if you got it, I already have some strut spacers Quote Link to comment Share on other sites More sharing options...
NorthCoast Posted April 26, 2012 Author Share Posted April 26, 2012 just the body spacers and the hardware for it if you got it, I already have some strut spacers Send me a PM with your contact info when your post count hits 10. Split... The radiator hoses are too long. You should be fine with 16" and 18". Gloyale... Do you have any pics of the extended shift linkage? Quote Link to comment Share on other sites More sharing options...
splitboarder Posted April 26, 2012 Share Posted April 26, 2012 Mine is up on jackstands with the wheel removed. Finally got a good look around under there. With an automatic I think Im ok because it looks like the auto is cable shift. Thats only based on the subie parts picture from the dealer. I will be starting this on the weekend. maybe get all the spacers and struts in I hope. Quote Link to comment Share on other sites More sharing options...
NorthCoast Posted April 27, 2012 Author Share Posted April 27, 2012 Well now I'm a little ticked. Got the manifold out back on and started her up. She started right away and sounded good. One problem though, left head was pouring out oil. I'm confused. I torqued to the right specs. What else would cause this? Quote Link to comment Share on other sites More sharing options...
driftskeetka24e Posted April 27, 2012 Share Posted April 27, 2012 so envious of your build. i got 92 leg wagon on 01 forester and primitive body spacers but its not enough. keep up the good work Quote Link to comment Share on other sites More sharing options...
stealth Posted April 30, 2012 Share Posted April 30, 2012 Well now I'm a little ticked. Got the manifold out back on and started her up. She started right away and sounded good. One problem though, left head was pouring out oil. I'm confused. I torqued to the right specs. What else would cause this? rocker cover gaskets or the wee seals around the bolts for the rocker cover? Quote Link to comment Share on other sites More sharing options...
NorthCoast Posted April 30, 2012 Author Share Posted April 30, 2012 rocker cover gaskets or the wee seals around the bolts for the rocker cover? I wish it was that simple. I checked them both then wrenched a wee bit too hard on the rocker cover bolts. Not once but twice. Luckily I had the spare engine sitting there and swapped the lifters since that was the quickest fix. I pulled the head off and realized I had the gasket on backwards. Definitely a face smacking moment. In my rush to get the engine done I checked most of the passages but not all and missed the oil pass through. The car is back together now and I'm loving the new engine. I did my first long range / high speed test this morning and drove the car to work. The power increase is delightful. It's fun to get a little chirp from the tires when transitioning from gravel to asphalt and not having to downshift on certain hills on my commute is nice. Quote Link to comment Share on other sites More sharing options...
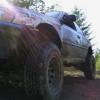
NorthCoast Posted April 30, 2012 Author Share Posted April 30, 2012 (edited) Here's a couple pics of her pinned down for freeway driving. Here's what I mean by pinned down. Now I need to fix the speedo and add the skid plate. No idea what happened to the speedometer. Maybe it pulled out when I raised the body? Edited April 30, 2012 by NorthCoast Quote Link to comment Share on other sites More sharing options...
89ChevondaSI Posted April 30, 2012 Share Posted April 30, 2012 two words. BAD A$$! I wanna do this to mine now.... Quote Link to comment Share on other sites More sharing options...
89ChevondaSI Posted April 30, 2012 Share Posted April 30, 2012 B4 and after pics? Quote Link to comment Share on other sites More sharing options...
NorthCoast Posted April 30, 2012 Author Share Posted April 30, 2012 Before with OB struts and spacers... and After with 6" SJR lift. Quote Link to comment Share on other sites More sharing options...
splitboarder Posted April 30, 2012 Share Posted April 30, 2012 Looking Great !! How long did you extend the steering shaft? I have mine out and cut in half. I have tubing to make the sleve. How was your rear alignment........was a shop able to dail it in ? Mine has the lift installed and the tires are back on the ground. Steering and tranny shift cable bracket is all I need Quote Link to comment Share on other sites More sharing options...
NorthCoast Posted April 30, 2012 Author Share Posted April 30, 2012 How long did you extend the steering shaft? I have mine out and cut in half. I have tubing to make the sleve. 4" How was your rear alignment........was a shop able to dail it in ? The back is fine...not sure why I would need an alignment. You will need one since you are putting in all new struts. Mine are existing. Quote Link to comment Share on other sites More sharing options...
splitboarder Posted April 30, 2012 Share Posted April 30, 2012 You will need one since you are putting in all new struts Yeah, new struts. And I have a lot of camber For radiator hoses I found 1.5 inch by 13.37 inch at autozone. They fit perfect Quote Link to comment Share on other sites More sharing options...

Recommended Posts
Join the conversation
You can post now and register later. If you have an account, sign in now to post with your account.