LouKoff
Members
-
Joined
-
Last visited
Everything posted by LouKoff
-
Thanks, I tried to baby it for a while and then came to a realization that after all the work and money I put into it to make it drive well it should be driven as much as possible. With that being said I notice every new scratch and dent and it kills me everytime, got caught out camping in a severe thunderstorm and hail with it the other day and picked up a few new dents on the hood which really hit deep.
-
I've been driving the brat as a daily the past two weeks because my other car broke and I've been waiting on parts to fix it. So in the mean time I've made some upgrades to the rear of the brat this week....suspension and a bumper. I used EMPI 9571 coilovers meant for vw baja beetles with torsion bar front suspension as a helper spring for the torsion bars. The stroke is 5" and the extended and compressed lengths are almost exactly the same as stock. Bolted right in other than having to press out the sleeve the coilover bushings came with and very minimal cutting. I cut a little off the bump stop tab on the control arm and ground a little off the bump stop to get the spring to clear on full droop. I also made a rear bumper with a hitch and swingout spare tire carrier so i can keep my spare out of the way and use a hitch mount bike rack or other things. Empi 9571 by Luke Hoffman, on Flickr Bushing sleeve brat coilover by Luke Hoffman, on Flickr Coil by Luke Hoffman, on Flickr Coil clearance on gound by Luke Hoffman, on Flickr lil rear lift by Luke Hoffman, on Flickr Bumper finsihed by Luke Hoffman, on Flickr hinge by Luke Hoffman, on Flickr Swung by Luke Hoffman, on Flickr I've also done some camping and doing some shakedown testing to get a feel for what else it needs in the suspension and steering to drive a little nicer off road, Im thinking trying to get a little stiffer front spring or finding another solution to getting better front suspension and steering. Brat PR4 by Luke Hoffman, on Flickr Brat PR3 by Luke Hoffman, on Flickr old grade back by Luke Hoffman, on Flickr old grade front by Luke Hoffman, on Flickr uphill brat old grade by Luke Hoffman, on Flickr downhill old grade by Luke Hoffman, on Flickr lakeside swing brat by Luke Hoffman, on Flickr lakeside bumper brat by Luke Hoffman, on Flickr
-
Not long after my last post I ended up tearing meniscus pretty badly while rock climbing which lead to me having to get surgery and spend about 7 months in bed, having to do lots of rehab to walk correctly and gain mobility back in my knee. Unfortunately this also meant that I was unable to bend my knee enough to safely drive the brat as I'm 6'4" and barely fit in the thing to begin with. After about a year I finally got it back on the road, but not after some trouble with the fuel tank. So anyway on to the update of the car, I replaced the rocker arm which had broken a spring washer and started driving it a bit but had trouble with the car stalling out often and sometimes not starting at all. Turns out that after sitting the fuel tank had rusted again pretty badly and the sediment from the tank was clogging the in tank fuel lines. The fuel lines turned out to be badly rusted inside as well so I tried to take a industrial pipe cleaner to the inside which was a bad idea as the brush on the end of the metal line ended up breaking off in the line making the problem even worse. Unable to get the brush out of the line I was forced to make a new line in the tank. I did this using some 3/8" brake line I bent to reach near the lowest point of the tank, drilling a new hole in the tank on the drivers side of the tank, then feeding the brake line through an opening in the baffle. After a deep clean of the tank using vinegar and then degreaser with many flushes of water to make sure any gasoline fumes and varnish had been removed I brazed the new line to the tank. To hopefully stop future problems with the tank I sealed the tank using por-15 fuel tank sealer following their recommended procedure of prepping the tank with a degreaser and then their metal prep which is an acid based solvent to etch the metal and get rid of any of the remaining rust. new line by Luke Hoffman, on Flickr new line out of tank by Luke Hoffman, on Flickr new line in tank by Luke Hoffman, on Flickr On to other news while unable to drive the brat I was forced to get another vehicle big enough for me to fit in so I picked up this 1988 Toyota right before my surgery. I also started cutting up the donor brat I took the ea81 from to make a trailer out of it. Brat with CC2 by Luke Hoffman, on Flickr Brat with CC by Luke Hoffman, on Flickr Brat trailer project by Luke Hoffman, on Flickr After getting the brat back on the road I decided it would only be right that now that it was no longer lowered I would flex it out to check the suspension travel. Here are the results right as it started to three wheel. Flex2 by Luke Hoffman, on Flickr Flex1 by Luke Hoffman, on Flickr Front Flex by Luke Hoffman, on Flickr Rear Flex by Luke Hoffman, on Flickr Now that it's back on the road I've found some new motivation for it and will probably be doing little projects on it here and there. Some things I'd like to do next are a rear bumper and some mods to try to squeeze some more lift and travel out of the suspension. I also decided to ditch the idea of fixing the topper as I'm not a huge fan of how it looks and it was just pretty messed up with a rotten core and missing windows, so I cut it up and am hoping to make a fiberglass tonneau cover using some of the pieces from the topper. As far as the second gen brat trailer goes I'm trying to make it a capable off road trailer I can pull behind the Toyota or maybe behind the brat for camping and doing utility work, so I'm going to be building a steel frame for it with new suspension, haven't decided if I'll go independent suspension like timbren or leaf springs and a straight axle yet. I've also got a build thread going on for my Toyota which I'm turning into a off road camper on expedition portal if anyone cares to check it out https://www.expeditionportal.com/forum/threads/1988-toyota-custom-cab-build.207189/
-
Wasn't able to get the brat going for the road trip because I found that I broke a spring washer on the rocker arm. But i did get the new rotor on and I got my rear drums turned, and the brakes feel better than ever. Took it out for some joy riding on some icy roads but immediately found out my alignment went wonky in the back because it was fishtailing and fighting itself bad in 4wd going straight over 25mph on the ice. Took it back to the garage and did a 2x4 toe plate adjustment and then used a drywall laser to double check everything. Now it's driving great, but I still have to replace the rocker arm assembly before I start dailying it again. Heres a random photo dump Header wrap by Luke Hoffman, on Flickr New Carpet Project by Luke Hoffman, on Flickr Winter Drive by Luke Hoffman, on Flickr Settled Suspension by Luke Hoffman, on Flickr Probably going to be taking it out of storage, washing, doing some more wetsanding and buffing to get the paint really looking nice this season, and then start dailying it again soon.
-
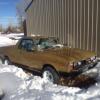
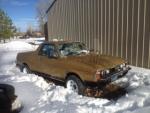
I thought the brat looked cool and handled decent when it was lowered but not that I'm planning to use the car for camping and hauling stuff I decided to lift it. I made a lift for the front and clocked the rear torsion bar to get some more ground clearance, got a period correct winch, fully sound deadened the interior. Winch by Luke Hoffman, on Flickr Winch Mounted by Luke Hoffman, on Flickr Raised by Luke Hoffman, on Flickr Working on getting it ready for a 3k mile road trip in a month. Gotta install a new brake rotor, check my valve tolerances, and try to fix up this topper. topper damage by Luke Hoffman, on Flickr bent window by Luke Hoffman, on Flickr The topper has some extensive damage and a bent window frame. The roof is made of a foam sandwich core which has molded/deteriorated and beyond repair so I picked up some plascore honeycomb material and fiberglass to remake the roof and repair the cracks.
-
I've been dailying the car for about 2 months now and have taken it on a number of road trips about 2700 miles and it's been awesome. The one issue is the rear spring rate is quite soft. Cuyuna 2 by Luke Hoffman, on Flickr Camping by Luke Hoffman, on Flickr End of the trail by Luke Hoffman, on Flickr Cuyuna by Luke Hoffman, on Flickr
-
Got my bumpers painted with some single stage enamel yesterday and installed them today. Also found some old-school cal customs "off-road" light at the thrift store. I tinted them yellow and threw those on as well, still need to wire them up but I think they're pretty sweet for $5 lights with metal buckets and glass lenses. IMG_5989 by Luke Hoffman, on Flickr IMG_5988 by Luke Hoffman, on Flickr IMG_5986 by Luke Hoffman, on Flickr Heres some other pictures I took this last week while driving it around. Sunset by Luke Hoffman, on Flickr 4wd test by Luke Hoffman, on Flickr
-
Here's a quick video of it, will be getting more in the future for sure. Think I have a small exhaust leak still, need to retorque it now that the gaskets have been heat cycled. You might have to click on the video to go to flickr to view it. Revs by Luke Hoffman, on Flickr
-
Chevy luv struts and reclocking the torsion bar in the rear (also have to cut off a bit of the bump stop) and 2nd gen 2wd struts in the front with 2nd gen springs and cutting about a half coil should get you there. You probably won't even have to cut springs with a 15" rim. I'm on chevy luv struts 14" pugs with 2nd gen 2wd struts and 2nd gen brat springs (didn't cut springs). Lake side by Luke Hoffman, on Flickr Had 15x6 trailer rims on the back for a little while I was building it and needed to roll the fenders. Primed by Luke Hoffman, on Flickr
-
Thanks guys! I couldn't be more stoked with how it's turning out. Got the rest of my interior in, put the tailgate on, and drove it to the gas station and for a little cruise. Only a few things left to button up before I can take it back from the cabin and start driving and enjoying it! Some beauty shots from tonight Lake back by Luke Hoffman, on Flickr Lake side by Luke Hoffman, on Flickr Lake front by Luke Hoffman, on Flickr
-
Well it's an important update. The brat is almost completely back together! The interior is almost all back together with the parts that I have, however it's going to be a work in progress for a while. Got my door handles and locks back in but still have to put the tailgate, more of the trim, and the cowl and wipers back on. But most importantly I took it out for its first drive since 2012, and it was awesome. It rides great and shifts great, Im still breaking in the engine and clutch so I haven't really stepped on it too much yet but it's got some pep. I would've taken a video but by the time I got the brakes done tonight it was already dark out. Drivers interior by Luke Hoffman, on Flickr Passenger interior by Luke Hoffman, on Flickr Almost all together by Luke Hoffman, on Flickr
-
Got the front and rear windows, lights, front and some of the interior back together. I also installed speedoo clutch and throttle cables, the radiator and fan and made a pitch stopper by sleeving the ea81 pitch stopper to extend it slightly using the stock mount location on the body and welding a bit onto a the original mount plate from the ea81. Waiting on a single brake line for it to hit the streets. Have had it running and have worked a bit on getting the carbs synced but need to take it for a drive to really feel it out, AFRs were looking good when I've been running it and it sounds healthy and peppy. Pitch Stopper by Luke Hoffman, on Flickr IMG_5876 by Luke Hoffman, on Flickr image_50428417 by Luke Hoffman, on Flickr
-
Sprayed another coat of base yesterday and then the clear today. So happy with the color and how the paint turned out, having never painted a metallic base coat before I was a bit nervous. Now there's only a few things left to get sorted out and I'm eager to get it on the road! Fresh Paint by Luke Hoffman, on Flickr Fresh Paint 2 by Luke Hoffman, on Flickr
-
Got the rest of the exhaust fabbed up today, wasn't able to finish welding it fully. Exhaust is 1.75" unequal headers then 2 inch to the back with a resonator and a high flow muffler, all mandrel bends except the 45 right before the muffler. Midpipe by Luke Hoffman, on Flickr Axleback by Luke Hoffman, on Flickr
-
Got the basecoat layed this afternoon, color looks really dark in the shop but when it's in the sun or with good lighting it lightens up a lot. Body In color by Luke Hoffman, on Flickr Close up by Luke Hoffman, on Flickr
-
Finally got spark after getting a refurbed hitachi distributor and then had to chase down a few changes that needed to be made from switching to an internally regulated alternator on the ea81. Once I fixed my spark issue and set the timing, I got the ea81 to run for the first time, and surprisingly it started right up and ran pretty well for not touching the carbs at al. I didn't get a chance to hook up the radiator and heater core yet so I've only run it a few times for a few seconds. The rebuilt ea81s first time running. I still have to make the rest of the exhaust so it's running open headers EA81 first time running by Luke Hoffman, on Flickr
-
Little update, got it to turn over this past weekend but had no spark. Tried to diagnose the issue and I think I may have fried my ignition control module with my incorrect wiring at first. The ea81 sounded healthy when it turned over and it should be ready to run once I get the parts I need ordered, can't wait to hear it run for the first time.
-
Got the carbs, distributor and alternator all mounted to the engine, got the tranny fluid, and break in oil in. Welded and wired up my wideband o2 sensor. Chasing down some electrical issues but it should be ready to fire up with a little more work. Dual carb in bay by Luke Hoffman, on Flickr o2 sensor by Luke Hoffman, on Flickr
-
To smooth out the wheel wells I started using a hammer and dolly to knock out some of the big dents from inside the wheel well, but because there are multiple layers of sheet metal in place it is impossible to knock out some of the dents. For what was left after using the hammer and dolly I just went over with some body filler and sanded smooth. Best of luck with your project!
-
Got most of the wiring, heater hoses, vacuum lines etc figured out and continued working on my headers. The engine is almost ready to start, just have to get a nut and bolt for the alternator, get some hose clamps for coolant lines and then I will have everything I need to wrap up the drivetrain. Also have almost the entire brake system back together, with all new soft lines, just have to get a piston compressor because my drivers side caliper won't fit on the rotor with the new pads. The engine mocked up with coolant lines and vacuum lines, waiting for hose clamps for final assembly. mock up by Luke Hoffman, on Flickr Heres a photo of the headers. Still need to put another short length of pipe on the end of the headers and weld on a flange and bung for my wideband but I'm pretty happy with how they're turning out Headers by Luke Hoffman, on Flickr
-
-
Been while since I've been able to work on the brat but I got a few things done in the past couple of days. I got the gas tank and diff and rear cv axles installed as well as gas tank breather line, new fuel pump, fuel filter, and fuel line. Also started fabbing up a set of 1.75" unequal length headers to give the car some rumble once it starts running, I think they look sweet too. Also started working on getting the wiring harness in, getting the heater hoses routed and started trying to figure out some other things like the clutch and throttle cables and routing a vacuum line for the brake booster since it's on the opposite side of the car on the dual carb manifold. Didn't feel like much was worth taking photos of this time. Diff rear cv axles and gas tank installed Diff and gas tank in by Luke Hoffman, on Flickr Heres the unequal length headers, only made it to the merge but the rest should be relatively easy to finish UEL by Luke Hoffman, on Flickr
-
Thanks for the kind words, it really means a lot. I got the pistons from ram performance, ltd. Unfortunately I'm not sure if they are making them anymore, they used to be listed for sale on their website www.ramengines.com, worth a shot to email them and see if they are still available to order a set. They just order them with their custom specs from wiseco anyway so I would imagine you could still get a set.
-
Got the engine in yesterday! Was planning to get it painted this year but had some issues with a contaminated rag when spraying the sealer so I got some eyelets on the roof and bed, and now the weather is too cold to spray so it's time to get it running and driving and I'll paint it in the spring. Engine in by Luke Hoffman, on Flickr
-
After block sanding the first coat of high build primer I found some more low spots and body lines that needed some more work so I did some more filler work to get it ready for another round. I also painted the brake calipers black and almost finished rebuilding the rear cv axles but I still need to do the boot clamps. Hopefully I'll have the car block sanded and fix any last spots that need attention so I can spray the basecoat soon. P side before 2k by Luke Hoffman, on Flickr P side before 2k 2 by Luke Hoffman, on Flickr Before 2k by Luke Hoffman, on Flickr P side 2k by Luke Hoffman, on Flickr Front 2k by Luke Hoffman, on Flickr D side 2k by Luke Hoffman, on Flickr D side 2k 2 by Luke Hoffman, on Flickr Misc 2k by Luke Hoffman, on Flickr Tailgate 2k by Luke Hoffman, on Flickr Brake calipers painted by Luke Hoffman, on Flickr CVs rebuilt by Luke Hoffman, on Flickr