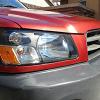
December 18, 200421 yr Since my camera sucks, you can hardly even see the dial on the gauge. But this gauge rocks! Here's where I installed it: The visability is great. Shouldnt distract me from the road at all. Here's a better picture of the gauge: The gauge itself isn't a true "boost" gauge. Its a grade A glycerin filled Compound Gauge. I got it from McMaster-Carr online. The guage reads from -30psi to +15psi and is 1.5" in diameter. I was trying to avoid the ricey look at all costs. I ended up removing all the glycerin cause the air bubble was making it hard to read, but it operates just fine as a boost gauge. The gauge itself was $22, i also got the T fitting, 20' of hose and a female nipple for the end of the gauge. Total cost for everything was $48 and shipped to my door. 2 day delivery Im very impressed with the quality of this gauge. It wouldnt have hurt to goto the 2.5" gauge but i think 1.5" is plenty for me. Now for a manual boost controller -Brian
December 18, 200421 yr Author damn i probably should have left the glycerin in the guage. Im getting alot of needle vibration under boost. Makes it hard to read actual boost pressure. Oh well. -Brian
December 18, 200421 yr What is up with your speedo, were you going backwards when you took the pic? Just kidding, Ya I think the glyserine if there to buffet high shock loads, you see it a lot on high pressure water gauges I think. Good placement!!! Where did you move your rear defrost switch too?
December 18, 200421 yr Author Who needs rear defrost Hahaha... I didnt move it, i removed it. I will have to wire another switch of some sort to control the defroster. The speedo rest's there. Its like 10mph off, which helps cause it keeps my passengers from freakin out since they dont know im doing 85. -Brian
December 18, 200421 yr Moved my gauges there after trying them in the console in front of the shifter. Much easier and safer to read when on the fly. Hope yours wasn't as big of a PITA to get right. three freakin tries on my install. My rear defrost hanging behind the panel. Looks like I'm about to second guess that decision real soon. Calling for snow on Sat. When I put them in it was 80 degrees, Baa, who needs rear defrost. Welcome to Dec. Jay
December 18, 200421 yr Author Thats where I got the idea, from looking at your setup It wasnt hard at all. I tried to cut a hole in the fake buttons that are in that panel, but there was ALOT to cut through, and when I got through a couple buttons fell out and things just didnt turn out as planned. Thats when I made the fiberboard panel. I will have my EGT gauge above the Boost Gauge once I find one small enough. -Brian
December 18, 200421 yr I used the black plastic from the coin tray that goes under the no cassette radio and cut it to fit. After I destroyed that in the first try, I switched to the coin tray from the 02 Legacy. I had another complete console, so I wasn't worried about blowing it up too bad. Ended up with a lot of plastic scrapnel all over the place from the Dremel before I finally got it to fit. I should have went with the rivets. much more utilitarian look. Jay Where are you thinking of putting the defrost switch? And that hole shape was a MF'er to duplicate, wasn't it? seemed random.
December 18, 200421 yr Author Naw, it wasnt hard to duplicate. I used the fake button pod as a template... traced it onto some cardboard which I cut to fit, and made sure it was the right shape. Then i traced that onto the fiberboard and used my dremel's router attatchment to cut it out. I made sure to cut it alittle too large, and used some low grit sandpaper to sand it down to an *almost* perfect size I will need to look at the wiring of the defrost switch and i will wire up a basic toggle switch. Then just put that in my fiberboard. -Brian
December 18, 200421 yr Did you tap any electrical wiring so you can see your gauge at night? If so, where did you tap? Pics?
December 18, 200421 yr Author the guage itself doesnt have a backlight. What i did was took the small LED that lights up the left side of the dash, strung it through the side of my fiberboard plate, and then its resting beside the gauge. It works pretty good, but looks kinda ghetto. I'll have to fabricate something to clean it up a bit. I'd take pix, but my camera sucks. I'll need to borrow a friends. -Brian
December 18, 200421 yr the guage itself doesnt have a backlight. What i did was took the small LED that lights up the left side of the dash, strung it through the side of my fiberboard plate, and then its resting beside the gauge. It works pretty good, but looks kinda ghetto. I'll have to fabricate something to clean it up a bit. I'd take pix, but my camera sucks. I'll need to borrow a friends. -Brian Ok...thanks! Looks like a nice setup. I likey mah defrosta doh. :-p
December 18, 200421 yr Cool, so you can use just a plain air pressure gauge for a boost gauge?? Cause I work with a ton of swimming pools, and we have a butt load of pressure gauges, and some of them still work. I wouldn't get the vac reading, but I'd get the boost reading. If I could use any air pressure gauge that would be awesome! Rick
December 18, 200421 yr Author Yup, thats all any boost guage is. Just a compound vac/pressure gauge. I will have my rear defrost back, just not in the clicky button it used to be. -Brian
December 19, 200421 yr Fine idea that, butchering the dash of a car that may someday become a classic. For about 30 bucks you can get an A pillar mount that works fine and keep all switches intact Mine is from JEG's and is listed for a 90 Honda CRX
December 19, 200421 yr Mine is from JEG's and is listed for a 90 Honda CRX This is the same one I have in my Impreza and XT6. I'm planning on getting a CRX dual gauge pod for the RX as well. I purchase mine from Summit Racing, part# ATM-20400.
December 19, 200421 yr Different strokes for different folks. I wouldn't do what you did to the interior of your car and you don't like what Junkie and I did. These dashes are a dime a dozen in parts yards thoughout the country. Most are the same color. Our dashes are subtle, yours is, ah, not. As for the defrost switch, it's a sacrifice I was willing to make for functionality and greater visibility. Don't much care for the add-on look of the pillar pods. Has the vague smell of a starchy product from the East. Jay
December 19, 200421 yr Author Yeah, no offence or anything. But the A pillar pod is too much rice for me. I preffer it where it is. I can always get another switch panel from the junkyard if I want to restore the car. -Brian
December 19, 200421 yr I personally prefer the A pillar gauge mount, although I think the defrost area mount is good too. I just can't be bothered to take the time to hash it in. If you need to remove the A pillar stuff to another car it's easy, and it's clean. Nice clean looking install.
December 19, 200421 yr Author Well, since my interior is grey, and the a-pillar mod is black... that's strike one. Plus, the A-Pillar mount is noticable to everybody who walks by the car, strike 2. And, it costs more money The dash mount keeps it sleek looking, out of the way, and i have a ton of fiber board laying around to use. To each their own. I still got some work to do on this mount. I want to add a plastic face to the fiberboard to even out the dash. And rig a better lighting system. -Brian
December 20, 200421 yr It looks fine. We're not working with Shelby Mustangs or Hemi 'Cudas here..just an '80's import..hack away:) .
December 23, 200421 yr i like them under the instrument bezel, where the hazard and fan knobs are. the lights tie in with the clip to the ashtray light. lights in the vent too! dont trash your 3-door!
January 7, 200521 yr Sweet, I got a liquid filled pressure gauge, just need to install it now. I will post pics when I get it put in my XT. Rick
January 7, 200521 yr Would be nice if someone posted an installation instruction of sorts. Most of us are idiots when it comes to these things.
January 7, 200521 yr Author Find a hose that comes from your intake manifold. Cut it, put a T in it. Then run hose from that T into your dashboard. Mount the gauge somewhere and attatch the hose to the gauge. Done The gauge i got had no mounting hardware or any threaded inserts to mount it anywhere. I used a hose clamp, stuck the gauge through the board which its attatched to... then put the clamp on the gauge behind the board to hold it in place. -Brian

Please sign in to comment
You will be able to leave a comment after signing in
Sign In Now