Vegablade Posted June 30, 2004 Share Posted June 30, 2004 How hard is it and what do you need to do to weld your differencial, i was thinking about it becasue my loyale doesnt do posi very well. Link to comment Share on other sites More sharing options...
GeneralDisorder Posted June 30, 2004 Share Posted June 30, 2004 A welder, and a 12mm or 14mm (can't recall which) socket to remove the rear cover of the diff. 10mm, 17mm, and 19mm sockets to drop the diff from the hanger, and you *could* do it without removing the axles, but a 3/16" pin punch to remove the axle and pull the diff out from under the car is a good idea. If you are lifted, you'll want to pull an axle each time you go on pavement - the stress from the bigger tires can break the axles pretty easily. On a stock rig your tires will chirp around corners, and you axles won't last as long, but I doubt you would break one. GD Link to comment Share on other sites More sharing options...
SubSandRail Posted June 30, 2004 Share Posted June 30, 2004 Any good photos? All my friends welded their Jeep diffs; is it exectly the same? Sure would like to see a write-up. I want to get my 6 lug conversion first so I can use my 26" Buckshot mudders, but a welded diff will be right after that. Link to comment Share on other sites More sharing options...
GeneralDisorder Posted June 30, 2004 Share Posted June 30, 2004 It's probably pretty much the same - you just weld the spider gears to each other. 4 welds on each side of the assembly - 8 total. I thought I had a picture around here - but I can't seem to find it. GD Link to comment Share on other sites More sharing options...
Sweet82 Posted June 30, 2004 Share Posted June 30, 2004 You'll want to get all the spatter out of the diff before you seal it back up!!!!! those little bb's can't be good for your gears:rolleyes: Glenn 82 SubaruHummer welded! 01 Forester LSD! Link to comment Share on other sites More sharing options...
bushbasher Posted June 30, 2004 Share Posted June 30, 2004 Actually the gears can handle running over the beads, they just squash them. But the bearings dont like them. Clean it out as much as you can before you fill it up, then do an oil change after a bit of driving and clean off the magnet on the drain plug. Then you should be good to go. I've welded 2 subaru diffs so far, welding the spider gears together and also from the spiders to the case. No problems on either differential. Link to comment Share on other sites More sharing options...
camosuba Posted June 30, 2004 Share Posted June 30, 2004 When i did mine i used cast iron rods and pre heated the centre it was originally in a 76 wagon running 13's and uni driveshafts, it was unstopable (almost got up a hill that was so steep it nearly wanted to tip over backwards ) it was then put into a 83 wagon and has broken an output stub axle, bear in mind the larger the tyres the more leverage they have on your shafts expect breakages:banghead: , so carry spares and you'll need to keep buying tyres , I did a set on the rear in ONE DAY ! (but i got up that hill!) Link to comment Share on other sites More sharing options...
Rooinater Posted July 1, 2004 Share Posted July 1, 2004 well just my 2 cents and what i've talked to welders about. there's always a chance of it breaking. i've ran one for years now. and my original one is in Zapars rig right now. so they can last just fine if you do it PROPERLY. where you want to weld is where it is similar metals. beings the fact the spider gears and the alignment shaft in the center are all tool steel. that is what you weld. you will be making it much weaker if you weld to the open carrier housing!! you would be welding cast and tool steel together... not a strong combination!! at all. I'd suggest using a mig welder so that you have less splatter and no slag to try to clean out. What you'll need: mig welder with a fairly strong wire. oxy/accetelyne tank brake cleaner Open rear differential 1st, remove and open the diff. drain all the oil out and spray down the whole inside with brake cleaner to remove as much oil residue as possible. let the cleaner evaporate. 2nd, set up you oxy/accetelyne torch with a good flame. you'll be using this to preheat the gears. 3rd, place torch inside onto the spider gears and center shaft. try to put as little heat on the ring and pinion gears (if you are not removing the open carrier and R&P's.) heat the gears up till you believe it is sufficent. (don't melt them...) 4th, take your mig gun and put a good tack weld on all 4 corners where the gears meet. on side 1. then repeat on side 2. 5th, put full welds on the 8 total areas (side 1 and 2). where the gears mesh. then what i've had done to all the lincoln lockers i have had made. is to weld the center shaft to the gears. that way the gears will not break and seperate. they are one big piece in the center. NOTE: BETWEEN EACH SIDE AND BETWEEN WELDING THE CENTER IT'S ALWAYS A GOOD IDEA TO MAKE SURE THE GEARS ARE STAYING PREHEATED. SO THROWING IN THE TORCH HERE AND THERE WHEN THERE'S PAUSES IN YOU WELDING IS NOT A BAD IDEA. JUST DON'T OVER DO!! 6th, keep the cover off and let it air cool. don't put anything on it to make it cool quicker. cause you'll make it brittle and easier to break. let it set over night (if possible, but do not fill when warm or hot with oil) then fill with oil. and you are ready to use it. it's suggested to remove one axle while driving on the street. do to the extra strain on the axles and the rest of the rear drivetrain. this is an excellent modification for OFFROAD rigs. it will help gain a lot more traction than a limited slip ever will. HOW TO REMOVE THE AXLE: To remove the axle on a EA81 car. remove lower shock bolt. lift up the rear of the car till the tire is off. punch roll pin out. and wiggle the axle around till you get it off. usually one side or the other will come off easiest. as soon as you find which side. stick with that side to remove. it's also a good idea to put a light lubricant on each time to make sure it removes easier. it's the same idea and the same way as any other rig to weld up the open differential. Link to comment Share on other sites More sharing options...
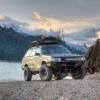
Matty B Posted July 2, 2004 Share Posted July 2, 2004 Do you think that I need to pop an axle out when running a 2" lift and 14'' road rubber? or will it chirp away around corners without going boom! Might be a little hairy on a wet winding road? This is my Brat/Brumby.... Link to comment Share on other sites More sharing options...
GeneralDisorder Posted July 2, 2004 Share Posted July 2, 2004 Depends on the rubber you are running. I blew an axle with 28" mudders just turning into my driveway :cool:..... The key to not blowing up your axles is to remember that CV's (and DOJ's too) are rated for how many RPM's they can stand at a given angle. Thus the steeper the angle, the fewer RPM's they can handle before failure. How are you planning to do the lift in the rear? If you are going to go with suspension lift like my wagon (I have about 3 of suspension), then I sugest some thought be put into using EA82 DOJ's, and maybe some limiting straps to limit downward travel when that wheel is in the air. Mine were running at such an extreme angle, that even though I had broken one rear axle and already removed it, the welded diff snapped the other axle too when I was attempting a hill climb (wheel in the air, rotating at high speed - BOOM). I broke both axles that day, and drove home with 2WD. That's a strong diff.... GD Link to comment Share on other sites More sharing options...

Recommended Posts
Please sign in to comment
You will be able to leave a comment after signing in
Sign In Now