All Activity
- Today
-
bushytails replied to 19Red_wgn98's topic in 1990 to Present Legacy, Impreza, Outback, Forester, Baja, WRX&WrxSTI, SVXYou should mention what the exact vehicle is, since there were some changes to the clutch release mechanism over the years. Your list sounds pretty good. You could get a new flywheel, have yours resurfaced, or just run it, depending on what it looks like. Your clutch kit should come with a new pressure plate, unless you're being extremely cheap. Always replace the pilot bearing (assuming it even still looks like a bearing - many have long since failed on older vehicles) and throwout bearing; both should be included with your kit. You should be able to get torque specs from https://charm.li/ , or look for a pdf manual for your vehicle. For better than stock, I've been extremely happy with my Spec Stage 1 clutch. Stage 1 is just a higher clamp pressure plate and a slightly grippier disc, nothing aggressive like the higher numbered stages. South Bend Clutch is a bunch of incompetent crooks, so avoid them when shopping for upgraded parts. (See, companies, you rip people off, and then they make sure to point out you suck in every single relevant discussion) A time estimate depends on your skill level and tools. If you have a lift, tranny jack, and a decade of experience, it's a 1-2 hour job. If you have a pair of ramps, a driveway, and a harbor freight starter tool set, plan on a weekend project. Pulling the transmission is easier than pulling the engine, especially if you don't have a fully equipped shop. For tricks, for a beginner, I'd say to make sure your disc is extremely perfectly centered, both by using the alignment tool provided with the clutch kit and by visually double-checking after torquing the pressure plate, and then be very careful mating the transmission back to the engine, making sure to exactly match the tilt angle of engine and transmission, then spinning either the engine or transmission until the splines engage and the pilot slips in.
-
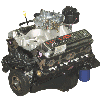
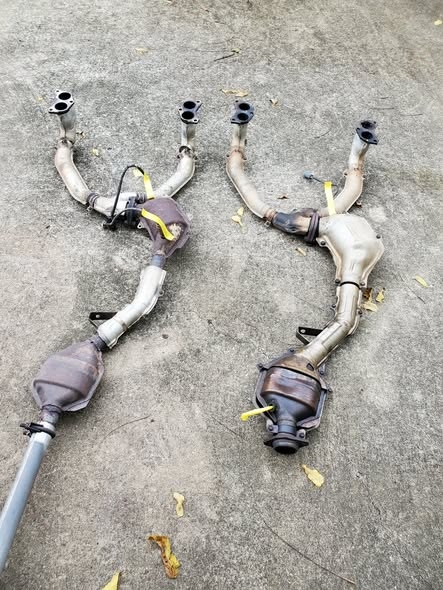
I’m looking for a write up on how to replace the clutch and if there is anything else I need to do. I have replaced other clutch’s before, but not sure of the full process on these cars. The car currently has 226k so I was wondering what else I should replace while I’m there. I’m kinda thinking rear main, oil separator plate reseal, pilot, throw out, flywheel, obviously the clutch. What parts would you recommend for slightly better than stock? Is there anything else I should replace while I’m there? I see around where some people pull the engine, and some pull the transmission. What are torque specs and where could I find them? What is the estimated time in the full process. Also would like to know what tricks can be useful. Thanks again.
- Last week
-
lmdew replied to 19Red_wgn98's topic in 1990 to Present Legacy, Impreza, Outback, Forester, Baja, WRX&WrxSTI, SVXwww.car-part.com If you have a you pull it yard close by, just go in with your drill and drill out the bolts and get the complete assembly.
-
Oof, the hits keep on coming. Between life happening and that stint where the forums were down - I hadn't had much time to update this, but today I took the time to get things moving a bit again. Long story short - I decided the simplest thing to do to solve the rubbing problem as it currently exists was to cut the tack welds and shift the whole subframe back about an inch, rather than doing a whole bunch of complex bodywork. My bodywork skills are definitely not my stronger suit, so I figured I'd better make things fit to what's already there as best I can. While this job was harder than I thought it was going to be (I had to cut out a larger section of the bed to get my cutting tools in there), the wheels now sit squarely (loosely) in the middle of the arches. To continue the spirit of solving a problem by creating new problems to solve, now I have to modify the original rear diff crossmember to make up for the distance the entire assembly has moved. Probably going to knock that out in the next couple days. Basically for that I'm going to cut some chunks out of the existing crossmember , then offset them with lengths of rectangular or square tubing of similar cross section. It shouldn't be too difficult because the stock part is basically a piece of straight U-channel with bushings mounted through it. No weird bends or offsets to be had so as long as I modify it so the threaded holes move directly rearword, it should be a pretty quick fix. Once that's all done it'll be a temporary modification of the stock lateral links to bring everything a little tighter in towards the frame, then I'll get started on fabricating the strut mounts in the bed, and probably remeasuring everything to see about finding an off-the-shelf set of adjustable lateral links and trailing arms that fit, and then another semi-permanent modification of the rear CV axles to get those back on. I'll likely need to revisit the wheel arches in some form or fashion, but I'm hoping I can get away with just some good ol' fender rolling. Time will tell.
-
So I have a 98 Impreza and I’m trying to find a new ignition lock cylinder to replace mine. The previous owner left just the tumbler and not the entire assembly. I cannot find the replacement for a 98. I find 97 but not 98. Find every year after as well. I can find the ignition switch just not the full assembly. Any help would be very appreciated. Thank you.
-
PhoenixPhire joined the community
-
ButtrockRockwight joined the community
-
Watson_Derthehood joined the community
-
subaruwillisco1940 joined the community
-
StaticFoz joined the community
-
winstonr1 joined the community
-
3 hours start to finish engine trans diff driveshaft axles mirrors ecu tcu fuel pump radiator and condensor out. nothing els worth keeping. and thats including driving it out of the woods and cleanup time.
-
well i started i opted to just unbolt the trans and pull em seperatly. stripping a car is so much quicker when you dont care about the car the parts are coming out of.
-
bushytails replied to 89Ru's topic in 1990 to Present Legacy, Impreza, Outback, Forester, Baja, WRX&WrxSTI, SVXMy bad, I think I got one of the pics backwards in my head, and thought the cam was totally ruined on both ends... the rear journal doesn't look totally ruined. There's still definitely some scoring visible on the cam in both the center and rear, though. But if it has a knock, it's time for an engine anyway.
-
89Ru replied to 89Ru's topic in 1990 to Present Legacy, Impreza, Outback, Forester, Baja, WRX&WrxSTI, SVXSo the rear journal isn't good either. I would describe the front journal as trash where the cam had a definite wobble and the aluminum is creeping up the shaft. The AVLS ports look ok, other than a bit of sediment in the filter screen. The engine was run low on oil at one point and had developed a slight knock at idle so I was leaning toward a JDM replacement anyway, but this clinches it. The oil pump was resealed at the previous head rebuild.
-
bushytails replied to 89Ru's topic in 1990 to Present Legacy, Impreza, Outback, Forester, Baja, WRX&WrxSTI, SVXIt looks like the cam ran without oil until it seized, from how trashed the rear journal is... If I were you, I'd probably be looking for an engine, not just a head. Would be a shame to put a new head on and then find the bottom end looks the same.
-
i do not have a lift im honestly not opposed to cutting the subframe and radiator support ither. as far as junk yards not many left. chuck and eddies is prety much the last pick and pull i know of. boyds in norwich will still give a good price on a stripped out car. there wont be much left in this one thats still good. the driveline was the only good part of the car.
-
89Ru replied to 89Ru's topic in 1990 to Present Legacy, Impreza, Outback, Forester, Baja, WRX&WrxSTI, SVXCam is broken The far end of the cam (non sprocket side) isn't seized, or at least it isn't now. Spins free, supported by the end and center journals. Probably seized at some point. Sprocket side journals are 'remodeled.' Will take apart the AVLS assembly and look at the oil ports. top view passenger side head broken cam cam wear cam fractured non sprocket side cam journal cam journal sprocket side center cam journal cam cap sprocket side cam slot
-
moosens replied to sirtokesalot's topic in 1990 to Present Legacy, Impreza, Outback, Forester, Baja, WRX&WrxSTI, SVXSometimes if it’s possible I’ll cut away the radiator support. Part car going to tue yard would be a candidate. Hey you’re in CT too, right ? Which yard(s) are you dealing with these days?
-
lmdew replied to sirtokesalot's topic in 1990 to Present Legacy, Impreza, Outback, Forester, Baja, WRX&WrxSTI, SVXI've pulled them attached. Yes the angle is significant. The other way to do it is to drop it out the bottom. The cross member and trans mount will unbolt. Raise the car or lower the cross member/engine-trans.
-
el_freddo replied to sirtokesalot's topic in 1990 to Present Legacy, Impreza, Outback, Forester, Baja, WRX&WrxSTI, SVXYes it can. But the angle can be quite extreme. Better way to do it is separate the gearbox from the engine and pull them out from the top individually. You’ll spend quite a bit of time under the car disconnecting mounts, driveshafts, wiring etc. Remove the gearbox crossmember to give more room if going for the one piece removal.
-
im pulling the engine trans and diff from a part car and sending the car off to the yard. i dont want to lay under the car and manipulate the transmission down. will it come out the top still bolted to the engine? 2001 legacy sedan
- Earlier
-
lmdew replied to 89Ru's topic in 1990 to Present Legacy, Impreza, Outback, Forester, Baja, WRX&WrxSTI, SVXwww.car-part.com is a great search engine for used parts.
-
89Ru replied to 89Ru's topic in 1990 to Present Legacy, Impreza, Outback, Forester, Baja, WRX&WrxSTI, SVXAgree. Given the wobble at the sprocket side I'm pretty sure there is damage to the head.
-
bushytails replied to 89Ru's topic in 1990 to Present Legacy, Impreza, Outback, Forester, Baja, WRX&WrxSTI, SVXSounds like a broken cam... Probably going to need a new head, since I can't imagine the journals are still good.
-
89Ru replied to 89Ru's topic in 1990 to Present Legacy, Impreza, Outback, Forester, Baja, WRX&WrxSTI, SVXCould be given what I found. Got the cam sprocket off. The head of the cam itself has a wobble. The intake ports in the head were half full of fuel, valves are tight apparently and certainly not moving. No cylinder compression from lack of valve movement.
-
Good luck! I'm more of an lift-and-big-tires wolfy myself, so have never gone to such an event.
-
bushytails changed their profile photo
-
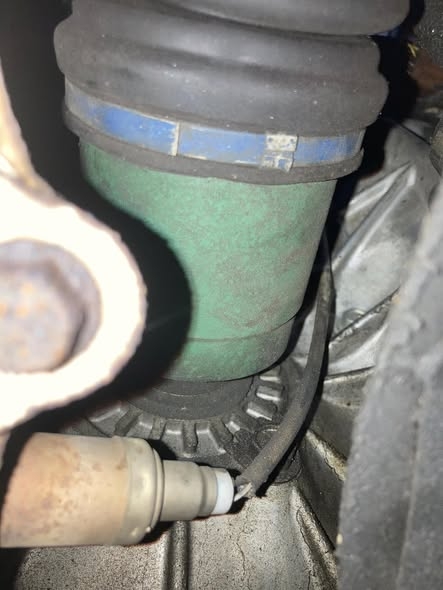
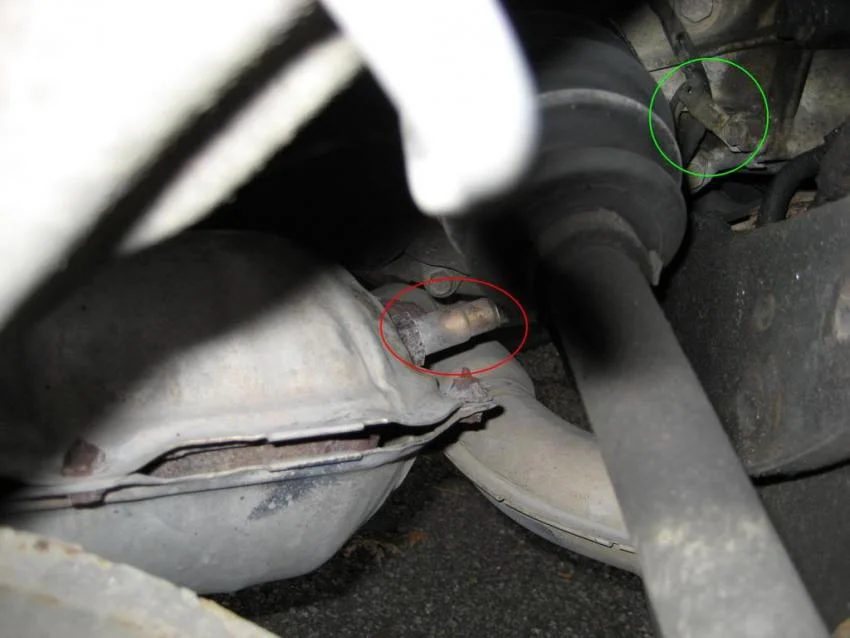
bushytails replied to DarkenLX's topic in 1990 to Present Legacy, Impreza, Outback, Forester, Baja, WRX&WrxSTI, SVXIntact factory wire routing keeps it away from the joint, but the clips and such tend to go missing after the first mechanic works on it... Attached is a couple more googled pics, of stock routing on a similar subaru, and of what happens when it's not in the clip. Just zip tie or otherwise secure the wire away from the joint.

-
DarkenLX replied to DarkenLX's topic in 1990 to Present Legacy, Impreza, Outback, Forester, Baja, WRX&WrxSTI, SVXOk thank you so what was it just a poor design choice by Subaru where they put it? 😅 Like im pretty sure the cv ripping out O2 sensors really should not happen to start with..lol
-
bushytails replied to DarkenLX's topic in 1990 to Present Legacy, Impreza, Outback, Forester, Baja, WRX&WrxSTI, SVXI don't have one of those, but here's some google-fu. The sensor wire is always pretty close to the cv joint, and I've seen more than one get wrapped up and ripped off.
-
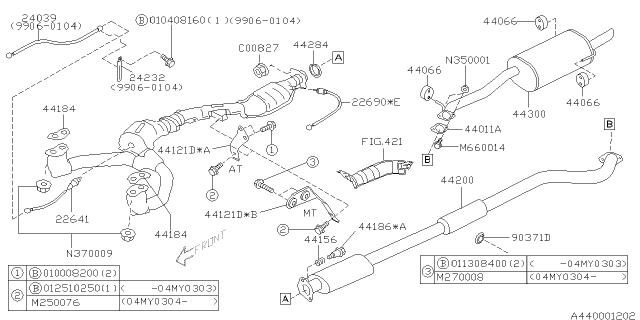
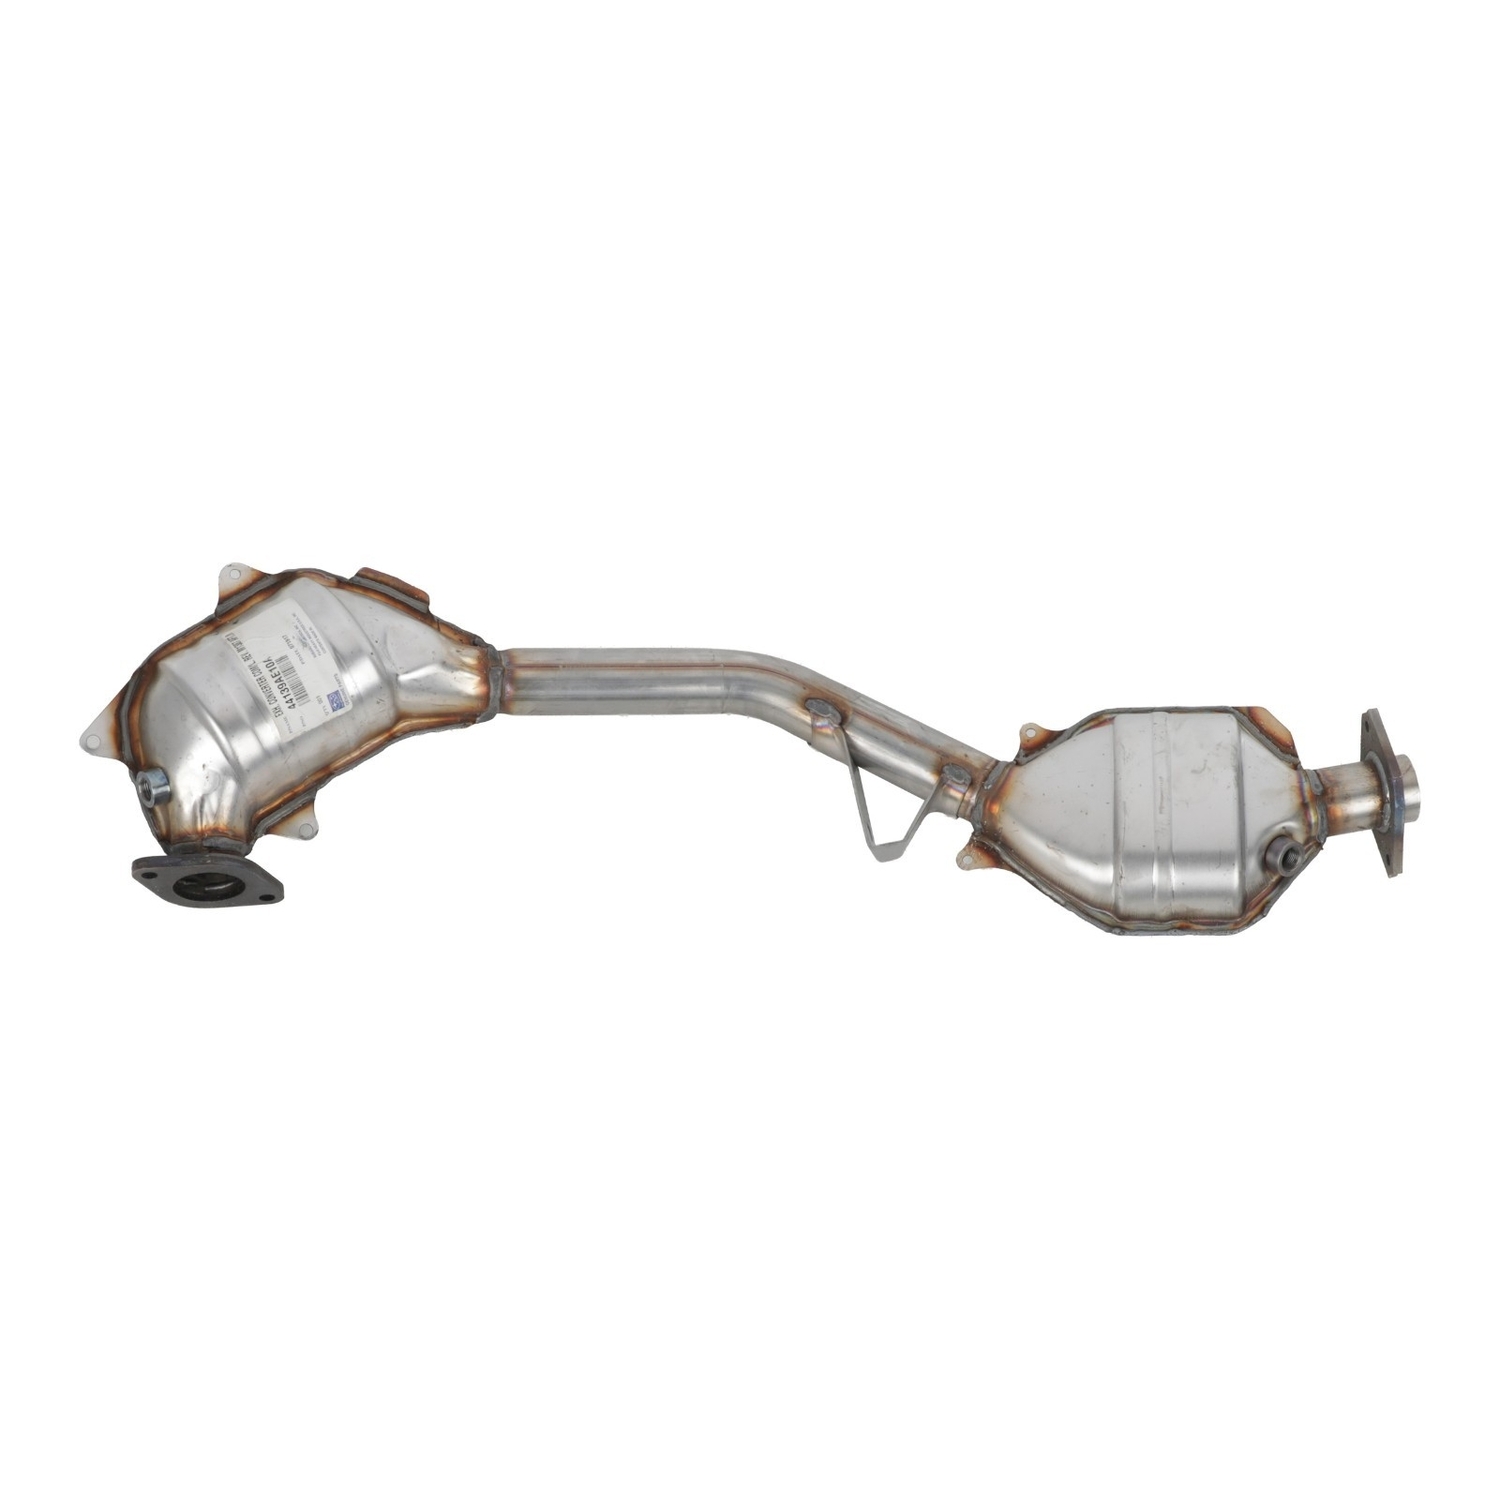
Hi does anyone by chance have or can get some pictures of the location is of the upstream O2 sensor on the exhaust system.. someone at some point before i bought my subie removed the cats and for some unknown reason removed/replace the pipe the O2 sensor screws in and I can't seem to figure where it's supposed to be positioned currently where i have it the wires wants to rub on the CV boot which is probably not really good for it. In thanks in advance for whoever helps.