
Leaderboard
-
Subaru_GL
Members3Points32Posts -
pontoontodd
Members1Points2618Posts -
slammo
Members1Points66Posts


Popular Content
Showing content with the highest reputation on 12/20/22 in all areas
-
Wonder if the R160 difference correlates to the one-bolt versus five-bolt design? (photos from Torq Locker's website) Knuckle mockup looks great, super excited for that! Hopefully the trailing arm dog leg doesn't cause any issues, that's not a lot of clearance to the wheel lol.1 point
-
B did some work on the blue Forester. It's been getting water on the passenger floorboards for a while now after (but not immediately during) rain or a trip to the car wash. He cleaned out a couple drains near the blower motor, couldn't find anything obvious. It seems to be leaking behind the rubber/foam on the firewall so it's hard to tell exactly where it's coming from. Probably not the source of the leak but he also noticed the area in front of the passenger door hinges was mostly cracked. He cleaned off the paint around the cracks. I didn't get any pictures since I was working on my rear suspension but he got it all welded up and painted and put the fender back on. He also replaced the tie rod and wheel bearing on that corner, they were both a little sloppy. First issue I ran into trying to mock up the front CV axles in the rear for the billet knuckle was that the rear axles in this thing seem different than any other EJ Subaru rear axles I've run into. This is the rear diff in the green Impreza: All of our other R160s look like this, including the one in my red Impreza which is a year older: Green Impreza axle on left, "normal" EJ rear axle on right. I think the splines are the same, obviously the snapring groove is totally different, also the spiral cut bearing diameter from the green Impreza is smaller. Just made sure I wasn't going crazy and took a look at some of my rear axle collection, they're all like the one on the right in the picture above. Long story short I turned up a dummy stub for mockup instead of using one of the ones we'd made. Ultimately it doesn't matter since I'm not going to use this diff but surprised me a little. Need to swap the R180 in (finally got one) and put those stubs in to see how that works out. Mocked up some new links with the billet knuckle. Surprisingly it doesn't seem like the trailing arm should be much longer, just needs a big dog leg at the rear end to clear the wheel. Need to mock that up better with some round tube bends. This is with the Impreza trailing arm bracket and no spacer. Lateral links need to be a little over an inch longer as expected. Surprisingly the tire doesn't rub the wheel well much worse than it did before. Camber is zero at ride height in the middle of the adjustment as best I can tell. Caliper bolt and strut nut are close to each other but can be removed and installed independently. Hard to tell in this picture but decent clearance even with the "big" front axle installed. Boot needs a strap but there's plenty of room for it.1 point
-
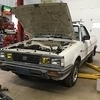
1 pointAt this point, I'd finished with all my engine bay paint work and repairs, and I was sick of tripping over the engine and transmission on the floor. Time to get it installed! It's starting to look like a real car again! I immediately ran in to my first oversight. A seasoned FF-1 enthusiast will note that this intake manifold is missing an important hose barb for the heater core. I used a 1400 intake I had lying around because it was one piece and fit right on, but it turns out I can't use it. I started running coolant lines and found this right away. Thankfully the parts car had the intake I wanted, a single piece but FF-1 specific unit, 1300g only. I quickly stripped it down and cleaned it up. My first coolant hose mock up, you can see where I really needed that last hose connection. Of course, I now needed to swap the carb throttle body back to the smaller base FF-1 style, so I took apart 3 carbs to piece together one nicely moving and functioning throttle body. I'm working on the throttle cable linkage now, it's been a challenge because the 1100 and 1300 are completely different and share almost no parts. I didn't take many pictures, but I spent many hours drilling out all the broken front end fasteners on the car, more than 12 by my count. This allowed me to bolt up everything on the front for the first time in possibly 45 years! Look, a real car! I'm stoked, it's really coming together! A recap of what you're looking at here: none of this car's original front sheet metal is present at this point. The hood, fenders, grill, and headlights are from the parts car, the turn signals are straight from Japan (used but extremely nice), and the green valance was from the Seattle trip. The bumper will be a project on its own, but the hood opens and closes with the latch as it should, a huge achievement! The holidays will surely slow my progress, but I'm pleased with how well it's come together at this point. Stay tuned for more!1 point
-
1 pointNext, I needed to turn the car around to start playing with the engine, so I needed to sort the steering rack. I'm still not done, I'll have more pictures when I get back to it. The FF-1 rack is easily disassembled, so I took a whack at "rebuilding" it. It was full of nasty 50 year old grease, so I cleaned everything, painted the rack housing, and re-assembled it with new grease. The nylon bushings were fine, it just needed a deep cleaning. I also took the opportunity to rope in the replacement rear window. I had to cut the seal on the parts car, but the old seal from the broken window was still nice and flexible, so with my friend helping it went right in. With the rack temporarily installed, I put the wheels back on and shuffled the car around in the shop until it was facing the other way. The hood will need work, hence the board. The original hood was very bent and poorly repaired in the past, so the parts car hood will be what I run. It seems that the hood latch failed and the hood flew open, or perhaps the junkyard the car was in took some liberties in getting it open. This is what the support looked like, you can see the hood prop was ripped clean off the cowl. The original hood has a good support, so I'll be drilling some spot welds and extracting it later. The cleaned up and repaired passenger side really made the battery tray look bad, so it was next to tackle. It also has some dents and accident damage, but not nearly as much as the other side, and the parts car was very rusty around the battery tray, so I did my best to straighten it up. I worked it over with a hammer and dolly to get it closer to straight, it helped quite a bit. Again, I have no idea what I'm doing, but it turned out alright so I'm not worried. I wire wheeled the whole area, and used some sheet metal screws to fasten the battery tray down better. Most of the spot welds were broken from past body work. The seam sealer came back out to cover up the sheet metal screws around the battery tray, and then I brushed some "canvas white" rust-oleum enamel paint on the whole area. It blends fine, and looks 100% better.1 point
-
1 pointIt's been a busy month, I've made tons of progress on this project finally. The subframe finally came out, no broken bolts but lots of penetrating oil required. The subframes met briefly before being swapped. The top one is the original, you can kind of see how bent it is by looking at the bumper mounts. With the subframe out of the way, it was finally time to get out the grinder... The point of no return! I bolted the "new" subframe in to begin lining up the replacement inner fender. I also bolted up the fender, grill, and core support from the parts car to help line everything up. The first test fit showed where I needed to trim the inner fender just a bit to get it to butt up correctly. The inner fender pre-trim, the gap is close but not perfect yet. The car had been rust proofed, but the parts car never was, as you can see by the color difference on the inner fender. More test fitting, this is with the original fender to the car which is VERY bent up. The bumper is also twisted, but I wanted to see how it would mount up. The final fit, with just a small gap to fill with weld present. I left everything bolted up to hold the part in place for the first few welds. First few test welds looked great, so I went at it. Quick note, I'm not a trained welder, I know these welds aren't perfect, I'm sure I messed up a bunch of body work because I'm a hobbyist. Feel free to judge away, just know that I'm not performing any metal work for hire or on anyone else's cars, so I'm the only one who will be effected by the quality of this work. I went up and down the seam with single tack welds spaced apart to keep it cool, grinding between welding sessions. I spent 3 or 4 days welding this up, doing it in my free time and letting it cool every time. Hey, that looks something like a real repair! I quickly primed and brushed some seam sealer on the repair, to hide my shame and add a factory style finish. Everything is lining up nicely, the core support measures out on both sides, and it's starting to look like a real car! More in the next post, I really have been cruising on this.1 point