rainman19154
Members
-
Joined
-
Last visited
Everything posted by rainman19154
-
rainman19154 replied to WickedV6's topic in 1990 to Present Legacy, Impreza, Outback, Forester, Baja, WRX&WrxSTI, SVXhahah awesome
-
Booyah!! Someone chimes in that has experienced my pain. Yes, I ended up at Autozone too and bought a split flange there. They do have a range of sizes. I selected the 2"-2 1/4" size but I won't know for sure if that is the right one until I get into it. Guess I should go back and give my self more options. ..... Do you remember what size you used? I'm striking out finding the bolt and spring kits.... my split flange comes with bolts, but no springs. I've even thought of going to a dealer for the set. But you ended up with differant bolts anyway? I'm thinking of putting a second jam nut onto the bolt if I can't find a spring kit. What about reusing the old spring? Is it salvageable?
-
Those kits do work well, by all accounts. I hand treated mine with rubbing compound. They're not perfect or near new but at least they do light the way now. Time invested hand rubbing is directly related to how much improvement there is in the light level. The kits generally include the buffing wheel to chuck into a drill - obviously it makes the task much easier and probably does a better job than my hand rubbing. I'm just too cheap to buy one.
-
rainman19154 replied to Lucenut's topic in 1990 to Present Legacy, Impreza, Outback, Forester, Baja, WRX&WrxSTI, SVXReplacing the fluid is EZ!!! Get an oil drain pan and pull the drain plug on your tranny. You'll get just about a gallon (on my '95 that's how it is). Replace the drain plug. With a long thin funnel, down the dip stick tube add a fresh gallon of ATF. Start the car and run the engine for a few minutes. I'll keep my foot on the brake and move the shifter to Reverse, then Neutral, down all the gears and back to Neutral, then Reverse again. Put it back in Park and shut the engine off. Drain it again and add a second fresh gallon of ATF. Repeat at least three times, four or more is better. I'm one that fluid changes fixed my Torque Bind. I do feel it sometimes but nothing like the KATHUNK!!! I felt when I first got the car. Now that I know about the problem and how our systems have such a low volume of ATF anyway, everytime I do an oil change I also drain the transimission and refill it with a fresh gallon. Total capacity is 8.4 quarts, so dropping a gallon out regularly keeps the fluid from becoming totally trashed. I don't know that brand is real important but I think you should pick one and stick with it. I use the Autozone store brand in my Legacy, but in my Mercury Tracer it's Walmart brand- that's where I was shopping when I first flushed the Tracer's auto trans. And be sure the first time you drain and refill just how much your car really needs. I know now for my '95 it's just about a gallon.... but your year/model may be differant. You do not want to under or over fill. You will want to swap out a couple gallons, drive for two or three days and then swap out another gallon or two.
-
Yeah, I'm leery of tearing into it, even if I get all the parts... for the reasons you describe. But I'm having zero luck finding an independant exhaust shop around. Mieneke and Midas are what I'm seeing so far. I guess I could try them but from what everyone else has said, I'm gonna get a sales pitch instead of an affordable repair.
-
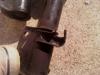
The Cat flange feels like it's pretty messed up on the top side of the joint. The worst I can discern is that the belled lip is pretty well gone on about a 1/3 of the circumferance. With a little luck, it can go back together and seal up. I'm not gonna fight the rusted hardware. I all ready plan to use new spring bolts and nuts, so if the pieces on there give me trouble I'll just cut em off and move on. On another thread, I've seen a two piece item from Napa that should help when dealing with a damaged flange. It's basically two piece hoop and the two bolts join each half of the loop. Unfortunately, I can't think of where I've seen a NAPA. Pep Boys, Autozone and Advanced are all close but I dunno what they're going to offer. You guys sound like there is a good chance it's repairable, so I will give it a try. Certainly I'll use anti seize on the nuts n bolts. Is there anything to apply to the gaskets between sections or does all that go together dry?
-
the linkage itself is fine used... it's just hardware. The bushings that snug it all up is a dealer item. There are online sources for used parts... and the linkage from a 20 yo vehicle is a prime candidate for that. I'm not sure what your target vehicle is or what it's set up is but if you look here (USMB) there are threads about setting that up with a stick for the hi/lo and a separate (push/pull), I think) for the 2wd/4wd. It actually simplifies the linkage you'll possibly be dealing with but you will have to cut a new hole and bring the extra control linkage in there. I may have it backwards about the 2wd/4wd but one function becomes a push pull stick along the tunnel, while the familiar lever between seats stays. 2WD in Low is nice for tooling along slow back roads.
-
95 Lego.... either 120K or 200K+.... history on the car is vague. At idle the leak isn't audible. Rev it up to 2k and it's still not distinct. Power brake (tranny damage, I know) and you can hear it. Going down the road it's very apparent. Go past a solid wall or a large truck that will reflect sound and it's a strong roar. I think the leak is between the second smaller Cat and the short 12-14" section. Perhaps it is at the back end of that short peice and the longest section, but both of those peices are in generally good shape. The flange on the small Cat feels pretty rotted on the topside where it joins to the short section. Frankly all the joints on the Cats are ugly and rusted, but that last flange seems worst just judging by feel. I was hoping to see some distinct dark soot to mark where the leak is but not the case. Looking at the condition of the Cat's flanges, I've very leery of taking anything apart. Unless I'm pretty certain it will bolt back up, I'd rather leave it as is. Many posts here suggest going to an independant exhaust shop that will work with me on a small scale, but I've had no luck finding one. I have devoted time and research but so far I'm zero on that issue. (If anyone wants to reccommend a shop in Philly, I'm open to input. It's a big city but I'm not finding anything in the east/northeast sections.) At this point, my next move will be to try the 'glob of JB Weld' tactic. And if it works, great! But what are the downsides to that? If it doesn't seal will I be any worse off?
-
Yeah the overseas markets are RICH with D/R units. I have a Legacy now and there are D/R units for it available beyond North America. There have been threads about getting them shipped from Australia and New Zealand... more recently Central America, but I don't know that any of it worked out. All things being equal, for what I'd end up putting into a 2nd Gen rig, $1k to $2K wouldn't be crazy for a D/R unit to fit my Legacy. Of course I can work on a project an affordable bit at a time, but the situation being what it is, I'm forced to consider a 20+ yo rig- that I'll have an even tougher time finding parts for here in the Northeast. I left Oregon last year and there are old Subes all over the place there. Here it seems pretty slim. And as for the MPFI- all the better, absolutely. Another reason to stick with the Legacy... there's better technology in there, for sure. Right now, I don't know that I can find an affordable project to start on or if I'll be able to get recycle parts to build it.
-
I"m guessing anything with an Automatic would not have the D/R? Thx for the response, BTW. This sort of detail can be hard to search out.
-
I''ve started watching the local market for 80's era Subbees but so far haven't seen anything older than 87- Loyale style. Frankly, I'm only interested in a rig with the Dual Range. I've had it in the past and won't bother with a project Sube that doesn't have it. Reading another D/R thread there was referance to D/R as late as '89 - I'd only seen it in the 2nd gen (up to 86?). When looking at Loyale era cars, are there models to look for? Any sort of a tell tale other than looking inside the car and seeing the second shift lever? Thinking 'outloud", I guess I could find a whatever 4wd and swap in the D/R later?
-
It's a good read. Seems like you're having fun, despite adversity. Keep us informed - it also seems like you're nearly done getting it back in one peice.
-
This place is Soobee Heaven, and is really the best forum I've been on.
-
Yeee HAAAWWW!! And welcome to the boards!!!
-
-
rainman19154 replied to WickedV6's topic in 1990 to Present Legacy, Impreza, Outback, Forester, Baja, WRX&WrxSTI, SVXGo grab em! It's not that big a job. I just did mine this week. It took me 90 minutes +/- to pull the replacements ... and I was robbing two differant corpses to get them. The install was about 2 hours for the rear and a little more than that for the front. And all of it done very casually. With modest effort, you could certainly shave 20 minutes off of my times. Grab em on Saturday and have em on by Sunday afternoon.
-
rainman19154 replied to WickedV6's topic in 1990 to Present Legacy, Impreza, Outback, Forester, Baja, WRX&WrxSTI, SVXwas that bumper swap a simple bolt on? I'm grabbing an OB bumper and grill from a 96 (as soon as Pick a Part gets it processed into the yard) - and i'd like to double check that it's a straight swap. From all I've heard about the early OB and their Lego siblings, this should be no issue.
-
I had two wagons/ squareback rigs that came with them (Subaru and S-10 Blazer)... I consequently added deflectors to the next two rigs I owned (Subaru and Toyota 4Runner). If you live in snow country or drive miles of dusty road, they are a big upgrade. They keep the back window clear when it would otherwise be covered within minutes.
-
+1 GF and I were both ROFL at that bumper sticker.
-
Just a finish up note. The front set took a little longer but really was not too difficult. As expected the main bolts were torqued a lot harder than the rear set. Well, were tougher to break loose. I'm back to wishing for a few 3/4" drive tools. I did my own Kentucky Windage on the top camber bolt and spun it all the way inside, making my own allowance for the longer legs. I set the Fastcam bolts on the rear the same way. I will get an alignment but I found some other work to do first. I have a little play in my inner tie rod and that boot is torn as well. Once I've put those right, then I'll take it in to the proffessionals.
-
First.... I wish I'd read this sooner- http://www.dirtyimpreza.com/forums/s...ead.php?t=6365 After lots of back n forth this week about 'Fastcam' bolts - which I'd never heard of before - there was a write up all along. This was linked from a thread in the suspension forum. It's a great write up: at least for me it answered my questions about camber, plus it had specific info on the Camber bolts. And after reading the warnings boldly prominent at DirtyImpreza, I'm gonna take time to pull my rear wheels off tomorrow and double check my work. I did have the right idea about the camber and how I set the bolts (tip the top of the tire in -"positive camber") But I am worried whether or not I have the tabs in like they're supposed to be, and not smashed flat or broken off. I understood how they were supposed to fit, but it was work manipulating it all together. I might have screwed them up and not realized it. Once I got the struts installed and the car off the jack stand, I just did a quick clean up and went to dinner. I left the hub caps off, the lugs aren't properly torqued and the brake lines aren't fastened --- I more or less expected to be finishing up back there tomorrow. Now I definitely will have it back up and tires off for a thorough inspection. But that is all after thought. The job itself went pretty smoothly. I had meat slow cooking on the grill at the same time I did this swap. It was Saturday: I really took my time and it was still only about two hours. Not really a big deal. The nuts and bolts of swapping the rears was no surprise. Having a couple of long pry bars to flex the suspension and a 4 lb sledge for appropriate love taps were extras that were great to have on hand. I did use my 18v impact to spin fasteners in and out, but its a light tool so I had to break loose and torque everything down manually. 1/2" flex bar and ratchet, combo end wrenches, flat tip screwdriver and pliers -- pretty standard for the most part. I did break out the hacksaw to cut the mount tabs for the brake lines. The other option would be to disconnect the line from the caliper... and that meant I'd have to bleed the brakes as well. I cut on one side of the hole in the bracket and used pliers to bend the new tab open, letting the line free. It was pretty ugly but those struts were getting tossed. I made a clean cut on the bracket before I put the replacement struts in- I'll edit here later ---->>> What I did was put the same metal section of the hose into the open bracket and then gently squeezed the bracket enough that the fitting is captured. The grip is not tight and damaging, the anchor point is essentially where it has always been... I feel comfortable with it. It will be something to monitor and if one looks loose, I will zip-tie it.<<<<<<< I do have an 18v cordless recipro saw but with the brake hose right in the line of fire, I went all manual so I would have better control of what I cut. And I did find that the ABS lines aren't attached to the strut but are very much in the way. I really had to take care not to stress them with the bottom ends of the units on either side - removing and installing. And when I went to take it off the jack stand on the first side, I learned the extra two inches of suspension left me cramped for lift on my modest floor jack. I had to raise the car to get the tire back on, then there was a brief moment when I worried I wouldn't get it off the jackstand. Seeing all this on the driver's side, I plotted more carefully where my jack points were when I did the passenger's side.
-
I've pulled 8 struts in ten days from Pic A Part. I've a full set of OB units for my Lego. To warm up, I've done front and rear on my 94 Mercury Tracer. The Lego will have Fastcam bolts to deal with but I hope it goes as easy as the Tracer. FWIW, the fronts were easier than the back.
-
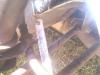
rainman19154 replied to Nolapete's topic in 1990 to Present Legacy, Impreza, Outback, Forester, Baja, WRX&WrxSTI, SVXThose are some good shots. It's obvious how tough it is to get a camera under there where the lines route to- I appreciate the effort. Have you had to replace any fuel lines? Was that leak on your gas tank in the last shots? What did you do with that?
-
I've known of Tire Rack for some time but never had reason to do business with them. Summit I've dealt with only once before but I know they are universally known and generally well respected. Based on this one instance, Tire Rack really needs to look at their pricing. This order was less than $60 from Summit, and from Tire Rack it would have been well over $90. Edit: Aug 28, 2010 good pricing and fed ex delivery two days later! Summit gets a thumbs up from me.
-
- - -on the rear strut, did you use the Fastcam on the top or the bottom? I want everything in place when I take it in for the four wheel alignment. Thx for all the feedback. I will post results once I've torn into this. I ordered up four of the Fastcam bolts. It was an interesting search. Tire Rack wanted $20 each, plus a high shipping charge. Summit Racing had them in pairs for $24 and fairly cheap shipping. Summit ftw... and they accept Paypal; another plus. And fwiw, they do match them to make and model. 14 mm is what they listed for the Lego... the same as someone else mentioned here at USMB.