caspice
-
Posts
48 -
Joined
-
Last visited
-
Days Won
1
caspice's Achievements
Advanced Member (3/11)
16
Reputation
-
I drew up some plans and priced up the material, but never got around to actually fabbing it up. At this point (work/life/blah blah) I just put the stock bumper back on, minus the indicators.
-
Ea82 engine gaskets and seals and clutch fan
caspice replied to burtonboarder84's topic in Old Gen.: 80's GL/DL/XT/Loyales...
Fair enough. burtonboarder84..if yours is still spinning along at temp and highway speeds then replace it or as Ivan said ditch it -
Ea82 engine gaskets and seals and clutch fan
caspice replied to burtonboarder84's topic in Old Gen.: 80's GL/DL/XT/Loyales...
eplacement; either from the JY or auto store. -
Awesome job Rust! The originals had an illuminated Blue switch on the lower left dash labeled "Passing Lamp" The subaru design engineers out did themselves with that whole setup of the motorized emblem. +1 on the hardware cloth stoneguards on the grille and headlamps. What did you use for the brushbar and roof rack?
-
Any suggestions on where to get parts from?
caspice replied to pablo83's topic in Old Gen.: 80's GL/DL/XT/Loyales...
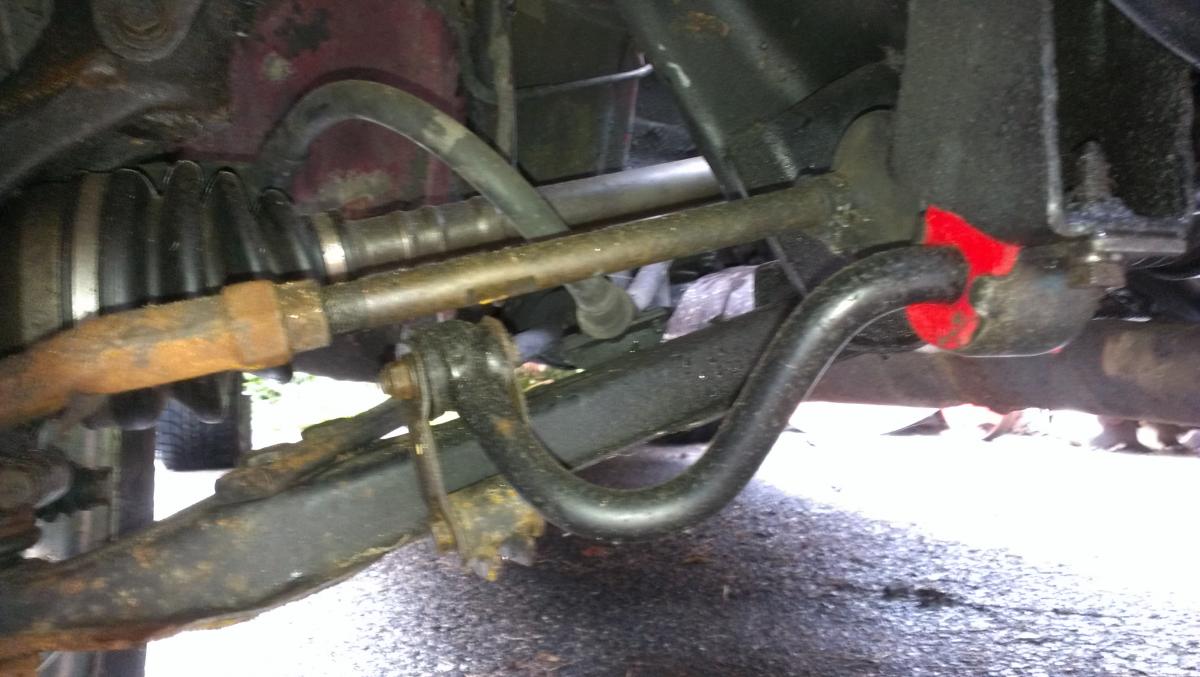
Just to clarify, are you looking for bushings at #15? You can try these: http://www.energysuspensionparts.com/proddetail.asp?prod=W71581 Not a direct replacement, but you can squeeze them in. Just remember to grease them up first.

-
In lieu of applying temporary paint you can try this: Wash the car, let it dry, apply some Paint Cleaner then apply a good quality Wax. Do this by hand...elbow grease. Do not just go to the autowash and expect their waxing to do much of anything. A manual application, Wax on-Wax off, is required. It may not improve the appearance of the flakey clear coat, but it will provide protection and decrease the rate of paint degradation.
-
In need of chiltons manual for a 1990 loyale wagon
caspice replied to AustRabel's topic in Old Gen.: 80's GL/DL/XT/Loyales...
You can access the Chiltons manual online through some libraries. Inquire with your local branch to see if they proved this service. Also run a web search for Chiltons Online library and you should get results. -
Great tip. How much gunk were you able to remove? How many miles does all that crud represent?
-
Neat mod. Whats the biggest load you've pulled with that setup? Would'nt be able to replicate on my wagon since my bumpers are rusted out.
-
Mark, Can you provide some details? What bits constitute your trailer hitch? How does it attach to the vehicle? How does it differ from a Curtis unit?
-
Body work: removing fender/quarterpanels
caspice replied to thesmith's topic in Old Gen.: 80's GL/DL/XT/Loyales...
Hope that no one was hurt. If memory serves corrrectly it is a 10mm head, and there are three at the door, six across the top/under hood, two behind the bumper, three on the lower valence. Remove the marker lamp assembly since it attaches to tje fender with a screw on the side. The thin strip above the bumper under the head lights and grill has two bolts on each side; take the horns off. Easiest to start by removing the bumper. Before you go to the JY, take the parts of of your car first. That way you will have a better idea of what size and how many fasteners are holding everything together. You will also know how extensive the damage really is and what you need to get from the JY. Good luck. -
ADMIN...can I get this thread moved to Member Rides? Thanx!
-
When was the carb last rebuilt? Indescriminately changing the fuel-air mixture ratio may compound your issue. Do you have a FSM? If it is randomly kicking into a high idle start with examining the electric choke. If it will not idle under 1200 rpm your problem may stem from clogged idle jets, bad fuel mixture, incorrect timing. Verify the PCV valve and hoses are clear. Years back picked up a great condition low mileage GL hatchback for a few bills because it wouldn't idle and could not be driven over twenty mph. The cause was a bad PCV and clogged breather hoses.
-
This just gives me an excuse to fix something else. If the weather holds next weekend, I will take the newused sunroof out, clean off the paint on the roof near the hole, and tack on a repair strip of sheet metal to decrease the width of the opening. A little mud, a little sanding, a little paint...no worries. That has to be more fun than pulling the transmission on my 04 Ranger to replace another crapped out slave cylinder.
-
Since it is a beautiful sunny day thought that I would change out my old leaky sunroof. Removed all the screws from the retaining ring and it came right out. No worries. Took the frame from the new used one, placed it on top of the roof and measured, and marked, and measured, and marked (you know where this going...right?) Pulled out my trust sheet metal nibbler and had at it; nice and neat. Trimmed up the headliner; again nice and neat. Put the new used frame halfs together, screws all in. And of course, doesn't quite work out the way planned. My old sunroof dropped in from the top and was held in place by a retaining ring screwed in from the bottom. The new used sunroof frame is designed so the the top half nests inside the bottom half then it is screwed together. Needless to say I am an idiot ;-), having transposed the width of the bottom frame for the top. Now that the hole is cut I can clearly see the the design of the newer frame is meant to pinch the roof sheetmetal for a tighter seal. This is one of those moments when instructions come in real handy, too bad my new used sunroof didn't come with any. Just one of those times when you do something so stupid you have to laugh at yourself and tell everyone. Cheers!