January 3, 201313 yr The 84 turbo wagon I parted out years ago did not have power mirrors, but one that was in the junkyard about the same time did. Check your wiring is the best way to tell.
January 3, 201313 yr Author The 84 turbo wagon I parted out years ago did not have power mirrors, but one that was in the junkyard about the same time did. Check your wiring is the best way to tell. that is what i thought if doesn't have them it doesn't matter me.
January 4, 201313 yr Pull one of your side view mirrors or pull the door panel, look for wires. Alternatively, you could look for the connector behind the console, should be pretty easy, considering there is no console...
January 7, 201313 yr Author no power mirrors:rolleyes:but i did a tail light swap with the older 80-82 ones with the chrome plated plastic.
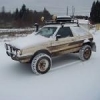
January 8, 201313 yr Author pics of manuals which im very happy about getting:headbang: from last week my treasures from the junk yard 1/4/12 grand total of $35:grin: the head light swap:D 1/6/12 also jacked it up like this(not for long in the rear just long enough to take off the wheels and hubs to check if the break cylinders where leaking which they were not and to check the beaks they look fairly new around 80%)
January 9, 201313 yr Author my dad called the cylinder head shop and i got some great news:):grin:the heads checked out fine and it turns out neither heads have a leak in other words a deep crack:headbang:so they rebuilt the heads and there ready to go:Dso where going to pick them up friday cost is $240 for everything they did they completely rebuilt the heads($100 per head) and both were pressure checked($20 per head)
January 18, 201313 yr Author got the gasket kit order on wednesday, it comes with everything from the head gaskets out and a little stuff in between. also ordered the rear main because my dad said it looks like it was leaking. so they will be in today and they will also be picked up:D
January 18, 201313 yr Author Where did you order your gasket kit from? at oriley's. but you can order it from car quest, napa, or from subaru.
January 20, 201313 yr Author was hoping to do a pick update but my google+ account isn't working right and my facebook was hacked:mad: well anyway went to the junk yard again:grin: and got a muffler that looks like it was just put on, auto starter that had the sticker on it still saying napa premium starter:D, 4 fender emblems, 1 rear subaru gl emblem, 2 oval emblems, 3 sets of hood stoppers, cigaret lighter, gas tank door(chrome one), plastic trim pieces at the end of the rear windows, and some bolts/studs with the price of $35:headbang:so glad i didn't go to napa and buy the starter for $100 but i did get it tested there and it passed.
January 22, 201313 yr Author pic update tomarrow since i finally got my facebook unlocked:horse:i did some more engine cleaning which has got easier since i got my dads engine stand:D i've been taking off brakets and cleaning them up with a bench grinder/wire wheel also with my craftsman drill with wire wheels, then painting them with hi temp gloss black paint. i even used the bench wire wheel to clean the puch rods(i blew out the holes for better oil flow too with the air compressor). also did the tube for the dip stick, power steering resivor, and the tube and cap for pouring in oil.im getting close to putting it back together i just need to clean up and paint the valve covers, alt/ac bracket, oil pan, the alumium thing thats 4wd turbo subaru, intake, some other stuff. Edited January 22, 201313 yr by turbosubarubrat
January 25, 201313 yr Author pic update the heads painted have dist. that will work might look for a better one though or clean one these up.(they look different sizes in pic but there not) http://sphotos-b.xx.fbcdn.net/hphotos-ash3/528893_236417469826732_276496216_n.jpg pic of the intake the case some more stuff painted or cleaned stuff from junkyard
January 25, 201313 yr Author previous post continued cat. had the pipe thing rust off(thats why my dad took the whole exhust off one of the subaru's we had) grounded off the rust and cut the braket off and patched(forgot to take a pic for the second patch after this one) on engine stand wire wheeled on bench grinder more painted stuff gasket kit wire wheeled all my extra emblems
January 28, 201313 yr Author quick update i got the heads on today:headbang:i just need to adjust the valve clearance then i can put the valve covers on(once i do a little touch up work on the paint on the covers). i also took apart the intake monifold, cleaned it, and painted it gloss black. now i just need to put everything back on it and get some new hose.
February 3, 201313 yr Author i've got most of the engine back together today:clap:i put the intake back together and put it on which is alot of work considering i wasn't the one who took it apart:eek:. also i cleaned all the bolts up i put on the engine and torqued them to what the manual said. i put 2 solid cement bocks under each wheel which lifted it about 8 inch, man its so much easier to work under it now:headbang:the blocks are roughly 2ftx2ft and are 4 or 3 inches thick.
February 4, 201313 yr Author pics tomarrow. bought a distributor from a board member today for $45 shipped its getting shipped on tuesday so will get to me sometime this week(only coming from washington). i got most of the transmission membrain bolted back on i had to take off the rear part because it was bent. also got the drive line hooked back up. also put on some more bits and pieces to the motor and adjusted the vavle clearance. so now all i need to do is put the valve covers back on and clean up the oil pan then put on rtv for the gasket then its ready to put back in and ready for new fluids which would be oil, anti-freaze/water mix, power stearing fluid, break fluid, and transmission fluid(see what that looks like tomarrow once i drain it:-\). after that stuff im going to put the exaust on and weld it together.
February 5, 201313 yr Author cat welded back together taped off took alot to balance it off for painting intake taken apart valve covers wire wheeled then painted engine reasembly wire wheeled then painted gasket kit minus head gaskets which i put on before pic
February 5, 201313 yr Author lifted up intake asembled and put on trans support was bent so tweaked it back in place with vise grips
February 5, 201313 yr Author yep have a transmission jack welded nuts onto the brakets for the maf because the ones that where on it were covered in plastice nd tore off. put the drive line on maf brackets took the interior apart for cleaning looks like i got payed to take the car:grin:
February 5, 201313 yr Author maf bolted on radio thats going in this over sized radio removed starter bolted on added about 1in of metal to the coil bracket so its held on it two places not one
February 6, 201313 yr Don't know how I missed this one? Great job! I always like reading your builds. Makes me wish I was 15 and had nothing more to worry about, lol. Great job on everything!
February 8, 201313 yr Author i adjusted the valve cleance yesterday a so i also put on the valve covers and gaskets on which means it is that much closer of being on the road plus i got the distributor in the mail today from a fellow board member. because i have a 4 day weekend this week dont be suprized to see the motor back in her thanks for the reply guys both the comments are so true Edited February 8, 201313 yr by turbosubarubrat
February 11, 201313 yr Author went to the junkyard in portland and found a harness that will work i just need to do a little re-arranging because it was off a 86 turbo 4wd xt-6. thats all i got but there were 2 other xt's non-turbo, 81 ea81 wagon with power steering and power windows(it had a weird center console with the power controls that was the low stlyle like a brat but was factory), some loyales and gl's.

Please sign in to comment
You will be able to leave a comment after signing in
Sign In Now