
All Activity
- Past hour
-
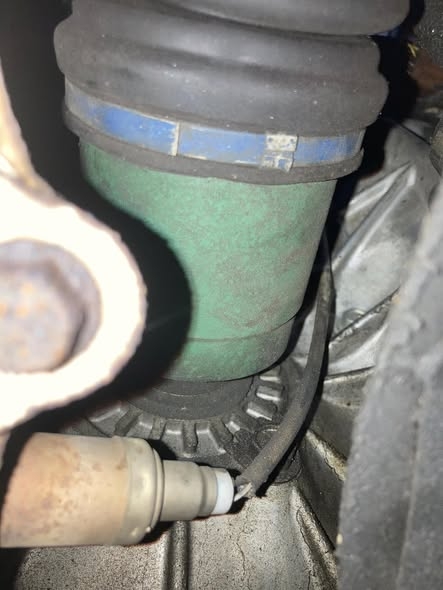
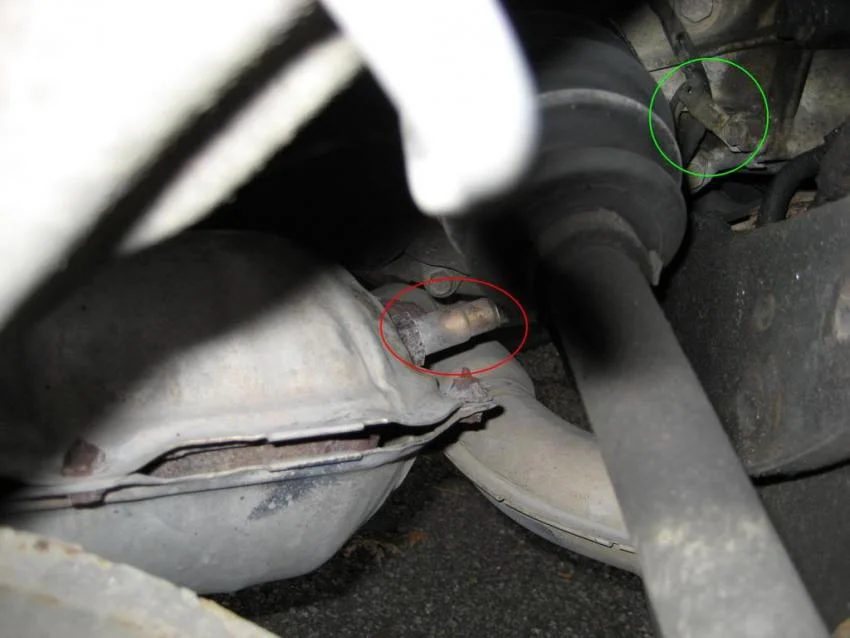
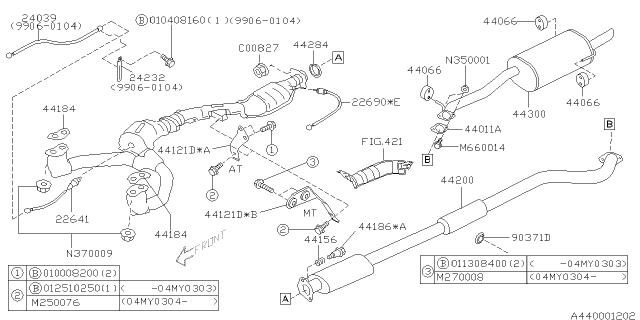
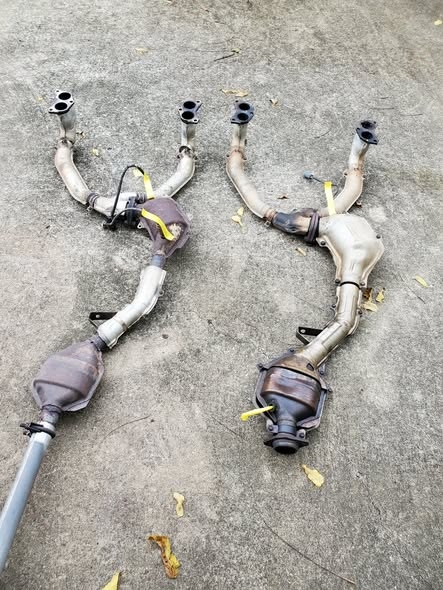
bushytails replied to DarkenLX's topic in 1990 to Present Legacy, Impreza, Outback, Forester, Baja, WRX&WrxSTI, SVXIntact factory wire routing keeps it away from the joint, but the clips and such tend to go missing after the first mechanic works on it... Attached is a couple more googled pics, of stock routing on a similar subaru, and of what happens when it's not in the clip. Just zip tie or otherwise secure the wire away from the joint.

- Today
-
DarkenLX replied to DarkenLX's topic in 1990 to Present Legacy, Impreza, Outback, Forester, Baja, WRX&WrxSTI, SVXOk thank you so what was it just a poor design choice by Subaru where they put it? 😅 Like im pretty sure the cv ripping out O2 sensors really should not happen to start with..lol
-
bushytails replied to DarkenLX's topic in 1990 to Present Legacy, Impreza, Outback, Forester, Baja, WRX&WrxSTI, SVXI don't have one of those, but here's some google-fu. The sensor wire is always pretty close to the cv joint, and I've seen more than one get wrapped up and ripped off.
-
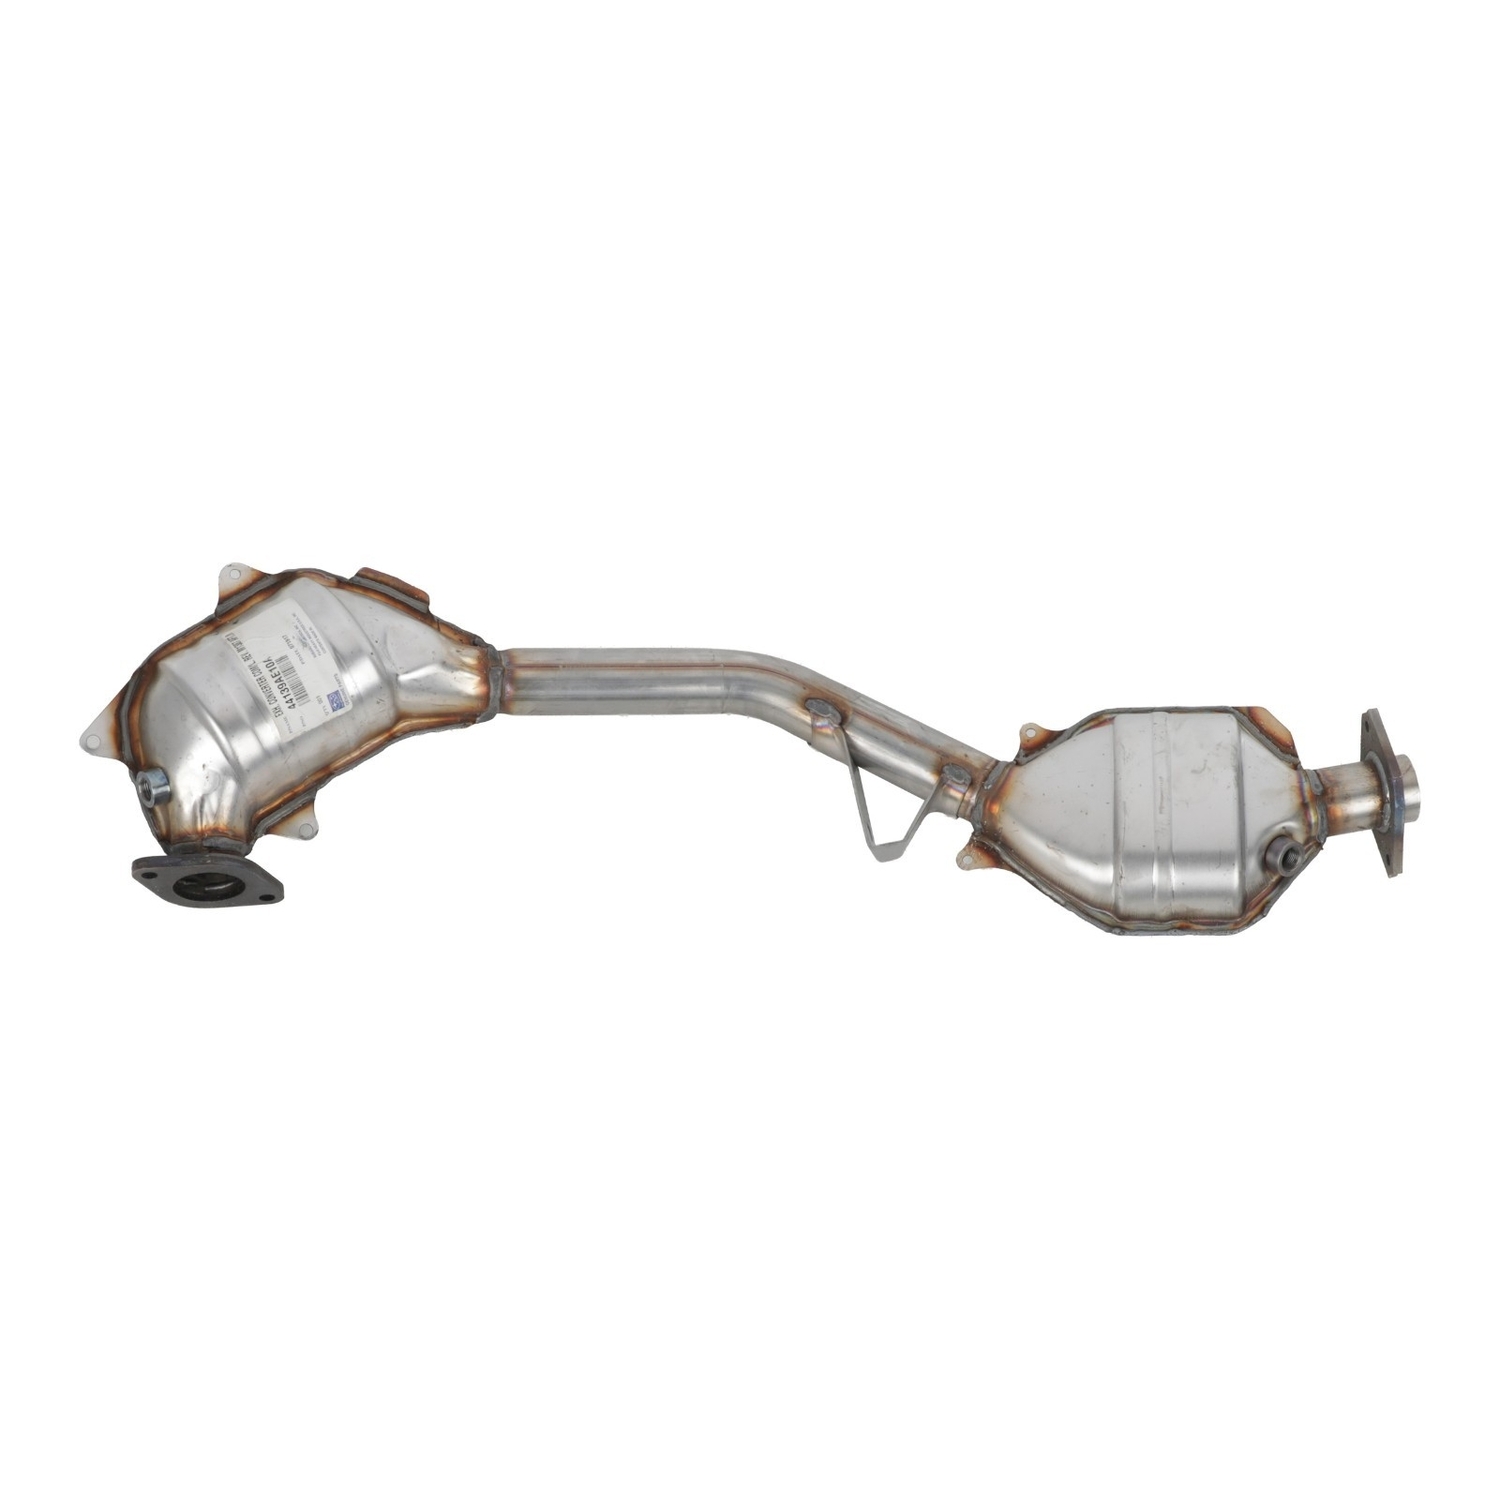
Hi does anyone by chance have or can get some pictures of the location is of the upstream O2 sensor on the exhaust system.. someone at some point before i bought my subie removed the cats and for some unknown reason removed/replace the pipe the O2 sensor screws in and I can't seem to figure where it's supposed to be positioned currently where i have it the wires wants to rub on the CV boot which is probably not really good for it. In thanks in advance for whoever helps.
-
Have some pictures to include with this post but site isn't taking them at the moment, will probably add later. Wife and I went on vacation for 11 days through AR, OK, and TX. Didn't really plan on doing any off roading but it'd kinda hard to avoid in AR. Met up with slammo for a day in his RAV4 prime. On our way to the beach in TX looking for the camping area he got stuck in soft sand. With the folding recovery ramps and a couple straps I was able to pull him out. Before swapping in a lower temp thermostat, engine seemed to plateau at about 215F CTS / 200F upper radiator temp while driving. If left to idle for a while it would slowly climb up (small fans kick in at 215F) until the large fans kicked in (220F), then they seemed to run indefinitely. Yesterday B came over and test assembled as much as he could of the billet knuckle conversion. Got his pair heat treated and painted. Bore for the long bolt/stud being tight was the biggest issue. I got a couple different ball hones but neither of them seems to remove material very quickly. Calipers with new pads seem to just barely fit his worn front rotors. He already swapped new ones on the front. We also had all of the lateral links painted, he got those anti seized and assembled. My main plans were to figure out the wiring issue on the Impreza and swap in a lower temp thermostat and bleed the coolant. On our recent vacation the delayed accessory power stopped working. Was still getting some voltage from its main battery feed but not enough to actually power anything. At the time I just hotwired it to the stock cig lighter. Turns out it had blown a fuse in the underhood fuse box, not sure if I checked those during my initial diagnosis. Cleaned up the wiring a bit put it back to how we had it and seems to be working now. While I was draining the coolant I had the bright idea to replumb the Ford heater cores we'd added under the hood. It seemed that with both of them in series on the heater core circuit the second one wasn't doing much, the first one seemed to cool it almost to ambient temp, and that circuit is a pretty small portion of the coolant flow. So I decided to plumb one of them into the circuit that goes through the oil cooler, figuring that would also cool the oil better. When I started I didn't realize those fittings are about 1/2”, not 5/8” like the heater hoses and cores we'd added. So I made up a couple of barbed adapters on the lathe. It was a bit of a pain to get the hoses routed but I think it turned out fairly well. Then I drilled a 3/16” hole in the top of the 78C (172F) thermostat and swapped that in. I'd had a stock 82C thermostat in it. Got a bleeder funnel recently too so we used that, no idea how much better that works than the normal method of just filling it up and driving. This all seemed like an improvement. When idling it would still eventually get up to 215F but once the small fans kicked in it would cool back down to 210F (where the fans shut off) and then slowly go back up. The only issue we noticed was the heater core circuit wasn't getting hot or even warm. I pulled various hoses off in that circuit with the engine running and just a trickle of coolant would come out at idle. I pulled both hoses off at the engine and backflushed it with compressed air and it seemed to flow great. Heater had been working great before all this. Eventually I just decided to drive it and hope it fixed itself. Which it pretty much immediately did. Maybe just needed some revs or jostling around to bleed. Regardless, it now blows hot air when you turn the heat on and both heater cores underhood get hot. Also seems like it takes less time for the little fans to bring the temps back down. While driving the temps seem to plateau at about 200F/180F so that also seems like an improvement. Will drive it a bit like this, maybe lower the fan temp at least for the small fans.
-
Hey all, just started doing rallycross events in Washington/Oregon with my stock 1988R RX. one event under my belt, & put the old girl through the paces! was on track to place 4th of 10 in the stock AWD class till i spun out in a corner transitioning from a field to asphalt, ended the day at 7th. Don't suppose there's anyone in here that goes to the NWRA events? I'm doin my best to keep the RX in the stock class for this year, tired old EA82t starts acting weird when it gets hot (190-205). next race is in Spokane in May, if you're there, stop by and say HI! i'll be camping at the track Fri & Sat nights.
-
bushytails replied to 89Ru's topic in 1990 to Present Legacy, Impreza, Outback, Forester, Baja, WRX&WrxSTI, SVXCould be a broken cam between 1 and 3.
- Yesterday
-
yay! :)
-
It has, still a light grinding sound, definitely from the 230k mile old wheel bearings, but no locking up
-
236k miles. Both heads rebuilt around 180k after we got it for cheap (tbelt break). Engine was replaced by previous owner, history not known. Sudden onset of running bad. May or may not have been some winter joyriding. Wondering about oil starvation? Runs very rough, engine is shaking, stalling at idle. cylinder misfire codes are not new. Able to limp home. At the end look for the cam wobble Tried a few quick fixes but no major improvement. The timing belt was off one tooth on the pass side cam. Reset the timing and runs better but still shaking, low power and still stalls randomly. Oil puddling on ground underneath on pass side from tbelt cover between oil pump and oil filter. Replaced the cam seal but probably also cam seal leak. CEL flashing intermittently, probably misfires. New Diamond coil (existing diamond coil didn't look bad at all). No improvement. Changed plug wires to new NGK (from existing NGK). New NGK plugs. FR5AP-11. A bit of chunky carbon on one plug (either 1 or 3) and #4 was loose possibly causing low compression and shaking. Now running with naked timing belt so everything is visible. Passenger side cam sprocket is backing off the cam! Able to turn the timing belt with a socket on the cam bolt, but it doesn't feel loose at all. Cam sprocket is wobbling while running. It likely partially backed off the keyway. So many questions. Did the cam sprocket rotate on the cam? I just don't see how this would be possible. Cam oil seal is compromised and oil is puddling below the cam. Oil coating the belt and flinging around the engine bay. Is the cam itself out of round? This seems impossible. Maybe the cam journals are gouged out. Car is knocking. Bottom end problems? Finally got the car on a trailer after sitting in a parking lot up in Michigan for a bit. Back in the garage. Just now checking compression after finding a new ride for the daughter, of course a Subaru. Cylinder compression is good on 1, 2 and 4 (220, 205, 200) but ZERO on cyl 3. Plugs look ok, not oily. Will pull the engine and check out the head. Probably the valves got grenaded on #3 or worse. Car hit a deer in 2024, needing a bunch of sheet metal replaced in the front. Tbelt cover was cracked. Wondering if the cam sprocket took an impact that was missed.
-
And did it fix the problem?
-
I Put a feeler gauge in the conical washer, there is an uneven gap. Fixed it. Checked the bolt holding the caliper on the bottom, the bolt was half sheared which kept the caliper at halfway open but not fully loose
-
"Any suggestions on common causes" The most common cause... it's almost 40 years old. :) Lucas can help slow oil usage, as can switching to 10w40 or 20w50. If the turbo is leaking, replacing it is probably a good first repair step.
-
Hello all! 1st post here, just picked up a new to me 1988 RX with EA82T a couple months back and trying to keep it running well enough to get a full season in the stock class at he local NorthWest Rally Cross in WA & OR. So far, i've put a new exhaust, new wheel bearings all around, ball joints, new rotors up front, pulled oil pump and replaced all seals, replaced a handful of vacuum & water lines, chased a few electrical issues including a burnt up fan resistor that nearly caught the car on fire due to all the left over rodent seeds left in the vent lines, & added boost gauge. i'm getting 110+ compression on each cylinder if i recall correctly, checked that just after i got it and forgot the numbers since. currently fighting what seems to be a sticky valve? went for a test run up a near by mountain road, lots of turns, roughly 9-10mile climb, pushed it fairly hard up the hill. once at the top i had to go downhill a bit before a good turn around point, ran this at low RPM, turned around, and on the short hill climb at 3-4k RPM, the engine had a hard pop (sounded like a backfire/detonation), followed by a muffled brrrrrrrrr sound for a second or two, getting worse every time i put on throttle and complete lack of power. let off the throttle, idled down & down shifted, power came back and problem never returned. at the top of the hill i was at about 190-200 deg F. drove very light the rest of the way back down the 10 mile decent and got the temp back down to 185ish. checked the oil, it was not milky, coolant also looks good, however, my intake manifold has quite a bit of thick oil build up throughout - i'd say about 1/16-1/8th inch of sticky oil buildup throughout. I'll be going through the PCV breather system soon to see if there are issues there, and likely replace the turbo as well just to be safe (it does boost well, i just suspect it leaks oil). probably worth pulling the intake off and giving it a good clean. Any suggestions on common causes for the oil build up in the intake? would an Air/Oil seperator be worth adding, if so, any particular one work well on the EA82T? Next up would be my oil. it goes black and runny really fast, and a quart disappears fairly quick as well - doesn't smoke a ton when running (a little at a cold start, then smooths out), no oil in water, and it doesn't leave puddles in the driveway. currently running 10w30 high mileage Valvoline. next oil change planning to jump to 10w40 same full synthetic Valvoline - unless someone can give me a good recommendation on what they've had work well! the cars got 140k on it, and the engine had the top end gone through about 6 years ago - i'm just not sure how many miles it's had since then. in addition to going black and runny fast, i can get good oil pressure when the engine is cold 40-60psi, but once it's warmed up, at rev i get 20-30psi and at idle 0-5psi - this was before and after the oil pump reseal - when it was on the bench, everything looked decent. Would there be a good oil additive that could assist with the intake oil build up and help clean up my valve guides if they are getting sticky? thanks in advance!!
-
Your wheel bearings are shot, the hub nut (big 36mm hopefully with a cotter pin) is loose, or both. Jack up the wheel, release the e-brake, grab the wheel top and bottom, and wiggle. If the whole axle wiggles, including the cv joint cup, your wheel bearings are bad. If just the drive flange wiggles on the axle, your hub nut is loose. Remove cotter pin, put tranny in 1st, tighten until engine starts to turn, put e-brake on, tighten until e-brake slips, lower down, tighten really bloody tight (150ftlbs), keep tightening until cotter pin goes back in. This multi-step tightening process is to make sure the drive flange ends up centered on the shaft and bearings - if you just crank it down with weight on the wheel, I've had them end up crooked. Edit: Another thing I've seen is your caliper has come loose (bottom bolt backed out) and is rubbing on the wheel, but that usually causes loud clunks and occasional lockups, not grinding and occasional lockups.
- Last week
-
WRXDannyW joined the community
-
19Red_wgn98 joined the community
-
RX88 joined the community
-
So randomly, one day, I go to drive the wagon and then I brake coming up to a stoplight, and the front passenger wheel is making a grinding noise as the wheel turns it get stronger almost like there's a high spot on the rotor, then it locks up here and there, but the rotors and pads are new - less than 250 miles on them - and brakes have been bled
-
New outback (to me) with non functioning power liftgate Liftgate just beeps but won't open when pressing the open button on the fob. Tried the reset trick by disconnecting the battery and shorting the battery leads together to reset the system, didn't work. Toyed with the option of converting to manual liftgate cylinders but we still need a functioning latch. The manual liftgate latch will not fit in the stock powered liftgate actuator position (non compatible mechanically). Also tried bypassing the touch sensors in the liftgate but this did not help. Disconnected the touch sensor connectors (two pin, left and right) and checked continuity across the sensors. Opening the liftgate (relieves pressure on the touch sensors) and both sensors should read 10k ohms. Remove the left sided lower touch sensor (two screws and a plastic plunge keeper that needs to be popped out). The lower touch sensor has a mating connector for the upper touch sensor, so both are daisy chained together. The upper touch sensor does not come out easily, apparently it is glued in place and if removed, needs to be replaced (according to the FSM) May spoof the system with a 10k ohm resistor across both touch sensor connectors. This is just for a test, as operating in this mode is risking someone (or something) getting trapped between the liftgate and the body) BOJACK 1000 Pcs 25 Values Resistor Kit 1 Ohm-1M Ohm with 5% 1/2W Carbon Film Resistors Assortment Amazon $15 A new liftgate actuator wasn't in the budget so opted to troubleshoot below. With parts and test equipment still came out ahead. Latch and Actuator Tailgate (power Rear Gate) Part Number: 63032AL000 $350 Remove the plastic access cover on the liftgate to show the innards on power up. Video shows the system searching for the home position and not finding it and defaulting to the liftgate latch open position. As a result, the system 'searches' for home, and not finding it, may leave the system in another state, such as unlatched Video of liftgate actuator The green 'sector' limit switch (with the lever pressed in, in closed position) defines the home position but if this switch is failing the system won't work. Schematic of power supply and switches One switch (OFF ON) is used to bump power on and off. The other switch (OPEN CLOSE) allows reversing the polarity of the motor leads and therefore motor direction. I only had two position switches DPST on hand so this is what I used. A single momentary DPST switch would work better, allowing momentary ON/OPEN ON/CLOSE with the default position OFF (center). Rigging an external power supply at 12 volts on current limit (guessed at 3 amps) with manual switches to simulate the battery and control module allows actuating the liftgate open (fully counterclockwise on the gear) and closed (fully clockwise) Power supply doesn't have to be fancy, just the basics but this is what was available (don't need USB) DC Power Supply Variable, 0-32V 0-10A Switching Bench Power Supply with 20W USB & Type-C Quick-Charge, Encoder Coarse & Fine Adjustment Knob, Output Switch, 4-Digit LED Display - SPS-3010V https://www.amazon.com/dp/B0DDPVDWPZ?ref_=ppx_hzod_title_dt_b_fed_asin_title_0_0 Video of bench power supply testing Replacing the power liftgate switch. Drilled out the "sector" limit switch aluminum post using a 3/16" bit. The bit slid around requiring several position changes and finally tearing off the remaining bit with linemans pliers. Then used the pliers to shear the post leaving the aluminum nub behind which popped out easily. Now we have a 0.24" thick switch body and a 0.07" hole that needs to be drilled out to 1/8" to allow a fastener to secure the new switch. Have to remove the motor assembly (3 bolts) to allow the M3 fastener to fit. M3x12mm hex bolt is 0.118" which should just fit inside the mounting hole of the switch (0.12") 2240PCS Metric Screw Assortment,M2-M5 Metric Screw Kit, Hex Socket Metric Bolts, Metric Machine Screws 12.9 Grade Alloy Steel,Black Zinc Plated,Free Allen Head Wrench Amazon $24 New limit switch. Panasonic ABJ363861 SWITCH SNAP ACTION SPST-NO 0.1A 125V $16 shipped from DigiKey Used solder sleeve to hook it up. Replacing the limit switch allows the system to detect the home position with the orange pawl on the gear engaging the green limit switch lever and closing the limit switch contacts. New limit switch Initial position of the actuator gear was max clockwise after bench test (which is where the system had left it after the failed initialization due to the bad switch). This position caused two issues The boot sequence no longer ran the initialization the same The system just beeped three times. No motor activity Why isn't known The manual unlock lever doesn't work in this position since the actuator lever is forcing the latch into the lock position Used the power supply and switches to run the actuator gear counterclockwise just enough to be able to manually open the latch Cycling the system power (battery disconnect) boots the system into a good state and the working limit switch is able to allow the system to find home, which consists of the system resting state with the limit switch closed (limit lever snapped shut) Test after resetting the system after reconnecting the battery This is the first powered liftgate opening test after replacing the limit switch Video Hope this helps. Bonus points if you have read this far down and are still awake.
-
Circling back for an update on the issue from a few months where I thought I needed an axle. It was actually where the hardware was missing/improperly installed on the driver side brakes and caused it to make the sound of a failing axle. Big thanks to @bushytails for his insight on the correct installation of the clips.
-
Hi i have a 2000 Outback "Legacy" and the dimmer switch? Dial? Does absolutely nothing when turned and im trying to figure out if it has gone bad or maybe a wire(s) have broke somewhere or what. The blinker switch works fine both directions and the head light switch works fine to... However there is a cluster backlight bulb currently burnt out so maybe the dial stops working if theres a bulb out? 🤷🏻♂️ I was hoping someone might know how to test the dial itself or bench test it or something to tell if the dial is bad or something else.
-
I too hate drum brakes... That's why I don't have any anymore! :P
-
Love the forum is back. Replaced the rear wheel cylinders 3 weeks ago after noticing brake fluid on the inside of the driver side rear tire. I didn't realize there were several variations for the wheel cylinders, especially for the wagon. I went with the Dorman W37419. OEM cylinders that I think I had, used studs with nuts. New ones come with tiny bolts...well, one unit did. The other didn't. I honestly blame it on a crappy ebay vendor that I left neutral feedback for. Luckily I was able to find some that threaded in. Had my son get in it on the lift while I bled them and then did the spinny-spin and had him mash the brakes to make sure they stopped. I hate drum brakes. Drove it to work again this past Monday. The windshield is absolutely trashed with scratches and pitting. I also need to give the carb a good study. I have a high idle and seems to have a slight miss while driving. I was hoping some of these issues would work themselves out as I drive it more and more. Part of me would consider a Weber. I had one on my 83 Brat that it came with and wasn't honestly impressed with it but I did love the amount of crap it clears up in the engine bay.
-
92boxerbox changed their profile photo
-
That's for the fairly rare Carter 1-barrel carb. You could get a matching Carter 1-barrel, or slap anything else on for a good horsepower gain. A 49-state Hitachi is the easiest manifold+carb swap, and parts are easier to get. EA81, not EA18, BTW. If you have access to TIG welding, you could probably weld on a generic Weber converter kit. Here's a Carter that might bolt directly up: https://www.ebay.com/itm/168145191200 Listing doesn't say what it's from, but it looks like the right mount, and even the correct subaru plugs, so it might be an exact match. But, as I said, you'll get better performance with a Hitachi intake swap, and much much much better parts availability.
-
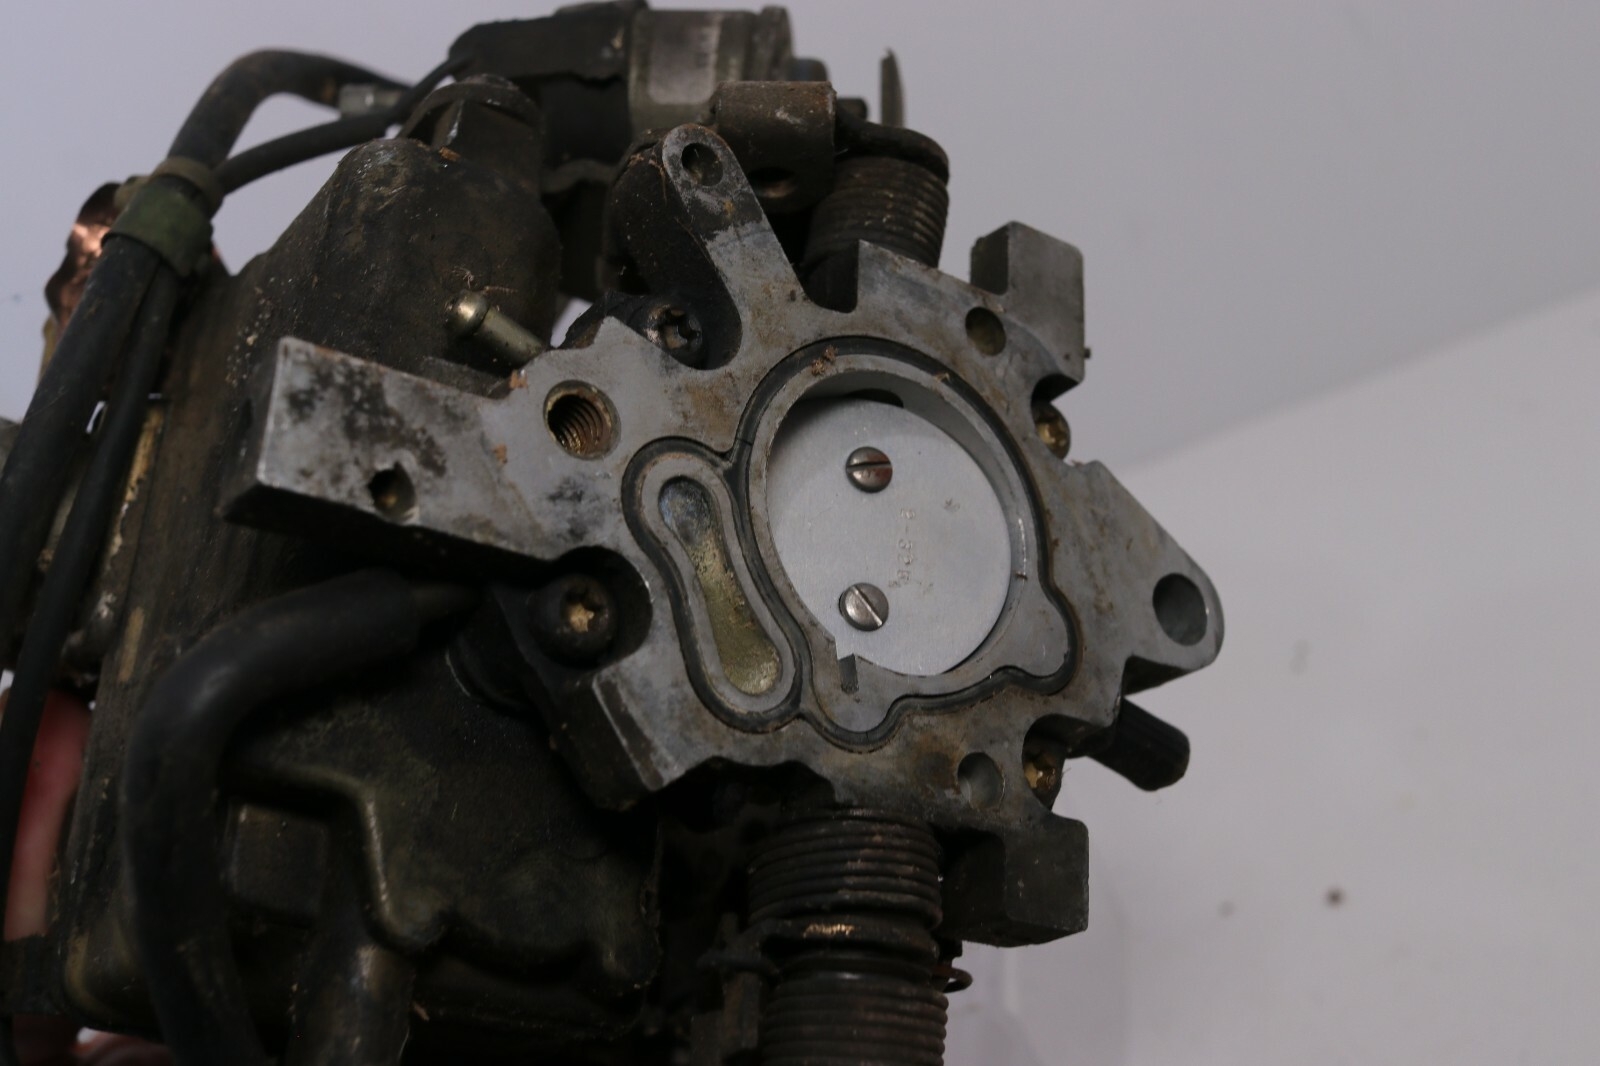
Hi all! Just recently purchased a 1982 brat with a ea18 in it. It came with a 2bbl webber carb but it doesn't line up with the intake and I can't seem to find any other ea18 that has an intake that looks like mine. Trying to source a stock one as I think the intakes has been swapped but was hoping someone here would have some insight on what might have been on the car previously as I don't have the old carb. Bare with me this is my first sooby, I'm used to Honda and vw's haha. Thanks!
.thumb.jpg.882b1c3a6b58d75d131af3490dc83229.jpg)
-
ersatz joined the community
-
Penny82Brat joined the community
- Earlier
-
ccrinc replied to jonathan909's topic in 1990 to Present Legacy, Impreza, Outback, Forester, Baja, WRX&WrxSTI, SVXIt's a really good engine. I've had 2 cars with the one in them. One word of caution: DO NOT forgo oil changes! Do them RELIGIOUSLY, FAITHFULLY and REGULARLY. That's the biggest killer of that engine because the engine oil also lubricates the timing components (ALL of them). If you let the oil get low or old, you're not taking good care of an engine that you really DON'T want to work on!
-
ccrinc replied to jonathan909's topic in 1990 to Present Legacy, Impreza, Outback, Forester, Baja, WRX&WrxSTI, SVXI've had two different cars with the EZ30 engine, a 1992 SVX and a 2001 LL Bean Outback. Man, I loved those cars!


.thumb.jpg.5a55962f634245430d0a865ae0f2fba5.jpg)

.jpg.80ad0da4cbd3e11c9b2c5b3fb4e12d24.jpg)

