mountaingoatgruff
Members
-
Joined
-
Last visited
Everything posted by mountaingoatgruff
-
the first thing i checked was whether the ecu would throw the code again after unbolting it and leaving the battery disconnected last night, just for curiosity's sake. of course, no code. i tried bolting the ecu into place while the car was running to see if i could get it to happen...nothing. so before busting out the multi-meter i checked the valve itself as gloyale suggested. it was closed with the car off. i then applied 12v and i had to play with the wire to get it to open (i thought maybe i wasn't getting decent conduction). after getting it to open, i removed current and it failed to close - i couldn't get it to close at all. so i removed the valve and noticed the black plastic housing has split down the one side. now its off to the wrecker to find another. good call guys, and thanks for the help. i love my subaru but crap like this really makes me appreciate the simplicity of my old mopars.
-
checked voltage at egr solenoid valve connector and tests out okay. here's something to complicate things... i didn't think of it earlier, but my spfi parts all came off a 92 loyale from co, fed smog equipped. but to avoid having to rig a clutch pedal switch in addition to a neutral switch i got an 89 spfi ecu from a car in a local wrecking yard, ca smog equipped. the 89 ecu was in the car when i got the code. the fsm explanation says that on ca cars code 34 may indicate a clogged egr passage, so knowing my passages are clean i thought maybe it was just sensing a discrepancy between the two sets of smog equipment. i know the difference in ca and fed cars is just the egr temp sensor. i kept waiting for a code 55 meaning an open or shorted erg temp sensor circuit, but it never happened. i then figured i just see what happened if i put in the fed car's ecu. it gave no codes for quite a few minutes and even through d-check mode. then after i shut the car off, actually bolted the ecu to the column and restarted it gave just code 34. i ran read memory mode on each ecu to check the vehicle specification codes and both the silver ecu from co and the black ecu from ca gave a 5, manual fed/can emissions car. maybe the 89's ecu was replaced... i'm done messing with it for tonight, but i'm wondering if anybody has ever had issues with an ecu grounding or something else like this. i'll try insulating the case of the ecu against grounding and remounting it tomorrow. if it goes through all check modes without codes and doesn't throw a code after driving a couple days i'll figure that the problem was in grounding the ecu case, despite how much sense that doesn't seem to make. i'm still wondering what conditions determine when the egr solenoid valve should be open or closed if anybody knows for sure.
-
good idea, cougar - i'll do that after work tonight.
-
hopefully this time i've got an intelligent enough question to avoid the routine condescension around here... my 84 hatch is running remarkably well after it's spfi conversion, but it's check engine light was on and the o2 monitor was throwing a code even as i was barely ironing out the kinks in my ignition system. i went through the "read memory" and "d-check" modes, following the procedures outlined in the fsm. both checks showed code 34: "egr solenoid valve continuously in on or off position, or clooged egr line for ca models" i then followed the fsm procedure for addressing the trouble code and according to the flow chart, the problem is in either the harness or the ecu. i physically followed the LR wire from the fourth terminal on the ecu connector through the round connector between the body and engine harnesses to the egr solenoid valve connector itself and found nothing wrong so that theoretically eliminates fault in the harness. i performed the voltage and resistance checks outlined further along in the flow chart and found nothing wrong with the ecu. my question is whether the voltage and resistance checks for the ecu would show proper values even if the ecu is faulty. also, under what conditions should the egr solenoid valve be open/closed? to cover the simple stuff: the heads have been replaced with rebuilt ones and in the process all the vacuum lines were replaced as well, the egr valve itself appears to operate as it should (opens when i goose the throttle, so apparently the egr solenoid valve is staying open). also, even though my spfi parts were off a co car and so the code wouldn't refer to clogged lines, the egr valve and pipe were cleaned before installation and i bead blasted my intake, including the egr ports, and verified all media was cleared from the mainfold before final cleaning. i don't think that how i have all my vacuum lines routed would affect this, but i can provide that information if needed. the car runs great and has much more power than i expected (which may be because of how poorly it performed in it's previous carb'ed life with small valve heads). i can't ignore the problem, though, because i need to take my car in to the smog nazi's asap. thanks in advance
-
Gloyale, i tried looking at your changes to my first wiring diagram so i could hopefully figure something out but they don't make sense to me. it seems there's no direct ground for the fuel pump relay in the original configuration. there's no extra wire hanging off the fuel pump relay to run to a fusible link as you show. there's the two BW wires that both go to a 4way junction where one other goes to the ignition module and the other is supposed to receive power, which i supplied from the ignition switched 12v R(12). i thought the R(12) coming from the ignition relay should be sent to a power source, so how can it send power to the ecu? then, the BW wire i originally ran between the ecu and the fusible actually runs 3ways - between the ecu, the ignition relay, and an open end again supposed to receive power as far as i understood. i'm officially lost and i guess i'll have to go to pick-n-pull to see how an untouched ea82's spfi is wired up. i don't always have this much trouble figuring things out but i don't know the functions of each terminal/wire on the relays. my current thoughts are that the fuel pump relay seems like it would have been fine how i originally wired it off the ignition switch. the RL(16) from the grey diode seems to be the signal wire to the ignition relay (so wire that to the ignition switch as well), while the R(12) looks to be the "main" power into the relay (route to fusible link then to R(12) from battery), and the BW to ecu pin 27 and the ignition relay look like a constant supply for the ecu and the open third wire in that junction would need to be sent to a fusible link w/ a 15a fuse. that would look something like this:
-
i guess i should have included all the wires for the relays etc. the first time, so here it is. i didn't really understand which wires would be which on your diagram, Gloyale. if you could clarify using the info above i'd appreciate it.
-
i just need to figure out this final bit of wiring. i'm dealing with the seven wires that are routed to my fuse/relay location: R(12) 12v in run & start from ignition switch R(12) constant 12v from battery positive for ecu power R(10) constant 12v from battery positive for relay power RL(16) ecu power supply - needs 12v in run & start w/ 15a inline fuse R(12) from ignition relay to green fusible link BW(14) ecu power supply - needs constant 12v w/ 15a inline fuse BW(14) from 4way off fuel pump relay - needs 12v in run & start w/ 15a inline fuse this is how i figured it out in my mind: i can't tell where the R(10) from the positive battery terminal is supposed to go. i know in his writeup GD says "The 10 will supply two 15 amp circuits through the two relays, and the 12 will supply the green fuseable link for constant voltage to the ECU." with how i understood everything else to be wired up, there's no place for this wire so i probably got this pretty well screwed up and i need some straightening out here. literally everything else is done and ready for an attempt at starting this thing as soon as this last bit of wiring is completed. i've got a bottle of cheap cali champagne in the fridge for when its really truly done...
-
i am working on converting an ej22 to run on an alternative fuel and i will need to have the engine running to do this, of course. well, i'm not doing this with the engine in the car - i'm building a stand that will hold the engine, rad, harness, etc. i am wondering how much of the transmission controls or whatever are integrated into the ecu. in other words, how much of the wiring/sensors for the tranny does the ecu need to operate correctly. i'm dealing with an ej22 out of a 92 legacy (not positive on the year, but it's first gen) w/ auto trans and awd. i've got the engine, ecu, most of the harness, and while i'm working on the stand i'm also trying to figure out the wiring and what else of the harness i need. i need the engine to run on my stand just as it would in the car and using gasoline before making any modifications. i guess a lot of you guys will wonder what "alternative fuel" i'm trying to convert this thing to use but to be honest, i'm keeping that under my hat to save myself the ridicule and make sure this thing doesn't rabbit trail away from hopefully getting the answers i need in the meantime. i promise, once i have it working you guys will know that same day - but please hold the sarcasm or prying inquiries until then. if you don't want to take me seriously that's fine, but i'm working on this project with a friend of mine and we've already made some progress. we're hoping for some useable results in the next year or so.
-
haven't made it to pick-n-pull but i haven't forgotten. hoping to go this weekend now.
-
i'll be going back to the same pick-n-pull that those heads are at probably wednesday and if i can manage to get pics i'll definitely post them. i almost took pics of the heads from seattle in case the guys at that jy wanted to make a big deal out of returning them but decided to hope for the best. hope i'm not hijacking here (just kidding, no hard feelings for deletes:) ) but i've had similar difficulties in identifying part differences on some mopar engines. i found a guy online who accumulated a lot of information by simply taking pics of each set of parts he came across and very specifically labeling each set. i think its best to just go through the trouble of measuring but if there's a serious enough demand for a way to identify these heads without measuring the valves i'd be glad to submit pics and info of the three or four pairs i have access to.
-
i ordered a set of heads from a jy in seattle a while back, specifically requesting large valve heads, and the guy said that they could do that. when the heads came, my caliper showed one was a large valve head and the other was not. neither head had the castings for the 10mm bolts - they both had the little "feet" that go over those holes in the block. btw, when i measured the valves i used a digital caliper and went off the valve margin surface with the valves still installed in the heads. i didn't measure the valve seats. after returning the heads from seattle, i pulled two sets of heads at a local jy, both off of ea81 d/r 4speed hatch's maked with 83 build dates (prob 84 model year?). one engine had been worked on and the other was virgin. the one that had been worked on had the little "feet" but small intake valves. so i then pulled the set off the virgin engine (i didn't start there cuz it was completely intact whereas the other had no intake to mess with). those heads had the little "feet" and the larger intake valves. i measured both of these valve sets the same as before. is it possible to install small intake valve seats in large valve heads (i'd think the larger seats require a larger bore) or to upgrade small valve heads by installing larger valve seats and valves? i wish i had known this would come up so i could have taken pics, but i think the most reliable way to tell is to measure the valves and from now on i won't settle for anything less that seeing a caliper on the valve to rely on what size it is.
-
my hatch had a nasty mess in the back seat when i got it that was causing obvious corrosion. my bench and pass side seat back are shot, there was rust from below the front seats clear to the cargo area, no cancer but bad pitting well on it's way to cancer. this goes to show rust doesn't always start from the outside, a mess inside can devastate a poorly protected interior. i had to toss my bench, seat back, carpet, and everything under it. being the ocd freak that i am, i used a wire wheel in a 12,000rpm angle grinder to take the whole floor from the rear seat to the very back down to bare metal. i applied a rust converting primer to pitted areas, paintable rubberized undercoating over that, and rattle-canned the whole area to finish it. i don't know if the ea82's use the same tar-mat stuff applied to the bare sheetmetal before paint @ factory, but that crap is a nightmare to remove. i spent two whole days in there with a putty knife, rubber mallet, razor blade scraper, a bunch of picks & screwdrivers and ate three 4" wire wheels to get it sparkling clean. my rust went under that crap in some spots, though...and my ocd couldn't live with the rest. for further sound deadening i added residential 4lb carpet pad - not the ideal material, just what i had lying around. i have yet to install fresh carpet (its been sitting in my dining room for two months ) and reassemble my int. the hatch has been under the knife for about three months with spfi conversion, then a last second head replacement (yeah - after the ea82 intake was installed), etc, etc... i have mylar faced sound&heat insulation that i planned on using for my 65 dodge van's doghouse but since the van's long gone i'm considering using it for the inside of firewall & front wheel wells when i yank my dash.
-
i've had fram filters fail on me before and i'll gladly pay 4x as much for a mobil one filter if necessary!! i read an article just like this one a few years back where a guy did the same thing with filters of every make he could get for a ford 302 and a mopar la 360. both sets of filters showed the mobil one's to be the best overall choice. i've noticed lately though that mobil one is starting to use plastic bypass valves for some models so i'll be looking to find a retailer that sell purolators come next oil change - or if i ever get my hatch going! ...guess i should get back to them heads while the little booger's still asleep, huh?
-
i am using the large valve heads and while i'm not trying to port for drastic hp gains, i would of course like to get the most for my time and labor. on the intake side all i did was clean up the jointlines and junk of the casting process but mostly i rounded and smoothed the area beneath the valve seat (small side radius' machined spots). on the exhaust side i cleared all the aluminum from the bowl to just barely match the valve seat, took 1cm off the diffusers (which us just where the runners open up inside), drasticly smoothed the whole length of the exhaust port, and simply by way of lots of sanding opened the end bit a hair. of course i also polished the exhaust side and combustion chambers. honestly, all i'm looking for with this car is the best mileage i can possibly get. i'm converting to spfi, did this p&p, i hope to followup with a d/r 5speed and i've been trying to get a buddy of mine to help me with some exhaust work. the answer i was really looking for here is whether i was okay taking a full centimeter off the diffuser. my dad's a mechanic with 30years of exp and he nearly crapped himself when he saw what i did. kinda had me worried is all. thanks as usual, guys!
-
first of all, yes i searched for an answer. no i was not willing to spend hours upon hours of searching through almost-what-i-need when hopefully plenty of you guys can help me here in mere minutes. that said, we're talking about the exhaust diffusers. i seen/heard guys say to cut it out for a bit better flow, but i haven't heard anyone say how much to cut and whether or not one should retain the healthy radius on the end of it. i'm thinking cut at most a 1cm to 1.5cm and leave a radius slightly smaller than the factory cast one. the rest of a mild p&p is pretty straightforward on these heads as far as smoothing the short side radii and leaving other major protrusions. i've just never encountered an exhaust diffuser like this and was wondering how happy i should let the dremel get. thanks:)
-
i don't know that this will help, but i snagged this unit from an 84 hatch at pick-n-pull for my 84 hatch... and the back: i haven't given much thought to rebuilding the thing, i mostly wanted the console parts but it was $20 for the whole gob of plastic and wires. there's an 83 hatch there with this exact same setup in a tan interior, minus the vol/tune knobs... the radio only says subaru, but the cassette deck says subaru and clarion. i don't know if the white cable's plug end is unique or used between all these decks, but i'd say that's probably the only thing you'd have to worry about. i'm considering installing the stock decks and doing the discman-on-the-dash thing, but that would only be really cool if i went all the way and installed the "red rope dispenser," right? :lol:
-
thanks man, but please see above. i think i'm gonna practice some porting on my old set of heads.
-
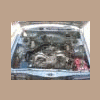
alas, fate has smiled upon my car and i!!! there's a new crop at the local pick-n-pull. i found an 80, 83, and 84 hatch (one each) and an 89 wagon! i didn't look over the 80 much, it was there last time i went, but it has a clean lookin front end. the 83 and 84 are both d/r 4speed cars. 84 now has an intake bolt snapped off in the pass head (hey, it was pretty damn rusty and i stopped before i ruined the rest!! ), and the 83 aint got no heads no more cuz they're in my garage!! i got a set of heads w/ bigger intake valves including rocker assemblies, pushrods and pristine valve covers with 148k. the long block is beautiful too, i may go back for it if its still there after my hatch is running. i looked at the 89, and whaddya know... a d/r 5speed car. it's ecu is now sitting in my garage as well. there's a bunch of good stuff out there for those of you who may be interested. pretty much all that's missing is bits of int and what i've taken. i'll be going back soon for that d/r 5speed (w/ 128k!) and some more off the 84 so let me know if anyone has hunting requests. i can't express how much better this makes me feel about how things are going with this car! i've regained my original enthusiasm and can't wait to get this thing done again!!
-
i was waiting for you to clarify this one, GD. i have both sets of heads on the bench and i planned on sending the large valve replacement head back for a small valve one. good thing i waited, huh? i'm also about to make a run to the local pick-n-pull as soon as the babysitter gets here. a friend at work told me he saw a "funny lookin old japanese wagon" that looked like mine there as a recent addition. with any luck, i'll find the heads i need there and i can send both of these overpriced mismatched heads back. also, if fate should smile on me today i'll let everybody know what other good parts i find cuz i know by recent experience they're getting hard to find and expensive around here.
-
thanks, man. i hadn't seen that thread. i guess by what GD said there i couldn't use the larger intake heads on my solid lifter block if i wanted to since the rockers and pushrods are different. or...would i be able to replace my pushrods and rocker assemblies with hydro parts to be able to utilize the larger intake valves with my spfi? are the two styles of pushrods the same length and will the hydro rods fit into solid lifters? i'm sure i won't do that much right now, but i'd still like to know - just for future reference. i guess i shoulda just got that damn brazing rod and fixed my old head!!
-
i searched around a bit and found in a post by GD that there seems to be two types of ea81 heads - small intake valve and larger intake valve heads. the reason i ask is because i just got a set of replacement heads that don't match my originals. i read the part that said solid lifter engines using larger valve heads retain the two 10mm bolt locations on the block, but there's no bolt holes for them on the heads. i also read the part saying hydro lifter engines don't have the 10mm bolt locations on the engine or the heads. so i'm wondering: 1) were ALL hydro lifter engines build with large intake heads? 2) the heads i just got have what look like "feet" that go over the 10mm bolt locations on the block instead of the holes for the bolts. would this mean they should have the larger intake valves? i threw a caliper on an intake valve from each head and the intake valves in my old heads are a hair over 39.5mm. the intakes in the pass side replacement head also look to be just over 39.5mm. the intakes in my driver side replacement, however, are about 41.5mm. i ordered the heads from aaron's wrecking, in the seattle area iirc. qman told me to call delta camshafts, who then told me to call these guys. i called them today and they want me to return the large valve head (at my expense, of course:mad:) so they can send me another small valve head. the guy said the two 10mm bolts were discontinued in 82 to make room for the asv flanges and the larger intake heads are just for hydro lifter engines. wtf??
-
i don't know how relevant this will be, but in the interest of lending another opinion... i bought a 62 dodge dart stationwagon awhile back. my grandfather drove one just like it and my father loves the car, too. it wasn't running when it arrived but i figured since it came from az, the body oughta be alright. EVERY floor pan is gone and there's some frame rot where the rails bend up under the firewall, this thing is a stinkin flinstone's replica!! obviously not originally an az car! add some title issues, outta state tax conflicts, and i thought i had a good parts car. after totally stripping the int, pulling that polyhead and 727, and snooping around with a wire brush, i realized it was totally fixable and since then i've gotten a clear title and strightened out all the legal crap. i love my dart even though i've never got to drive it, so that's a major difference in our situations. i think the more important fact is that we both seem to be interested in our cars enough to continue looking for justification and a way to fix them. it seems as though you like the car enough to keep arguing against logic here, so i'd say just fix it. i'd also support the idea that you do it yourself. this may be the only way that you'll feel all the time/trouble/money is worthwhile cuz if you do it yourself, not only will the sentimental attachment have opportunity to grow, but if you're anything like i am, you'll be more able to trust the car. btw, i'm doing my sheetmetal work with a 14 year old clarke turbo weld gas/no gas mig (that i inherited from said grandfather) even though i've been laughed at by guys with expensive millers/lincolns. the box isn't eveything - its all in how its used!
-
about k&n's as a bandwagon acc- i noticed a drastic difference in my truck's performance after installing the fipk2 in my ram. anyone who has seen the 94-01 air delivery system on these engines knows dodge shot themselves in the foot with that crap. the k&n improved response, high end capabilities while haulin rump roast, and low end grunt while haulin weight. i was very disappointed with the mpg increase, though. i think the decision to get a k&n or similar prcoduct should be based on deficiency in the stock system. if the stock ej22 air delivery system is overly adequate as GD suggests, there's no apparent need for an expensive filter, especially one that just drops into the stock airbox and retains it's bad flow characteristics. if i even did put a k&n style filter on it, i'd want to rig a better air tube and use a big conical filter. btw - i never put the stickers on my truck!
-
i'll be going with the magnecor wires with the expectation that i'll make my money back after they last through what would otherwise have been a few wire changes. just to double check - i need magnecor set # 45277 for my 97 legacy's ej22, right? this will be the first time i've spent this much on wires for a 4cylinder, i once spent $115 on 10mm wires for a mopar bb v8 running a 45,000V msd, but that's a different beast! going ground shipping to save a few bucks so ask me in a few weeks how they worked out! as far as the whole k&n thing goes, after paying this much for the wires i'm not even worried about a k&n! i was thinking about it though and was wondering, if the oil used on a k&n gums up the wires of a maf sensor, why doesn't it gum the inside of the intake tube? wouldn't the amount of oil gunk one would think necessary to cause a maf to malfunction be dectectable in the intake tube? my k&n's intake tube was always squeaky clean, even after many recharges. could it be that some of those folks experiencing these problems are improperly recharging (too much oil)?
-
the ngk's are available through kragen's for $70 w/ a 3mo warantee. i found them online for around $45+s&h at a few places, but no mention of warantee on any site, including ngk's. if i go that route, i may as well get the magnecor's for an extra $30. i'll know there's a warantee and the wires sound to be much higher quality judging by each mfg's description. i still find this whole thing to be ridiculous as i've never seen, heard, or experienced this problem on any vehicle. sure, i've encountered wires that interfere w/ each other while they're touching and operating at high revs, but that's not what you guys seem to be describing. i fixed that with a few inches of plastic conduit and a couple zip ties. obviously this tuneup remains on the to-do list as multiple factors force it's postponement. a bit of time can be a good thing under these circumstances, though.