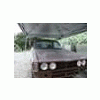
crizzlE Posted May 22, 2010 Share Posted May 22, 2010 Hey all, I have had this brat since november and havent been putting too much time into it because of the weather. it started to clear up, so heres some progress. When i first obtained the brat it was sitting in a field, with the drivers side roll up window broken in the down position. This allowed for water and rust to develop, also letting in the elements and creatures. I started to gut it, and found out there was a family of rats living above the blower motor, pissing on everything and eating wires. i had to gut the interior, and patch wires. i have a lot more work body wise, but I am hoping that with the wiring all worked out, that a new battery will get it going. Started by using bedliner to cover a few things Turned into doing the whole interior Had to solder about 15 wires that the rats chomped through bed full o parts n sh*t SOME of the rust, i will be repairing with sheet metal ea81 in yo face more updates with progress. enjoy Quote Link to comment Share on other sites More sharing options...
bendecker Posted May 22, 2010 Share Posted May 22, 2010 Thanks for the pics. Keep 'em coming. Rats are little terrorists! -Ben Quote Link to comment Share on other sites More sharing options...
crizzlE Posted July 8, 2010 Author Share Posted July 8, 2010 Update** Got the beast running and took it around the block!!!!! Welded a broken hood latch, now it closes Put in some 92 saab seats from craigslist had to make a bracket for the seats to fit tune up and body work next Quote Link to comment Share on other sites More sharing options...
Ricearu Posted July 8, 2010 Share Posted July 8, 2010 oooooh squishy leather!!! I like!! Quote Link to comment Share on other sites More sharing options...
suberdave Posted July 9, 2010 Share Posted July 9, 2010 hey that looks just like my garage... Quote Link to comment Share on other sites More sharing options...
MaddCelt Posted July 10, 2010 Share Posted July 10, 2010 Boy, if that is all the rust you have for sitting in a field, I'm envious! I had to clean out one heck of a nest out of my dash from it's time in the field. Makes for a smelling trip to work this past winter. Noticed that your vacuum switches are still attached. Any chance you could take a few pics as to where the line is supposed to go? Mine is not connected and I have yet to figure out where it connected to. On the dash, did toy strip off the original cover and foam? Quote Link to comment Share on other sites More sharing options...
DaveAP Posted July 11, 2010 Share Posted July 11, 2010 Do you have the dual range tranny? Sorry about your rust. I live in Arizona. '78 '87 brats Quote Link to comment Share on other sites More sharing options...
crizzlE Posted July 12, 2010 Author Share Posted July 12, 2010 DaveAP- I have only the fwd/4wd lever, I wish it had a hi/lo. Torc- I couldn't stand my rat piss heater unit so it all came out. On the dash I just painted over the vinyl/foam like 8 coats. I wish I would have pulled the foam and glassed it. It was just a "what if" it works sort of thing. How do you want that picture? Like close up of carb throttle body area without air cleaner? Thanks for the positive feedback! Quote Link to comment Share on other sites More sharing options...
crizzlE Posted October 22, 2010 Author Share Posted October 22, 2010 UPDATE: started doing body work, i'm a bit further than pictured, but the delay between work and pictures is me just being slow. I started off by patching some rusted out spots with fiberglass and bondo. A lot of the rust formed from a camper shell the guy had on previously Heres a before and after of the driver side, the passenger side wasn't as bad, but still horrible nonetheless. BEFORE: AFTER: I pulled off the front fenders and bumper cover to repair some rust Front Passenger Driver Passenger front fender zoom Driver side fender and bumper gaurd zoom driver side fender The empty rear tail light holes, im going to have to fab something up, im thinking black diamond plate or sheet metal with two red 4" circular trailer lights, with reverse lights mount to the bumper Quote Link to comment Share on other sites More sharing options...
Ricearu Posted October 22, 2010 Share Posted October 22, 2010 or ask around for some tails. I will look but i think the set i have are for a wagon... I will keep an eye out for the tails around here. Quote Link to comment Share on other sites More sharing options...
MaddCelt Posted October 22, 2010 Share Posted October 22, 2010 Got a question for you crizzlE, the main fuel line from the firewall to the hard carb lines, where does that connect at the firewall side? I am replacing lines in the next few days and I'm not sure where that line connects or what I will need to do to remove/replace it. Quote Link to comment Share on other sites More sharing options...
michael appel Posted October 22, 2010 Share Posted October 22, 2010 Great job with the build Quote Link to comment Share on other sites More sharing options...
crizzlE Posted October 25, 2010 Author Share Posted October 25, 2010 Got a question for you crizzlE, the main fuel line from the firewall to the hard carb lines, where does that connect at the firewall side? I am replacing lines in the next few days and I'm not sure where that line connects or what I will need to do to remove/replace it. Maddcelt, I took some pics for you, hopefully they will help. let me know if you need more indepth pics. Quote Link to comment Share on other sites More sharing options...
crizzlE Posted October 26, 2010 Author Share Posted October 26, 2010 UPDATE: As I stated in my earlier post, those pics were a little behind. I did some more work, and now these are the most recent. The Fender with the huge hole, fiber glassed, and bondo-haired The fender with the little hole, fiber glassed for now... more work to come Cleaned some of the stuff I took pics of earlier, gives you a better view of whats got to be done... Will gc8 impreza struts fit? Latest predicament... vent holes, let water in, when I washed it, what would you use to plug them? Good look at jump seats and theoretical tail light configuration (if I cant find some for an 81) Let me know what you think! Quote Link to comment Share on other sites More sharing options...
mulletsquirrel Posted October 26, 2010 Share Posted October 26, 2010 That is really cool! I like where this is going! Did you have any troubles with fitting the dash back in once it was lined? Quote Link to comment Share on other sites More sharing options...
crizzlE Posted October 26, 2010 Author Share Posted October 26, 2010 The dash was pretty simple to put in, more of a pain getting all the speedometer stuff in correct order. I would have done a few things differently though. Quote Link to comment Share on other sites More sharing options...
Gloyale Posted October 26, 2010 Share Posted October 26, 2010 Maddcelt, I took some pics for you, hopefully they will help. let me know if you need more indepth pics. It surprised me when you said this car was an 81 w/EA81 but NOT a D/R? Well guess what, that is DEFINATELY a D/R trans. You can see the rod running on the drivers side that activates the Hi/Lo. (above picture) Someone must have changed the shifter out. From what I gather, that car is a rarity. Something about a one year only crossmember to fit an EA82 5spd trans? Or something like that C'mon experts, what was so special about the EA81 D/R brat? Quote Link to comment Share on other sites More sharing options...
crizzlE Posted October 26, 2010 Author Share Posted October 26, 2010 it is dual range? and i have the capability of swapping a 5 speed? the little 4wd shifter is missing the little icon so i just assumed, it had fwd and 4wd. and 5-speed compatibility, just made my day... Quote Link to comment Share on other sites More sharing options...
92_rugby_subie Posted October 26, 2010 Share Posted October 26, 2010 Great project, Im excited to see its continued progress and will subscribe to it. Looking good! Quote Link to comment Share on other sites More sharing options...
crizzlE Posted April 27, 2011 Author Share Posted April 27, 2011 So, I'm back on the brat. Today I did some work, to get the brat ready for rust removal. Took out the radiator, the head lights, and the little splash guards underneath. I found some weird stuff. If you could help, I would be grateful. Heres the ol' girl in her rusty glory. What the heck is this little dangly thing right next to the oil sensor? Hopefully nothing. you can see it in a couple of the pics Is this what I think it is?! opening for a possible turbo? What is this? little object on the passengers side of the radiator, looks broken. Missing some screws maybe?! Please let me know if I am, because it doesn't look right. Both sides The gap between the sub frame and body?! on both sides..... Please don't let this be true. Then some gnarly rust......... battery box What its supposed to look like I have what looks like a lot of weird problems. some answered questions would be so awesome thanks guys. try not to judge ol shannon too hard Quote Link to comment Share on other sites More sharing options...
92_rugby_subie Posted April 27, 2011 Share Posted April 27, 2011 I could be totally wrong, but that looks to be the drain plug for the radiator... Looked like that when the one on GDs brat came off, but its hard to tell what it is by the position of the photo, but I think its a radiator plug/drainplug. Quote Link to comment Share on other sites More sharing options...
moosens Posted April 27, 2011 Share Posted April 27, 2011 Nice project! Be thankful it could be a lot worse. Your wheel aprons look good. I'll probably be replacing at least one of mine when the time comes. As for your Q's , 1st pic is a broken wire hold down. That holds the oil sending unit line you have right there next to it. 2nd pic , "stove pipe" which would have a paper/foil-esque tube going from that up to the air filter box under the "nose". You can get by w/o it but it helps to have it working in the winter. (carb. warmer) 3rd , Broken radiator drain plug. Temp. sensor also in pic - has one wire lead - clean that sucker up with some 0000 steel wool and it'll last another 30 years, well , maybe.... 4th , Crossmember not in ???? Those should be your crossmember bolts holding your wad (engine and tranny) .... hmmmm , ok , I see it now , you got the engine on the ground .... 5th , battery box is like many get even where there's no rust - sort of. Cut and paste. Toughest part for you probably , but again be thankful for that . Have fun! You're doing plenty fine enough for making it functional and enjoyable again. Cheers! Quote Link to comment Share on other sites More sharing options...
fignuts Posted April 27, 2011 Share Posted April 27, 2011 I'm going through a similar process with my 78 brat I recently purchased. The pics with the missing bolts are for where the front bullbar/pushbar mounts - I just pulled mine off last week for paint prep. Nice work, btw - wish I had the ea81 with d/r Quote Link to comment Share on other sites More sharing options...
crizzlE Posted April 27, 2011 Author Share Posted April 27, 2011 thanks for all the replies guys! i'm definitely feeling better about this now. if these are bolt holes for the push bar, bumper etc. then we are all good because i took those out a year ago and probably forgot. if its not then i'm going to shoot myself. I knew it felt a little floaty when i drove it around the block hahahahha I knew I could rely on USMB for the answers! Quote Link to comment Share on other sites More sharing options...
bheinen74 Posted April 27, 2011 Share Posted April 27, 2011 Those look like crossmember bolt holes. You drove it without crossmember fastened, and lived.. :eek: Quote Link to comment Share on other sites More sharing options...

Recommended Posts
Join the conversation
You can post now and register later. If you have an account, sign in now to post with your account.