All Activity
- Today
-
 The engine develops more power and responds quicker as a result of improving the suction in this breather system, for some odd reason.
 -
Check Engine Light Decoding on an EA82
scoobydube replied to Xithael's topic in Old Gen.: 80's GL/DL/XT/Loyales...
Better to figure out why it does not work right, instead getting some vague description of a problem from trouble codes. What are the symptoms? For instance, my car suddenly decided not to maintain it's idle, even when giving it enough gas. Then it would suddenly run right for a mile, but then do the same thing later. I first replaced the alternator since I keep a spare. No change. Then I swapped out the two engine relay switches. No change. So that narrowed it down to the distributor for me. So I thought that the distributor brains were going out. I pulled the distributor and was ready to swap out the brains with a backup distributor with the wrong gearing, and by chance I sucked on the timing advance diaphragm inlet. Vella! It would not hold a vacuum. So, I swapped out the timing advance diaphragm and it worked perfectly again. Obviously, I saved myself from have an actual Subaru dealer look at it, where they either would not likely be able to figure it out, or they would have fixed it, charged my a small fortune in order to get my car back, and sabotaged it so that I would have to bring it back in 30 days. Standard Subaru mechanic scam. -

Clutch Cable replacement blunders
bushytails replied to gadberry's topic in Old Gen.: 80's GL/DL/XT/Loyales...
Just run the pin you have. The wear will be taken up by the adjustment at the release fork. -
.thumb.jpg.96479a473cd1ed4b8bac667c0ee181f5.jpg)
Clutch Cable replacement blunders
czny replied to gadberry's topic in Old Gen.: 80's GL/DL/XT/Loyales...
Go back to ACE and get an metric allen bolt + nylon lock nut sized to fit. -

Check Engine Light Decoding on an EA82
Xithael replied to Xithael's topic in Old Gen.: 80's GL/DL/XT/Loyales...
Thank you so much, I found some engine codes elsewhere but this list is much better, especially due to me having the SPFI as opposed to the MPFI 🙏🙏 -
Check Engine Light Decoding on an EA82
Xithael replied to Xithael's topic in Old Gen.: 80's GL/DL/XT/Loyales...
Is it a light green? Or sort of darker green? The only one I have is very bright green. - Yesterday
-

Clutch Cable replacement blunders
lrgvanman replied to gadberry's topic in Old Gen.: 80's GL/DL/XT/Loyales...
Cable broke at the tuning fork sort of thing at the end that hooks to the clutch pedal. Also, the clevis pin wore out and acquired two grooves, adding to the slop. Subaru no longer has this clevis pin part so I got one at Ace Hardware about half an inch longer than the other one and I'm pretty sure it will work. I tried to send a picture but this site will not take a picture of that size. I will try again later. UPDATE: There it is below. I went to ACE and got a 5/16d x 1/4l clevis pin and the internal washers they had were incompatible. Either mine works after flattening with a hammer or I go the route of 10 flat washers and a hitch pin. We'll see. I haven't lost my touch with improvising..jpg.918537d00af7ac9c44cf603b2ccc46d1.jpg)
-
 Other places to check. If near the rear passenger, check the pcv hoses. If turbo, theres a middle block nipple that likes to leak when the clamps weaken from heat.
 -

Check Engine Light Decoding on an EA82
subaru1988 replied to Xithael's topic in Old Gen.: 80's GL/DL/XT/Loyales...
They can't be all that different? How about this? https://www.troublecodes.net/subaru/#codes88multi -
You own a subaru.
-
 Nikkileef joined the community
 -
 Storm301 joined the community
 -
 Highstone Soobie joined the community
 -
 agerwick joined the community
 -
 Tsti joined the community
 -

Check Engine Light Decoding on an EA82
SuspiciousPizza replied to Xithael's topic in Old Gen.: 80's GL/DL/XT/Loyales...
The test connector is the 4-pin green plug (mine has a yellow, black, red, and white/yellow wires). Not sure about the brown plug, but it doesn't have to do with pulling codes. I'd turn the key off when connecting or disconnecting any connectors. But I have accidentally driven with my test connector connected so it *shouldn't* send sparks flying or making any magic smoke. :] -
 TheJorgeAAA joined the community
 -
 machern joined the community
 -
 jhajeski joined the community
 -
 larryharper646 joined the community
 -
Check Engine Light Decoding on an EA82
Xithael replied to Xithael's topic in Old Gen.: 80's GL/DL/XT/Loyales...
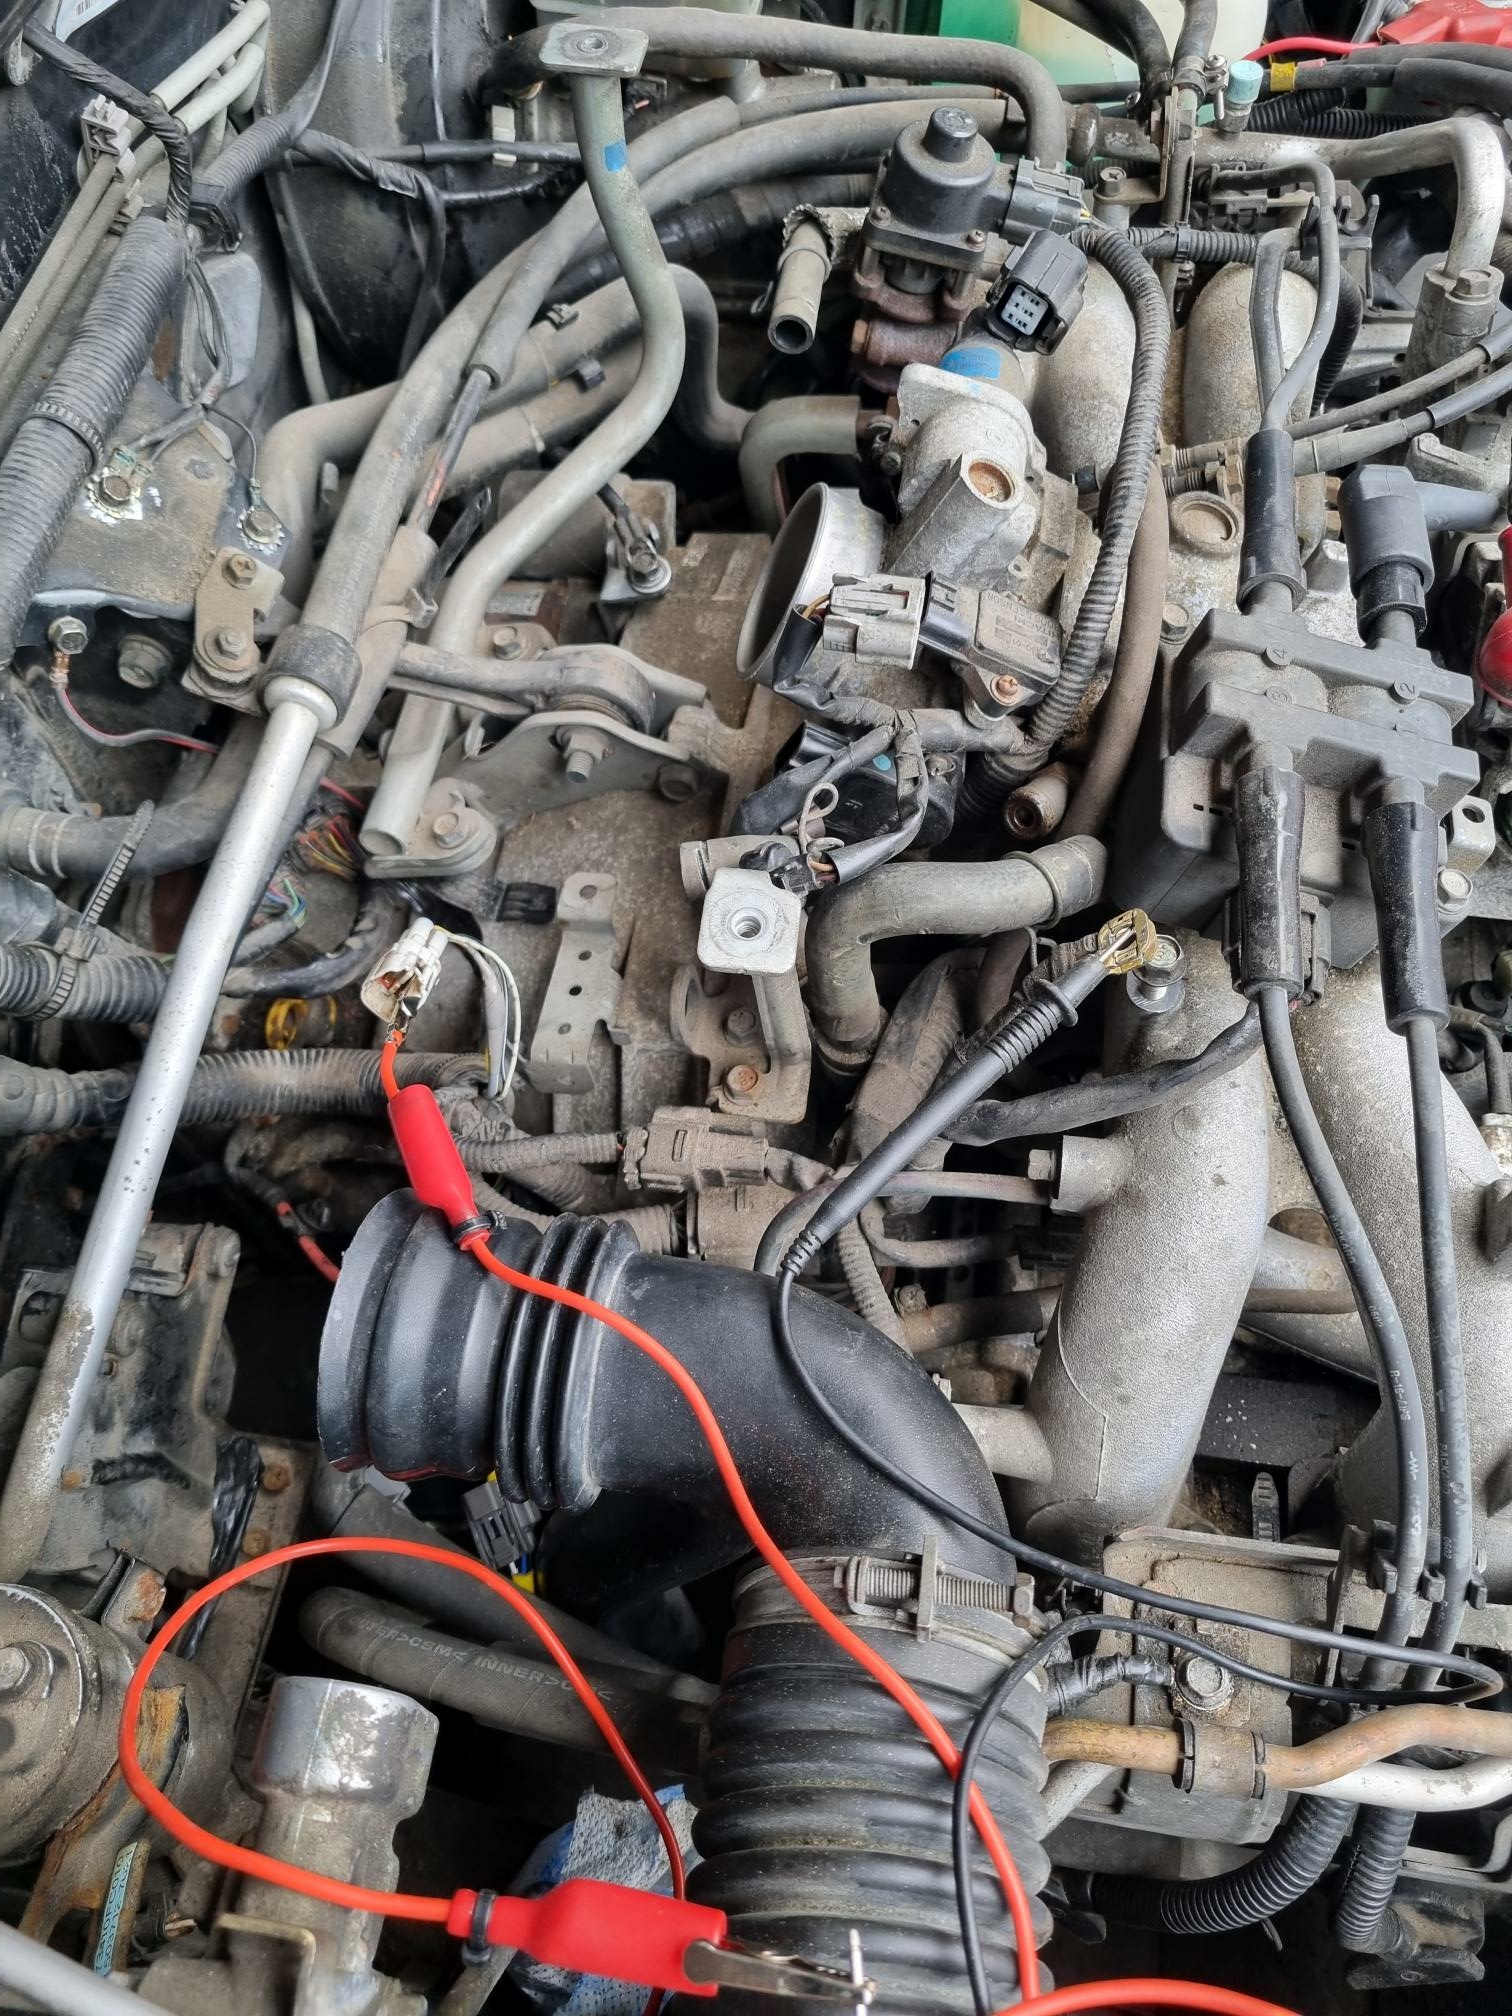
So there may be a small problem in that I only see one green plug and it’s already plugged in, way in the back corner of the cubby below the steering rack. The only outwardly accessible plug is a brown male and female plug with a blue and a black wire, and a brown male plug with a yellow wire and black wire. Should I try messing with them while the ignition is at “on” or will that break things? Thanks in advance -

Check Engine Light Decoding on an EA82
azdave replied to Xithael's topic in Old Gen.: 80's GL/DL/XT/Loyales...
My 87 DL wagon with a stock EA82 just popped on the CEL light upon first start today but went out about 100' down the road. I'm at roughly 254K miles. I haven't checked yet to see what code(s) are stored. I hope the light was one of those "service reminders" that really mean nothing. I have not tried to get the DL to pass Arizona emissions since I got it three years ago. I insure it as a classic vehicle instead and get an exemption. Once I put the full new exhaust and converters in place, I may try to run it though the DMV the test just to see if it will pass. It is $17 to have them sniff it and find out. -
 if near front ps fluid?
 -
 oil pressure sending unit
 -
Check Engine Light Decoding on an EA82
SuspiciousPizza replied to Xithael's topic in Old Gen.: 80's GL/DL/XT/Loyales...
As Benny said, there should be a green connector under the steering column. Connect these (I believe 4-pin) green connectors and flip the key to ON. Watch the ECU light flashing. Short flashes are values of 1, long flashes are values of 10. There will be short pauses between codes. Disconnect this connector when you're done pulling codes. For a check engine light, this can (maybe not in this instance) be a check engine light that pops up when nothing is wrong to notify the driver to get the car serviced. I believe these cars will pop up a check engine light every 40,000 (?) miles, again just as a service reminder. :] -
 There are puddles of oil on top of the engine, particularly visible on the passenger side. This is the 2002 I put a new short block into about 5000 miles back. Anyone have any idea where that's coming from?
 -

Check Engine Light Decoding on an EA82
el_freddo replied to Xithael's topic in Old Gen.: 80's GL/DL/XT/Loyales...
To get the codes you need to connect two plugs above the driver’s feet. I can never remember if it’s the green or black plugs. Then put the ignition into the on position, watch the check engine light. The CEL will flash long and short dashes. Long are multiples of ten where as short are just ones. Example: long long long short long short short = code 31 and code 12 Once all codes have been displayed the ECU will cycle through the codes again until you turn the ignition off. Don’t forget to unplug the test connectors. As for a code reference list, I recall there being a good one in the Haynes manual. It’s been ages since I had to play with the EA82 codes. Cheers Bennie -
Hello everyone, I have a check engine light post-complete rebuild of my EA82, and this means I can’t get it smogged, ergo I can’t get it registered, either. Does anyone have either the method or the decoder sheet for the EA82 Brats, Justys, etc? I looked some stuff up on google; from what my grandpa says, my car (1992 Loyale) doesn’t have OBD, and google outlined some tips, but you still need a decoder, right? I’m not very experienced. On a previous post I made, another forum user posted what I can only assume is the digital version of the holy grail for Leone/Loyale/Justy/Brat owners (several manufacturers’ guidelines, manuals, guides on engine and brake swaps, etc), but after flipping through it, I couldn’t find a single decoder sheet. Does anyone have anything of the sort? Thanks in advance, y’all
- Last week
-

'79 Brat EJ22 Retrofit Build Thread
mka replied to mka's topic in Historic Subaru Forum: 50's thru 70's
Truly the realest most impressive approach. -
 I have been searching around and checking connections inside the ecu. Someone has been doing home soldering on the ecu but it looks fine. I have followed all the Connections down to the connecting point of the connectors and know that i have no problems with the wiring for the front o2 sensor. I tried to find ground to the sensors and found that the rear sensor gets ground from the manifold grounding cables. I could not find where the front sensor gets ground from?.
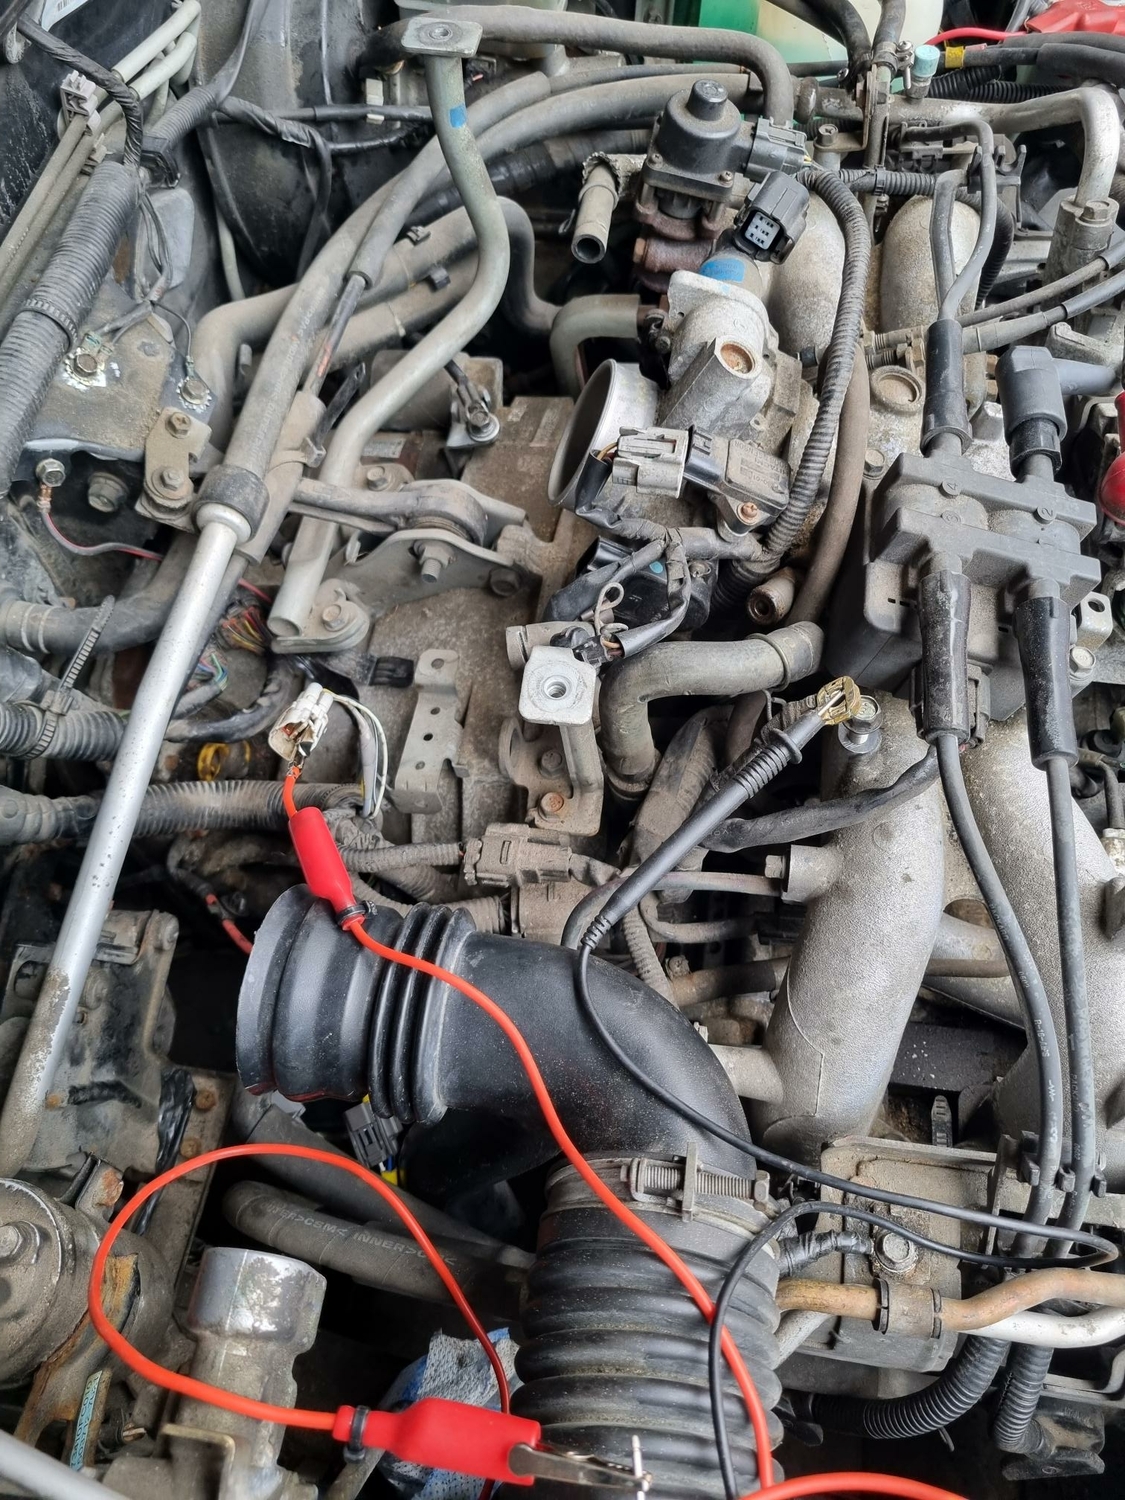
-
Confirm that your JDM has (VVT) variable valve timing heads; if not, use only the short block and install your heads with MLS #642 Subaru turbo head gaskets. Remove all the JDM external parts. Strip it down to a long block and install your original intake & other parts. Confirm your crankshaft sprocket is the same as your original; if not, use the original. Be sure not to damage any ears while removing from the crankshaft. Only install the original equipment timing belt and all new components. Use only an original equipment (OE) thermostat, not an aftermarket one. NGK plus and wires
-
Calling All Dual Range Owners
SuspiciousPizza replied to SuspiciousPizza's topic in Old Gen.: 80's GL/DL/XT/Loyales...
The inner DOJ races cannot be swapped between 23 and 25 spline models. The 25 spline axles are a larger diameter (0.944" vs 0.896" measured on the axle shaft) and use a larger DOJ race, ball bearings, and carrier. Also the splines are most definitely NOT pressed in. Modifications to the inner DOJ race to convert a 25 spline race to a 23 spline race would take a fair amount of machining. It'd be interesting to see if a 95AC23 DOJ race can be swapped with the D/R's 87AC DOJ race. :] -
'79 Brat EJ22 Retrofit Build Thread
bushytails replied to mka's topic in Historic Subaru Forum: 50's thru 70's
You could narrow the subframe... you could add fender flares... orrr.... you could cut the brat down the middle and add 6" of sheet metal! -
'79 Brat EJ22 Retrofit Build Thread
mka replied to mka's topic in Historic Subaru Forum: 50's thru 70's
Well, everything was sort of in place for me to get a first order test fit even with my bum leg. Doc says I'm good to do pretty much anything that doesn't stress the break through my new aircast boot, but no running, jumping, sprinting, wrestling, or heavy lifting. Basically I have to be deliberate with my movements and creative with the use of wheels and levers when it comes to heavy stuff. I'm not pushing it, even though this update so soon may appear otherwise. I had all the heavy stuff in place already, so today was just minor manipulation to see how things sit. The new diff does in fact mate directly up with the original front diff mount, exactly where it needs to be. The bolt patterns are exactly the same and the lengths are almost identical as well, so I will be reusing the OEM Brat front mount for the differential. I may need to figure out a replacement option for the rubber bushings that secure the front mount to the frame, but for now the originals are intact enough. There's a little interference on the tires at the front of the wheel wells which I should be able to counteract by placing the trailing arm mounts correctly in combination with narrowing the wheelbase. As far as the width goes, one could ostensibly leave that alone and just flare the wheel wells out to accomodate things, but that's not the direction I'm going to take with this build, as I'm going for a more subtle outward appearance. Lastly for the big rear diff subframe, it is a few inches too wide and will need some trimming and a creative solution to mount to the frame. likely more bracketry. In the spirit of the build I'm hoping to reuse what I can from the Impreza - I bet I can come up with something to allow me to repurpose the bushings that mounted it to the undercarriage of the newer car when I narrow the pivot points governing the rear wheelbase - the plan for which I've sketched in on the photo. Red dashes indicate cuts and shifts I plan to make to the pivots, green indicates the trimming of the outside edge so I can move the frame mount bushings to a place where they will be able to be attached to the frame. It looks like the original fuel tank will either need some serious modification to fit in the space with the new subframe, or I'll need to fabricate an entirely new cell. I suspect I should be able to find something serviceable that will fit behind the entire assembly and still meet up with the original fill spout. Just need to take some measurements once I've got the new differential subframe into place. It seems easy enough to put a new cell behind the differential, under the bed, but I'm a little concerned that may turn my Brat into a Pinto in the event of a rear end collision. There's also an empty space up behind the cab, but I'm not exactly excited about that placement, either. Suggestions for solutions are welcomed but as usual not expected