Leaderboard


Popular Content
Showing content with the highest reputation on 03/22/20 in Posts
-
@heartless - Please take a look at the FSM pdf file I posted earlier page 23. It shows the new style tensioner. It is compressed Vertically at no more than 66 pounds. Must be because it is a 96 Impreza. The 95 and 97 Legacy 2.2 that we have use the old style tensioners. Of course, there is a chance someone may have installed the old style tensioner. In that case you are very correct in how to compress it.1 point
-
1 pointThe rings are very high-tension, you won't need pliers. You will need a tapered-sleeve ring compressor (wiseco makes them). As you read - honing is a VERY bad idea. GD1 point
-
Can of worms youre opening. bare minimum is: belt, toothed pulley and pump gasket. Add pump if needed/wanted. water pumps have a short no visible shaft so they’re not axially loaded like long shaft pumps which are prone to fail more often (at least OEM pumps don’t) ideally they’re subaru parts but it’s a noninterference engine and the cheaper aftermarkets May look too appealing to pass up. The other stuff has low failure rates and isn’t necessary. That probably has the old style tensioner such rarely fails, I never replace those and almost always replace the new style.1 point
-
No timing light, you use the marks on the new timing belt. If you get them set right the first time, the engine will start up like new. Take a look at this. Save it and print the pages you need. http://jdmfsm.info/Auto/Japan/Subaru/Impreza/1996/1996 Service Manual/ENGINE SECTION/Engine/Service Procedures/Timing Belt.pdf First, I remove the fans and radiator. I tend to bump the radiator with tools and my knuckles. Unplug the connector to the coil. Then to break loose the crankshaft pully bolt, use a breaker bar with a short extension and socket. I have a long breaker bar, but you can put a piece of pipe on yours. Put the socket on the bolt with the handle and pipe under the passenger side of the frame. Pull the pipe up against the frame and have someone use the ignition key and bump the starter. Done. A friend and I made a tool to hold the pulley so I could torque it on assembly. Remove the front timing cover on the drivers side and turn the engine over clockwise until you see the timing mark on the cam sprocket line up with the groove behind it as shown in the pictures of the pdf file. That cam is holding valves open, so if you bump it, it will rotate off the mark. Just use a wrench to put it back on the mark. The other cam will turn free, so you have to watch both on assembly. I also use Hi Tack to hold the water pump gasket in place on assembly. Put a thin coat on the pump and apply the gasket making sure the bolt holes are lined up. Do this before you start removing things so it has time to set. It does not get hard.1 point
-
that pic is the overhaul section so it’s going to include more steps than you need. You want just the timing belt section if it exists. After that the water pump is only like 6 more 10mm bolts, bypass hole and clean the block surface. Done. I’m sure I missed something but what I just wrote is fairly comprehensive and detailed. You’re also using a fanatic forum for getting help. Very talented and experienced folks on here. I’ve never seen this high of a density of shop owners/workers who generously help others. Very cool folks on here.1 point
-
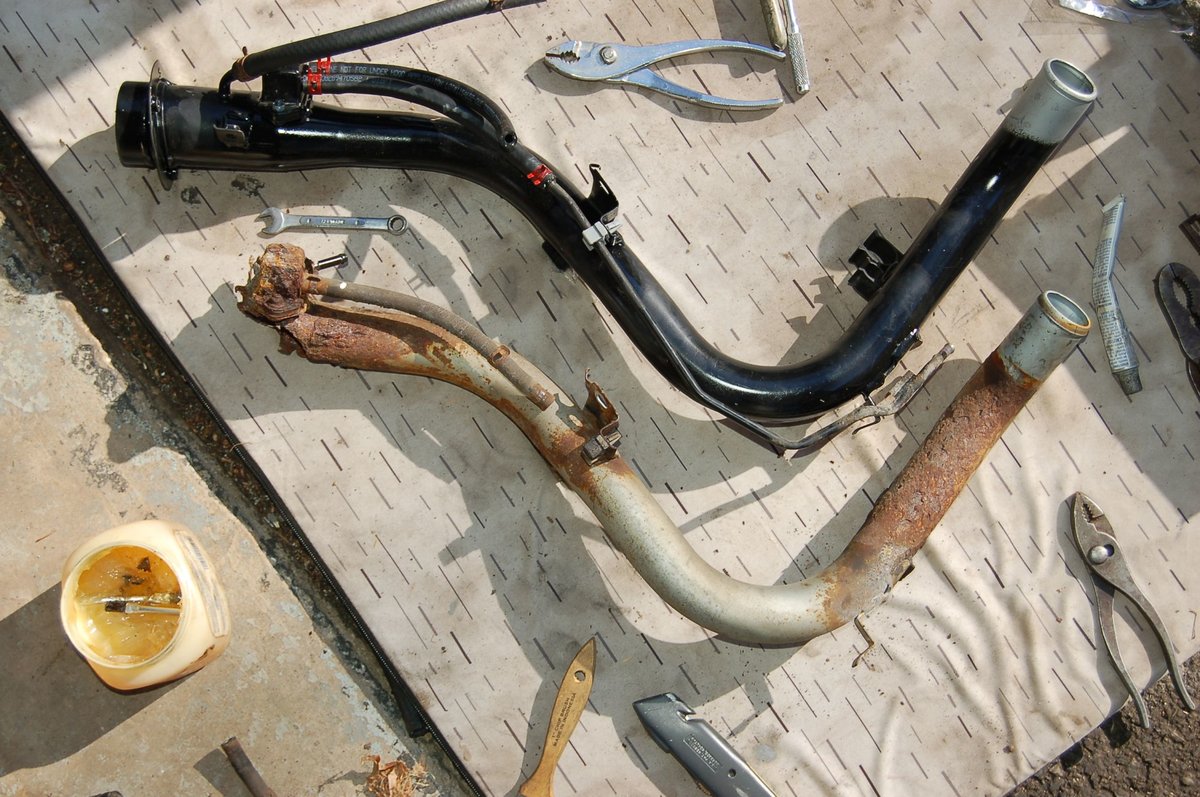
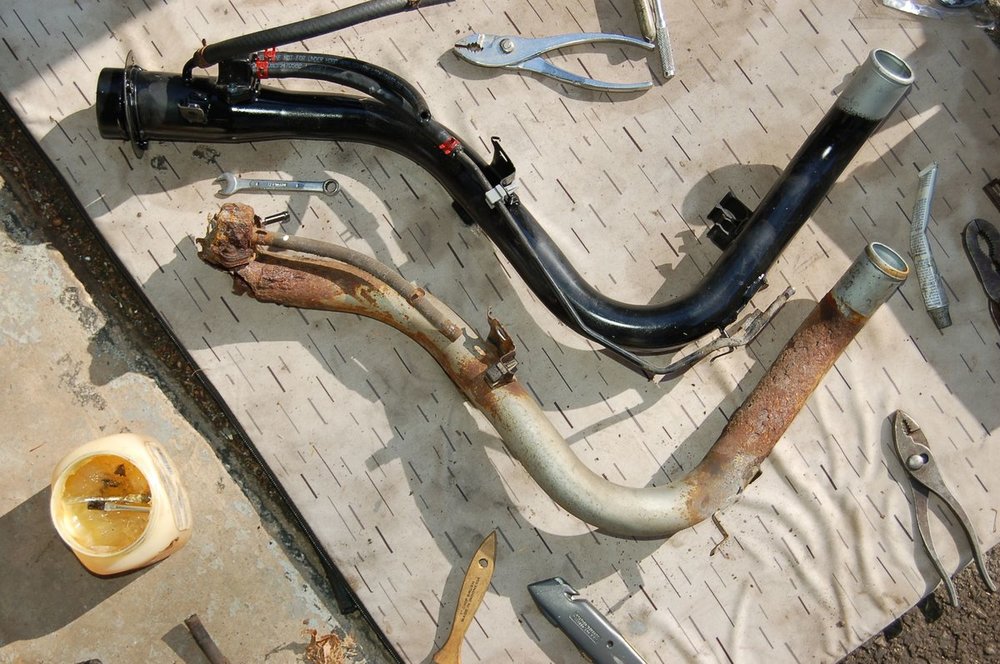
1 pointOK, today was the day. I got the part and it was the exact part that was ordered, and it was Subaru genuine. Also the top solenoid came in from Rockauto, plus I bought some hardware and hose. I don't remember if we discussed putting in one end or the other first, but I first tried to put the tank end into the rubber hose, and found that I had to scrape undercoating off to get the outside end in place. With some mallet help, I got that out, and then the hose end popped out! So I went back and did it reverse order. I was worried about getting the pipe end into the hose but the hose was soft enough and I did use the WD40 trick, so it went in OK. The middle bracket that mounts to the inner fender was something I had to work around. I did get it in place and got everything back together. It took much more time and was much more of a hassle than I expected, but I got it done. I had ordered a new hose to connect to the tank, but I found out from the today that the rear differential has to be dropped to get the tank out, and I didn't see any way to get to that hose clamp, so I didn't use the hose I bought. The reason the pipe is black is because I painted it with Rustoleum before installing it. I figured it would help this one last until the car is end of life anyway. You can see my side by side photo.... Thanks for all the help and good advice.
 1 point
 -
1 pointProgress! Do you have 12 volts on any of the FPCU wires? If not,the FPCU is not the problem. There are 2 seperate 12 volt feeds to the FPCU.One is live w/the key in ACC position and RUN position.The other only in RUN, One of the blacks is hot in RUN,the other is ground. Might be a bad ignition switch or corroded connector.1 point
-
1 pointHere is one https://www.opgi.com/air-fuel-delivery/fuel-pumps-regulators/electric-fuel-pump-controller2/fuel-pump-controller-all-12-volt-ch30173.html Or,if you do not mind eliminating the engine stops/pump stops safety function(I did),just use a normal relay.1 point
-
1 pointRelay can be bypassed with a piece of wire that connects the power wire to the pump power wire. Sorry, I can’t remember wire colours etc. I think I went with the fattest two wires when I bypassed mine for testing. Cheers Bennie1 point
-
1 pointWas the fuel pump connected when you did this test? Using a test light, there must be a load on the circuit. If not, hook up a headlight bulb or a fan motor to the connector and ground. If it works, then you know you have good voltage and current at the connector and that leaves the pump questionable. If the light is dim or the motor runs slow or not at all, then there is a problem upstream like relay contacts or another connector or even dirty fuse contacts.1 point
-
1 pointYes,Should be very close to battery voltage. My test light lights up at less than 5 volts.You need a meter. If less than 12V,then bad connections or FPCU.Pump should run w/9-10 volts though. If the jumper wire to negative does not work,put a fuse on the battery end and jump power to the pump for a test.1 point
-
1 pointWell if pump is pumping, take off the line right at carb, have someone crank and see if you are getting fuel right at the carb and then work backwards.1 point
-
1 pointBad ground,if you have 12V while the harness is connected to the pump. Run a jumper to battery negative for a test1 point
-
1 pointMy Brumby is positive switched when ignition first on for few seconds, then once engine is running Old fuel ....do not even try to use it or its tank until you know tank is clean inside Fuel is a complex makeup that when stale, chemicals have evaporated out if it into the air space in tank. Leaving a full fuel tank for years seems to be better than less This changed fuel rots plastics and rubbers, causes gumming of intake valve stems.... I have cleaned each section of fuel pipes with compressed air and had some good crap rust coloured stuff low out resolving all similar issues Once you wire up pump, run some new temporary hose to each end and see if it pumps it through from one safety approved container to another in a safe environment with an assistant and observer standing by...bench test the pump1 point
-
1 pointFurther thought: check for spark. If you’re not getting any spark, the fuel cutout relay does not power up the fuel pump after an initial prime of 3-5 seconds. Cheers Bennie1 point
-
1 pointThe fuel safety cut relay is under the dashboard above the driver’s feet. In my brumby/brat it’s a black unit. This could be disconnected or have a kill switch incorporated into it. I don’t know that it’s negative switching or not. If it was positive switching you wouldn’t see any voltage at the pump. The other thing it could be is a blocked fuel pipe. Used compressed air to blow any crud from the front to the back of the car - disconnect the flexible fuel lines so you’re not blowing crap into your new pump. If the car won’t start after this, you could manually apply 12v and earth to make the pump run, then try starting. If it starts then you know for sure you have a wiring issue to sort out. Have fun, these little utes are real gems! Cheers Bennie1 point
-
1 pointDanielsHardLoyale Maybe I have a fix for your problem if it is the same problem I had with my 1991 Loyale. If cel comes on and shows code 34 then it might be a bad IC chip inside the ECM module. I replaced that chip in my car and cel went away. Been two years now with no cel. There is a reference voltage that the egr solenoid needs from the ECM in order to give the AOK to the ECM. I checked reference voltage at egr solenoid and it was way below normal, showing 6 or 7 volts when it should have read 11 volts. The first IC in the ECM is where the egr solenoid will trace to. Remove ECM box and open it up. It is a 10 pin IC that handles routing. It was 5 ICs for 10 buck [China] . Chip is dead easy to desolder and swap out as it is NOT SMD. If you get intermittent cel w code 34 , don't waste 40 bucks on another eger solenoid. Contact me and I'll send you one of my extra chips for cost of mailing.1 point