March 29, 201115 yr Author JoAnne, well its 100% ture. If it wasn't for you two, I wouldn't have the part I needed, and would still be sitting on my rump roast. Just remember, the Subaru Alliance has your back when you need it. Let me know when or if you ever get in touch with Fox and about what date your gonna be bringing the beast down here!
March 29, 201115 yr I will, Tom - and thank you, too. It is nice to know one has friends when they are needed. Got to get taxes taken care of before i can do anything else - know anyone that wants a classic pick-up truck?? easily worth twice what I am asking for it! LOL So anyway - where are the pics???? this thread is worthless without pics!!!!
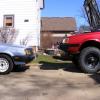
March 29, 201115 yr Author I know I know, I am soooo bad with this thread... I always had pics in the TW10 thread. But never fret, I have pictures!! Welded nut
March 31, 201115 yr YAY!!! Pictures!!! :banana: looks pretty good - altho the valance is very obviously much darker than the fenders...i like the darker color myself... like your little camera mount, too - how is that attached?
March 31, 201115 yr Author The headrest pillars just slide through the tube and holds it in place. Yea I like the darker color too.
April 6, 201114 yr Author This coming weekend, I am thinking of swapping axles. I have one EMPI axle, and am waiting for the other EMPI axle from Rockauto.com. It was on sale - $50. I also have new tierod ends and boot for the passenger side, I have yet to buy them for the other side. But once all this is done, the front end will be problem free. I already have two new Moog BJs in there as of last year. I am also gonna need to re-boot my rear axles before the boots rip.
April 7, 201114 yr Author Well I said F******* it, and gone and did the axle and tierod ends today, as I probably won't have time this weekend. Got it all done in 45min which I think was pretty good. Its so nice to have a solid axle in there that doesn't knock when turning. And the Pop I used to have is gone, must have been the inner rod end as it had some in/out play. Everything is A-OK now. I''m waiting for the other EMPI axle and both rod ends/boot so I can do that on the driver side. Pictures. You will also notice that the EMPI axle has a larger shaft vs the Genuine axle. This thing was WORN out big time!
April 13, 201114 yr Get a hair cut you hippy! Nice work on the Loyale Tom, pretty soon it'll be brand new again.
April 13, 201114 yr Author Get a hair cut you hippy! "Private Property, Hippie be quite, your peace sign T-shirt could cause a riot"
April 14, 201114 yr Did you notice it was harder to do with the lift kit on it. Ill be doing this in a couple weekends. Why did you go empi i thought the blue ones (forgot the name) were the best ones. Edited April 14, 201114 yr by The Dude Abides
April 14, 201114 yr Author Did you notice it was harder to do with the lift kit on it. Ill be doing this in a couple weekends. Why did you go empi i thought the blue ones (forgot the name) were the best ones. Not really harder, I just disconnect the Control arm from the Crossmember and undo the Radius Rod, that gives you more then enough movement to get the axle in and out. EMPIs are built, they also have a larger round shaft.
April 14, 201114 yr That's great that you got a big axle. I had just the opposite experience. My oem axle was the thick one and the empi from autozone was the smaller one with the butted ends. I've read a lot on axles and have seen people get a random assortment of shaft/cup setups on remans. I've also used EWI's (the blue ones) with good results.
April 18, 201114 yr Author Today I was able to almost finish up sealing the rear section of the car up, I need to POR-15 it now. I also need to address some more rust which I found behind the heat sheild. I am gonna clean up the heat sheild and reinstall it with stainless M6 bolts too.
April 18, 201114 yr Try unbolting this metal piece and replacing with stainless. If you really want to get into it, you can pull up the rear carpet and pop out a panel to get to the fuel sender. you will have to drill out spot welds, and pop rivet to install. the nuts will be 5mm. If you are really ambitios, you can pull the lines from the font of the fule tank, and drop it more, or get into pulling the whole thing. There are fuel lines in the passenger rear cargo hold. There is a metal cover that comes off and there are 3 fuel lines, and the fuel sender connector. Inspect this are afor rust as well, pull the grommet and get inside the frame.
April 18, 201114 yr Tom, I recall that you were rear-ended (lightly) and that your mounts for your rear bumper were kind of ripped out or stretched. Are you going to weld in some plates to repair the mount? Just curious as to what you plan on doing.
April 18, 201114 yr Author Tom, I recall that you were rear-ended (lightly) and that your mounts for your rear bumper were kind of ripped out or stretched. Are you going to weld in some plates to repair the mount? Just curious as to what you plan on doing. Only one mount was ripped due to me only having 3 bolts holding it Vs. 4 as the welded nut broke loose. I have new rewelded a nut to the bumper and will be able to use all four bolts this time. To help give it more strangth I am gonna use some larger washers to help cover more area and I think that'll do it.
April 22, 201114 yr Author It was finally decent enough out today where I could finish up the rear of my car! I did put the heat sheild back up.
April 22, 201114 yr I like that bumper. Curious though.... Have you tested opening the rear hatch? That brace holding the tire mount looks like it will be close.
April 22, 201114 yr Lookin' Spiffy! You've gotten a lot done! It's a good thing someone mentioned what that black thing was... I almost thought it was a fold down table frame or something
April 22, 201114 yr Author That SJR bumper has only been on there for the past 2 years lol.. As for it hitting the gate, no even close. If SJR makes it, its quality.
April 22, 201114 yr Oh and be careful when using that black stuff... I'd hate for you to get POR-15 in your eye....
April 22, 201114 yr Holy crap Loyale! I can't believe how much rust you're fighting there!! I thought I'd seen some bad rust in L's but this one is unfortunately the worst You do an amazing job to keep your L going! It certainly makes what I'm dealing with an easy task, mainly body fatigue after a good 440k kms with some hard 4wd'n since I've had her at 293k km Cheers Bennie
April 22, 201114 yr That rust is considerably mild compared to typical ea82 fare in the midwest. Have you seen the threads with broken subframes due to rust? dam you aussies with your dry climate, and your un-rustable cars!

Please sign in to comment
You will be able to leave a comment after signing in
Sign In Now