August 27, 201510 yr Author HD video of Turn Signal Modification! Edited August 27, 201510 yr by TheLoyale
September 1, 201510 yr Author Anyone have an idea of what type of sealant is used on the tail lights? The Black tar like substance. I'm looking for something like that, I can apply to my '80-'82 Tail lights before I put them on the Hardtop. Cheers!
September 2, 201510 yr Author Time for a fun post! Swapped in an EA82 dome light. Direct fit and finish. But so much more light than the EA81 style. Just chillin' in back of the Hardtop. Its ONLY 90 degrees out
September 2, 201510 yr Author Thanks man, that is the one thing this car does have. Its clean interior. Body isn't bad, until you look on the over side. Its so rusted, its sad. Thats what happens when you leave a car sit in tall grass forever.
September 26, 201510 yr Author Been acting as one of the DDs lately. so nice to turn the key and know it'll be ready to go! Still need to add a lot of things, and make things better, but its a perfect driver right now.
September 28, 201510 yr Author I was surprised to find Clarion speakers in the rear deck. I am going to replace them with something new, possible some type of 3-way. one speaker is kinda blown, probably from all the sunlight and age. So some new Polypropylene speakers will help. I'm not changing the Head unit, as I don't have a slant console. The currant radio works perfectly as is anyhow.
September 29, 201510 yr Author 6.5" Pioneer TS-A1676R 3-ways. Am improvement over stock, a little more depth and range. I may see about finding a new HU that will fit into the stock console, but with the option of USB.
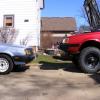
November 6, 201510 yr Author All cleaned up, and covered for winter. Still need to figured out the final resting spot and then take the battery out and toss it on a Batt tender.
November 28, 201510 yr Author Got the rear quarter molding from a Fellow member! Its actually a Brat molding, but is identical to whats supposed to be! Thanks Forrest!
March 19, 201610 yr Author So as Wisconsin unthaws from its winter ravages, the birds start to chirp around 6:30am, the sun peaks its head over the horizon. But wait! Whats that noise...? Ah yes; another year of working on Subarus, fixing what was neglected by others. Anyway! As the snow has all melted and the temps are climbing, the GL has been uncovered and moved into the driveway. On the chopping block this time is the Fuel System, Tank, Lines, Pump, Float. Here is what the original tank looks like. I am thinking this is from sitting in grass over the years, along with the addition of road salts being in the air, clinging to damp steel. Pretty nasty if I may say. Since I have the tank out of the way, I gave these rust areas a go-over with the wire wheel to clean them up a bit, before hitting them with Primer and bed liner. This is only a temporary fix to slow down the rust until I get more time to actually tear into this car. Luckily I have a rust free fuel pump and bracket that I can swap in after I make sure its cleaned up and re-protected. I was also hoping I wouldn't need to make new metal lines, but after looking a bit closer, I am pretty sure they will need to be replaced too. Now! What better to replace ye ole' swiss cheese tank, than this well persevered one. I cleaned up any surface rust with a wire wheel, making sure to check for any cracking around the hose nipples and such. Everything checked out 100%. New fuel tank again thanks to Forest. This is also a 4WD tank. So if in the future this cars becomes 4WD or AWD swapped, the diff will fit nicely. After wire wheeling any trouble areas, I than coated the entire tank with Mar-Hyde Etching Primer; And then coated it again with Dupli-color black truck bed liner. I will snag a pic of the tank once it dries and I get the float back in. (And yes, I tapped off all threaded studs and hose nipples before applying bed liner) Also, here is a snap of the Brat moulding I mentioned in the other post. Fits perfect! Once I get the fuel system finished, I will be moving on the Brake system! Over the course of a few months sitting unmoved; I noticed all the brake fluid in the master cylinder was gone. I have come to the conclusion that one of the wheel cylinders is leaking. Brakes still hold pressure, but I am thinking over time the fluid is seeping out.So since I will need to bleed all four corners, might as well replace everything while I'm at it, Any hard lines, Soft lines, Calipers, Rotors, Pads, Drums, Shoes, Wheel cylinders, Hardware etc.... The Master looks and works fine, so that will remain as is.As I make more progress, I will keep the updates coming. So stay tuned Cheers, -Tom Edited March 19, 201610 yr by TheLoyale
March 24, 201610 yr Yep - nice work there Tom ... Might want to try something like this for the rust : Just dab it on & cover the rusty areas and it will stop it from getting worse ... Warning : just be careful where you do put it, as is acid based & will eat flesh ... Cheers, Bantum ...
March 24, 201610 yr Author I will have to see if this is available in the U.S, I've used other acid based rust converters (Permatex brand) which seemed to have worked out ok. Turns the rust black and hard as rock. But maybe this is a better product! Thanks for posting it, I will check into that as well. Cheers, -Tom
March 24, 201610 yr Author So, I was making progress on getting the fuel tank in with new hoses and such. But the weather likes to play tricks in Wisconsin and we are now getting freezing rain/snow. Everything is ready to put back in, I also cleaned up the filler neck, it was rusted where Subaru didn't hit it with undercoating, but it cleaned up good and is now protected. Need to get some M5 or M4 stainless screws for it along with some proper hose clamps. I will get some more photos of the finished products before install.
March 25, 201610 yr You should try ospho for your rust. It kills rust and leaves the surface rust free with no primer needed.
March 26, 201610 yr Your baby is coming along nicely! I too have swapped fuel tanks for future swap-ability. Fortunately I didn't have much rust at all so I hit it with a wire wheel and some some converter from Eastwood. Then undercoating. Now If only I could figure out whether I simply did not tune the Weber properly or if my foot is too heavy. I miss getting 35 mpg. I forgot to mention that rather than dealing with all the other radio stuff there is another option if you listen to music from your phone more than the radio. Fusion MS BT-100 is a 12 volt stand alone Bluetooth receiver with RCA outputs. You can figure out your own way to use it to trigger a small amp or whatever but when the local stations here suck it has been a life saver. That is what I would do if I didn't want to cut my dash. Mine was already cut so I managed to plug into my current aftermarket radio. ( it's 20 years old so nobody is going to steal it). Anyway I found it on amazon for $40 or something close to it. I used one in my garage for a while. Mike Edited March 26, 201610 yr by Mykeys Toy
March 29, 201610 yr Author Got the Tank in and all hooked up today. New lines, clamps stainless hardware and the works. kinda nice having a tank that isn't puking gas! Next up will be the brakes. I snagged a set of FWD XT rear disks from John in KY. I am gonna compare the calipers I have, and see which ones have larger pistons and run those along with Slotted rotors.I am also going to see if Loyale calipers/brackets bolt up to the EA81 knuckle. I have a feeling they will! In that case, I will have the 9.5" brakes in the front!! And again, slotted rotors. Should have some good stopping power once all done.Will get some pics once I get the rear disk parts -Tom
March 30, 201610 yr Author So.... After matching up 2WD EA81 front calipers/brackets to 4WD EA82 calipers/brackets I have found they both are vastly different and are NOT compatible between EA81/EA82 knuckles. In order to run EA82 front brakes on an EA81, the entire knuckle and possibly the control arm will need to be swapped out with EA82. So my plan on running 9.5" EA82 brakes on the front of the Hardtop went out the window. Guess I will stick with EA81 9" brakes and run slotted rotors all around. Took a few photos of the differences. (In my hand is the EA82 Caliper) 2WD EA81 Caliper. Caliper Brackets EA81 on the Right, EA82 on the Left. Figured I would post this info up incase anyone else was looking into this as a swap. Anyhow, today I received 2WD XT Rear Disk Parts from John in KY! Thank you again for sending these out to me! Gonna get everything cleaned up and painted, may run one of the sets of reman calipers I have (I may run EA81 4WD rear calipers as they should have a larger piston) Will also be putting new bearings into these. MADE IN JAPAN.... Nothing better! Can you Spot the Amsoil....? Cheers all! -Tom
March 31, 201610 yr Author Thinking all Calipers will become Bronzy gold. Keeping it 80s Thoughts anyone?

Please sign in to comment
You will be able to leave a comment after signing in
Sign In Now