
All Activity
- Past hour
-
 The head bolts are reusable. Unless they have stretched or are damaged in some way. These bolts are an odd size. M11. Not exactly an easily accessible off-the-shelf part. Some modern Chevy's have similarly sized head bolts but I believe there isn't any modern production of these head bolts. If you do need some, search locally for a used engine. That way you get a lot of extra parts for a decent price.
 - Today
-
 Hey does anyone have a lead on these parts numbers or a substitute for the OEM part 800211050 Bolt-11x130x34 800211060 Bolt-11x116x34 I'm going to take the head off for head gasket job and need some new head bolts.
 - Yesterday
-
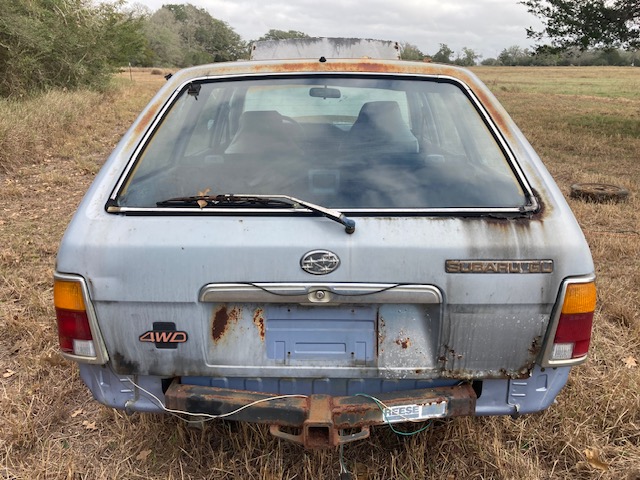
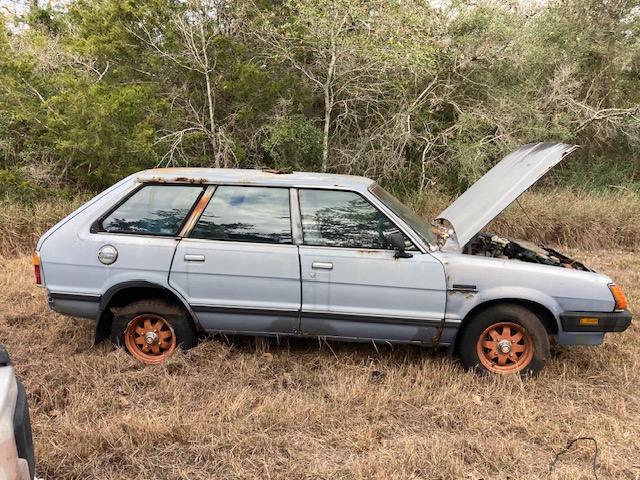
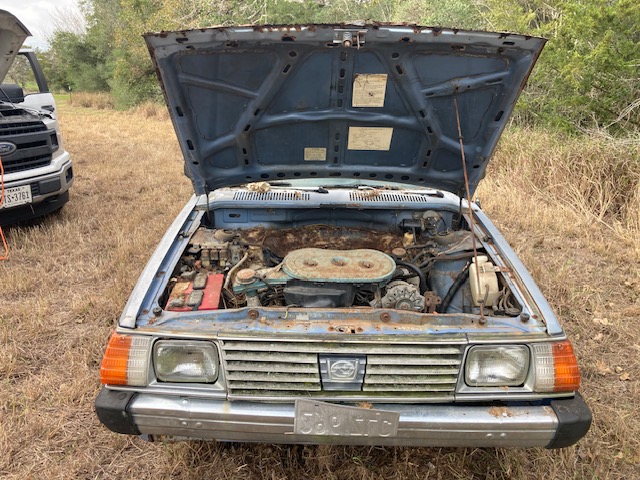
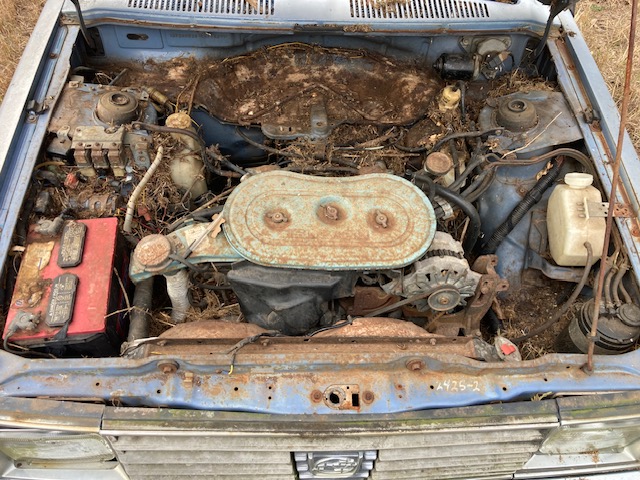
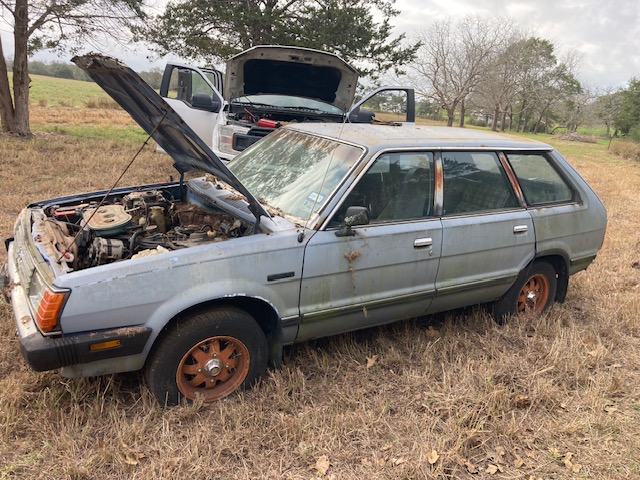
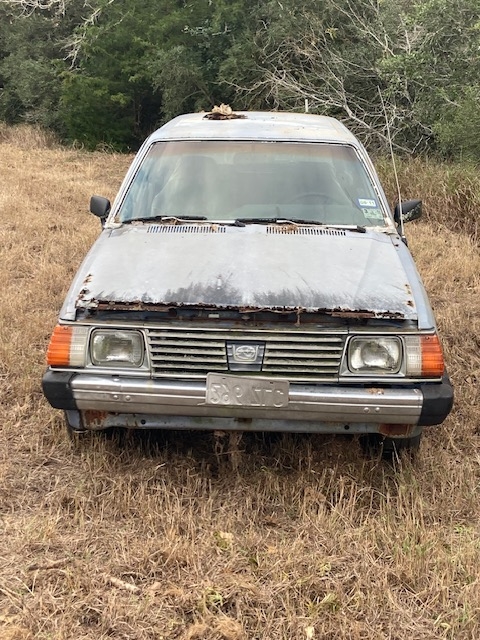
I've decided to part out my '82 GL 4WD. Its been sitting in the back yard (in Central Texas) for 10+ years and the interior and exterior are both pretty rough -- but there may be some parts you need that are in decent/working condition. It's got an EA-81 engine with ~260,000 miles; both the interior and exterior are blue. That is a custom-made Class 3 (2" square) hitch on the back. I have additional spare parts for the vehicle including extra wheels and cylinder heads. I'm keeping the cyclops light but everything else is available. Let me know what you need and we'll see if we can work something out. Thanks- 82baru
-
 That sure is unusual! How does that work? I don't see a physical connection between the vacuum lines on the booster, and the brake-fluid system.
 -
(1)(1)(1)(1).thumb.jpg.9a67b2972671901ccb8571c55dc8ea78.jpg) Yes that's the plan
Yes that's the plan -
 So new Brake Master Cyclinder and Booster?
 -
 Thank you kindly! I AM due for a Pull-A-Part day....😉
 -
Finally solved it for anyone wondering it wasn't actually oil burning like we thought at all it somehow is getting brake fluid sucked in from the brake booster which I didn't even know was possible
-
Rich Mixture, Misfire, Stalling
SuspiciousPizza replied to SuspiciousPizza's topic in Old Gen.: 80's GL/DL/XT/Loyales...
Checked my oil level tonight and I've lost about 1/3 to 1/2 qt in 1400 miles. I do have an oil leak from somewhere. Could have something to do with my jittery oil pressure. Since I do oil and filter changes every 3,000 miles I'm not worried about the leak but I'll keep an eye on my oil level. I did update the PCV hose routing with one of those factory PCV kits (p/n 11813AA010) so maybe that'll help reduce oil consumption. Other than that I've been having no issues even in the cold and snow. The engine does still have a miss when cold. - Last week
-
 Just thought I'd share a vid we made about failing the CARB legal engine swap. - we go over the carb process, why we failed, and future options.. Basically, the 83-87 Brats are "trucks" and 81-82 are "passenger cars." And ej22s only came in passenger cars. We're down but not out! Open to suggestions!
 -
For the axle nut, a center punch works fine. Just drive it in a little. If you have a 6 point socket and large breaker bar you can just back it off. No damage to the threads. Best bet for the axle, would be to get a set of both and take the inner CV joint off and swap them. I believe the spline count is the same, but I could be wrong. A bit of time at the you pull and pay where you could investigate would be best.
-
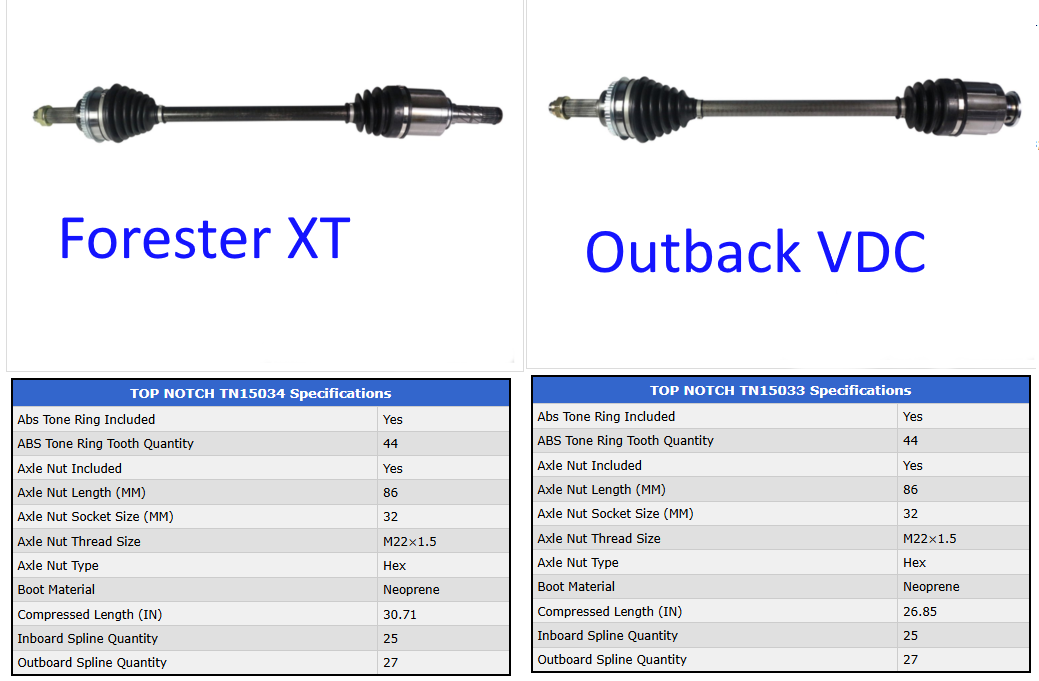
Hey guys, I'm sure this topic has been spoken of many times in this endeavor, but I found nothing by searching. My apologies. I bought a 2002 Outback H6 VDC with a bad 4EAT, aspiring to 5-speed swap it. Today I snagged a 5mt out of a 2004 forester XT. Upon looking at obvious differences between the two trans's, the most blaring is that the FRONT axles are two different styles. My 4EAT's axles have female inboard ends and stub shafts that plug in to the diff, whereas the 5MT is simpler, with the inboard axle ends being male and just plug right into the diff. Spline count is the same between the two, but I'm unsure of the difference in length, if any, between the axle stubs on the 4EAT, and the FXT axles' own input shafts(FXT didn't come with axles to compare). Has anyone done this swap that can verify the two match, or do I need to frankenstein the two styles? Also....what are you guys using to pry out the staked indent in the 32mil axle nut? I've tried hammering both a flathead screwdriver and a chisel type punch, and quickly abandoned the idea in fear of damaging the threads. In the past, I've just run an impact on them , but that was on already damaged axles I did not intend to ever use again... Thanks!!
-
 Danksnaks joined the community
 -
Private Girls In Your Town - No Verify - Anonymous Sex Dating https://PrivateLadyEscorts.com [url=https://PrivateLadyEscorts.com/girls.html] Private Lady In Your City [/url] - Anonymous Adult Dating - No Verify
- Earlier
-
 Join the two together in the engine bay. If you have both out you can bolt them together as a test run to ensure your clutch is aligned. If you have a clutch alignment tool this bit isn’t necessary. IF you decide to do engine and gearbox together, drop the front end out, mount the engine and box to this and raise the front end into the engine bay OR lower the body over the engine and box. I’ve done the bolt in job in the engine bay a number of times; in the L series and Liberty I drop the gearbox out the back and I’ve done the engine, gearbox and front end up into the engine bay twice - L series (EJ22) and the brumby (stock). L series I raised the drivetrain up to the body; brumby I lowered the body over the drivetrain with my engine crane. If you have a hoist it’s so much easier!
 -
 I've always done gearbox first, then engine. I haven't tried doing them together. You'd need to lower them in pretty much vertical with the car way up in the air, I'd think.
 -
 Hi all, A beginners question... I'm putting an EJ22 into a Subaru Brat/Brumby. I'm using the original manual Brat gearbox and an adaptor plate and 2" lift kit from Subarino. I have very basic tools at home, I can borrow an engine crane/hoist. My question is, is it easier to mount the gearbox to the engine and put the engine and gearbox in at the same time (I guess take the gearbox mount out first, and put it in after the engine/box is in), or put the gearbox in first and then the engine? Thanks all, Simon
 -
 Yes except I have mine plumbed the opposite from your example. It sort of works as a locker but mainly it's used as a steering brake. It's my favorite kind of steering brake. This shows how we ran the lines and how close the brake is to the center console compartment. Center console reinstalled, handle lines up perfectly with one of the coin holders. Mirror adjustment switch doesn't go all the way back in. Ran the lines under the carpet and through the stock grommet under the back seat. Connected them to the bulkhead under the seat. I tried a different bleeding procedure which ultimately didn't seem to be an improvement.
 -
long travel Outbacks or making Subarus faster and more reliable offroad
el_freddo replied to pontoontodd's topic in Off Road
The cutting brake? Not heard that term before. I’m assuming it’s a device to lock up one wheel at a time on the rear? Eg: push forward to lock the right rear, backwards to lock the left rear, have I got this correct? Poor man’s locker 😎 -
One of the two main projects I wanted to do this winter on the Impreza (other being the gas tank) is installing the cutting brake from the black Outback. I made this bracket to bolt it next to the parking brake. B replaced the ABS unit with a couple of tee fittings. The one for the fronts is our solution for those lines. B rerouted the braided stainless line we had in the black Outback from the master to the cutting brake, it was still in good shape. Bolted to the cutting brake. Bolts down using two stock fasteners on the top of the driveshaft tunnel. It backed right up to the storage compartment in the center console so I plugged the normal feed location and plumbed the line from the master to the top (former bleeder location). This lines the handle up with the coin holder in the center console (haven't cut that out yet). Handle will be bent too. I made and ran new braided stainless lines from the cutting brake to the bulkhead fitting under the back seat that feeds the stock rear brake lines. We spent quite a bit of time and brake fluid trying to bleed it. I eventually got it to the point that it was driveable and I could lock up the left rear tire but the brake pedal and cutting brake are definitely spongy. Related to this mod was adding another heater core under the one I've been using. Hoping it will give me a little more insurance against overheating. Plan is still to put the two small puller fans on the main circuit in hopes that the pusher fans don't have to run much. They seem to shred plant matter and jam it into the condenser and radiator. B and I did some mockup and made a couple brackets to bolt the second one on underneath the original. That hose linking the two is definitely not ideal but I don't think it's closed off and will probably open up under pressure. I do plan to put a barbed elbow in there to help though. Should make sure the one closer to the fan is getting coolant first too. Still gathering a few connectors for rewiring the fans and extra fuel pumps.
-
 I don’t see anything for A/C in what I do have. Hang in there. If you’ve got a local dealer with an older technician ask that guy.
 -
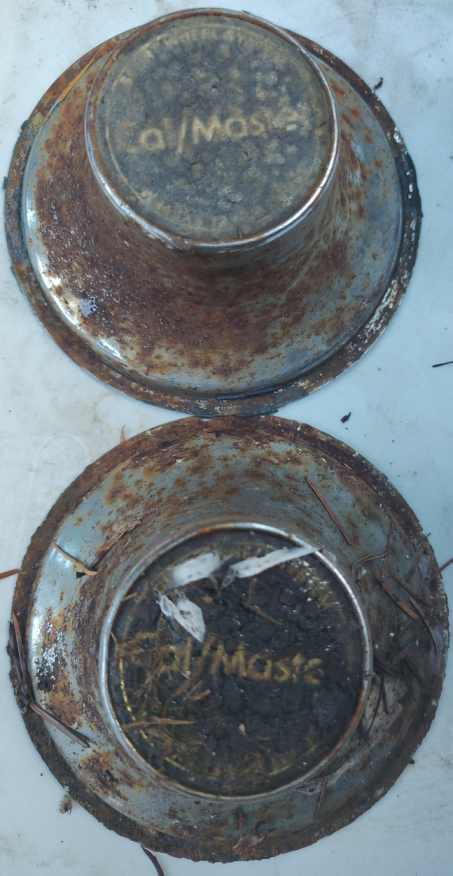
Picked up some was-chrome aftermarket wheels for $50. advertised as brat wheels. Don't know much about them and they need some work and polishing. I'll probably drop them off at a car restoration place. I did find a site the seems to have a catalog scan about the wheels, so I have some specs. https://vintagewheelcatalogs.com/cal-master/ I'm assuming these are Cal-Look wheels for the Volkswagen guys that also happened to be made for Subarus. If anyone's got anymore info I'd love to hear it, like if these folks are still in business or if they got a phone number, also if anyone has any hub caps #1019 I need 2.
-
 Thank you. This has been the most helpful reply by far. Specifically in regards to the swapping. I'm planning to get it done after the 1st of the year as thats when my mechanic is next free.
 -
There was but it was changed out. I've had both cats replaced and it's still happening.
-
Rich Mixture, Misfire, Stalling
SuspiciousPizza replied to SuspiciousPizza's topic in Old Gen.: 80's GL/DL/XT/Loyales...
It was a code 34. I inspected the wiring harness terminals to the EGR solenoid and they were corroded. I replaced the terminals and no more CEL. Note to self, if an issue is intermittent check the wiring and terminals.


