Leaderboard
-
GeneralDisorder
Members4Points23391Posts -
DaveT
Members2Points5095Posts -
idosubaru
Members1Points26995Posts -
el_freddo
Members1Points4486Posts


Popular Content
Showing content with the highest reputation on 10/25/18 in Posts
-
1 point
-
We use the 111 on all o-rings, lip seals, oil filter gaskets, thermostat gaskets, etc. Especially any Buna-N (Nitrile) seals. It keeps oxygen from getting at them, which is what ultimately speeds up the hardening and cracking process. We also use it for all dielectric applications since it's a silicone grease. It's food grade so I'm told it goes well with toast. Seriously we love it and use that $hit on EVERYTHING. That and Yield are probably my two favorite shop chems. Also Amsoil HD Metal Protector. We clean them with a lint-free paper towel and brake cleaner because it's a fast evaporating degreaser that leaves no residue and we buy brake clean by the 55 gal drum. We found that our bathroom paper towels that I buy from Costco are essentially lint free. Georgia Pacific Marathon Dispenser Roll Towels. LOL. Cheap too. GD1 point
-
Wheel bearing.. turning right/left is the key. I would hit the local parking lot and jack up the front to do the 12-6 9-3 o'clock check, pretty sure they didn't replace the cone and it's loose... Hell I can almost bet they didn't repack or replace the bearing seals .. without looking at paper work. Kinda weird the mount bolts were missing..1 point
-
Evening (and a late evening from the east coast of Oz - 10pm-ish here!) The issue you describe does sound like a drive shaft - particularly since the replacement item was an after market unit. I agree with you, the missing engine mount bits won’t matter, so long as the engine is still held on either side of the engine mount by one nut and washer setup. Other things to consider are: - tail/prop shaft uni joint on the way out. Although that’s not powered when in 2wd, so it’s a long shot - excessively worn gearbox mounts After reading that linked thread I think you’ve already got your answer - and it all points at the after market cv shaft. Bugger about not being able to work on your car at your apartment :/ Cheers Bennie1 point
-
1 point1. read the check engine codes - what do you get? any national chain can do it for free if you can't. 2. knock sensor is the most common failure on that engine by a mile - i've never seen a cheap $8 ebay special knock sensor fail yet so they're at least a cheap test mule. 3. plugs and wires 4. the timing belt and pulleys are 22 years old and basically worthless for service - they all need replaced. at a minimum check that none are compromised.1 point
-
From what I have owned, EA82 powered cars from at least 87 through 93 are nearly the same. Drive shaft may or may not be different. It should bolt to the engine no problem. What year / model is the old one?1 point
-
as comatosellama suggested, speed dependent vibrations/shaking are most often caused by a tire out of balance, sometimes a damaged tire - Start there. As texan suggested, swapping tires from front to back for a quick, inexpensive test.. if the vibration is still present, bet less noticeable in the steering, that would suggest it IS a tire out of balance and/or damaged. get them checked If swapping the tires has no effect on the vibration/shaking, then yes, you need to dig deeper. potential issues: ball joints, tie rod ends, wheel bearing, CV joint (axle), maybe a frozen brake caliper.. also check struts & springs.. also take a look at the lower control arm mounting points. the rear most mount bushing tends to be a problem area1 point
-
When I had my 92 legacy it was doing the same thing and it ended up being the tie rods.1 point
-
Go to discount tire and have them check balance, if it gets worse with speed this would be my first guess. Especially if there aren’t any new noises associated with the vibration1 point
-
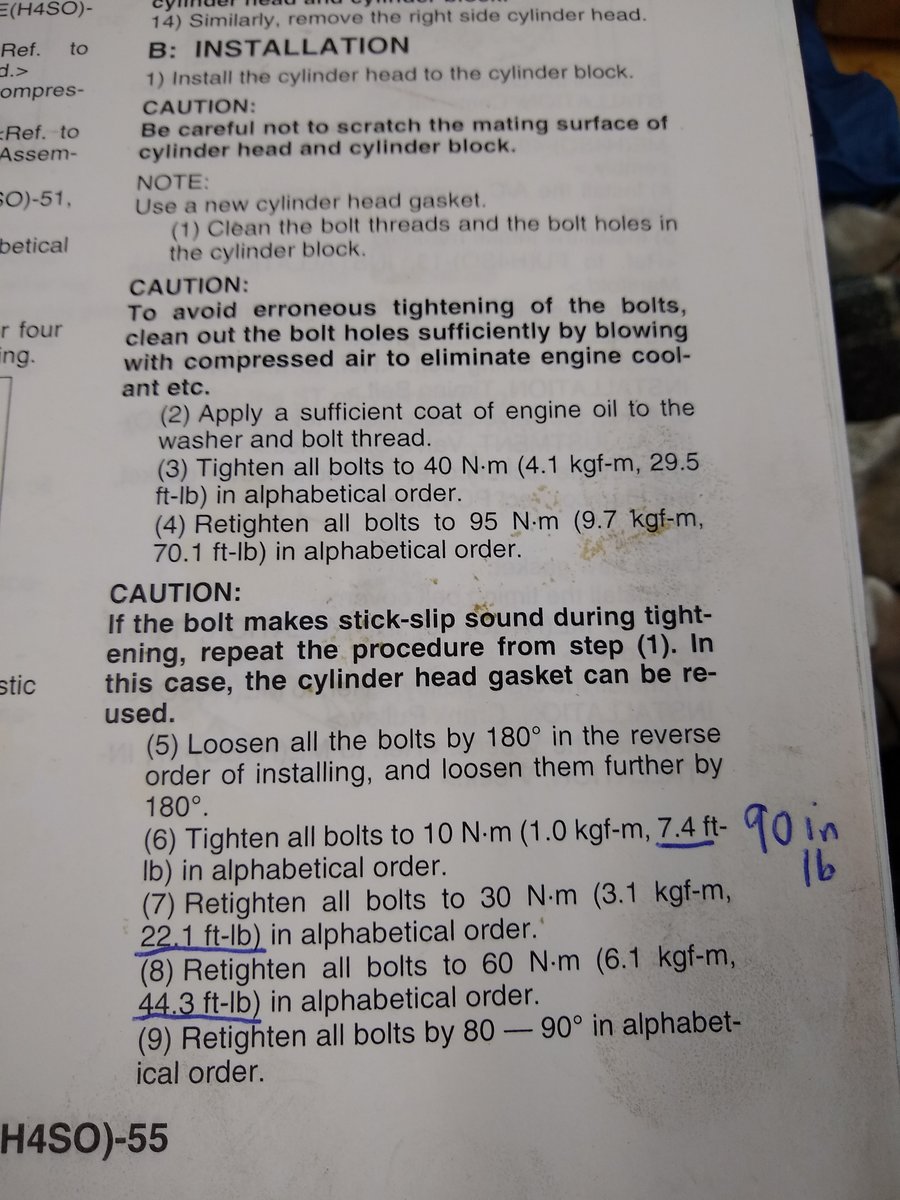
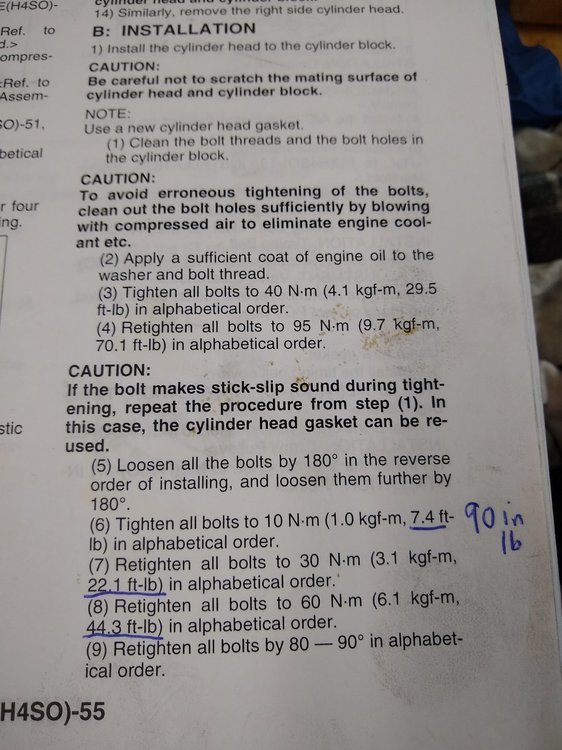
1 pointSkip NO steps. Regardless of bolt newness. Repeat each of the ft/lb torque sequences till they do not turn any further. If that takes three times or 50 times - once you run through the sequence and they no longer turn you can move on. Obviously this does not apply to the angle torque values. If you get creaking (stick-slip), STOP and take it apart. Yes chase the threads with an old bolt. And then you need to lube them with Amsoil Engine Assembly Lube. Lube the bolt threads of one bolt, run it in and out of each hole with the head off a couple times - relubing between each. Apply assembly lube LIBERALLY to each bolt and between the bolt head and top of the washer (not between the washer and the head). Make sure you use the small washer bolts in the corners and the big washer bolts in the center. You must use something like the Amsoil lube. Regular engine oil won't handle the load and will creak. Once you achieve ZERO creaking you are doing it right. Creaking means false torque readings and in all likelyhood insufficient clamping. My point was your machinist is a hack. I bought an Ra meter (used) for about $350. It's a neat little tool and a proper machine shop would own one (maybe several) in order to ensure they achieve proper specified surface roughness for any given application. This doesn't only apply to cylinder heads - lots of things need to have specific surface qualities. GD1 point
-
1 pointPerhaps this is one of several errors. I skipped steps 3,4 and 5 below. Was following some advice that stated these steps were for new bolts only. I started on step 6 with existing bolts. One other question. How many passes do you make? I found that the early steps take 2-3 repeat passes in alphabetical order to get all bolts to the specified final torque for each step.
 1 point
 -
1 pointNot sure what you've skipped. Subaru head-bolts are NOT torque-to-yield. that's why you can reuse them. I've always followed the complete torqueing sequence when installing new head-gaskets.1 point
-
1 pointNO SEALANT. Pull it apart and check everything. You have done something horribly wrong. I can measure Ra finish. I bought a meter for it. And I'm not even a machinist. Use the Subaru head gasket part number ending in 770. GD1 point
-
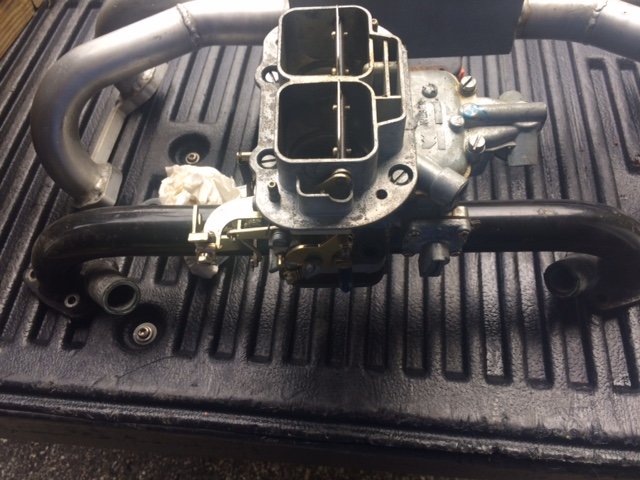
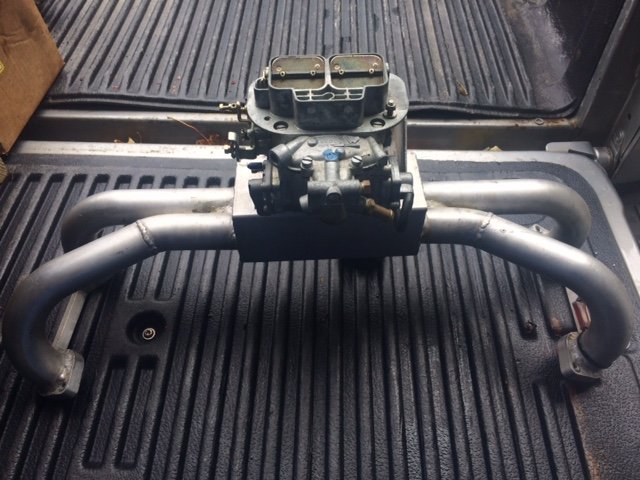
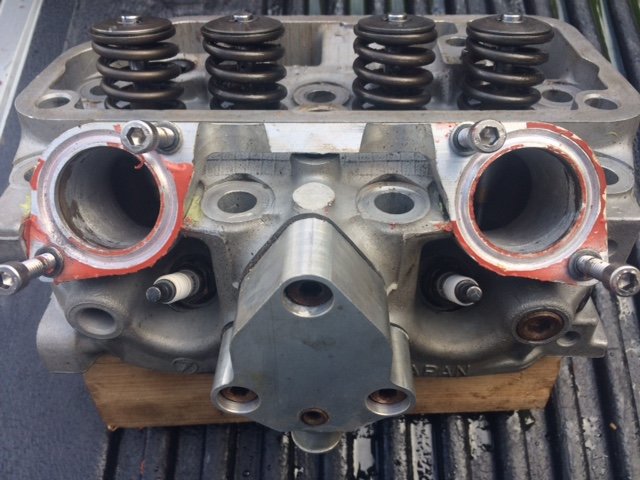
1 pointI have the Ram Dual intake EA81 heads with stainless oversized valves, bronze guides and HD springs with only 25 hours of use. I also have the Ram custom Aluminum Dual intake with a like new Weber 38 carb. Serious HP gains with this set up! I also have a custom single intake with a like new Weber 32/36 carb. I will entertain any offers. I can be reached at 860-86six-61zero4 or PM me
 1 point
 -
They are NOT torque to yield bolts. Subaru has never used TTY head bolts and there is no mention of replacement in the FSM. Just clean them with mineral spirits, or a parts washer. Do not use a wire wheel or brush or anything abrasive - it will remove the anti-friction coating. If any have pitting damage or rust replace only those. Reuse the rest. Lube them with Amsoil assembly lube. Chase the block threads (an old head bolt with a couple slots cut up the threads works well), and run the bolts in and back out a couple times (head off) with the assembly lube to pre-lube the block threads and check for any binding. Reapply assembly lube to the bolt for final torque. If you feel any binding or tightness to the threads STOP and asses the situation. If you seize the bolt in the block and it breaks off you are totally F'd.1 point