3eyedwagon
Members
-
Joined
-
Last visited
Everything posted by 3eyedwagon
-
The last time I went to Walker I had Wildcats. I had an incredible overheating problem, and an even more incredible camber issure. All due to my own ignorance of course. But the Wildcats performed just fine.
-
Depends on what tranny setup you are using, and what generation car you are talking about. I have no experience on the 3rd gens, so I'm not claiming any expertise as to lifting them. If you do the 5 speed swap into the second gen, the linkage is real simple. You just lengthen it to accomodate your lift. No bends or anything. So to me, it stands to reason the setup is very similar in a lifted 3rd gen If you keep your 4 speed in your 2nd gen, it gets a little trickier, but it really isn't that bad. Gearbox Shifter Linkage The shifter for the gearbox needs to have a detent put in it in order to clear the 4x4 linkage when shifting into either 4th gear or reverse. Reverse will give you the most problem. While making this detent to clear the 4x4 linkage, keep in mind that you shouldn't point the top of the shift handle too far towards the drivers side door, as this will result in the shifter hitting on the hole in the floor when shifting into 1st/2nd gears. You can beat the *&@#$% out of the stock hole to make more room, but thats kinda hokey, and it makes it harder for your stock console plastic to fit back on. I found that the stock 2nd gen sway bar has the perfect bend in it that you can salvage, and add to your shifter. This makes the "detent" that clears the 4x4 linkage, and lengthens the shifter around 5 inches. I just fabbed my linkage up with the transmission in the car. I tacked everything together light enough to bend the linkage if needed, and heavy enough to hold together while testing through each gear. The only problem I have found with my 1982's linkage is that I had to notch the stock plastic "console pieces" at the bottom, otherwise I couldn't shift the car into 2nd or 4th gears. IF I had spent a little more time on it, I may have been able to avoid that problem. NOTE: I found you are better off doing the four wheel drive linkage first, then making the gearbox linkage. Also: Once you finish your four wheel drive linkage you can test your gearbox linkage in all 4x4 linkage positions while building it. Be sure to test all gears (1st, 2nd, 3rd, 4th AND REVERSE) with the 4X4 linkage in ALL 3 POSITIONS. There is nothing more frustrating than making a nice gearbox linkage, painting, and installing it, only to realize that while it works well in 2wd and 4hi; YOU HAVE NO REVERSE IN 4LOW!!! 4x4 Shifter Linkage As for the 4x4 linkage; I cut the stock linkage in half where it starts its bend upward to go up through the floor. Then I held the half of the linkage on the transmission as close to the stock angle as I could. This means parallel with the transmission casing, so it pushes straight into the transmission. I then added the necessary length to the piece that comes through the floor to reach the linkage on the transmission. The piece that was added met the stock linkage on the transmission at about a 40 degree angle on a 4 inch lift. I realize that this puts alot of stress on the point where the added piece meets the stock linkage at that angle, So I gusseted it and ran healthy welds around the entire joint. If you tinker with it before welding it solid, you can even get your hi/low lights to come on at the correct time. Sorry this is so long. Just wanted to be thorough. GOOD LUCK!
-
Count me in. I just downloaded a DNR map of the area. The map is from 2006 and somewhat incomplete, however, it is the best one I could find. http://www.nwjeepn.com/Maps/walkerValley.pdf If anyone has a newer, more complete version of this map; please post a link. Thanks I'll be sure to invite some of my Toyota buddys, as they're always very entertaining to watch . Oh, how they do try so very hard!
-
I agree that this probably wouldn't last very long. Only because you are allowing lash in the setup, followed by an abrupt uptake. That kind of force against a small surface area would destroy almost any smaller differential. I've never even heard of this done on any differential, but allowing that lash doesn't sound like a good idea to me. I'd just weld it all the way up and live with it. A welded rear isn't that bad, you just learn when to cut a tight corner, and when not to. As for the front; I'd find an LSD. Or you could weld it and pull an axle for driving it on the street. With that said, I don't know how you guys are destroying stock Sub diffs without any gearing mods. That is unless they just have a ridiculous ammount of miles on them with no maintenance, and your right foot rests heavily on the floor. My welded rear diff is in its 3rd car, and it's been welded for years. It's seen everything from 31's to the 27's that are on it now with no problems at all. Most of my buddys rear differentials have been in numerous cars as well, and I've never heard of them breaking any. :banana: Maybe we are all just really lucky! :banana:
-
Just wondering; what kind of frame is that? What are you planning on using for a transmission, and t-case? :grin:Other than that:grin: zzz Good luck!
-
Sounds like fun. If Jeff's in, I'm in for sure. I'm always game to go find some snow to sling around.
-
Not to hi-jack your thread; but I was wondering if anyone knew of any auto-parts stores brands of air shocks that spin/rotate. I recently tried to buy a set of air shocks for my wagon, but the air bladder was glued to the inside of the shock tubes, preventing them from spinning. Since the top mount point, and lower mount point are rotated 90* from each other the shock needs to be able to turn. My buddy has a set that are for a Landcruiser, and they work great on his 6" lift. Unfortunately, he can't remember where he got them. Also, the casting numbers on the shock body were no use for a cross-reference number. I would love to run air shocks on the rear of my wagon as a way to easily adjust my rear CV-axle angle, but have not been able to find an air shock that rotates. Anyone have any suggestions as to a name brand of air shock, or parts store that carries air shocks that spin/rotate freely?
-
So does anyone understand why he cut the wagon up, when he was just going to take the drivetrain out of it anyways? I guess it did look like it had "a little" rust in it, but that was a lot of sawzall blades to just yank the drive train out of it. Kinda looks like he had a change of direction mid way through.
-
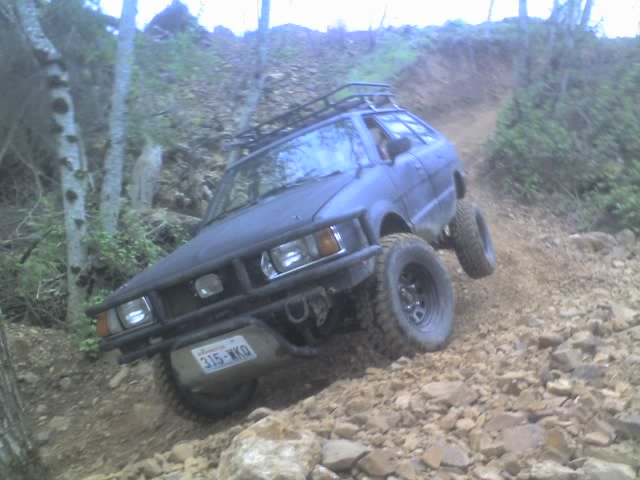
And here is a picture of a car with a road sign bolted to the bottom of it. That skidplate went through just about everything you could possibly imagine, and I believe it may be going back on another car here real soon.

-
Looks good man. Keep up the nice work!
-
Most common shaped (all the most regularly used designs, like squares, and octagons) are made out of 7000 series High Zinc Alloy. The zinc is to make this family of alloys both corrosion resistent, and harder. High Zinc Aluminum is not as flexible as more common aluminum alloys, and will not bend as uniformly, like 6000 series aluminum. The upside of the 7000 series (or street signs in this case) is that they are incredibly durable. With proper bracing, the street sign will make a killer "skin" for a skidplate. Now, I am not saying that you can just screw one end to your bumper, then the other to your front crossmember and call it good. One Eye and I recently made a skidplate for his Brat out of a T intersection sign, and it was utilized on the trip to Reiter Pit. The top is tab mounted to a pipe cross-piece on his bumper, and it has one crossbar directly in front of the 90* bend in the Y pipe. The crossbar is 1/4" x 1" flat bar, and it didn't bend Saturday. The bottom is connected to the crossmember under the steering rack. I'm not claiming any originality to this idea because I stole the idea from our friend Woody. Woody has had the same street sign skidplate on numerous cars, and it has held up really well. As I recall; Woody's skidplate has pipe running down beside the Y pipe, and a few cross braces in between, with the sign acting as a skin. I have seen that skidplate take numerous "direct hits" with no breakage or any other ill effects. That skidplate has been on a few (I think 3, ?help me out Jeff?) heavily wheeled Subarus and is yet to be ripped, or crack. There aren't even any dents in it to speak of. Woody has time tested the street sign skidplate, and it has held up for a long, long time, through multiple cars. I'm excited to see how the one we fabbed up for Jeff's brat holds up. It was a spur of the moment idea, and was done in haste to prepare for the trip to Reiter Pit. I'm thinking it will need more bracing, but it did hold up just fine through the tree roots on Saturday. Jeff? I think the main thing is that you need to give the aluminum a heavy structured frame, with support in the rear. That way the sign acts as a skin and helps things slide past. Plus, they look good! Hope this helps!
-
Hey GD, Just out of curiosity, did you cut the input shaft of your steering rack at all? The input on mine seems to stick out about 4 - 5 inches further than a non-power steering one. I cut it in half under advice from a friend who has lifted a bunch of them. Just no power steering rigs. Now it looks as though I'll be welding that splined section back on the rack. Just wondering how you did it. Thanks.
-
Thanks guys. I had something of that sort in mind, I was just wondering if anyone had any experience in successful conversions. Thanks again for your time 3i"dwagn
-
Did you rob parts from a EA82 steering setup? My car has a rag joint / u joint setup on the top end of the linkage, and then that was mated straight to a fixed splined shaft coming out of the power steering rack.
-
I'm wondering if anyone could point me towards some pictures of what people have done for their steering shaft/linkage from the firewall to the steering rack on EA81 cars WITH POWER STEERING. I'm putting 4 inches of lift on an EA81 wagon, and would definitely prefer to keep the power steering. I did a forum search and a picture search, but couldn't turn anything up. I'm beggining to think that I am going to have to drill the firewall to lower my steering column, but that will only help so much. If anyone has any advice on making the linkage for this or pictures of such linkage to provide inspiration, it would be greatly appreciated.
-
THANK YOU! I LOVE my EA81 wagon, but I realize it wont be winning any road races any time soon!
-
The fact remains, I could strap a 350 into a cheap Chevrolet body of ANY year between 1957 to about 1995 (the uglier and stranger the better) and kick the crap (AND I MEAN CRAP) out of your car. Plus I would still have plenty of money left over for beer or another toy! Or I could be lazy, wait for a government auction and purchase a Caprice ex-police car for next to nothing. Then hand you your @$$ in style in comfort while adjust my POWER EVERYTHING! I dont need to make up any formulas to prove this because its been going on FOREVER! I win.
-
So, youre going to preach to me about the racing prowess of the EA82T and youre "11 psi of boost" and then in THE SAME EXACT POST say that you will race any Honda except "a bike OR A TURBOCHARGED ONE"! Thanks for proving my point. I dont know how it is where you are, but around here, junkyard turbo'd hatches are a dime a dozen, and B16s are about knee deep. I know this because I HATE THEM! I would call exhaust, intake, ignition, sometimes a dry shot of NOS (20-60 hp), and lots and lots of lightening a mild Honda, and an EA82t XT isnt gonna catch one of those till WAYYY after the quarter has ended. GAME OVER. I think its safe to say that quarter mile drag racing and freeway grudge matches are the most common types of races. So unless we're talking about racing down the Audobahn, I'd pick a different approach to smoke a Honda. Trust me, theres plenty of ways to skin that cat, but the EA82t just isnt a PRACTICAL, LOGICAL, or even REALISTIC choice.
-
I couldnt find anywhere on here how many miles (Im guessing the 56k had something to do with it) are on your wagon, but it looks pretty similar to mine. I have an 82 GL-10 wagon, its pretty optioned out. I recently paid $500 for it, but knowing what its worth; I wouldnt part with it for anything under $2500. It has a few things done to it, but it is still relatively stock. If I can be of any help, let me know.
-
All the gadgetry in the world isnt going to make a EA82 fast enough to hang with even a mild B16. Thats "reality coming back to bite you". Sure you can bolt on all the boost you want, but horsepower is a simple equation. More air, more fuel, more spark. IF you want to get down to brass tacks, dollar for dollar, pound for pound, the EA82 just cant hang. Not even with a mild b16 let alone ANY H series Honda motors. I don't like it any more than you do. But thats "reality coming back to bite you". I do admire and appreciate your sense of adventure in trying something new tho! The last thing the road needs is another **** Honda! If moneys no object, go for it! Drop a B spec in it and give er 'ell! But just like any engine, the EA82t DEFINITELY has its limits.
-
Step 1. Park XT. Step 2. Buy just about anything with a Chevy 327 or 350 v8 in it. IE: Shortbed pickup, mid 70s dirtbag Camaro, postal van, Caprice ex cop car Step 3. GO to local NAPA, get speed parts. Step 4. Install said speed parts. Step 5. Lighten Vehicle using sawzall or other destructive device. Remove EVERYTHING you dont need. Remember, you only need headlights if you plan to drive after dark! Step 6. Go fast for cheap. I like my early Subarus, but if you really want to go fast, youre gonna have to abandon ship or buy a newer Sub. Like a STI! Now I know everyones gonna get all whiney, but I mean FAST, not fast for a older Subaru. I'm a Subaru fan, but I'm also a realist, and EA82s just werent made to make a bunch of torque. "There's no replacement for displacement." Cheezy, but true.
-
Im gonna go ahead and play devils advocate here and tell you why Loyales kinda suck. Keep in mind I am an EA81 fan so my opinion will be biased, but Ill try to be fair. Subaru had been turning out a quality line of products for (in my opinion) about 12 years or so. You can argue with me on this but I think the company didnt really get rolling until the release of the EA81. This isnt just because of the engine, but they were selling ALOT more units by this time. So Im gonna say that Subaru had a quality line up from 1978ish to 1990ish. Anyways, after a good run of a nice little cheap quality product, (everyone knows this is Subarus bread and butter) they gave us the "Loyale". Now, if you take the Loyale for what it is, it is a fine car. However, if you look back and compare it too previous models, it was a major let down. NO D/R? You've got to be kidding me! It was basically a DL in a time when nobody really wanted a DL. The name also has something to do with it, it is a crappy name. Most of all though, I would have to say that it just isnt as popular of a car because, by the time it was released, Subaru owners were expecting more of the same neat, cool, gadgety, quality product, and they got less. I really think the car seems to be nothing more than an attempt by Subaru to kill some time in the early 90s until they could get new models up and running. The whole car projects that to me anyways. Oh yeah, and timing belts kinda lick *** too.
-
The first design 3rd eyes had a larger, more elaborate door. It had quite a bit of chrome on it and some would consider it a little gaudy. I think they look kinda neat, retro 60sish. The 82 models have a smaller door that blends into the grille really well. Most people dont even notice its there until its turned on. The button is located on the dash, down low by the left knee. I have seen "Center Lamp", "Passing Lamp" and (as mine says) "Offroad Lamp" on the button, which lights up a nice blue when turned on. If installing/purchasing one, be careful. The center lamp doors are powered two ways; Electric, or Vaccuum. Electric is a relatively simple mechanism. However, the Vaccuum operated doors require; Vaccuum! Kinda a pain in the @$$ to set up. They do look cool if you just cut a NICE hole in a quad lamp grille though!
-
GL= Grand Luxury DL= Dissapointing Luxury GLs just have more options. Most importantly a tachometer, but they can come with other neat trinkets like mine. AC, Power Steering, Remote Mirror (WTF?), Rear Defrost, Rear Wiper/Washer, Cruise Control, Hill Holder, One touch power windows in 1982, GOTTA LOVE IT!
-
Awww. 390s. Gotta love those $280 OEM equivelant rubbers!