RelicGL
-
Posts
28 -
Joined
-
Last visited
Content Type
Profiles
Forums
Gallery
Store
Everything posted by RelicGL
-
Weber install: backfire from intake.
RelicGL replied to TheYeti's topic in Old Gen.: 80's GL/DL/XT/Loyales...
Somehow, the float level in the fuel bowl comes to mind. Make sure it's set properly and that shipping turmoil doesn't have the float stuck at the top. If that's the case, put everythiong else on the carb back to a base starting place, ie the mixture screw set back to 1 1/4 to 2 turns and go from there. -
Recommendations for main&con.rod bearings???
RelicGL replied to PoorManzImpreza's topic in Old Gen.: 80's GL/DL/XT/Loyales...
and now, for something completely different. that re-ring kit looks interesting. Rods, mains, gasket set and rings. -
oooooh, that'll make the wagon just spiffy! :lol: Thanks! :banana:
-
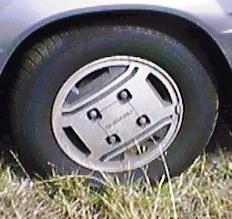
I got a line on a set of 4 of these with tires. Question: Will they fit an '83 GL Wagon 4x4? Any clearance issues for brakes and whatever? Thanks. The wheels on my wagon are fuuuuugly! Black 8-spokes that must have been painted with a brush or something, years ago. I could deal with them but I'd rather just up-grade to these IF they fit. Oh, the PO described them as 14 inch but the site here lists them as 13" Any help on this matter would be much appreciated.

-
Robertson screwdriver, if it has a nice thick shaft and a squarely machined shoulder at the tip to load on the roll pin and thus prevent the wedging effect. You probably have one laying around.
-
Somehow my brain registered that as the springs in the pressure plate. In which case I would say as a result of not tightening the bolts correctly. With any pressure plate tighten each bolt only a small amount and follow the tourquing sequence. You can only go a few turns at a time on each bolt. Do this constantly and consistently until finally tight enough to pull out the tourque wrench for final tighten. None of the springs in the pressure plate want or should be any tighter than any other spring at any given time. This will ensure maximum longevity. Broken disc springs? LEADFOOT!
-
Neautralize the acid corrosives on all the nearby metal in the battery well quickly with lots of baking soda and water and rinse well after. No point in allowing a rust problem to come about because of the event there.
-
Axle replacement for EA series cars
RelicGL replied to edrach's topic in Old Gen.: 80's GL/DL/XT/Loyales...
I've been slowly going through my 83 EA81 wagon and have done the wheel bearings and seals and am awaiting new axles [payday] so some more crap DOES have to be removed than if one were just changing axles. With 3 types of penetrating fluid and patience, I had great success sticking a second small floor jack and a piece of wood under the ball joint with the nut very loose but threaded on, then jacking it until a reasonable amount of pressure contacts the nut and then using a piece of wood and a 3lb sledge to smack the lower control arm down off the tapered part of the ball joint. It came apart beautifully that way without stressing any rubber roots on the ball joint. Tie rod popped fairly easy. Due to some rusty hell on the driver's side I removed the whole strut and knuckle as an assembly, [calipers wired off to side, hub and rotor off] instead of screwing with rusted pinch bolts for the ball joint to knuckle or the lower strut cartridge itself. I undid the two top outer nuts on the strut mount, left the center nut tight, [spring! DO NOT TOUCH!!!]] and just yanked out the whole unit, after smacking out the axle with a piece of wood. Axle popped out very pleasantly with only a few blows of the same 3lb sledge and a piece of 2x4. I had to make one crafty cut for the brake cable to come away from its strut mount, but it will assemble fine with the prong bent back into place and the clip replaced. It was easy popping out the old seals and wheel bearings and putting in the new ones even though it seemed an odd angle at times. Did it right on the pavement on a piece of cardboard right beside the car with, of course, plenty of rags and brakecleen. I had a new grease gun cartridge of chasis and wheel bearing grease I had been neglectful to load into the grease gun so I pillaged it for doing the wheel bearings. Run what ya brung and it's what I had! Saved a trip to the store. Now I just have to source the new GCK axles here locally and experience the utter joy of getting the new axles in through the knuckles and new bearings. I am hoping the NEW axles and NEW bearings make the pull-through a little more co-operative than possibly otherwise. New Raybestos semi-metallic PGD brake pads as well. I went with the cheap-rump roast rebuilt water pump and surprise, it had the correct original-style impeller, excellent! I've also been changing spark plugs, cap and rotor, [new wires already there, 7.5 mil] engine seals and the oil pan gasket. I used gasket adhesive to glue the cork to the cleaned oil pan and just left a nice clean surface where it mates to the block and got the bolts back in quick enough for a little wiggle room before the adhesive set further. The idea for that is so if I ever have to take the oil pan off again, for whatever reason, the gasket will stick to the pan and release cleanly from the engine block saving the gasket for re-use. Thwarting Murphy's Law by being prepared for a second pan removal means I WON'T have to ever remove it again! I hope! [also cleaned the pick-up screen with lots of brakecleen and a brush and a old towel to catch the drippings; also cleaned the inside bottom of the oil pan. Surprisingly not very cruddy. I expected all kinds of crap to lay in there] and doing the water pump as well as the rear brakes. Basically just going through it and making it safe and operate dependably for another 100,000 miles. One rear wheel cylinder was leaking, no big deal. Two new wheel cylinders and cleaned up the shoes, drums and backing plate with brakecleen and reassembled, final bleeding stilll to come. New gear lube concoctions for the trans and diff as well. I still haven't found a local retailer for GCK axles, but I must admit, I haven't looked that hard yet. Front axles have to wait for payday anyway but I will Phone and google around. Doesn't seem to be an Autozone in Vancouver, yet, but SOMEONE here locally, wet coast Canada, has to be able to source them. I bought the car for a hundred bucks and by the time it's done I'll have another $600 or $700 or so into it and I'll know exactly what I have as I drive down the road, or off-road. I got a little delayed due to a back-log of bills and other life expenditures but they are all paid finally and I'm getting close!!! -
RoboBucky..aka Wheel Well repair
RelicGL replied to Bucky92's topic in Old Gen.: 80's GL/DL/XT/Loyales...
Best and cheapest way to reduce road noise and perfect for Bucky right now would be sheet form rockwool insulation, about an inch thick or less. You can get it with one side adhered to what looks like foil sheet. Great for built-in dishwashers as well. Cheap too, at least in comparison to automotive specialty crap. -
I have a variety of hard rubber head mallets with wooden handles. One of them is pretty big. I start with the regular rubber hammer and if necessary pull out the bigger one when needed. Bought 'em used cheap at the local pawn shop. Apparently the previous owner of the hammer set installed stone floors or something like that.
-
Perfect timing for this '83 GL wagon new owner! Parts come in tomorrow and this photo-spread is EXACTLY what I needed for a procedure breakdown. Perfect time to slip in a new cv axle as well which is what I'm also doing. If it stops raining today I can rip it apart and bring the old cv axle in when I pick up the new one and avoid a core charge. The seal info is also perfect timing. I'll be sure to get the dust shield version. I just hope my hub splines have survived.... I've been working almost every day and finally have two days off to do this job. Soob mobile soon and this helps alot!!!
-
Gotta new toy today!!!!
RelicGL replied to newsoobdude's topic in Old Gen.: 80's GL/DL/XT/Loyales...
Crop circles on the hood...yep, it's a keeper! -
Uncle Scotty! one cocktail please
RelicGL replied to Numbchux's topic in Old Gen.: 80's GL/DL/XT/Loyales...
Lucas Oil offers a few interesting additives to improve gear lubes. One was very good for the gears inside to carry up the most amount of oil to transfer to the gear above and better lubricate the uppermost shafts and gears while retaining other desirable properties. Sounds viable enough to improve the lubing. -
85-GL ES82 Wagon Dropped Valve?
RelicGL replied to onetoothoff's topic in Old Gen.: 80's GL/DL/XT/Loyales...
The EA81 has a two-step initial valve adjusting procedure which shouldn't really vary from the EA82 much, at least as far as Hydrailic lifters are concerned. When initially setting valve clearance upon re-assembly put #1 cylinder at TDC and adjust both vaves for #1, and also the exhaust valve on #3 cylinder, and the intake valve for #4 cylinder. Rotate engine now so that #2 cylinder is on TDC, adjust both those valves as well as the intake valve on #3 and the exhaust valve on #4. Keep in mind that with hydraulic lifters there is a 15-minute bleed-down requirement that is done by having each valve positioned wide open and let the pressure of the valve spring take out the pressure in the lifter by the 15-minute wait under pressure. The zero-point is then determined by opening the adjuster screw until the valve closes and pressure is no longer present on the screw. Then, I think 1 and 1 half turns will set it. Not sure exactly about this but initial adjustment is with each valve seated and the lifter fully collapsed by the 15-minute bleed-down first. Check the FSM for your engine, it is outlined better there as a two sequence procedure with each step outlined more thoroughly. -
EA81/EA82 Engine Tranny question.
RelicGL replied to Gyoas759's topic in Old Gen.: 80's GL/DL/XT/Loyales...
Before you do anything drastic like change a transmission do one thing FIRST! If it's not shifting smoothly into reverse because of what feels like slop in the shifter and you just can't seem to find reverse without it grinding then try this: If, when the engine is not running, the trans seems to shift ok, but when the engine is running it's slop city and grindarama then do this: Check your clutch pedal free-play travel. If it's excessive, like lots of sloppy, dead travel before it seems to meet resistance [disengaging the pressure plate from the flywheel], then the clutch cable needs adjusting, and pronto. Lift hood, remove spare tire and right under there you'll see the Clutch Release Fork with one or two cables attached to it. The main cable goes from the Release Fork to the clutch pedal. The attachement at the pedal is fixed and non-adjustable [i think] but at the Release Fork there are two nuts that travel along almost a couple of inches of threading. The small nut is the locking nut and the larger nut is the adjusting nut. With open end wrenches on BOTH nuts, and a shot of penetrating fluid, crack loose the smaller locking nut and then start turning the bigger adjusting nut closer towards the firewall. The Factory Service Manual states that The Clutch Release Fork should have 2-3mm of free-play, [which will be more at the pedal] and the full stroke of the Release Lever is 17-18mm [for a full clutch-pedal stroke]. Note: If there is a second cable and that one acts as the return spring for the Release Lever and heads over to the driver's side and connects just around the brake master cylinder, then that is the hill-holder clutch cable. A sight search here of the forums will tell ya all about THAT thing. Blew me away!! Never heard of it before. If so then that cable has to be disconnected [just grab where the cable hooks up at the hill-holder device and turn it to create enough slack at the Release Fork to disconnect it at the release Fork]from the clutch Release Lever when doing the above adjustment. Hook a bungee cord to the Release Lever and run it over the air cleaner and attach it to the front bumper or something. That's what I did. The object is to SIMULATE the return spring that was on the hill-holder cable. Bungee cord worked fine. Once the big nut has been turned down the threaded rod end until the adjustment seems to be within the given parameters [the 2-3mm of freeplay of the Release Lever] then turn the smaller locking nut down the threads and tighten it tight to the larger nut using BOTH open end wrenches. Check your clutch pedal free-play travel and give the clutch a good full stroke. I ended up with under an inch of pedal free-play. If this seems well, disconnect the bungee cord [temporary return spring] and reattach the hill-holder cable the same way you took it off. That system is now adjusted on its own. Search the Forum, you'll find lots of info I hope. Hop into car, stroke the clutch pedal and shift some gears around. Start engine, find reverse now and I'd bet it finds it, and ALL the other gears, right away with no grinding whatsoever. One of the tells for me on initial diagnosis is the transmission shifted fine without the engine running, but once the engine was running it was slop city and grindarama. Adjusting the cable has made it feel like a brand new car! I had the luxury of finding a brand new cable already there in place but was merely extremely mal-adjusted. Caveats might include whether or not your cable has stretched so there is no more adjusting room. or, perhaps, the clutch disc has worn and with a stretched cable there may not be enough thread left for adjustment. Either way, perhaps buy a new clutch cable [they are reasonably cheap] and repeat above adjustment process. Heck, you're gonna need a new one eventually and, of course, they will ALWAYS break while in traffic, leaving you FOOKED, unless, of course, you subscribe to the theory of creative driving. Good to have a spare and carry the wrenches to change it should the need ever arise. The stretched but serviceable one could always be the spare. Good Luck, and I hope this simple and long-winded explanation solves your dilemna. -
Re-Rings, Bearings and Bushings while in-car
RelicGL replied to RelicGL's topic in Old Gen.: 80's GL/DL/XT/Loyales...
That makes sense. It's wet and fresh up front below the front crank seal and oil pump, wet around the oil pan, wet all along the skid plate, and thicker and drier along the bottom of the transmission. Driving at speed must be blowing it onto the y-pipe and transmission. I don't think the car got much highway speed based on where I bought it from. Alot of stop and go traffic with much congestion whereas the drive to my home had more open highway to spray it more onto the y-pipe and transmission. So, front seal and oil pan does make the most sense. Besides, the clutch works too good now since the cable dilemna was fixed, which I doubt would be the case if the rear main was leaking. -
Re-Rings, Bearings and Bushings while in-car
RelicGL replied to RelicGL's topic in Old Gen.: 80's GL/DL/XT/Loyales...
Well.....bottom of transmission covered in oil, oil leaking on to Y-pipe is definately NOT from oil pan or the seeping oil pump up front, so it looks like I need access to the rear of the engine. As an apartment dweller I don't think I can get away with engine pulling. They certainly don't mind if we work on cars but I may be pushing it if I assemble an engine hoist and rip out the engine, which does look straight forward and simple. I can, however, do a semi-stealth transmission pull. The DOJ and CV axles have to go anyway for replacement so it's a good time to address a variety of concerns at the same time in one fell swoop. I start a new job tomorrow with more hours and higher pay so bonus income helps to pay for it all. $400 bucks allowed as budget for re and re of front cv axles, wheel bearings and a gasket set for engine and miscellaneous things like oil, filter, antifreeze. I have a 5-gallon pail of GL-5 with hand pump in my storage so that takes care of trans and diff lubes. Does the transmission/transaxle mind GL-5 or would something low-sulphur like GL-4 be better? AH, the fun of it all.... -
Re-Rings, Bearings and Bushings while in-car
RelicGL replied to RelicGL's topic in Old Gen.: 80's GL/DL/XT/Loyales...
It sounds like a case of leave well enough alone. It does run fine, no puff of blue on startup, factory dash oil pressure gauge appears to read plenty of pressure [a better aftermarket one, ya I like that] and once the Hitachi secondaries kick in there's gobs of torque..well...considering the flow restrictions inherent in this thing. So....chasing down oil leaks...ya, I'll stick to that. OOH! pavement is drying out....gotta go work on it! Thanks for the responses, folks! My Subie loves yas all! -
After viewing the FSM for the EA81 in order to familiarize myself with the engine I was trying to figure out how much I could accomplish with the oil pan off. I'll be removing it to clean the oil-pickup screen, clean the inside and out of the oil pan and mate a new gasket. Engine has 165k kilometres, a little over 100k miles and only 50 of them from me...the drive home after aquiring it. I'd like to check for various play and clearances of the crank while under there and, if humanly possible, individually remove each connecting rod and piston for a re and re. New rings, bearings and bushings. The FSM describes a procedure where an access plug is removed from the front of the front cylinders and the rear of the rear cylinders. With each cylinder at BDC insert appropriate tool [needle nose pliers?] and remove piston pin clip, and remove piston pin with another appropriate tool through this access hole. Now....? Will the unbolted connecting rod come out with the crank in place but rotated and can the piston come out from the bottom as well? I have a flexible shaft cylinder hone and if piston to wall clearance allows I would like to hone a fresh pattern on the cylinder. Will a ridge on the bottom of the cylinder have to be removed? The hone has different grit stones. I have the medium to fine. Piston cleaning, groove checking and some new rings, a new bushing pressed into the con rod small end and some new bearings for the big end and back in after a THOROUGH cleaning of cylinder wall and oiling anew. I also have a digital micrometer to check each crankshaft journal for roundness. Are new piston pins a good idea and is it necessary to replace connecting rod bolts? How's there reputation for just cleaning and loctiting red upon re-assembly? I sure as hell don't want to pull the whole engine and split the cases....nope! What can replicate the piston pin removal tool? Can this be done in car?
-
'83 GL Wagon, build date 11/82, EA81 stamped on passenger cylinder case front top, bellhousing has a sticker: T81PA2H-BE followed by another sticker with 039802 [i assume that's the number we want]. Inside of hood has 109ci and valve adjustment specs with engine cold.
-
The subie gets under the skin, that's for sure. I recently bought an '83 Gl Wagon for $100 as my first Subaru and after surfing here for a week or so strange things are starting to happen..... In the shower this morning thinking about the EA81 my brain came up with the scheme of Ebaying up a pair of cheap stock 90-96 ZX twin turbos and have 'em feed a 500 cfm Barry Grant blow-thru carb with sealed throttle shaft bushings and a suitable camshaft.....what's a little custom manifold work anyway....no big deal... That's when I realized just what these Subarus can do to ya.... I did get some new NGK spark plugs today while out in the real world. So many more things to go...
-
Thanks for the reply. That confirms my doubts on the push-button transaxle, it's the one most readily available to me because it's there and could be obtained quite cheap. Where I live the low range is essential. I suppose I phrased the question wrong out of my lack of knowledge about the various types of trans out there over the years. I don't have a requirement for push- button or any particular type of actuation. Levers work just fine. Whether a solenoid is triggered via air, electric via pushbuttons, toggleswitch, column lever, headlight dimmer switch, whatever doesn't matter to me. I should pull the actuating solenoid from that trans though. It seems they come in handy for a variety of things to modify.
-
I have an '83 GL 4X4 Wagon with 4-speed D/R and the single stick that activates FWD/4HI/4LOW. I assume that's typical. The wrecker has a newer than mine Subaru in the back of the yard that has a 5-speed. I don't know the year but I'd guess late 80's early 90's. The five speed in it has the push-button 4x4 actuator in the center of the shifter knob. Do any of those have D/R? Would this linkage in the photo someone posted circled in pink also be there for the push-button? I would like to install a 5-speed into '83 but I can't sacrifice D/R to do it. I basically need to know how to identify a push-button dual range. Is it possible the 5-speed would have different axle gear ratios and if so would I have to aquire the rear diff from the 5-speed car if the 5-speed passes D/R criteria? I'm about to change front cv axles so this would also be the time to put in a 5-speed if I'm gonna do it.
-
ooh ooh wonderful! Great tips to utilize. I'm starting to really visualize the rest of the procedure. The next item I have to prepare for is something that fits into the spindle center that won't wreck the threads upon banging it out. Somehow I don't think a Crappy Tire screwdriver will do that job.
-
For removing the pin that holds the cv axle to the transmission stub I didn't have a suitable pin punch. However, a search through the toolbox found a Robertson screw driver that appeared tailor made for the job at hand. This one had a shaft that just perfectly matched the diameter of the hole the pin sits in, with very little play once it starts in. The machined lip that was turned down to the smaller Robertson head was nice and flat providing a good driving force without distorting the pin. Plenty of penetrating fluid the day before probably helped a lot too. I removed the starter on the driver's side for easy access. I then used a long half inch ratchet extension that had a nice flat surface machined at the socket end. With care, and the shock absorbing help of the rubbery hand on the screwdriver, I could hold and brace the arrangement with one hand and nice solid coordinated blows with my big rubber mallet removed them very effectively without damaging them. I also got lucky loosening the two axle nuts for a preliminary check to see if I have to run out and find a 36mm socket which I don't have.....but will.....eventually....like when reassembling the new/replacement components. I used my biggest crescent wrench, carefully, with as tight a jaw bite as possible and voila...they came loose with only an estimated 30-40 ft/lbs of torque. The cotter pin probably should have been one castle parapet tighter to line up with the hole. So what was mentioned in above posts about the wheel bearings lossening off after rolling awhile is most definately gonna happen. I found a receipt in the car from two months ago which kind of explains some things about the clutch. Apparently the clutch cable broke in traffic. The bill indicated towing, replacement of clutch cable, labor, taxes to tune of about $230. Canadian Tire.... more affectionately known here Crappy Tire, a chain hardware, housewares, sporting goods etc...car parts and shop place coast to coast. The mechanic that worked on it got the pedal end ok but never adjusted it properly up top where the adjusting nut is. I had to turn the adjusting nut a good half inch tighter for a nice pedal feel and preplay and correct pressure plate travel. The plus side now is it's a new clutch cable with reasonably proper adjustment. I haven't tested the hill holder yet but that cable was not far off its adjustment. A bit of refining and testing will surely be in order. Oh....the srewdriver I mentioned above? It was a cheap but good one available as sets on sale frequently for up to 70% off, check their flyers for sales. It always comes up. The Robertson set all have the same shaft diameter so the smaller head gets the extra machining to form that nice shoulder that drives the pin. They have a blue rubbery material for a handle. I got 'em where you say? ......Canadian Tire! :lol: Question: If the stub pins are in good enough condition can they be reused with replacement cv axles again or do the new axles come with new pins?