BeefaRu
Members
-
Joined
-
Last visited
Everything posted by BeefaRu
-
I'm performing for a corporate Xmas party Dec 1. They get pretty wild. This year the company's doing it in a hotel and they gave me a room......something tells me I may not be alive at that time in the morning. I can catch up with everyone a little later though, but I'll need a number to call (if there's cell there) to get to your location. --E
-
I concur. Drips onto exhaust. Same with transmission. Can't smell unless it drips while at a stop and only when heating/AC are running.
-
Hey I'm in if I'm not at a catastrophe. But this guy is really in. Not only is he coming to Colorado from Oregon to join us for an x-mas tree run, he wants to do another one at mount hood. And would like us to join him.
-
The dimmer wheel that dims the digi speedo etc is acting up once in a while. It still dims but then it constantly flickers up to full on. Just curious if anyone has experience fixing this. Thanks! -E
-
Thread is on page 5....The "lab" has been mysteriously quiet. You guys must be onto something. For some reason, the "Young Frankenstein" movie comes to mind. "For what we are about to see next, we must enter quietly into the realm of genius!" I vote for staying out of the way until ShawnW says the magic words........"its ALIVE......ITS...A...LIVE! --E
-
Sorry 'bout being off topic. They've been on the "overhaulin the beefaru" thread for a while, but I did put a reveal album on the site yesterday on this page.
-
Materials: 350 grit sand paper Scotch Bright 7448 ultra find hand pad 0000 Steel wool Bull dog adhesion promoter: qtp0312 bond-fled tiecoat 3 in 1 (local car paint supply will know as bulldog) A can of SEM trim black 39143 Wiper arms/roof rack: The stock paint is very thin on wipers, I found myself down to aluminum pretty quick on wiper arms, but nothing to worry about. I believe the roof rack is aluminum or galvanized but with thicker paint. After cleaning the part, use heavier grit sandpaper to smooth paint chips etc, then use scotch brite to finish out scratches for a smooth painting surface. Apply a coat of bulldog Finish with a couple light coats of trim black. Thicker coat risks paint chipping easier. Non plastic "trim": Black trim on front blinkers, roof rack, satin black paint on rear view mirrors, black column trim on wagons etc...: Same method as above, but if you need smoother surface, finish up with the steel wool. If the part has any plastic or rubber, remove the oxidation down to good material before going to finer grit and painting. See "restoring trim" post if you want a factory new appearance on rubber/plastic. The trim black is a satin finish material identical to factory satin black and a cost effective way to make these items a solid black again. Good luck and show that Subaru some love! No closeups, but there are some photos of the restored look in this overhaulin' album
-
For restoring non rubber "trim" (rack, mirrors, black column trim, wipers, restoring bumpers etc) I'll post a thread on how I did those. For window door trim this worked well for my restoration project. Its a lot of work, but the result is impressive. Materials: 150, 200, 300, dry or wet sand paper Scotch Bright 7448 ultra find hand pad 600 grit wet sand paper 0000 steel wool 3M Perfect it III rubbing compound: #051131-05933 Sand paper and steel wool can be found many places. Scotch bright I used was picked up from local car body paint supply place. Same for the 3M product. Method: The main idea is to take off the oxidized damaged rubber and take it down to the good rubber so it can be fine sanded/steel wooled and buffed. If your window trim is too far gone you either won't have any good rubber left, or not enough for restoring. Easiest shortest method is to use trim you have and do on-car restoration. Longer way is to upgrade trim with junkyard finds, restore, remove your trim, then use urethane to mount restored door trim, and/or get identical double sided tape from local body shop supply but that tape isn't cheap. Urethane gets messy fast and easy when mounting so it's good to have a whole roll of thick paper towels and a can of solvent to wipe off excess that may spooge out. Don't get it on your hands. Lots of solvent burning the skin or black hands is the result. Window trim below rolling windows just pushes on, window trim on wagon cargo windows (above rear wheels) is clipped in. Plastic clips my break but can had at junk yard if there's enough donor cars. Door trim is one of two types.... thinner tends to be glued/taped on. Thicker is clipped in through holes in the door and taped on with double sided tape. Remove the interior door panel to see if it's clipped or not. If clipped, squeeze clips with needle nose pliers while using a pry tool on the trim to detach it from the door. For installation the clips have small washers around each clip to keep water out. Good luck finding those, and you'll probably do better urethaning around each clip for that water seal. I'd recommend double sided tape on the rest of the door trim for a less messy install. Back to restoration method: If doing on-car restoration, cover all car paint at the trim with masking tape or you'll be sanding your paint job. Depending on how thick the oxidation layer is, use the more abrasive sandpapers first, then go down in grit. The more abrasive, the more work it'll be to get it smooth. You'll get a feel for the fastest sequence/paper type for your job. Sandpaper doesn't clog if wet sanding. Get wet sanding style paper (black paper) if choosing to wet sand. Sand down, then use a finer grit to see if you're down to smooth non-oxidized rubber. If not you'll still see fine cracks and rough surface. If so, then move down in grit to 600, scotchbrite, 0000 steel wool until you have a great smooth finish. Steel wool used with a light touch will give it that finished non-scratchy look. And FINALLY.......using a rag, apply the 3M rubbing compound and buff away. You'll be blown away at how factory new 20-30 year old trim can look, but you're not done yet. After buffing, let the buff job settle in for a day or two, then apply a rubber vinyl protector to that naked rubber and you're good to go. Good luck! No closeups, but there are some photos of the restored look in this overhaulin' album
-
Re: Bumper discoloration - solution I had a dilemma painting the wagon: New paint + old trim/bumpers = bummer. This was the result of what a body guy told me to do. Materials: Scotch Bright 7448 ultra find hand pad 1000 grit sand paper OR..0000 steel wool Bull dog adhesion promoter: qtp0312 bond-fled tiecoat 3 in 1 (local car paint supply will know as bulldog) A can of SEM trim black 39143 If there isn't a lot of oxidation, wet sand with 1000 or with 0000 steel wool. Sanding wet, the sandpaper won't clog. If lots of oxidation, the Scotchbrite can work well to get rid of a thicker oxidation layer, but you'll need to follow up with the finer grit or the steel wool or you'll have a nice black bumper with fine scratch streaks. When the oxidation is off and bumper is clean, bulldog adhesion promoter was sprayed on. It allows paint to stick much better. Then SEM trim black 39143 was painted on (spraycan). Just a light coat dusted on or two coats gets it very black. Any more and you start filling in the texture. If you paint without sanding/prepping in combination with the bulldog, your paint may peel or flake off then you'll have to work 4x longer....or blow $250 on a new skin from the dealer. This is the same bumper above next to a brand new from the dealer rear bumper. Blacks are the same. There are more photos of the restored look in this overhaulin' album
-
I just glued mine back on with some gorilla glue. After a few years of running it that way, being in the land of junk yard bliss, I pulled one. If you pull one try to get the smallest trim pry tool you can because its pretty easy to end up with the button clip still on the car and a torn rubber trim in your hand. I might actually get mine into the car after having it for two months. Been getting tired of the extra wind noise in the door since the glue job didn't result in a "factory" fit. --E
-
Loyale wagon 5sp d/r dropped to 4:11 with forester 5th gear: 10 years, 20 states, 184,000 miles on an EJ swap in 1996 Hauls about 350 lbs music gear packing the cargo bay over the continental divide on I-70....9 years season after season. With tranny dropped to 4:11 the EJ22 torque in low range 1st gear puts a helpless grin on your face as you crawl up steep stuff. 85-90 mph flat highway cruising speeds no problem, middle lane up the mountains, long distance quiet cruising. It's all part of the joys I've had with a swapped wagon.
-
The lifts look great! We could use a mad lifter guy like you here in town.
-
Also submitted to the repair manual area Searched for automatic seatbelts fuse here, didn't find it, but did manage to find out myself. The fuse is located in the fuse box with the rest of them, but it isn't labeled belts, or auto belts. Its in the top row of fuses, 5th from the left and is labeled 15A horn clock hazard Mine stopped working remaining in the forward position whether doors open or closed etc. Immediately started working after fuse was replaced. I think it would be easy to overlook not only because it isn't labeled, but I didn't notice hazards and horn weren't working and my clock is digi and not hooked into that fuse.
-
If auto seatbelts stop working the fuse IS in the fusebox, but it isn't labeled. The fuse is in the top row, 5th from the left and is labeled 15A hazard clock horn This fuse also runs the automatic seatbelts. So in short if your belts stop working AND you have no horn or hazard lights it should be just a fuse replacement.
-
I concur; I've had custom shafts, but currently have a stock 2005 impreza shaft that went to Minnesota & back. Hmmmmm I was also concerned about pressing gears & thought it might pose a problem without a significant press. I may be heading out very soon to another catastrophe and will keep tabs when possible. If not, I'll be here and available for anything I can do that might help.
-
From my recent experience I'd say yes. When a paint shop looks up your paint color code, it'll bring up a list of ingredients used to make your color. Most will have a computer that'll dispense and mix the ingredients down to 1/10 of a gram. And bingo......replacement paint. Sometimes the paint doesn't match 100% depending on the shop and the ingredients, but good news is you'll have new paint that's very close to original. --E
-
Just a thought, but the RX pinion may not play with the Leg VC and might require the Leg pinion. --E
-
Looks like Jerry and Keith were out. Did you have lab assistants? This transmission formula is being recalled from memory 10 years after the build. There's no guarantee it's perfect. Part of me wonders if the transmission I have (version 2) is simpler with minimal RX changes and he was recalling a mixture of versions 1 & 2 of the tranny. Perhaps not, and besides 4:11 R&P you need 1st 2nd reverse of loyale and legacy pinion shaft. It's interesting the ring gear fits fine, but the "formula" says it needs to be shaved. All I can say is hopefully the Subaru gods will smile upon you tomorrow and you will be enlightened. Good luck --E
-
I called the mechanic with the parts. He'll double check to make sure he has them, then if all goes well, Keith may be able to pick up when he gets the RX. I offered to pay with card, but cash is king as is zero paper trail so we'll get it figured out. Keith: He might be done early today and want to go home, so it might be a good idea to try to pick up the RX earlier than this afternoon. I'm in town & can help if needed. I was supposed to be gone to a big hail storm in Columbus as of this am, but they called back & put me in a holding pattern till Sat or Mon. --E
-
Should I assume you have all parts on hand including RX? If not, let me know & I'll hustle up an additional "formula" for the lab before the weekend. Keith, give me a ring on your trailer status so I can call the seller for arrangements. Congrats on your (hopefully with tranny) parts car! --E
-
Good news gang, Got an RX today, $300 for all but wheels & water pump from the guy who works on my car, which is great, but EVEN BETTER...... He called the builder of my wagon and took down the recipe for my transmission......and.....he said he has all the tranny parts we need to make it happen. Lights.......... Curtain........ And now......(drumroll)........ The mysterious massively mixed RX to 4:11 transmission parts list: CASE: RX full time/diff lock - or... XT6 case may work RING & PINION: Legacy -- grind/shave ring gear to fit into the RX box 1ST, 2ND, REVERSE-BOTH SIDES: Standard hi/lo loyale/GL 1st,2nd, reverse Pinion tube of legacy TRANSFER CASE: (only if changing from diff lock to legacy viscous LSD) Legacy xfer case Legacy viscous coupler OPTIONAL: Forester 5th gear If doing legacy viscous coupler, diff lock vacume system can be re-used to engage low range with button instead of lever arm.
-
Whoaa....nice trick changing the picture. OK playing by rules now. This year is 10 year anniversary of owning the wagon 88 gl-10 wagon 2" lift 1996 ej22 w/ modified intake RX f/t d/r 3:7 tranny dropped to 4:11 Forester 4:44 5th gear 4:11 legacy rear LSD Legacy viscous coupling unit RX diff lock vac. engages 4low bigger sway bars (XT6?) Video stil: Yankee Boy Basin, Ouray, Co and after 2006 paintjob
-
At long last......... The REVEAL!! Tadah :clap: "My name is Eric and I've been OVERHAULED!" Here's the reveal photo album Sorry 'bout the long delay. Had to go to Minnesota to make money, then meet some local Subaru Old Scool dudes.
-
I can't help it, gotta put up one more. This one really shows the full meal deal in full sun. I love this color!!
-
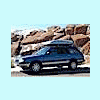
Thanks! and here it is: :cool:The "reveal"::cool: #4 trim divides paint, without wheel flares. Photoshop version, and the actual paint job. Managed to get similar shot to orig. The spot on drivers door is a flash, since original had it, I did same for reveal shot. Also for those who didn't know, the plan to go exact stock blue was shelved in favor of modern paint hopefully close to orig. 2006 Jaguar blue was closest. Modern paint is pretty high tech, ingredients are within 1/10 of a gram, the pearls are awesome and can have multiple colors to them. This paint has a mild purple pearl/cast at different angles in the daylight. There's a hint of it in this photo. That was an unexpected bonus. I'm really happy with the color. Original paint w/ photoshopped silver The final reveal This was a lot of fun fellow USMBers. Thanks for everything, and heres is the link to the overhaulin thread in case you haven't been there. A full reveal photo album will be posted to that thread today.