All Activity
- Today
-
New outback (to me) with non functioning power liftgate Liftgate just beeps but won't open when pressing the open button on the fob. Tried the reset trick by disconnecting the battery and shorting the battery leads together to reset the system, didn't work. Toyed with the option of converting to manual liftgate cylinders but we still need a functioning latch. The manual liftgate latch will not fit in the stock powered liftgate actuator position (non compatible mechanically). Also tried bypassing the touch sensors in the liftgate but this did not help. Disconnected the touch sensor connectors (two pin, left and right) and checked continuity across the sensors. Opening the liftgate (relieves pressure on the touch sensors) and both sensors should read 10k ohms. Remove the left sided lower touch sensor (two screws and a plastic plunge keeper that needs to be popped out). The lower touch sensor has a mating connector for the upper touch sensor, so both are daisy chained together. The upper touch sensor does not come out easily, apparently it is glued in place and if removed, needs to be replaced (according to the FSM) May spoof the system with a 10k ohm resistor across both touch sensor connectors. This is just for a test, as operating in this mode is risking someone (or something) getting trapped between the liftgate and the body) BOJACK 1000 Pcs 25 Values Resistor Kit 1 Ohm-1M Ohm with 5% 1/2W Carbon Film Resistors Assortment Amazon $15 A new liftgate actuator wasn't in the budget so opted to troubleshoot below. With parts and test equipment still came out ahead. Latch and Actuator Tailgate (power Rear Gate) Part Number: 63032AL000 $350 Took a video of the liftgate actuator (remove the plastic access cover on the liftgate) to show the innards on power up. Video shows the system searching for the home position and not finding it and defaulting to the liftgate latch open position. As a result, the system 'searches' for home, and not finding it, may leave the system in another state, such as unlatched <iframe width="640" height="360" frameborder="0" src="https://mega.nz/embed/a7wVzKab#0lcyc0AnsR_df7pMo_J8q5WgE45nTGcvYIWV8l9sAAM" allowfullscreen ></iframe> The green 'sector' limit switch (with the lever pressed in, in closed position) defines the home position but if this switch is failing the system won't work. https://mega.nz/file/G3ADhCBR#Tz9hzy6qwJTXAeKUiDz9W20ZcEWJpaTU6PtWp7odEgE Schematic of power supply and switches. One switch (OFF ON) is used to bump power on and off. The other switch (OPEN CLOSE) allows reversing the polarity of the motor leads and therefore motor direction. I only had two position switches DPST on hand so this is what I used. A single momentary DPST switch would work better, allowing momentary ON/OPEN ON/CLOSE with the default position OFF (center). Rigging an external power supply at 12 volts on current limit (guessed at 3 amps) with manual switches to simulate the battery and control module allows actuating the liftgate open (fully counterclockwise on the gear) and closed (fully clockwise) Power supply doesn't have to be fancy, just the basics but this is what was available (don't need USB) DC Power Supply Variable, 0-32V 0-10A Switching Bench Power Supply with 20W USB & Type-C Quick-Charge, Encoder Coarse & Fine Adjustment Knob, Output Switch, 4-Digit LED Display - SPS-3010V https://www.amazon.com/dp/B0DDPVDWPZ?ref_=ppx_hzod_title_dt_b_fed_asin_title_0_0 <iframe width="640" height="360" frameborder="0" src="https://mega.nz/embed/rj5AiJBZ#yJwUq1QGlemKSJKULN5D0TUah9oFPhHqJnCrWoD5FAg" allowfullscreen ></iframe> Replacing the power liftgate switch. Drilled out the "sector" limit switch aluminum post using a 3/16" bit. The bit slid around requiring several position changes and finally tearing off the remaining bit with linemans pliers. Then used the pliers to shear the post leaving the aluminum nub behind which popped out easily. Now we have a 0.24" thick switch body and a 0.07" hole that needs to be drilled out to 1/8" to allow a fastener to secure the new switch. Have to remove the motor assembly (3 bolts) to allow the M3 fastener to fit. M3x12mm hex bolt is 0.118" which should just fit inside the mounting hole of the switch (0.12") 2240PCS Metric Screw Assortment,M2-M5 Metric Screw Kit, Hex Socket Metric Bolts, Metric Machine Screws 12.9 Grade Alloy Steel,Black Zinc Plated,Free Allen Head Wrench Amazon $24 New limit switch. Panasonic ABJ363861 SWITCH SNAP ACTION SPST-NO 0.1A 125V $16 shipped from DigiKey Used solder sleeve to hook it up. Initial position of the actuator gear was max clockwise after bench test (which is where the system had left it after the failed initialization due to the bad switch). This position caused two issues The boot sequence no longer ran the initialization the same The system just beeped three times. No motor activity Why isn't known The manual unlock lever doesn't work in this position since the actuator lever is forcing the latch into the lock position Used the power supply and switches to run the actuator gear counterclockwise just enough to be able to manually open the latch Cycling the system power (battery disconnect) boots the system into a good state and the working limit switch is able to allow the system to find home, which consists of the system resting state with the limit switch closed (limit lever snapped shut) Replacing the limit switch allows the system to detect the home position with the orange pawl on the gear engaging the green limit switch lever and closing the limit switch contacts. This is the test after resetting the system after reconnecting the battery. <iframe width="640" height="360" frameborder="0" src="https://mega.nz/embed/G7YE1CTK#hxkNAcG3WlelnWR5FzOWg_ebg-0RsdhV7qeZyEBfKSQ" allowfullscreen ></iframe> This is the first powered liftgate opening test after replacing the limit switch <iframe width="640" height="360" frameborder="0" src="https://mega.nz/embed/f3A1CLxS#HNODjDaooZk-t233x_BMcUEHW38MEocCYdgA0WaMgMc" allowfullscreen ></iframe> Hope this helps. Bonus points if you have read this far down and are still awake.
-
Circling back for an update on the issue from a few months where I thought I needed an axle. It was actually where the hardware was missing/improperly installed on the driver side brakes and caused it to make the sound of a failing axle. Big thanks to @bushytails for his insight on the correct installation of the clips.
- Yesterday
-
Hi i have a 2000 Outback "Legacy" and the dimmer switch? Dial? Does absolutely nothing when turned and im trying to figure out if it has gone bad or maybe a wire(s) have broke somewhere or what. The blinker switch works fine both directions and the head light switch works fine to... However there is a cluster backlight bulb currently burnt out so maybe the dial stops working if theres a bulb out? 🤷🏻♂️ I was hoping someone might know how to test the dial itself or bench test it or something to tell if the dial is bad or something else.
-
I too hate drum brakes... That's why I don't have any anymore! :P
-
Love the forum is back. Replaced the rear wheel cylinders 3 weeks ago after noticing brake fluid on the inside of the driver side rear tire. I didn't realize there were several variations for the wheel cylinders, especially for the wagon. I went with the Dorman W37419. OEM cylinders that I think I had, used studs with nuts. New ones come with tiny bolts...well, one unit did. The other didn't. I honestly blame it on a crappy ebay vendor that I left neutral feedback for. Luckily I was able to find some that threaded in. Had my son get in it on the lift while I bled them and then did the spinny-spin and had him mash the brakes to make sure they stopped. I hate drum brakes. Drove it to work again this past Monday. The windshield is absolutely trashed with scratches and pitting. I also need to give the carb a good study. I have a high idle and seems to have a slight miss while driving. I was hoping some of these issues would work themselves out as I drive it more and more. Part of me would consider a Weber. I had one on my 83 Brat that it came with and wasn't honestly impressed with it but I did love the amount of crap it clears up in the engine bay.
- Last week
-
92boxerbox changed their profile photo
-
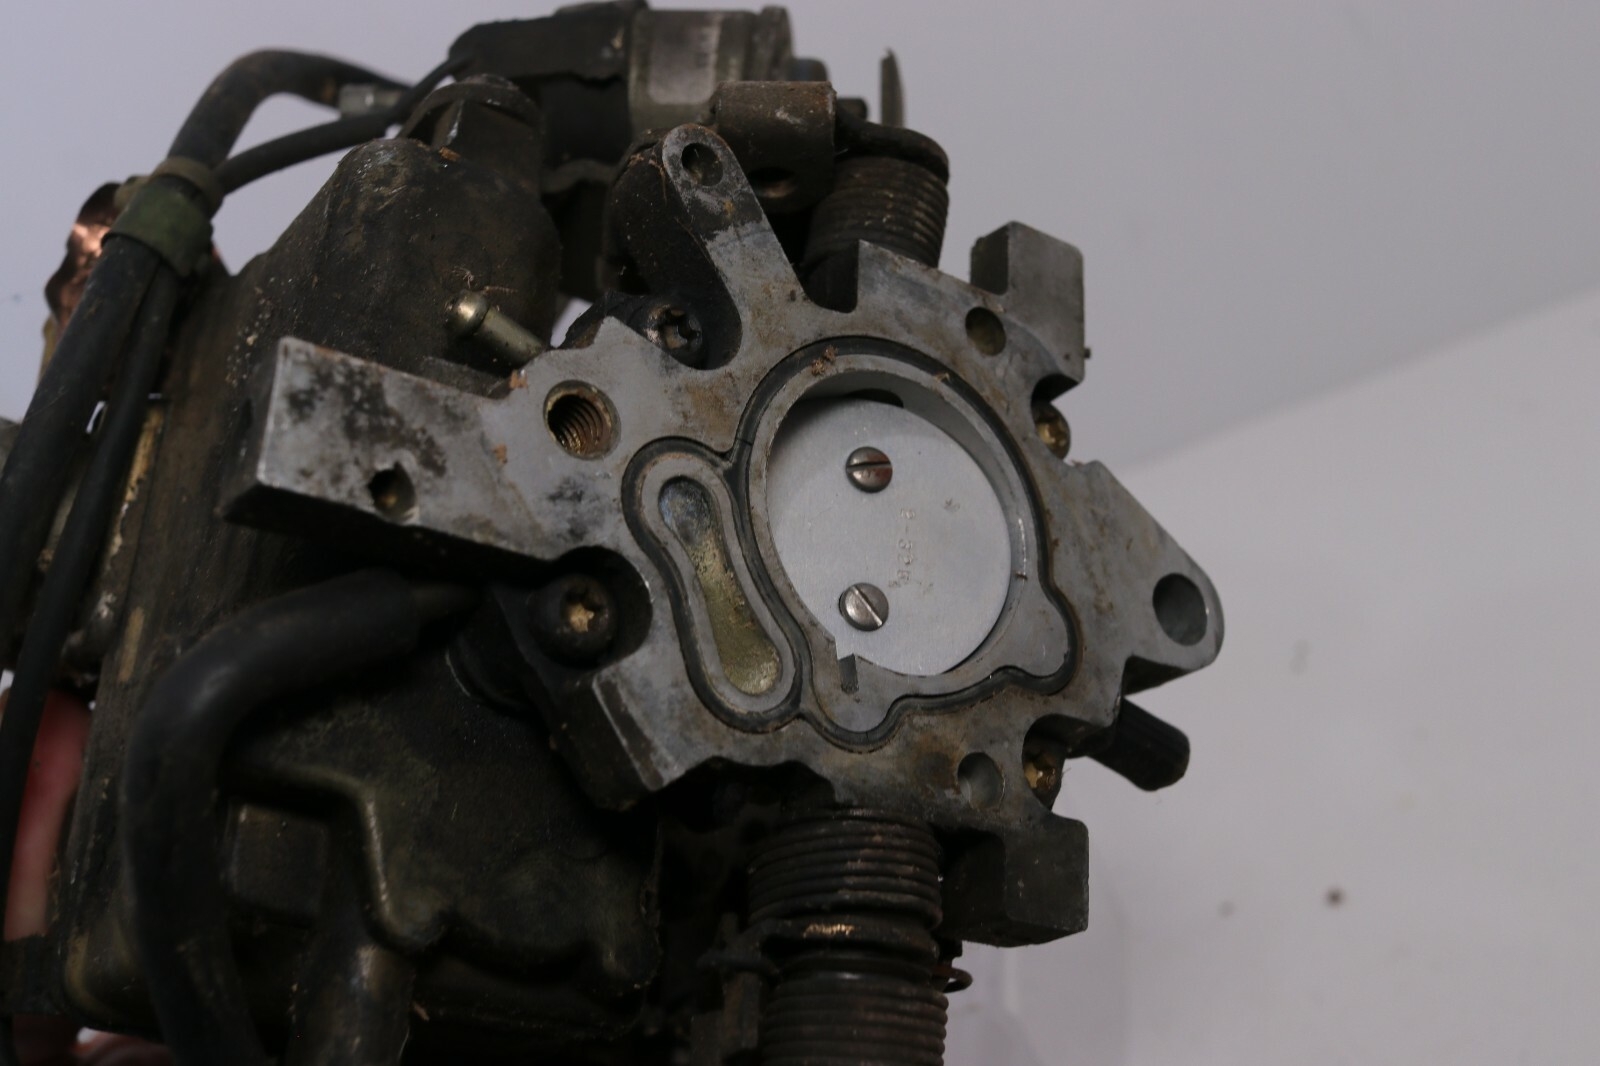
That's for the fairly rare Carter 1-barrel carb. You could get a matching Carter 1-barrel, or slap anything else on for a good horsepower gain. A 49-state Hitachi is the easiest manifold+carb swap, and parts are easier to get. EA81, not EA18, BTW. If you have access to TIG welding, you could probably weld on a generic Weber converter kit. Here's a Carter that might bolt directly up: https://www.ebay.com/itm/168145191200 Listing doesn't say what it's from, but it looks like the right mount, and even the correct subaru plugs, so it might be an exact match. But, as I said, you'll get better performance with a Hitachi intake swap, and much much much better parts availability.
-
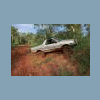
Hi all! Just recently purchased a 1982 brat with a ea18 in it. It came with a 2bbl webber carb but it doesn't line up with the intake and I can't seem to find any other ea18 that has an intake that looks like mine. Trying to source a stock one as I think the intakes has been swapped but was hoping someone here would have some insight on what might have been on the car previously as I don't have the old carb. Bare with me this is my first sooby, I'm used to Honda and vw's haha. Thanks!
.thumb.jpg.882b1c3a6b58d75d131af3490dc83229.jpg)
-
ersatz joined the community
-
Penny82Brat joined the community
- Earlier
-
ccrinc replied to jonathan909's topic in 1990 to Present Legacy, Impreza, Outback, Forester, Baja, WRX&WrxSTI, SVXIt's a really good engine. I've had 2 cars with the one in them. One word of caution: DO NOT forgo oil changes! Do them RELIGIOUSLY, FAITHFULLY and REGULARLY. That's the biggest killer of that engine because the engine oil also lubricates the timing components (ALL of them). If you let the oil get low or old, you're not taking good care of an engine that you really DON'T want to work on!
-
ccrinc replied to jonathan909's topic in 1990 to Present Legacy, Impreza, Outback, Forester, Baja, WRX&WrxSTI, SVXI've had two different cars with the EZ30 engine, a 1992 SVX and a 2001 LL Bean Outback. Man, I loved those cars!
-
That sounds like them, just a difference of terminology and jargon. They were the goto in Australia until supply dried up. I used them for racing and they never broke, just wore them all out. Shame NTN stopped making them.
-
lmdew replied to yourfavoritesubaru's topic in 1990 to Present Legacy, Impreza, Outback, Forester, Baja, WRX&WrxSTI, SVXGet the circuit schematic out. Load - antenna motor, Ground and Power. Was it happening before you changed the stereo? The connectors may be the same, but....
-
PplMy 1999 Legacy L 30th ann. has a weird problem that when the car is off, the antenna will extend and retract at seemingly random intervals. I have installed a Mcintosh stereo receiver, amp, and rear sub from a donor Subaru, and all the connectors match perfectly from the harness to stereo, stereo to amp, and amp to speakers. There was a weird problem that the speakers would play static while the car was off, draining the battery, but installing a relay on the pin 5 wire in the DIN cable fixed that. I have replaced the entire antenna assembly and it still happens. Online, there are suggestions to add a switch to the antenna rectractor to manually control it but I would prefer to have everything work as originally intended without extra hardware.
-
"The Red Beam" a name earned through it's demonstration of power, and striking appearance, especially when in motion. A 1999 Subaru Legacy L 30th Anniversary Edition at heart, with performance, longevity, and comfort based modifications. A 2.2L naturally aspirated engine with an automatic 4 speed transmission. I bought this car from a chop shop in Portland, Oregon, and basically the engine and the wheels worked. A short list of repairs since purchase/rescue: Driver window motor and glass replacement Head gasket done Coil pack replaced New plugs/wires Reman alternator New battery Starter Kill switch Mcintosh stereo receiver and amp/sub from a donor Subaru Leather door panels Exhaust pipe welded New muffler New radiator New starter Led light bars Radiator mounted wind turbine(in testing) Sound deadening from rear seat through trunk Hood and scoop Ac delete Windshield washer delete New tires All new fluids Custom LED tail light with Subaru light up pattern New headlights/bulbs Cooling system pressure release valve This car has the WEIRDEST problems, one after the other, and it has been a joy navigating everything and I want to start sharing some of the experiences.
.png.0dd937e4b164c17c8f5d86eaa8e36332.png)
-
We've been using the 187N front female CV axles for years now. They're a direct replacement for the front wheel drive Legacy. Same splines as the other female front axles (27 tooth outboard / 25 tooth female inboard I think) but slightly larger CV joints, shafts, and more plunge travel. It also has a spline stub adapter on it to fit the R160 in that picture. Sounds like 95AC CV axles are an EA thing, in that case no.
-
mmmmm......billet
-
Are your "big front CV axles" 25 spline? Otherwise known as 95AC joints?
-
B and I did a test assembly of the billet knuckle, big front axle, and fabricated links on the left rear of his Forester. I did get this pair case hardened which will hopefully keep the bore for the long bolt from wearing out as quickly. That did tighten up the holes a bit so I'm ordering a 14mm ball hone to open those up. Mostly went together fine, will have to clearance a few minor things we had on mine that we'd forgotten about. Brakes etc seemed to fit well. Axle length worked out. Inboard CV was close to fully compressed at full extension of the suspension but there was still some play. The left rear corner is normally the one that takes a shorter axle so we should be good on the other side. Biggest issue we hadn't anticipated was tire clearance to the rear bumper. This is mainly because we'd made the trailing links longer than stock. Usually easier to hammer/cut the body behind the tire rather than in front. But in this case it would also rub on the bumper. Which could be modified fairly easily. But since there's at least 1.5" clearance in front of the tire to the body throughout the travel, we're going to shorten his trailing arms an inch. One of the reasons we're doing this pictured below. Big front CV axle we use on left, stock rear axle on right. The boots were starting to leak so I repacked the CV joints and replaced the boots. Hopefully won't be on this car too much longer. We put the old suspension back on for now. Plan is to fully weld and paint all the links etc. Then sometime in April swap the rear diff and do the rear knuckle conversion.
-
88SubGL replied to Daskuppler's topic in 1990 to Present Legacy, Impreza, Outback, Forester, Baja, WRX&WrxSTI, SVXWhat about taking a long drive, where everything gets hot and then trying to remove it. You mentioned trying to heat it up, but you would have to heat up all of the diff fluid as well. Just a thought.
-
I like that you found the issue but I don’t like the potential cost of sorting out the issue unless it’s the oil trick that Bushytails mentioned above.All good mate! Like I said (somewhere), we didn’t get the SPFI over here in Australia. Any that are here are kits that were sent over from the states. I did think it odd that they didn’t run an O2 sensor but not knowing the system myself I could only go by what I was told by others. Thanks for the correction though. I hope having the O2 hooked up properly will sort out your fuel usage!Hello Everyone, A while ago, I did a drain and fill on the front differential, everything went smooth. Going to do it now, the fill plug seems to be seized in place. The allen head stripped out, so I hammered in an extractor. The extractor stripped, so I drilled out a slightly larger hole and really hammered in a larger extractor. This extractor stuck, but I couldn't turn it. I put an impact on it, and it wouldn't turn. I heated the differential case and it wouldn't move. Sprayed some PB Blaster on it and let it soak, reheated, and it still won't move. I tried some of that bolt freeze stuff, and it still won't move. It's not the end of the world as you can shove a hose through the drain port and fill it until it runs out of the "full plug", but it's annoying at the least. Anyone have any suggestions?I had an EA81 for a while where every couple months I had to add a bit of oil to the dist to keep it quiet...It was distributorlmdew replied to lmdew's topic in 1990 to Present Legacy, Impreza, Outback, Forester, Baja, WRX&WrxSTI, SVXThanks. It's also solving the issue when I feather the gas pedal. I have a TPS, I'm going to change it. I hate throwing parts. Google AI: Subaru Loss of Power That Returns When Gas Pedal Is Feathered When a Subaru suddenly loses power and then recovers when you lightly press the gas pedal, it often points to an engine or fuel delivery issue that the ECU can detect and manage under certain conditions. Common causes and explanations: Fuel delivery or sensor issues: Even if the fuel pump and tank are new, problems with the fuel pressure regulator, injectors, or oxygen sensors can cause the ECU to limit power. If the pedal is feathered, the ECU may interpret it as a low-load condition and allow more fuel or throttle response Subaru Outback Forums+1. Oxygen sensor or exhaust system problems: A failing O2 sensor or a partially blocked catalytic converter can cause the ECU to enter a “limp” mode. Feathering the pedal can sometimes bypass or reduce the severity of the restriction, allowing partial power recovery Reddit. Vacuum or intake leaks: Unmetered air entering the intake can confuse the ECU’s load calculation, leading to sudden power loss. Feathering the pedal can temporarily mask the effect Reddit. Ignition system faults: Worn spark plugs, coil packs, or plug wires can cause misfires that the ECU compensates for by limiting power. Feathering the pedal may reduce the load enough for the ECU to allow more throttle Subaru Forester Owners Forum+1. Timing or mechanical issues: A timing belt jump, valve lift sensor fault, or internal engine problem can cause intermittent power loss. Feathering the pedal may allow the engine to run at a lower load where the fault is less critica


.thumb.jpg.5a55962f634245430d0a865ae0f2fba5.jpg)

.jpg.80ad0da4cbd3e11c9b2c5b3fb4e12d24.jpg)