TheLoyale
Members
-
Joined
-
Last visited
Everything posted by TheLoyale
-
Yep any all of these apply to the Loyale as well. 1988-94 SPFI EA82s are all the same -- 1988 and Later Models With Single-Point Fuel Injection -- CODE PROBABLE CAUSE 11 Crank Angle Sensor or Circuit 12 Starter Switch or Circuit 13 Crank Angle Sensor or Circuit 14 Fuel Injector - Abnormal Output 21 Coolant Temperature Sensor or Circuit 23 Air Flow Meter or Circuit 24 Air Control Valve or Circuit 31 Throttle Sensor or Circuit 32 Oxygen Sensor or Circuit 33 Vehicle Speed Sensor (VSS) or Circuit 34 EGR Solenoid or Circuit 35 Purge Control Solenoid or Circuit 42 Idle Switch or Circuit 45 Kick-Down (Detent) Relay or Circuit 51 Neutral Switch Continuously in the On Position 55 EGR Temperature Sensor or Circuit 61 Parking Switch or Circuit
-
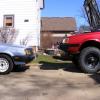
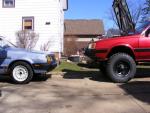
I prefer that bumper, keeps it more factory, with JDM flare throughout! Plus the added bit of chrome really finishes it off. Is that a 230/w132 next to it?I got the new Intake from TomR today! Thank you!! Only problem I have is, I can no get this plug out. I put some pretty good force on it, and it didn't give anything in return. Hmmm. If I don't get this out, I can't put this other thing on. This goes to the Carb, Choke IIRC. I don't think I can leave this off? I bet this controls the choke? If I run a Weber DGEV, do I need this?This is a good possibility. With the car on the ground, turn the steering lock to lock, that will make everything settle down to where it should be. If you still have wild camber after that, then yep, swap the blocks around. You will have a little positive camber anyway, I know mine does, you can see it more with larger tires.You have the sides backwards. Put the Driver side on the Passenger and the Passenger side on the Driver side Or, since you have an EA81 chassis. The lift blocks are oval, right? Just spin them around 180* and rebolt them up, that should solve it.This must be the update everyone wants to see.I had the idea of running EJ cooling fans on this vs the original. Will both of them fit on the EA81 radiator? I haven't got two laying around to mock up.So I did as you said, I actually used the original flange, since it still seats into the plug/fitting. So it should be good to go now. I will be making my own header at some point soon, so I will probably remove this spacer blocks then. I can't wait to hear what an UEL header does to a 1781cc!Looking at both Calipers, it looks as if those would swap between models, and work with the EA82 bracket. The distance between the two slide pins looks the same. So perhaps the only real difference is indeed the bracket.Ah, gotcha. I'm not sure about the Brat Caliper working on the EA82 Bracket. I have both demonstrations outside, and will take a gander of them both. What Rotors are you using? Brat or EA82? The EA82 rotors are about 1/2" larger in diameter, so the Brat caliper might not work anyway. I will check asap.EA81 Calipers/brackets are different (Bigger) than the EA82 Calipers. So if you are trying to run your original EA81 wheels, they won't clear the caliper. What issue are you running in to?I would drop the Trans xmember 3" and 3" on the Radius rods. This way you are keeping everything within the stock specs (Just 3" lower)What the hell is this sticking out the side? Bottle opener?Where would it leak to though? The weld is air tight, and nothing is going to get past the threads that I can fathom. So these Blocks aren't needed? I could remove them entirely and bolt the header right to the head! Thats an idea, I'm gonna make a custom UEL header anyway.So, I removed that big one-way valve outta the engine bay, and plugged up the port on the exhaust for it. I truly did not see a reason for that thing, other then some hokey emissions item. I used one of the existing fittings that would secure the pipe to the Header and one-way valve. Air tight. Port, before plug: After plug: Engine bay with out that dumb plastic bubble and valve.GOOD! I want this thing outta my engine bay ASAP!Can I remove this thing all together with my stock setup? I would need to plug the threaded port in the exhaust, but any reason why I could not remove this?WolfsBurg. Shaazu.I have made the decision to paint the new Manifold, Cheery Blossom Red (Or something similar that I can find locally) Gonna check out what Wal-Mart and Menards have for paint. I can get the exact color matched in an aerosol from Grimmspeed.com for $14, but I don't want to wait for it since I might have the manifold, Monday.That works!So, I am working on a few extra little things for this car come the Don Miller show. We'll see if I get them in time...!Original Starter! Cleaned up and repainted the original Alt (Now it'll probably fail) Repainted the PS bracket/tensioner. Fill tube. Now have a matching center cap for the spare!Quote of the day!I was thinking about this style. The page gives measurements, so it would be easy to determine. And these are easier and cheaper to get then the correct ones. http://www.ebay.com/itm/Subaru-Center-Cap-/140665338797?pt=Motors_Car_Truck_Parts_Accessories&hash=item20c04ebbad&vxp=mtr#ht_500wt_717 http://www.ebay.com/itm/1993-2006-Subaru-Legacy-CENTER-CAP-/260880293531?pt=Motors_Car_Truck_Parts_Accessories&hash=item3cbdad5e9b&vxp=mtr#ht_605wt_702 Even these! $1 but $19.00 shipping lol. http://www.ebay.com/itm/4X-Subaru-Impreza-Forester-Legacy-Tribeca-Wheel-Center-Cap-Part-28821SA030-NEW-/320897135751?pt=Motors_Car_Truck_Parts_Accessories&hash=item4ab6f5b487&vxp=mtr#ht_646wt_936