Caboobaroo
Members
-
Joined
-
Last visited
Everything posted by Caboobaroo
-
Yes, its slotted to allow adjustment for the voltage reading to the ECU. If you remove it, make sure you put it back on in the exact spot or yes, you'll have to follow the FSM to get it back within tolerances.
-
Nope just those in the heads. If I were you, I'd get some new ones rather then trying to put the old ones back in. Even if they go back in, it's not going to seal 100%
-
This is why I'm getting rid of my early '87 body for a '89 RX body. I have a modified crossmember that I built to make it fit using the XT6 front section, EJ center section and a FWD auto crossmember that has been modified to bolt in. The tranny crossmember for your peticular setup will be the following: XT6 front and rear sections EJ center section Also, you'll need to shorten the EA82 driveline to make it work with the EJ transmission. I think its having the front section shortened like 2" but its been a couple years since I had mine done so I don't remember. I had mine done at Drivelines NW for $63 but they didn't balance it as the u-joints have some flat spots in them and they didn't want to replace them for me:rolleyes:
-
Check to make sure the freeze plugs inside the heads haven't popped out. I've had one where that was the case.
-
I'm not sure on how the FF1 gearbox works but I do know on some older imported cars (not sure if the FF1 is going to be one of them), you have to push down and then slide it into reverse.
-
Shift it into what you think is reverse and spin the input shaft. Once the diff turns you'll know where reverse is.
-
Now go out and bolt everything in. The only issue you might run into will be where the lower control arm bolts to the crossmember. I've had to drill the hole in the crossmember out bigger (I used a 1/2" bit I think) then use the smaller bolt with washers on the outside of the crossmember and make sure the control arm is pulled out as far as it'll go before bolting it down tight. I usually do it with the bolts loosely bolted in, then put the car on ramps after the rest of the suspension is in and then snug them down.
-
It'll have to be cut down IIRC, as the ones from an STi mount on the C-pillars. I've actually been thinking about connecting it onto my RX's back window somehow. Got a couple ideas but nothing concrete yet.
-
Check the USRM. I have a thread in there for the correct parts list and depending on what direction you go with it (either the XT6 or the Impreza parts) it'll tell you what parts you'll need from what cars.
-
So you said you're unemployed... Does this mean you got more time to get this car finished before WCSS13? I'd hope to see it there in the next couple years because this thing has turned out phenomenal!
-
I think I've figured out how to attach the new style roof vane to the RX rear window but I don't have one yet so its all irrelevant:-\
-
Psh whatever. You know you're moving there to be closer to me, lol:lol:
-
Shoot me a PM on cost including the trunk stripe (which I can get a pic of for you if you need it) because I need to make sure I have some when I start on the bodywork.
-
Could you make me new stripes for my XT6? Here's what I have and here's what I'm looking to get made.
-
Awesome, I'll PM you here in a bit. And yes, I'd love to have that cargo cover still.
-
www.ebay.com then search!
-
The coolant drip is most indeed the waterpump area. Could be the pump, the O-ring on the pipe where it fits into the pump or maybe just the waterpump gasket. If you were having HG issues, it would be over heating, loss of coolant would be more AND you'll see more white smoke coming from the exhaust. The cream on the underside of the cap does mean there's water in the crankcase but its probably something like these. Cheap oil (can't tell you how many times I see it in newer Mercedes-Benz:rolleyes:) Short trips that aren't long enough to get the engine warmed up to help burn off some of the moisture from the cheap oil
-
If you want a lot of good info on building EJ22Ts, check out the Built Motor forum on NASIOC. Specifically search for Fuji K as he has done his homework as far as building a good EJ22T. He currently has a thread talking about the differences in blocks, heads and what makes a good combination. Its one I currently am subscribed to as I'm in the slow process of piecing together parts for my EJ22T build. EJ22T block with #5 thrust machined into it EJ257 crank Manley I-beam rods JE pistons (overbored to make this a 2.4 stroker) ARP headstuds, rod bolts and whatever else I can replace for fasteners EJ20K heads, intake, PS setup (the "K" was a similar setup to the newer EJs as the turbo inlet goes under the intake rather then up behind it like the EJ22T, EJ20G) FP Green turbo and other respectful bolt on mods.
-
A few years ago, I was working with Sean at RalliTek as we were thinking about building an EA81TT for my old '79 wagon. Unfortunatly, nothing really panned out as finding aftermarket parts to handle any sort of power for an EA81T is almost impossible which is why we ended up abandoning the idea. I still have the complete EA81T with harness, ECU and a few other parts I believe at my parent's house still but last time I saw everything was about 4 years ago so I'm not sure if its still around...
-
Caboobaroo replied to 86GLScooby's topic in 1990 to Present Legacy, Impreza, Outback, Forester, Baja, WRX&WrxSTI, SVXTire wear indicates there is an alignment issue and/or worn parts. If the inner tie rods have movement, replace them before any alignment is performed. With tire wear on the outside edge and from the sounds of it, its only the LF wearing on the outside edge, too much positive camber could be the culprit. Have the worn parts replaced and realigned. Take it to a reputable shop, no small backwater place as the equipment they might have won't have been calibrated anytime this decade. Also, like said before, have the rims and tires checked for a wobbles, bends, etc.
-
TheSubaruJunkie had some 2wd XT struts and springs on his RX a few years ago. The reason why the 2wd stuff is longer in the rear is because they mount to the trailing arm where the axle would be on the 4wd setup. If you want to lower it for the sake of lowering it, just get some Impreza coilover sleeves off of ebay. Cost under $100 usually for a set of four and they are adjustable typically. I have 2 sets; one on my XT6 and the other on my RX.
-
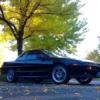
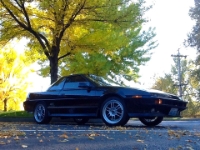
Is that the super Nissan I see in the backround?
-
Its the injector pulsing. Basically the click is coming from the injector turning on and off. Totally normal on any fuel injected vehicle.
-
Usually with injector leak, it happens over the period of a couple hours. When the car is shut off, the fuel system is still pressurized and if an injector is leaking, the pressure escapes through it. Then the fuel washes down into the cylinder, past the rings and into the oil. You can pull them out and send them to an injector specialist to have them checked out and repaired if nessessary, or source up a good known set and be done!
-
I'm always weary of putting grease anywhere near the rubber on brake calipers, brake lube or not, it can still cause the rubber to expand and cause bad things. I use just some brake fluid as lubricant when I put the pistons back into the caliper. Also make sure the piston bore is smooth, not pitted or scored. I've used JB Weld to fill in some small pitting before on a set of '68 Buick Riviera calipers as there are no aftermarket replacements for the housings. Haven't had any issues doing it that way. Oh and when it comes to bleeding, get a friend. It makes it so much easier. Have them push down the peddle and hold it, while you open the bleeder screw, then tighten it back up and have them release. Do this until the fluid changes color and no more air comes out. Best to use a hose that fits onto the bleeder and a small clear glass jar with some fluid in it. Put the end of the hose on the bleeder, the other into the fluid in the container and as you open the bleeder, the fluid will be forced through the tube and you can see the bubbles inside the container.