April 28, 201510 yr Where do you guys get studs? I'm hopefully about to do something 6 lug, and the stud price and the fact that I can't swap to my 13s if I get autoX tires are the main things keeping me from it. But mainly the studs, where I'm able to find them ($35 for 4), I cant afford that at all right now Junkyard! You just pound them out with a BFH. I guess you could probably use a bolt if you weld it in. Right?
April 28, 201510 yr Author I would assume Grade 8 would be strong enough. Tip on pounding out studs. Put a lug you don't care about on it, so you mush the threads. Works Everytime!
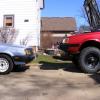
April 29, 201510 yr Your thread is awesome bro. I have a 1992 subaru loyale I'm planning on lifting. I plan on getting the 2 inch lift from ADF. Your tips on the lift install will be helpful. Your rig looks awesome man. Edited April 29, 201510 yr by MrMark303
April 29, 201510 yr Author I'm glad this thread can give help to others, thats always the point for me Cheers! -Tom
April 30, 201510 yr Author Rear backing plates came in today! One step closer to a full rear disk swap! Thanks goes to bratman18 for sending me the backing plates! Edited April 30, 201510 yr by TheLoyale
April 30, 201510 yr Rear backing plates came in today! One step closer to a full rear disk swap! Thanks goes to bratman18 for sending me the backing plates! I wonder what his garage looks like... Just bought a header from him. Must be mostly subaru parts lol
April 30, 201510 yr Lol. No garage unfortunately. But a big porch full of parts and an entire parts care filled. I have a lot of Subaru parts.
May 5, 201510 yr Author Just received the NOS Black EA82 Hand Brake from a good friend in Honduras (JesZek) This is gonna be awesome in the Safariwagon! Also tore apart the 5spd Pedal Box to clean it all up regrease and paint everything, it is drying now, but will get an updated photo once I reassemble it!
May 5, 201510 yr Just received the NOS Black EA82 Hand Brake from a good friend in Honduras (JesZek) This is gonna be awesome in the Safariwagon! ... I'm really Glad that you received the Black RX handle, Thank you for sharing the Photos! Kind Regards.
May 7, 201510 yr Author 5spd pedal box reassembled and greased! Also working on clearancing the cab corners/rockers to allow room for the 30" tires under compression with full lock. I am looking a little bit of left foot room, but it shouldn't interfere with the Clutch pedal. I will also need to do the same thing on the passenger side.
May 7, 201510 yr Dear Thomas, Maybe you're interested in this Euro Style NOS Tail Lights? ~► http://www.ebay.com/itm/NOS-1980s-Subaru-L-Series-Leone-Loyale-Station-Wagon-Van-Estate-rear-lamp-units-/291455117102 Kind Regards.
May 14, 201510 yr I've never been a fan of those taillights, they came on the 89-93 Omega facelift in NZ and I personally prefer the more symmetrical look of the earlier Leone lights. Each to their own though.
May 29, 201510 yr I love this thread! Maybe you're interested in this Euro Style NOS Tail Lights? Never noticed those before. Not bad.
May 29, 201510 yr Author Thank you!. JesZek, actually, I am not too keen on the Euro style tail lights, I don't understand the one white, one red reverse lights found on a lot of German vehicles. Anyhoo, Finally finished the front cab corner reconstruction/rust repair on the driver side. have to fix rust and also change the design to allow enough room for the 30" tires. Now I need to copy this over to the other side along with finish all the other rust repair...
May 29, 201510 yr Regarding the Euro Style tail lights, also I never liked the asymmetrical look. Your Repairs on the floor pan are looking very Clean and Well Done! Kind Regards.
May 29, 201510 yr Author I don't really understand the Logic behind having on white/clear and the other red (I am assuming the red portion lights up with the reverse lights) Maybe someone from Europe can shine some light on what the purpose of that is. Thank you JesZek for the kind comment
May 29, 201510 yr Author Got both of the rear disk hub plates blaster and primed between the showers. Here a few pics of before and after. Once the primer sets for a few days (Humidity) then I will spray them with Duple-Color trucked coating....
May 29, 201510 yr In regards to the one white and one red reverse light. The one red is a rear fog light. Required by some nations DOT or equivalent.
June 17, 201510 yr How hard is it to lock down the hub while drilling it? Bolt it down using the holes for the 2 knocked out studs or use a big bolt going through the center of the hub. My drill press has a slotted drilling surface that turns so you can bolt things to it. Kind of like this but mine is old school setup with a custom cart and a breaker wired straight to it.
June 17, 201510 yr Author Yep, just like dude said. I went with the big bolt and some washers in the center (So I could turn the hub as needed. I too have a slotted deck on my drill press, so it worked great. Keep in mind, what I did to make sure each hole was perfectly lined up, I bolted the hub to a spare 6-lug wheel, stuck a 9/16" drill bit thru each lug hole and started drilling with a hand drill, so the bit wouldn't wonder. It makes a nice concaved area to line up with the drill press. Worked like a Charm! Edited November 2, 20169 yr by TheLoyale
June 25, 201510 yr Got that gearbox in yet? It's good weather over there now isn't it? Your attention to detail with the floor pan mods are amazing mate! Cheers Bennie

Please sign in to comment
You will be able to leave a comment after signing in
Sign In Now