
All Activity
- Past hour
-

The Awesome Older Generation Picture Thread
WYLDE007 replied to 6 Star's topic in Old Gen.: 80's GL/DL/XT/Loyales...
This was my 3rd Subaru - best damn car I ever owned and I kick myself for getting rid of it. ©1995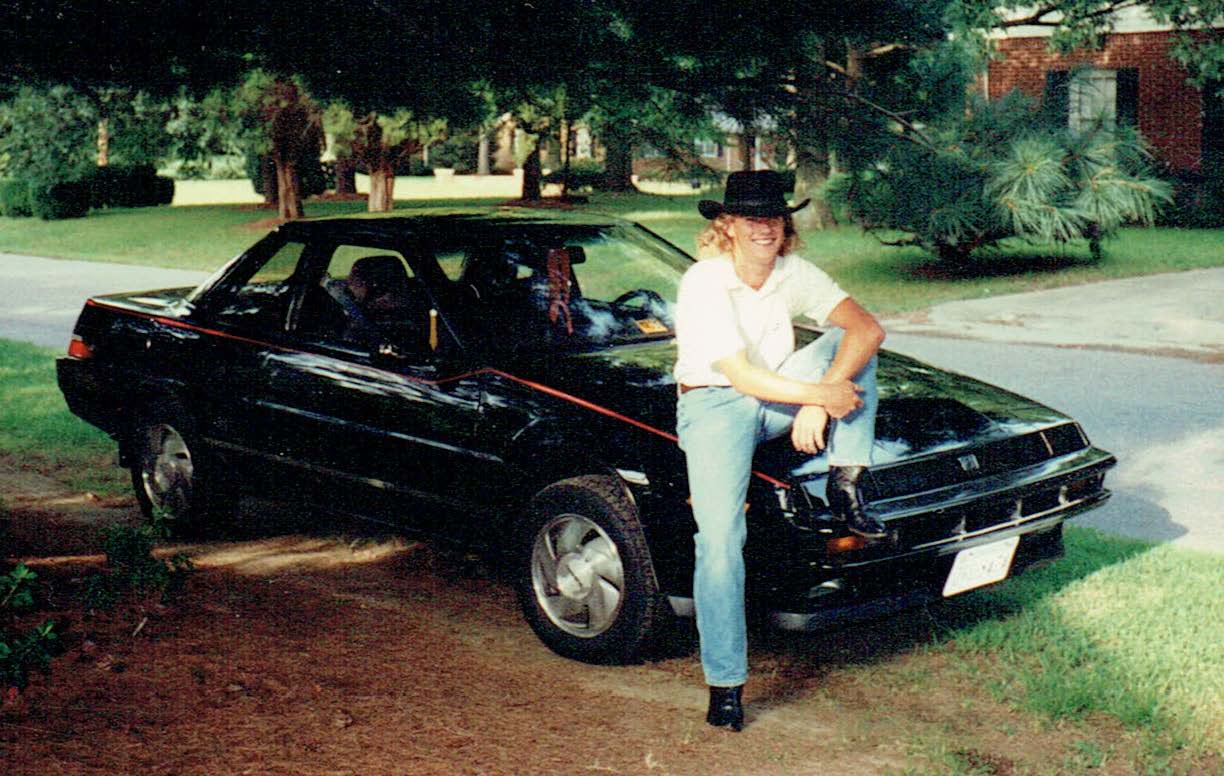
-
WYLDE007 changed their profile photo
-
 Yeah sort of looks like 5 lug swapping these things is the only move going forward. I'm interested who you bought from, I couldn't find an Australian suspension supplier willing to ship to the US. And I'd be concerned using one of those forwarding services because they would likely refuse to ship them as well. What part number is your spare left Sachs?
 -
Looking at an XT6 today
WYLDE007 replied to landovonderberg's topic in Old Gen.: 80's GL/DL/XT/Loyales...
I've looked at this car a couple of times and it seems like it would be a good candidate for an EZ30 swap. Unfortunately it's in BC which is too long a haul, but $1000cd sounds like a bargain if it comes with spares. There is a pretty good market for JDM engines and transmissions right now. I could swap an EZ30 and 5MT AWD from a Legacy and get almost 200 horses right out of the box for less than $3k US. -
Sure. I tend to use TimeSerts which are a threaded cylinder if you’re not already familiar. More money but allows bolt to be removed and reinstalled without a new coil. There are other makers-of that same type insert. Are EA82 pump seal kits still around ? The old Mickey Mouse seal ?
-

Divorced tcase and stock rear diffs/cv axles
SquigSprinter replied to SquigSprinter's topic in Off Road
I'd try 6 inches first (Raceworks coilovers can get me to that height without top hat spacers). Between that and 31s I would hope to regain the clearance lost from the front diff getting mounted. We'll see how the fab goes in the front, my plan is to order a rear subframe and cut/modify it to incorporate in front control arm mounts and build up the front subframe from this - Today
-
 How high is your lift? I've heard 2" is about the limit of the axles but I'm not experienced in lifting these cars so other's experiences may differ. It seems to be the general consensus that aftermarket axles aren't worth running if it's avoidable. If anything, check out the grease in the joints. I highly doubt they'd assemble them dry but knowing the quality of modern aftermarket parts for these cars, it also wouldn't surprise me. I'd try packing the joints with a good quality grease and seeing what happens. I recommend Yamalube Molybdenum Disulfide grease. It comes in 4.5oz bottles which is the perfect amount for one joint. I squeeze out as much as I can into the joint, then I cut the bottle open and scoop the rest into the boot. It's expensive but it's very good grease. Try looking out for used OEM axles. It's a pain to track the right axles down but if you run them with good grease and quality neoprene boots they should be just fine. :]
 -
 bunknubber changed their profile photo
 -
 ssncars joined the community
 -
bunknubber joined the community
-
 gadawg4lyf joined the community
 -
WYLDE007 joined the community
-
 Just replaced both front cv axles on my lifted 92 Loyale (5spd manual 4wd) and I'm getting some nasty clicking/clunking noise multiple times per rotation during acceleration straight or on turns. There is no noise while coasting in neutral. I used aftermarket axles as the originals had already been replaced and the axle lengths seemed to match what was already on the vehicle when I bought it. Could this just be a result of using shitty aftermarket axles that can't handle the angles of the lift? What should I check for potential issues caused by errors during install?
 -
The threads on the block are gone. Is it a good idea to try a helicoil or? Engine runs like a champ so id like to keep it. 90 subaru loyale 5 spd
-
 Well did the thing, so kinda pleased with myself, but also bummed.... dismounting went smooth, in italy they dont use salt on roads in winter, so cars here are very rust free, there was nothing frozen. I did have to make a 1/8" U shaped plate to add height to my fork tool as it wasnt tall enough to separate the taper, easy. 10 mins with an angle grinder to make second bigger issue was none of my fault, i mounted the first new ball in the arm, went to feed it into hole in the steering knuckle.... wont go in! Really? Turns out the SKF bodies were machined oversized due to an error in the factory, 38,10mm instead of the 37,95mm it should be! how the hell this can happen is a mystery. Options was to send them back to amazon and wait for new ones, but with the car on stands and the rubber boots destroyed during removal i couldnt go back to the old ones Luckily i have a lathe and been able to take a lick off the diameter and bring it back to dimension, but gee.... what the heck Now for the real bummer - As i was bolting back the torsion bar tie rods, i casually pulled on the bar and heard a knock.... well turns out that the free play making noise was in the tie rods, not the ball joints!!!!! Indeed after lowering the car and driving with the new ball joints, clacking was still there. The old ball joints had no free play to begin with. Ordered new tie rods, changed them in 10 minutes or so without even lifting the car, noise gone. Cant believe i did all the knuckle ball joints work (and SKF agravation) for nothing. So lesson learned, check your stupid little tie rods before changing your ball joints.
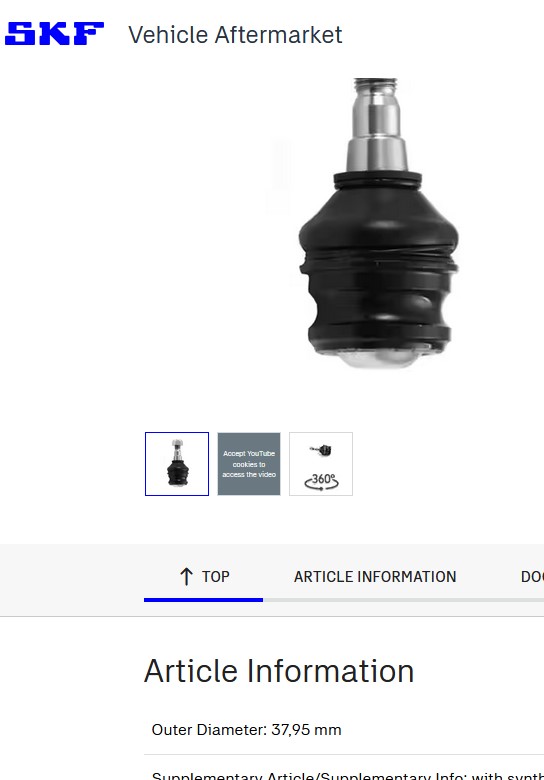
-
(2).thumb.jpg.bec89cdb417321b805950fa2084ffc78.jpg)
long travel Outbacks or making Subarus faster and more reliable offroad
travelvw replied to pontoontodd's topic in Off Road
Nice to see the low range improvements/upgrades about to be put to the test: my favorite of all your upgrades is a proper low range. Keep up the great work. K - Yesterday
-

88 GL - Distributor not sparking.
88SubGL replied to Yarlissa's topic in Old Gen.: 80's GL/DL/XT/Loyales...
The best way is to compare the wiring diagrams for both distributors. Of course, if you don’t know if ‘87 distributor is off a carburetor or fuel injected car, that might make it more difficult. But I don’t know if there was a difference between the two. -
EA82 Cleaning & Assembly Questions
88SubGL replied to SuspiciousPizza's topic in Old Gen.: 80's GL/DL/XT/Loyales...
If you’re going to flip the engine, shoot carb cleaner in the holes. It should wash it right out. -
That sounds awesome. What size lift will you run in the cross trek? Should be an interesting and capable vehicle!
-

88 GL - Distributor not sparking.
Yarlissa replied to Yarlissa's topic in Old Gen.: 80's GL/DL/XT/Loyales...
So is there anyway to know what the correct wires on the car that need to match the 87 distributor? If anyone can tell me the 12v, 5v's and ground or a way to test the 87 distributor side? - Last week
-
Divorced tcase and stock rear diffs/cv axles
SquigSprinter replied to SquigSprinter's topic in Off Road
Aye the welded center diff would be required in my case (this is a 23 Crosstrek with the dr 5mt swapped in, it has the viscous coupling center diff and came with 4.44 final drive stock) If I go with the Samurai tcase I plan to upsized tires to 31s to take advantage of the hi range reduction I know the older stub style cvs tended to explode from too much torque, this would be using newer style Subaru CV axles. I mostly want to avoid getting all of this low gearing in place and then start popping diffs/CV axles. -
 Coincidentally when I typed up that post I was using our checklists for notes. There's always plenty to do on all of our cars, some issues more pressing <cough> than others. Don't hold your breath on the 5MT low range, the odds of me making those are extremely low. No way any of these modifications ever "pays for itself" but yes the rear knuckles with bolt on wheel bearings and big front axles and bigger rear brakes are a welcome improvement. B and I were discussing upgrading his drivetrain to 6MT low range/R180/billet rear knuckles over the winter. We have most of the parts and his rear diff has been making noise for over a year now. Spent some time this week on the trans removal. No major obstacles. Trans crossmember was nicely packed with dirt, took a few minutes to clean that out. Just got it out this morning. Missing one of the brass thrust washers in between the planet gears. Didn’t find any chunks of brass so maybe I just didn’t have it in there on assembly? The brass washers that are still there are worn about 1/3 of the way through from the needles. Going to see if I can find some steel washers that size but not before this goes back together. You can see it was breaking the needles inside the gears that were missing the dividing washer. Found a few partial needles in the trans. The parts of the noisy one in the black Outback that were worn/discolored are similar in this one but not as bad. Finally made parts to replace those with a different material/heat treatment, more oil holes, and an added bearing. Makes me wonder if the low range in the black Outback was missing some needles and that was what was really causing the noise. Still haven't removed and fully inspected it. I should have tried locking the center diff to see if that made the noise go away. Pretty sure we tried that in the black Outback and it didn't quiet down though.
 -
EA82 Cleaning & Assembly Questions
SuspiciousPizza replied to SuspiciousPizza's topic in Old Gen.: 80's GL/DL/XT/Loyales...
I did, even with an adapter and a smaller hose, it helped but there's still gunk at the bottom of the holes. I'm going to try tipping the engine so the cylinders are vertical (and get myself bathed in coolant and oil), using a piece of wire as a pick to dig the gunk out and use a shop vac to help pull the gunk out. I know I'm making it more complicated than it needs to be, but I'd rather think it through rather than rush through. -
EA82 Cleaning & Assembly Questions
88SubGL replied to SuspiciousPizza's topic in Old Gen.: 80's GL/DL/XT/Loyales...
You could try using a shop-vac. -

EA82 Cleaning & Assembly Questions
el_freddo replied to SuspiciousPizza's topic in Old Gen.: 80's GL/DL/XT/Loyales...
I don’t recall the EA82 having head bolt holes that go into water jackets. I you have it on an engine stand turn the holes to be cleaned upside down and let gravity do its work. You might only need to agitate it with a piece of wire. Then run the thread chaser down each hole again. Or so it on the bench by “whacking” the deck into a soft surface like a newspaper or towel on the bench. Anything that doesn’t come out shouldn’t be a problem. -
EA82 Cleaning & Assembly Questions
SuspiciousPizza replied to SuspiciousPizza's topic in Old Gen.: 80's GL/DL/XT/Loyales...
So I've been spending the past few nights after work cleaning up my deck surfaces and head bolt holes. I ran a thread chaser down all the head bolt holes and they all cleaned up great, however some of the gunk it scraped off the threads is now at the bottom of the holes. I don't want to use compressed air as I worry some of the holes go into the water jacket and I don't want to blow the gunk into the water jacket. Any tips and tricks here? I thought about using a wood screw to auger the gunk out or using some safety wire as a pick to get the gunk out. I used a small amount of engine oil to help the thread chaser and the gunk is sticking to the oil. Obviously brake clean would help get the oil out but I still worry about the brake clean blowing the gunk into the water jacket. :] -
Measure whatever lift block you have on the subframe or above the strut. I believe you can get away with removing half an inch from this measurement and use this to fabricate the new trailing arm mounts. If you can make your own mounts, you have the advantage of making several sizes to see what works best for you and keeping your costs down in the process.
-
I have not done this and those that did this years ago are most likely long gone from the forum. One of the biggest factors is your driving style and mechanical sympathy. With a dual range gearbox and the dual range divorced transfer case and the addition of 4.44:1 diffs, you could run larger tyres and crawl really slowly - best of both worlds. What vehicle are you putting all of this into? If a vehicle with an AWD, you’ll need to weld the centre diff. Being a 1.44:1 low range it’s either an MY chassis or the sf forester (but I didn’t think you guys got the dual range gearbox from factory in the states).
-
long travel Outbacks or making Subarus faster and more reliable offroad
el_freddo replied to pontoontodd's topic in Off Road
I love your checklist of stuff you worked through, very systematic! Interesting about the low range, you’re probably keen to know what the issue is. I’m keen to see a low range for the 5spd! That redesigned rear knuckle “just paid for itself” (quote from “The Castle”) with that bolt on bearing replacement! I bet the rally crew would be interested in a set of these knuckles! Keep up the good effort! -
Air Struts: Repair, Replace, or Swap?
el_freddo replied to LaMamelle's topic in Old Gen.: 80's GL/DL/XT/Loyales...
Metal zip ties are awesome to use too. Just ensure you get plenty of pressure on the boot before cutting the tag end short. Roll the remaining tag end over the zip tie’s clamping piece. This locks it in somewhat. -
Air Struts: Repair, Replace, or Swap?
SuspiciousPizza replied to LaMamelle's topic in Old Gen.: 80's GL/DL/XT/Loyales...
A few things when disassembling/assembling axles: Inner joints (transmission side): These have a large diameter metal clip close to the outer edge of the bearing cup. Just use a small flathead screwdriver to get this started and remove it. Take photos of the orientation of the outer bearing retainer, it is unidirectional. Remove the bearing carrier/retainer as an assembly, use your small screwdriver to pry the bearings out (be careful to not scratch the surfaces, use a cheap screwdriver they'll be softer than nice ones), then turn the outer retainer and it'll separate from the inner carrier. Outer joint: These joints have the metal clip I was mentioning above. If this joint wasn't accidentally disassembled when you were putting in the strut then leave it be. They're not supposed to be disassembled but they *technically* can be. Only use molybdenum disulfide grease when assembling the axle. Make sure the axle is clean of grease before regressing and reassembling. Zip ties can work as boot clamps, but I'd recommend actual boot clamps.

