July 31, 201411 yr At 12:21 am Thursday July 31, 2014 Uno took his first revs. Took a small drive and then put him away for the night.
August 1, 201411 yr Welded passenger side rear strut tower in my -96 impreza. Was kinda pain in the butt till I figured you can actually fit your head in the wheel well and have line of sight to repair area. Live and learn
August 1, 201411 yr Woodie wagon progress: hardwood floor installation, LED lighing. I am saving pics for last as i am not goingo to show unfinished work! This car is quite the opposite of a TrashWagon, but unoficially it is #16 Possible aftermarket audio retaining the factory head unit and appearance. Man, it would be nice to install the spare tire under the hood so i can use the tire well as a 'smuggler's trunk' like the EA82's.
August 2, 201411 yr On my 1986 Subaru rx I Just finished sandblasting painting and 7 coats of clear coat on my 14 inch plugs The tire size is 195 70 R14 BFG'S radial TA You can't tell by the picture there not just black they also have a green metal flake when in the Sun they glitter If any of you are going to west coast Subaru show come take a look I'll be there That's if you can see them when they're covered in mud LoL
August 3, 201411 yr Finally got my carb issues dealt with and reinstalled the weber.. Oh man do I love to hear her idle like that.. IT was getting really old having to kick the pedal to bring the RPMs back down.
August 5, 201411 yr So today I played with frog tape and silicone for my hated sunroof.. We shall see! or maybe just stay dry when it rains.. I would be ok with that.
August 6, 201411 yr Got lots of painting done Twitch Is it still blue? Back to topic. I pulled old fan thermo switch and replaced it.. Fan didn't come on so I unplegged the fan and look at the connection. All this time it was a bent spade connection.. Oh well I have a back up. Tomorrow maybe I can trace my fuel gauge wiring.. I love progress. Mike
August 7, 201411 yr Put radiator, water pump, thermostat, and antifreeze all back in the appropriate spots. Had to jump it since it was sitting for almost 2 weeks. Now I just need my replacement crank pulley and I'll be good to go.
August 8, 201411 yr So far over 400 miles on Uno since first start and no issues. Got the hill holder properly adjusted.
August 10, 201411 yr Ok, first issue since the Uno build. I was so concentrated on the engine that I neglected the wheels. I was driving 30 around a 25 corner, slightly fast i know, but as I went around the turn my rear wheels rumbled as if they were skipping out because of my speed. Took it home and lifted up each rear wheel and tried moving them to see if there was slack. The driver side had a little so I replaced the bearings. It was not easy finding anyone that had a seal in stock. I then took off the passenger side bearings and repacked them as the wheel seemed to get a little too warm. Just got back from a 40 mile drive with lots of highway and no heating and no more skipping. Tomorrow the brakes will be verified and adjusted as needed. Now at 525 since first start.
August 10, 201411 yr Did some rocker assembly cleaning and lubrication Also learned that while just because you can remove circlips without the proper pliers, it doesn't mean you should. But soon, since my rockers and their respective parts are back together and clean, the heads will find themselves back on the engine. Lets hope the steel core composite permatorque gasket will handle the extra pressure Progress marches on! Twitch
August 10, 201411 yr Apparently there was still a chunk of something in my cadillac converter >< -it got stuck and blocked up, so now I have a "custom" y pipe fabbed by the local exhaust artists. It's only a touch louder, we'll see how mileage is affected. Been racking up lots of miles lately.
August 11, 201411 yr A few more gauges to watch oil pressure max 140 psi is overkill though, where clock came from, tacho to 11.000rpm (only one I could find with black face in 2" )from fuel and temp gauge hole had to flat black ( flatter than matte) the outer surround, surgically remove the highly reflective plastic 'glass' to get the right look also had to perform delicate surgery on the PCB at the rear to allow cable plug entry, holes to mount to PCB and a hole to access the change colour of LED lighting. Default colour is green, which goes OK with orange of the dash night glow. Needs to be hooked up to permamnent 12V to retain the memory or the chosen red defaults to the green. I need some tiny solenoids to mount at rear in case I lose power - save removing dash set to reset colours. Being LED I don't think I will get dimmer function to go with other incandescent globes ? Tacho replaces the fuel temp combo gauge. Figure that a fuel gauge is not somethng that needs constant watching, so its LED bar gauge will go to one side, and the temp will go digital aquarium reader with alarm. All the PC tracks I cut through - patch wired up with soldering iron. Most wires from both gauges tap into sources on the back of the PCB being 12V battery for LED memory, 12V ign, 12V lights off dash so should dim if LEDs dim ! earth is on long wire to body.. Edited August 11, 201411 yr by jono
August 11, 201411 yr Discovered the shake-o-rama in the PandaWagon's driveline. Seized front U-joint in the drive shaft. Currently searching for a replacement. If push comes to shove, I may just have to pick up another used one till I can get the old one overhauled.
August 11, 201411 yr Got Line-X in the bed... So you had Line X put your liner in. What did that run you, if you don't mind me asking?
August 11, 201411 yr So you had Line X put your liner in. What did that run you, if you don't mind me asking? It was going to be (without the tailgate) $450.00 for the standard or $525.00 for the premium that has the UV blocker in it; I paid the $525.00. This was also after attempts at making Duplicolor Bed Armor work; that stuff is horrible - even with proper preparation. After 5-6 days of letting the small panels cure with the Bed Armor - I was able to score it with my thumbnail - not cool. I also took a whole weekend sanding out every bit of rust that I could find - surface or deep. Then I did the POR-15 cleaner spray, metal prep spray, then 2-3 coats of POR-15... knowing that the guys at Line-X would sand most of that down. I wanted to be sure every little place that the bed liner didn't reach was sealed by the POR-15; and I also did this to explore/inspect every bit of the bed before the liner went down. Honestly I was a bit apprehensive spending that much... But I saw a friends Rhino Liner and while it was hard and it stuck, it also dulled to a grey. The guys at the shop seemed genuinely interested in the Brat; there was another guy who brought in a new Tacoma and they treated him way different (even though his was going to be more expensive). The guys at the shop answered every question I had before I did the job. I also work at a location where people spend gobs of money for things that wont last nearly as long as the liner... so that made me man up and spend the money.
August 12, 201411 yr It was going to be (without the tailgate) $450.00 for the standard or $525.00 for the premium that has the UV blocker in it; I paid the $525.00. This was also after attempts at making Duplicolor Bed Armor work; that stuff is horrible - even with proper preparation. After 5-6 days of letting the small panels cure with the Bed Armor - I was able to score it with my thumbnail - not cool. I also took a whole weekend sanding out every bit of rust that I could find - surface or deep. Then I did the POR-15 cleaner spray, metal prep spray, then 2-3 coats of POR-15... knowing that the guys at Line-X would sand most of that down. I wanted to be sure every little place that the bed liner didn't reach was sealed by the POR-15; and I also did this to explore/inspect every bit of the bed before the liner went down. Honestly I was a bit apprehensive spending that much... But I saw a friends Rhino Liner and while it was hard and it stuck, it also dulled to a grey. The guys at the shop seemed genuinely interested in the Brat; there was another guy who brought in a new Tacoma and they treated him way different (even though his was going to be more expensive). The guys at the shop answered every question I had before I did the job. I also work at a location where people spend gobs of money for things that wont last nearly as long as the liner... so that made me man up and spend the money. Thanks for your input, these are all questions that I have been pondering. I've also been thinking about doing this myself too, thanks to your trials and errors.
August 12, 201411 yr Thanks for your input, these are all questions that I have been pondering. I've also been thinking about doing this myself too, thanks to your trials and errors. From what I could tell through a few days of searching online; Herculiner seems to have the most "good" comments about a DIY bedliner. The only reason I opted to give the Duplicolor Bed Armor an attempt was I found it on clearance and for sale; was 30 bucks a gallon - otherwise my DIY attempt would have been with the Herculiner and it would have been much more costly.
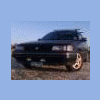
August 12, 201411 yr today I started up my GL-10 Turbo after a complete re-build/re-seal... ea82 turbo, minimum shaft play, 8psi boost, STI intercooler top mounted, blue plumbing lines, Exeddy Clutch, 5spd DR swap, 2inch lift, 235-14 cooper AT's, all done at once! runs killer! love this car!
August 12, 201411 yr Gage and I finishing up a full brake job, all 4 rotors and pads. The rear discs are so much easier to do brakes on than drums!

Please sign in to comment
You will be able to leave a comment after signing in
Sign In Now